Activation
Before using the device, please activate it by logging into your SHINING 3D passport account first: power on > connect to the network > register / login.
Note
The device which has not been connected to the Internet or logged in can still be used to scan, but the scanned data can only be stored in device SSD, not able to use SHINING 3D Cloud storage.
Power On
To power on the device successfully, press and hold the power button for 2 seconds until the screen displays the startup animation.
Select the language first after startup, the default option is English, supports conversion to other languages in Setting > Language.
Note
- If the device remains black screen or displays a charging prompt
 , please promptly charge the device until it reaches the minimum battery level:
 : Charging.
 : Charging completes.
- After powering on and selecting the language, please make sure to check the End User License Agreement first, or you will not be allowed to enter the Next Step.
Power Off
Press and hold the power button for 6 seconds to power the device off.
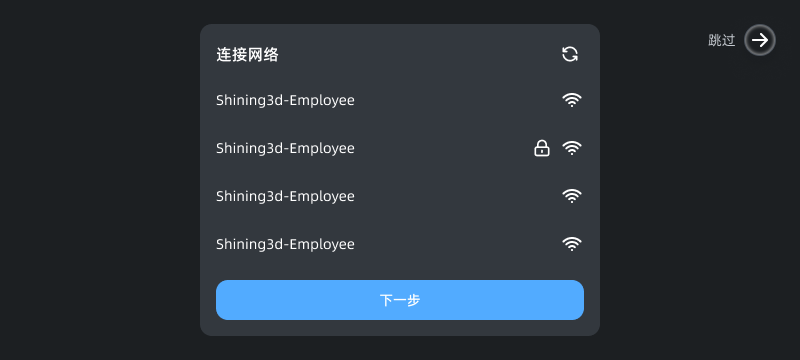
Connect Network
After entering the Connect Network interface, the device will automatically search for available wireless networks nearby every 10 seconds:

 indicates that the Wi-Fi is encrypted.
 indicates the signal strength of the Wi-Fi.
- Tap
 to manually search for nearby Wi-Fi.
 - Tap or long press an unconnected Wi-Fi to enter the connection process.
- Long press a connected Wi-Fi to delete it from the list.
- Tap Next to register or log into SHINING 3D passport account.
- Tap Skip
 to directly enter the scan process.
Note
- When no network connected, you can not enter the Next step.
- If it prompts that "
 Network connection error", please try again or change the network; if still can not be solved, please restart the device.
 - If you choose to Skip the network connection to directly enter the scan process, the scanned data can not be uploaded to SHINING 3D Cloud or transferred to your computer.
Register / Login

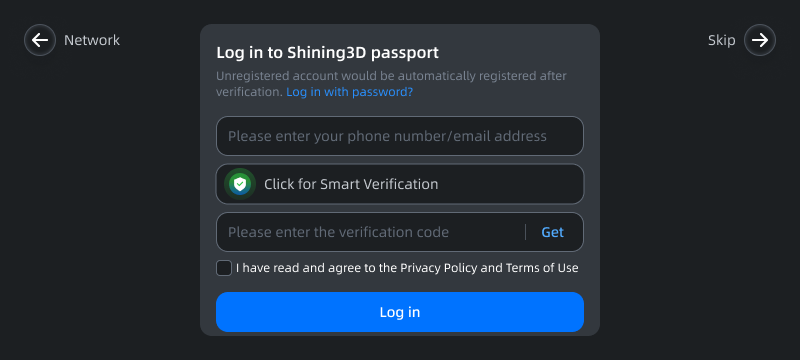
After entering the Log in to SHINING 3D passport interface, you can choose to log in with verification code or password.
● Tap Log in and you will be prompted with "![]() Login successful", then you will be directed to the scan interface.
Login successful", then you will be directed to the scan interface.
● Tap ![]() to return to the Connect Network interface.
to return to the Connect Network interface.
● Tap Skip![]() to directly enter the scan process.
to directly enter the scan process.
Note
- If this is your first login, it is recommended that you choose to log in with a verification code. If your phone number or email is not registered, it will be automatically registered after verification.
- If you choose to Skip the network connection to directly enter the scan process, the scanned data can not be uploaded to SHINING 3D Cloud or transferred to your computer.
Device Connection
Note
- Before activating the device, it can not be connected to your computer to transfer files.
- If the device is connected to your computer through a cable, but the StarVision software is not started, the device will be charged only.

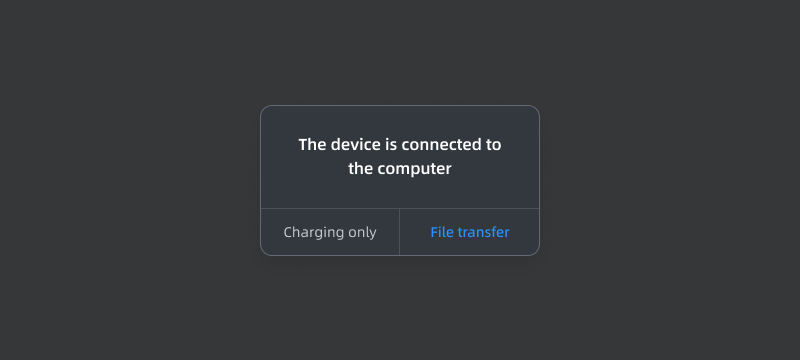
Use a cable to connect the device to your computer, and a pop-up window will appear (as shown in the right figure); if you choose File transfer, you can check device files on StarVision.
Note
For Windows users, if the connection fails, please open the Firewall and Network Protection Notifications on your computer, and click Allow if a notification from Windows Security Center appears.