Edit
To ensure the current digital model living up to the basic requirement for 3D print, it is necessary to use the method of Cutting Plane, Brush, Lasso and Cut Through to remove the redundant data.
| Icon | Function | Instruction |
|---|---|---|
 |
Flip | Click the icon to overturn the upper jaw/ lower jaw for 180°.  Note: This function is only available when importing the project only containing the upper/ lower jaw data. Note: This function is only available when importing the project only containing the upper/ lower jaw data. |
 |
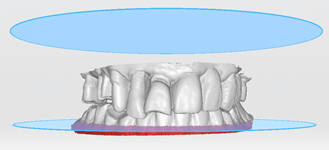
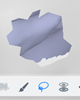
Cutting Plane | 1. Click the icon, there will be a blue horizontal cutting plane appearing at the outward side to the surface to be added with extra dies. 2. Move the cursor into the blue cutting plane, then hold the left button to drag the plane, until the outermost clinical/ unsmooth data is covered by red color. 3. Click  to delete all of those red data with the smooth horizontal cutting plane. to delete all of those red data with the smooth horizontal cutting plane.
Note: By deleting the outermost clinical/ unsmooth layer, the alignment effect of the original data and the added data would be improved. |
 |
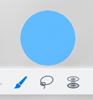
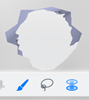
Brush | 1. Click the icon, meanwhile, the cursor turns into a blue round brush within the operating interface. 2. Move the blue round brush into the area where the data needs to be deleted, and hold the left button to color those data blue, then the blue data on the out layer of the digital model is to be deleted.
|
 |
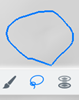
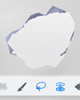
Lasso | 1. Click the icon. 2. Move the cursor into the area where the data needs to be deleted, then hold the left button to draw a blue irregular figure whose center and internal diameter are the starting point and the moving distance of the cursor. 3. Loose the left mouse button, the blue data on the out layer of the digital model is to be deleted.
Note: ● Users can switch the methods of brush and lasso so as to delete data accurately. ● To adjust the internal diameter of lasso and brush, hold down Shift key and meanwhile rotate the wheel. |
 |
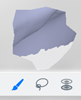
Cut Through | 1. Click the icon of lasso/ brush. 2. Click the icon of cut through to apply additional cutting through effect to the lasso/ brush method. 3. Use lasso/ brush to delete the data on the out layer and the internal layer of digital model at the same time.
|
 |
Undo | Click the icon for undoing operation. Click multiple times continuously for undoing multi-step operations. |
 |
Redo | Click the icon for redoing after undoing operation. Click multiple times continuously for redoing multi-step operations. |
 |
Cancel | Click the icon, then the current edit is not to be saved. |
|
OK | Click the icon, then the current edit is to be saved. |