Add Resin
Please select and add appropriate printing material for the model to be printed.
Caution
Damage to the device, data loss and any other accidents caused by procedures not specified in this Manual are not covered by the warranty.
Resin Type
SHINING3D provides various high-quality resin materials featuring different highlights to apply high-precision resin productions to multiple scenarios.
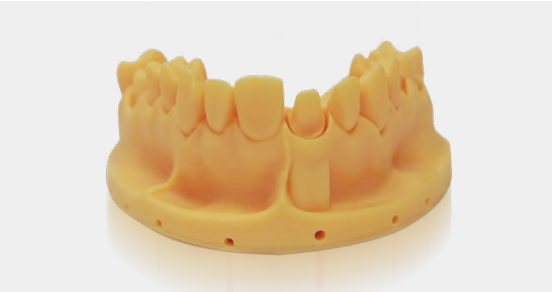
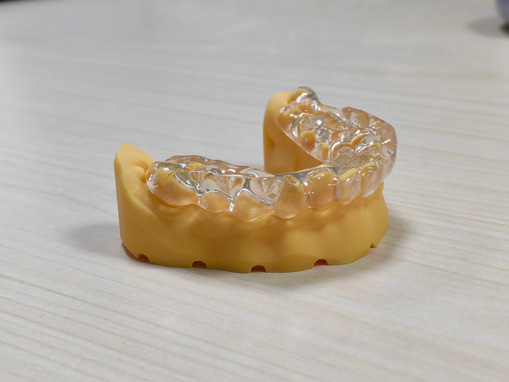
DM05 is used for printing implant models and removable models. Its high toughness and high pressure resistance and unbreakability contributes to its excellent fault-tolerant performance, which provides a better experience for removal and insertion.
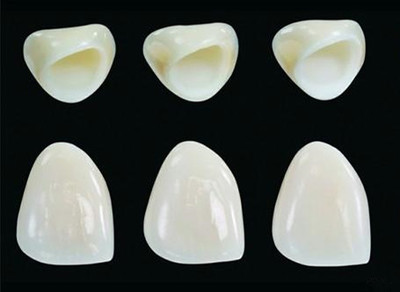
DM12 is the ideal choice for printing separated models for crown and bridge application. It optimizes model precision through its lower elasticity modulus. The hardness and mechanical properties of the cured resin allows DM 12 to resist abrasion during seating and finishing for crown and bridge cases, ensuring a perfect fit every time. The yellow color offers maximum detection of margin lines and adjacent contours, and cleanup is easy thanks to the low viscosity of the resin.
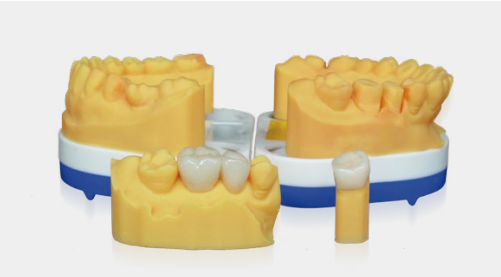
With good molding stability, DM15 can accurately restore oral digital models with high color fidelity and good aesthetics results. It has good retention and less dimensional change over a long time. It is the ideal material for crowning shipping models.
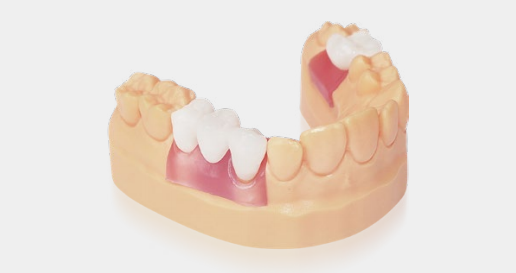
Gingiva Mask GM11 is an excellent choice for replicating gingiva contours for digital implant cases. Its flexibility can assist in planning the emergence profile for digital implant restorations.
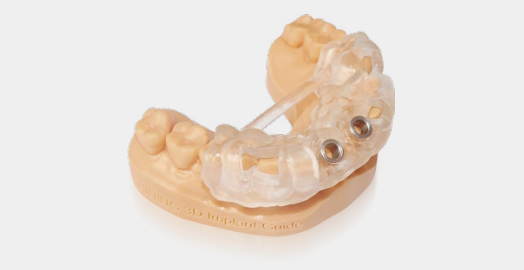
SG01 is a clear and bio-compatible resin mainly used to print guide templates for implant, gingival cutting, orthodontic bracket bonding, bone grinding, etc. The printed model has transparent and clear colors, and high stability without warpage and deformation. Besides, its biocompatibility allows for short-term contact with the human body.
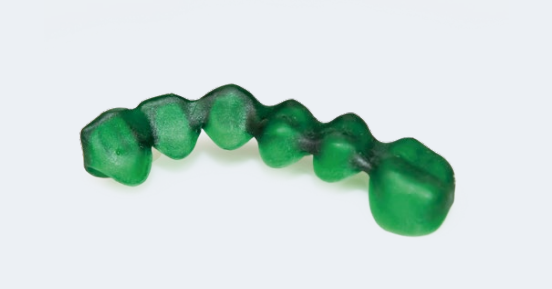
DC12 is a printable wax-like photo-polymer specially developed for metal casting, suitable for dental casting applications such as crowns, bridges, and partial dentures. The printed model has delicate surface and is not easy to deform.

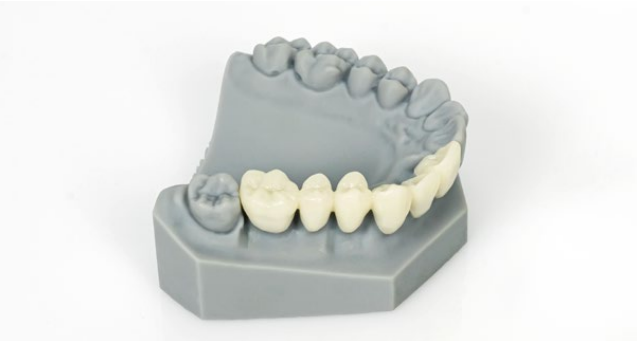
OD02 is used to print orthodontic models that can withstand vacuum adsorption. The printed model has a high degree of detail reproduction, super surface hardness, and super edge stability. It has a small deformation at high temperatures, making the molding accuracy of invisible braces higher.
Col
CB11 is a light-curing resin material specifically designed for dental restoration and model fabrication. It is composed of photosensitive resin, acrylate monomers, and inorganic fillers (such as silica), offering moderate strength and good wear resistance. It is suitable for general restoration needs, such as temporary crowns, bridge fabrication, and dental model printing.
Col
Col
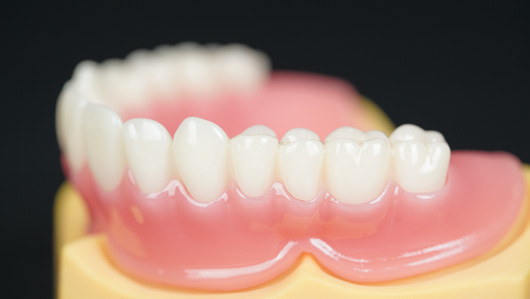
DT01 can be used for printing try-in bases to confirm the shape, color, occlusion, and fit of removable dentures. The material features fracture resistance, bending resistance, and low water absorption. It comes in three colors, allowing for the reproduction of natural soft tissue colors and textures based on the patient's gingival shade.
Col
Col
SH01 material offers strength and toughness comparable to traditional orthodontic base self-curing resins, making it an ideal choice to meet the performance requirements of hard splints in dental clinics.
Col
Col
DM03 resin material is a high-performance material specifically designed for dental applications requiring precision models and surgical guides. It features high accuracy, exceptional strength, and excellent biocompatibility, making it ideal for applications such as implant guides and auxiliary models used in dental treatments.
Col
Operational Procedure
Please check if there is any residual solid resin inside the tank; if there is, please follow the steps below to cure the resin at the bottom of the tank to avoid the residual resin affecting the printing effect and prevent damage to the components.
① Place the PET Card in the corner.
② Go to Settings > Hardware Settings > Optics Settings or Home > Resin Tank Information, tap Cure Resin and set curing time.
③ After curing is finished, carefully open the buckle and gently remove the resin tank.
④ Wear disposable gloves and use the resin tank cleaner to lift and remove the cured resin layer from the bottom.

Note
If there are still some residues floating, use an 80 to 100 mesh filter to filter the residues.
Caution
The bottom of the resin tank is made of a single layer of FEB film which is easy to be broken. Therefore, when removing the solid resin layer, be careful not to poke the bottom of the tank.
Please follow the instructions below to add resin materials.
Warning
Please read and understand all relevant notice for material thoroughly before adding the resin.
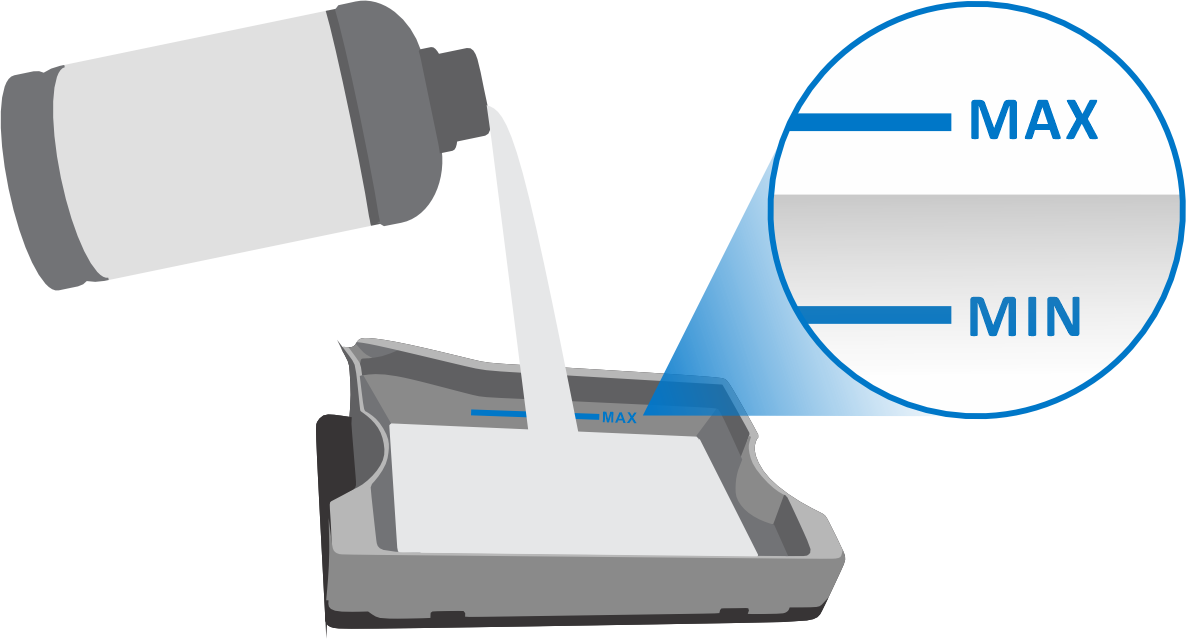
① Shake the resin bottle for about 2 minutes, and then pour the fully shaken liquid resin into the resin tank.
Caution
Keep the level of liquid resin between the MAX and the MIN lines so that to prevent the liquid resin from splattering during printing and to ensure the printing effect.
 |
 |
② Use the scraper to stir the liquid resin constantly until there is no sediment.

Note
During the printing process, it may be necessary to add resin material to ensure successful printing. Without interrupting the printing program, simply open the chamber door and slowly pour the resin into the resin tank when the build platform is moving upward and the light source is turned off.
Before printing, set the resin tank first.
Go to Home> Resin Tank Information, tap to select the brand and type of the resin in the tank.
Caution
-
The printing effect is not guaranteed when the used printing material does not appear in the list.
-
Select the brand and type of resin actually added to the tank, or the printing may fail; if the resin type is not listed out, select Others.
If there is need to change the resin, please clean the resin tank, then add the alternative resin following the procedure mentioned above.