DentalCloud Operation
After binding the printer to your DentalCloud account, you can monitor the printer and the status of print jobs in real time as well as managing printers.
Note
The DentalCloud tracks data from printers and supports real-time data updating.
DentalCloud Page
All the printer data belonging to the current organization is arranged in the order of the most recent printing completion time and the printer, as shown in the figure below.
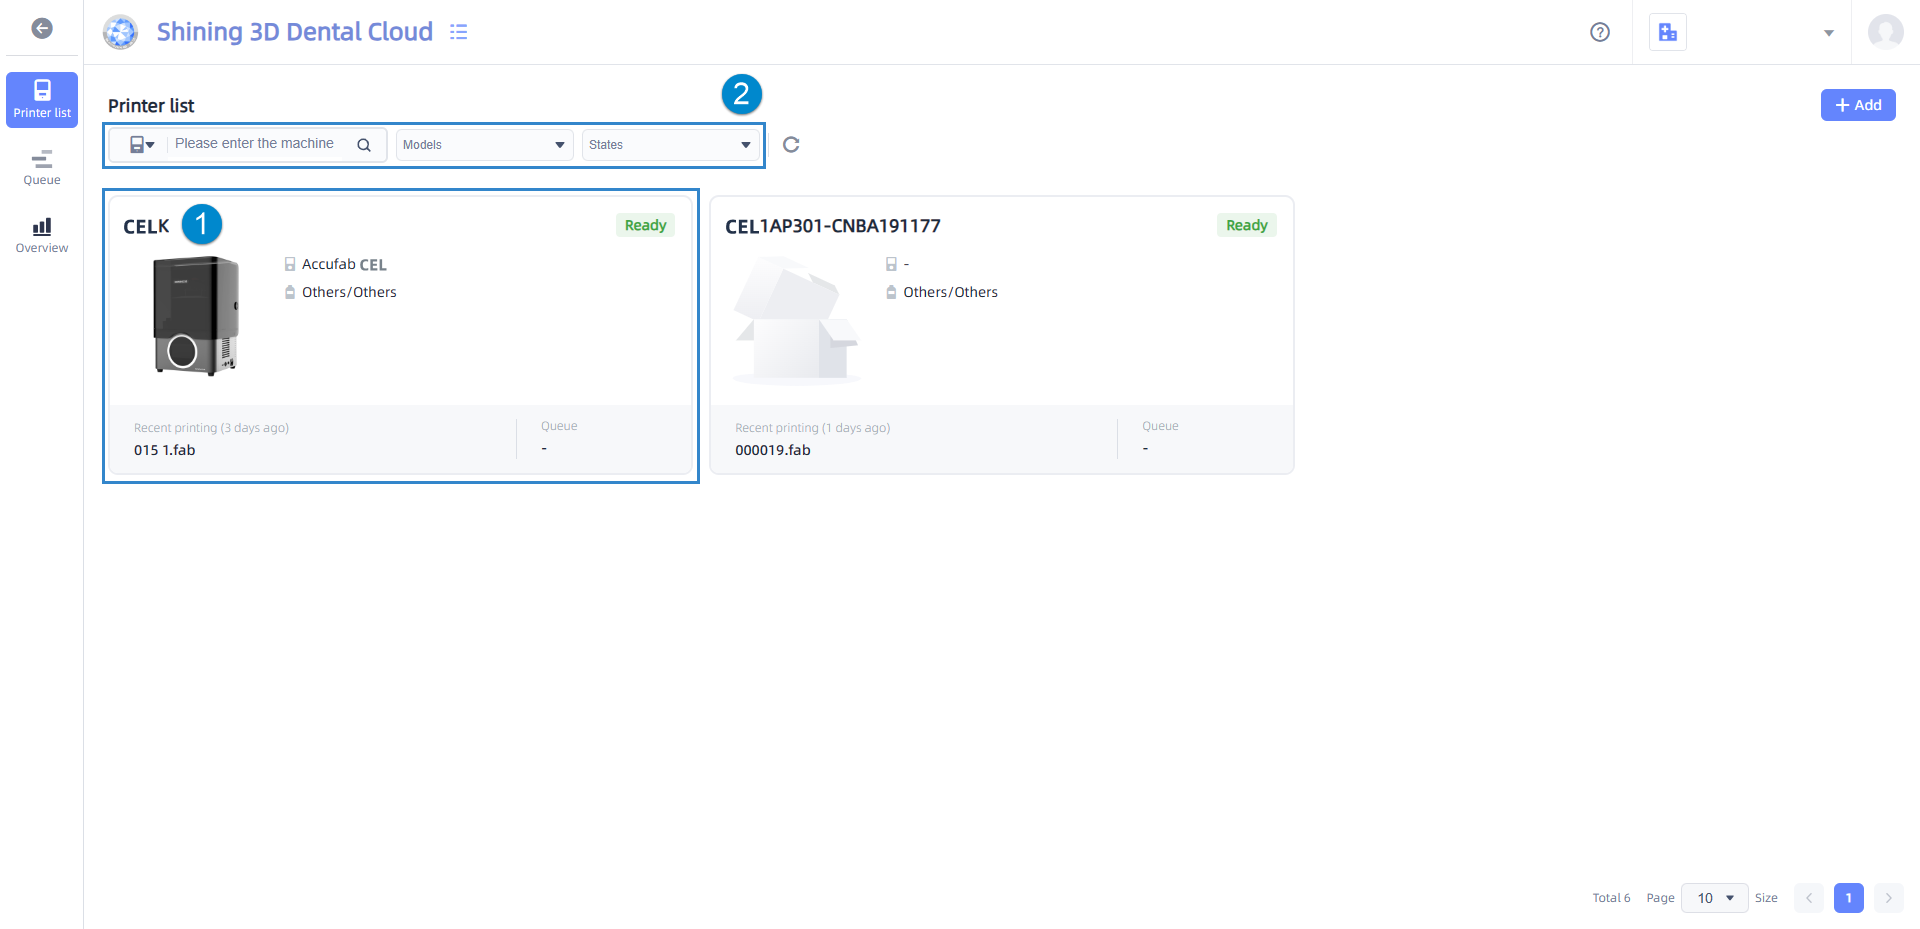
① Printer cards:
-
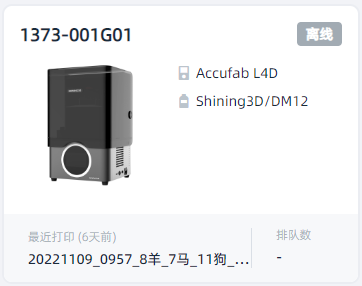
Click to get detailed information to the machine (including temperature&humidity, the version of software&hardware, resin tank usage, printing data overview, etc.); for more, please expand the Note section below.
Note
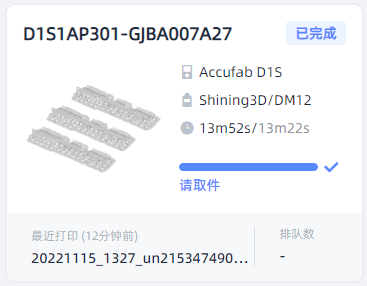
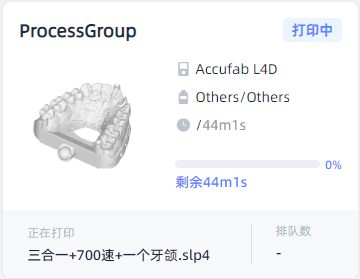
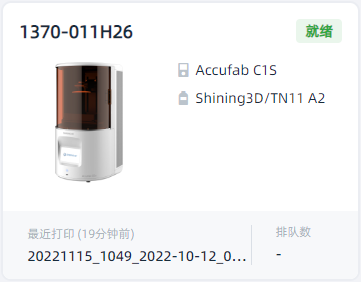
There are 5 different statuses to printers reflected by various printer cards, as shown below. Error Completed Printing

Ready Offline
-
Click Queue on the bottom-left corner of the card to enter the Queue page while tracking the location of current machine.
② List Admin Widget: Use filtering conditions such as machine name, serial number, type and status to manage the Printer list.
③ + Add Button: Enter the binding code to add printer to the list.
The Queue page records the tasks to all printers bounded to the current organization one week time before and after (14 days) clearly in the form of task cards, as shown in the figure below.
![]()
① Vertical axis: A list of all printers bounded to the current organization.
② Horizontal axis: Time axis.
③ Task card: Click on the card to check detailed information about the corresponding printing task (including the number of printing layers, layer thickness, total duration, etc.); for more, please expand the "Note" section below.
Note
| There are 5 different statuses to printing tasks reflected by various task cards, as shown below. | |
|---|---|
| Print succeed | Print failed |
| Printing | In the queue |
Note
- Task cards other than "in the queue" ones show their actual working time, while "in the queue" task cards array equidistantly and indicate estimated time through their length.
- Printing tasks can not be canceled, and tasks in the queue can be cancelled or deleted manually.
- Tasks in the queue correspond to that in the Pending queue of the printer: By dragging and adjusting the order of tasks in the Queue page, the Pending queue of the printer will also be changed; if a pending task is cancelled due to limited insufficient storage space or other reasons. the corresponding task card will also disappear, and the task can be reissued in the Pending tasks list.
④ Pending tasks: All the printable files that have not yet been issued by the current organization display the name of the task and the designated printer.
- Support fuzzy search task name or search based on the filtering condition of pinter.
- Click each task bar to go to the details page of the corresponding order.
-
Click issued button to issue print tasks to the printer's Cloud queue.
Note
If the task is not issued successfully, please check the reason for failure in the Pending tasks.
Note
Here are methods facilitating seeking target tasks on the time line:
-
Zoom in / out the timeline: Use ⑥ Zoom Widget.
-
Move forward or Backward in time: Press and drag the left mouse button, or drag the horizontal scroll bar.
-
Return to the current time: Use ⑦ Refresh Widget for locating to ⑤ Current Time.
The Overview page displays various graphs relating to selected machine(s) within chosen day(s) for making the data self-explanatory.
① Printer buttons: Select all for viewing the data overview to previous organization in default; select one printer for viewing the printing record to one machine; select multiple printers for comparing the data between them.
② Calendar: Select The day, In 7 days, In 30 days, or choose start and end date manually by using the calendar, the duration shall be no longer than 7 days.
![]()
Monitoring Printers
Check States
Enter the  Printer List page for checking printers' status.
Click the printer card to get the real-time temperature and humidity, hardware and software information, printing history and overview data of machine.
Check Ongoing Printing Tasks
Find printer card(s) with printing tag, click the card to get detailed message such as the progress bar to previous task.
Click  for returning to the current time.
Find the current task card(s), which being marked in blue and being divided by a vertical blue line. Click the card to get detailed message such as printing time predication.
Check History Printing Tasks
Click target card and then click history for entering the printing history page and viewing the information of all the history printing tasks to this machine.
Press and drag the left mouse button, or drag the horizontal scroll bar to the right to find the target card.
Click the card to view the information to the target task.
Enable Printing Status Notification
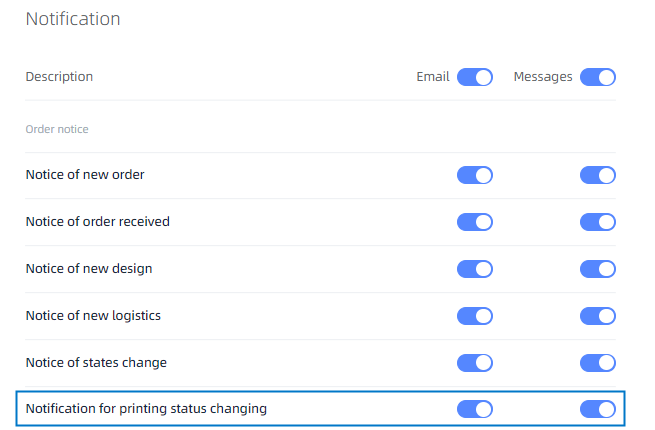
Unfold the account management list in the right upper corner select Notification.
Enable the function and set receiving methods by clicking Notification for printing status changing sliders. The system will send the error massage to the people uploading the printing task as set.
Note
The system will send the error message to the administer instead if can't find the certain people uploading the printing task.
Charge Printers
Enter the printer list for charging printers.
Search Printers

Input keywords, then click  to filter printer(s) with this keywords in its name or serial number.
Filter by Models

Click the Models search box and select a model to filter printer(s) of the same model.
Filter by States

Click the Status search box and select a states to filter printer(s) of the same states.
Update Data
Click  for resetting screen condition(s) and loading the latest data of printer(s).
Bind
Specific operation steps are provided in the Binding DentalCloud Account section.
Unbind
Caution
The Unbind function on DentalCloud is only available to the administrator account.
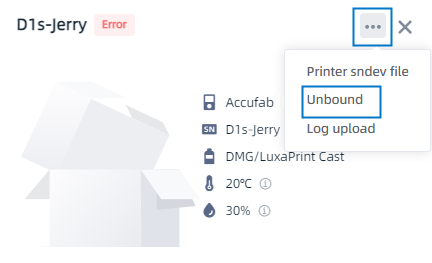
To unbind, click the card of the target printer and click ··· button on the detail information page, than select Unbind and confirm. The software built in printers also support the unbind function.
Caution
After unbinding, the data to printer will not be displayed on DentalCloud anymore. To find back the missing data, rebind the printer to the original organization.