One-click Printing
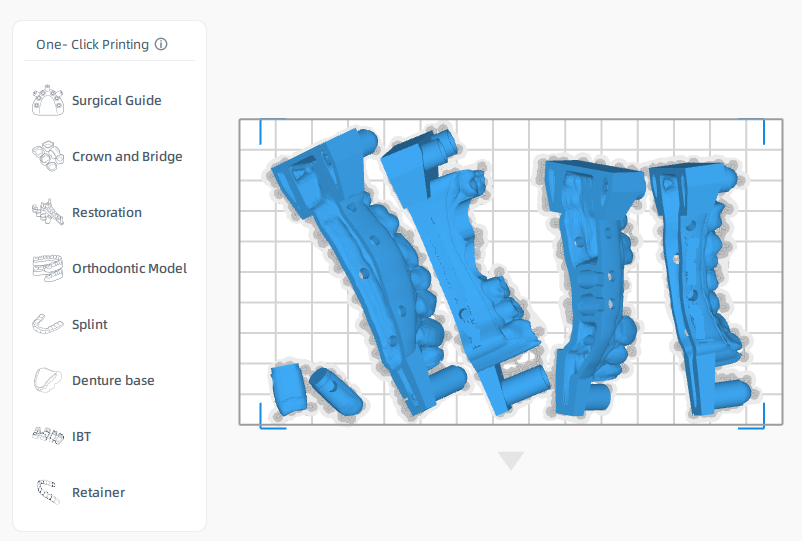
It is recommend to use the "One-Click Print" feature, which automatically performs sequential actions including layout placement, support generation, and slicing operations. This feature effectively saves operation time.
In the ② Data Processing interface, select the One-Click Print panel and choose the desired type of one-click print: ![]() Surgical Guide,
Surgical Guide, ![]() Crown and Bridge,
Crown and Bridge, ![]() Restoration,
Restoration, ![]() Orthodontic Model,
Orthodontic Model, ![]() Splint,
Splint, ![]() Denture base,
Denture base, ![]() IBT and
IBT and ![]() Retainer.
Retainer.
Note
- The One-Click Printing process supports quitting at any time.
- To enable the Multi-Platform Project, please go to
 Settings > Print Setting > Mode Choose and switch to the mode.
Steps
Caution
If you need to print an orthodontic model, it is recommended to select OD 02 as the material in the print settings interface. This resin material provides both stability and fine detail performance. Choosing other materials may result in reduced printing accuracy.
- Select the model for one-click printing as desired.

-
The software will use pre-existing data to automatically arrange the model layout, generate supports and slice model.
-
When finished slicing, click Print to immediately start the print on your connected printer, click Send to add the file to your printer's queue.
Note
- If the selected printer is offline, the [Print] and [Send] buttons will be unavailable in the [Generate Image] pop-up window. If you still need to use this feature, please refer to the Add Machine guide.
- You can also import the sliced file into the print queue for printing using a USB flash drive, as described in the offline printing guide.