Edit report
In the main interface, the dentist can create snapshots of different symptoms, mark their locations, and generate personalized health reports. In addition, for different usage scenarios, the dentist can better communication with the patients and allow them to quickly understand their oral conditions.
Function overview
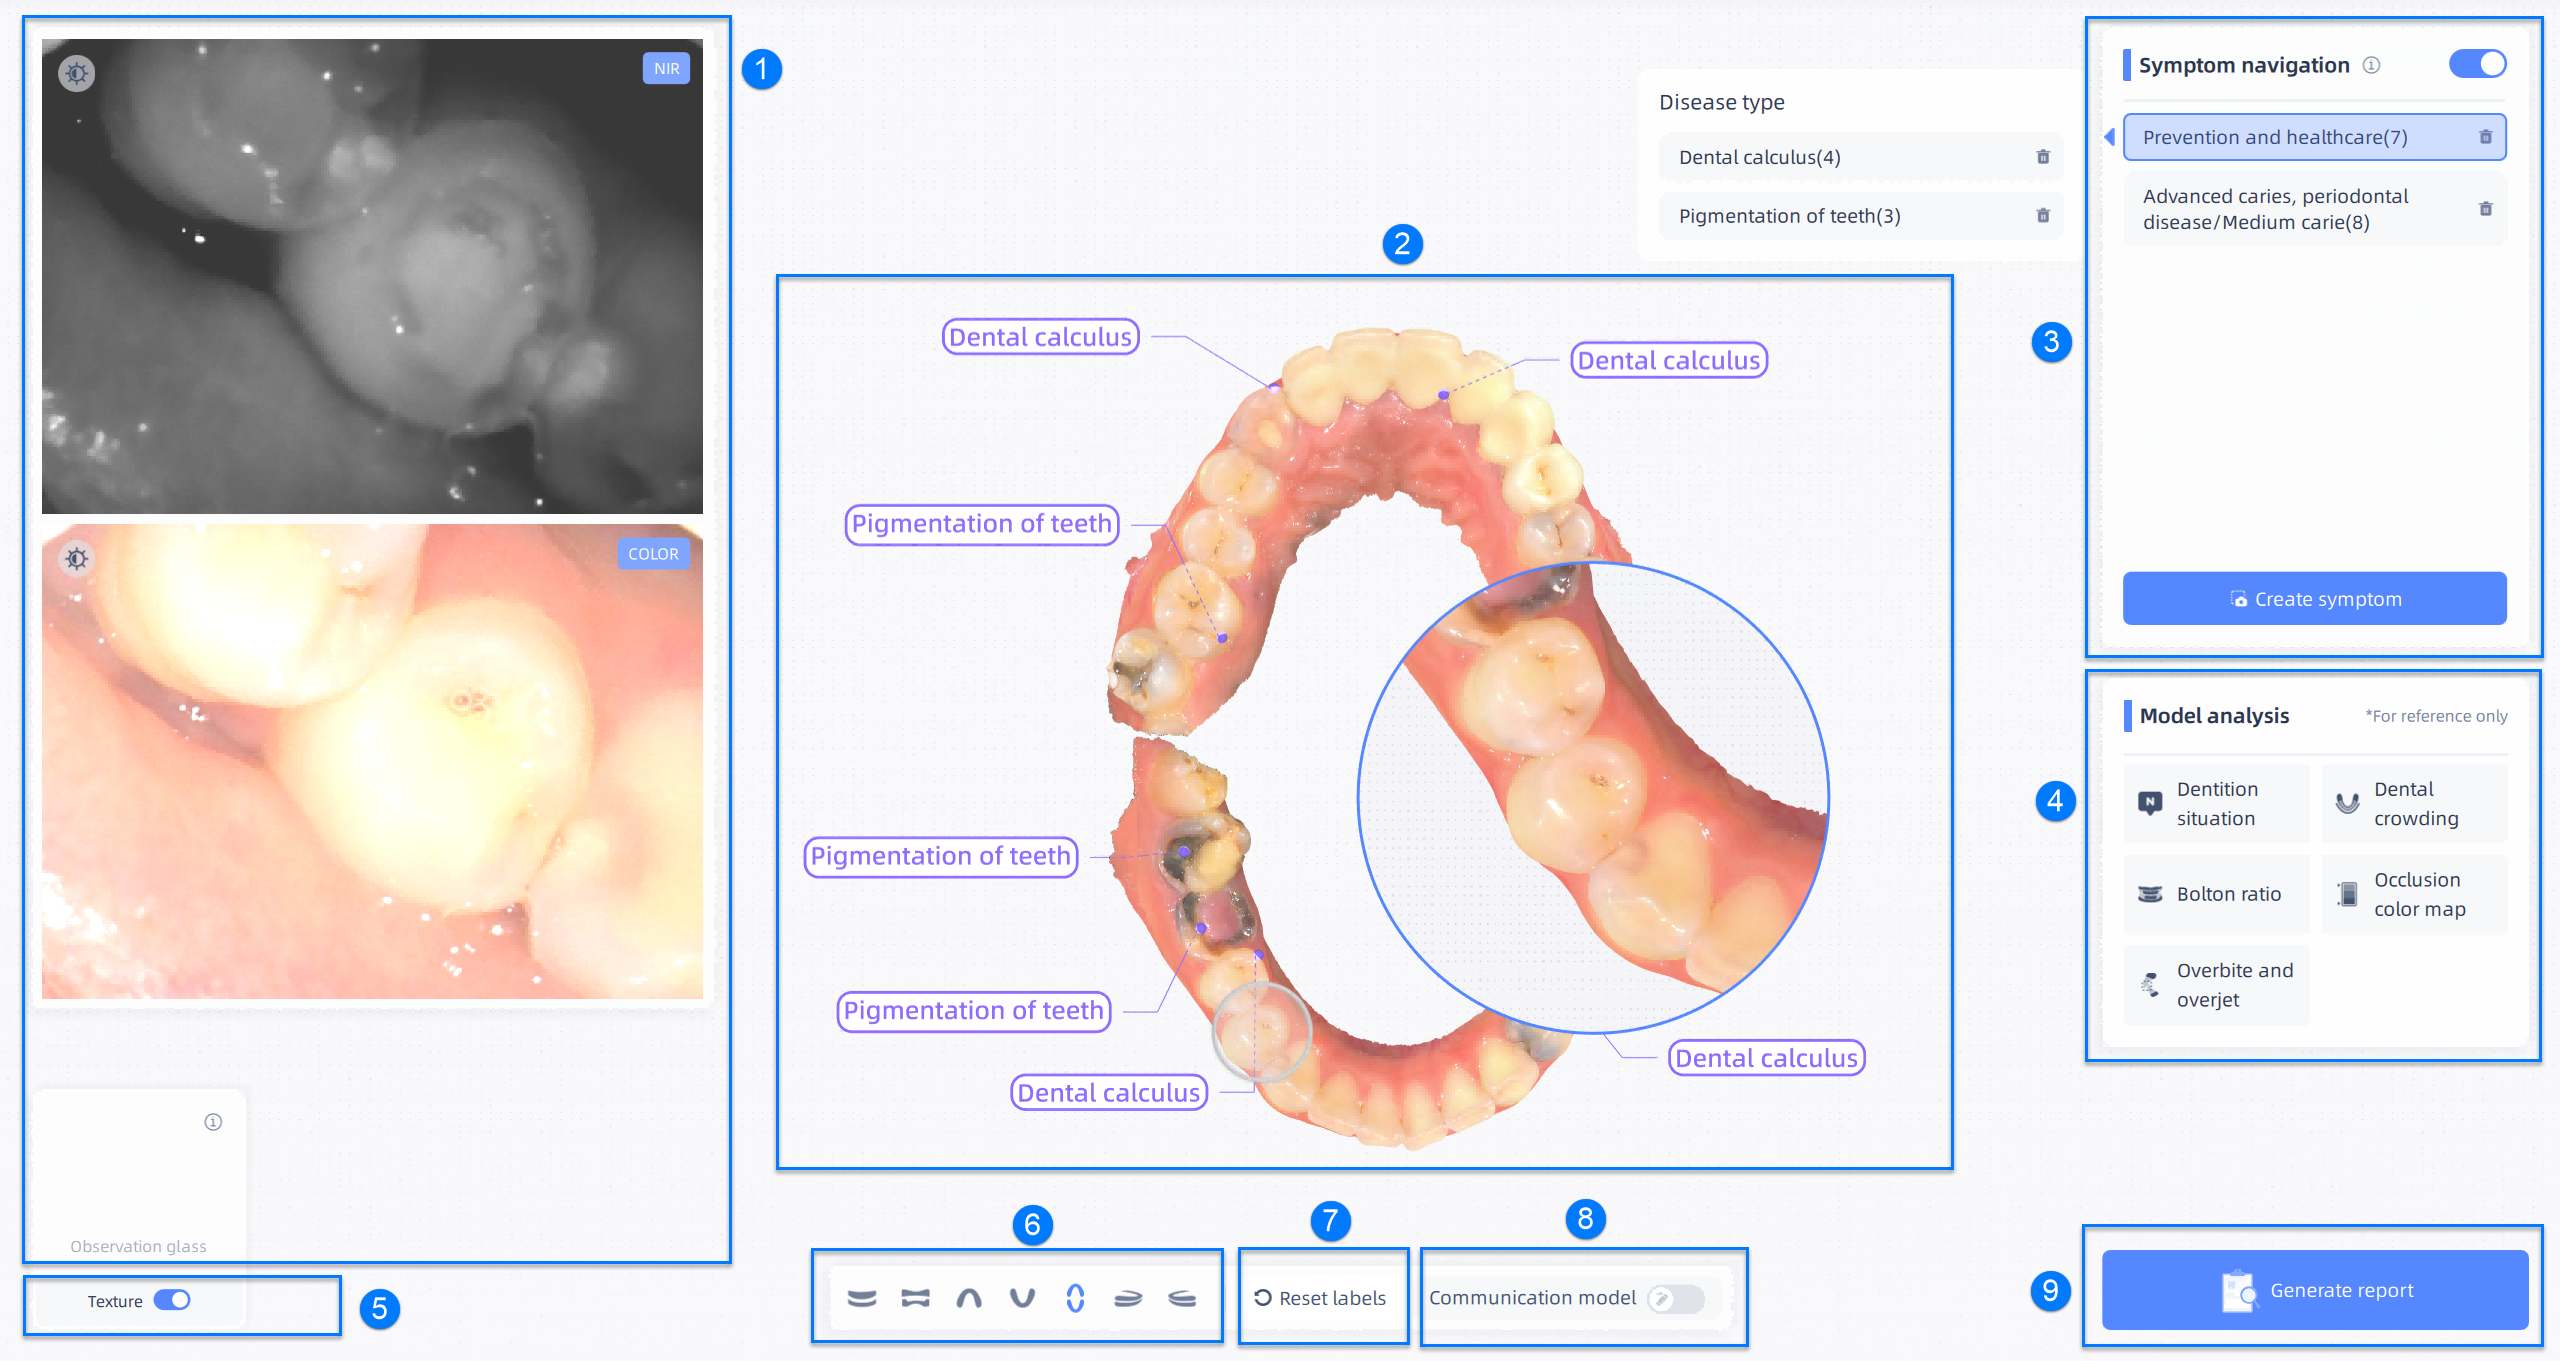
① Observation glass
Observation glass can enlarge one part of the model, making it easier to observe more details.
Use the observation glass:
- Method 1: Move the observation glass to the model for more details.
- Method 2 : Double-click the model and the observation glass will be moved to the position automatically.
Exit the observation glass: Double-click the observation or move it to the original position.
Note
- If the imported file includes near-infrared scanning data, a near-infrared view window and a color view window will be displayed on the left side of the main interface.
- Click
to adjust the
contrast and
brightness of the image.
- After adjusting the image indexes, clicking
to reset.
- Click
- When using the communication model or taking snapshots, the observation glass will be moved to the original position.
② Model preview
Preview the imported models and the symptoms.
-
Rotate the model: Press left/right mouse button and move the cursor.
-
Move the model: Press left and right mouse buttons or press the middle button, and move the cursor.
-
Zoom in and out the model: Scroll up or down the wheel.
③ Symptom navigation
When checking symptom navigation, the symptoms will be listed in different classifications and displayed on the model with labels. Click the label to modify the symptom.
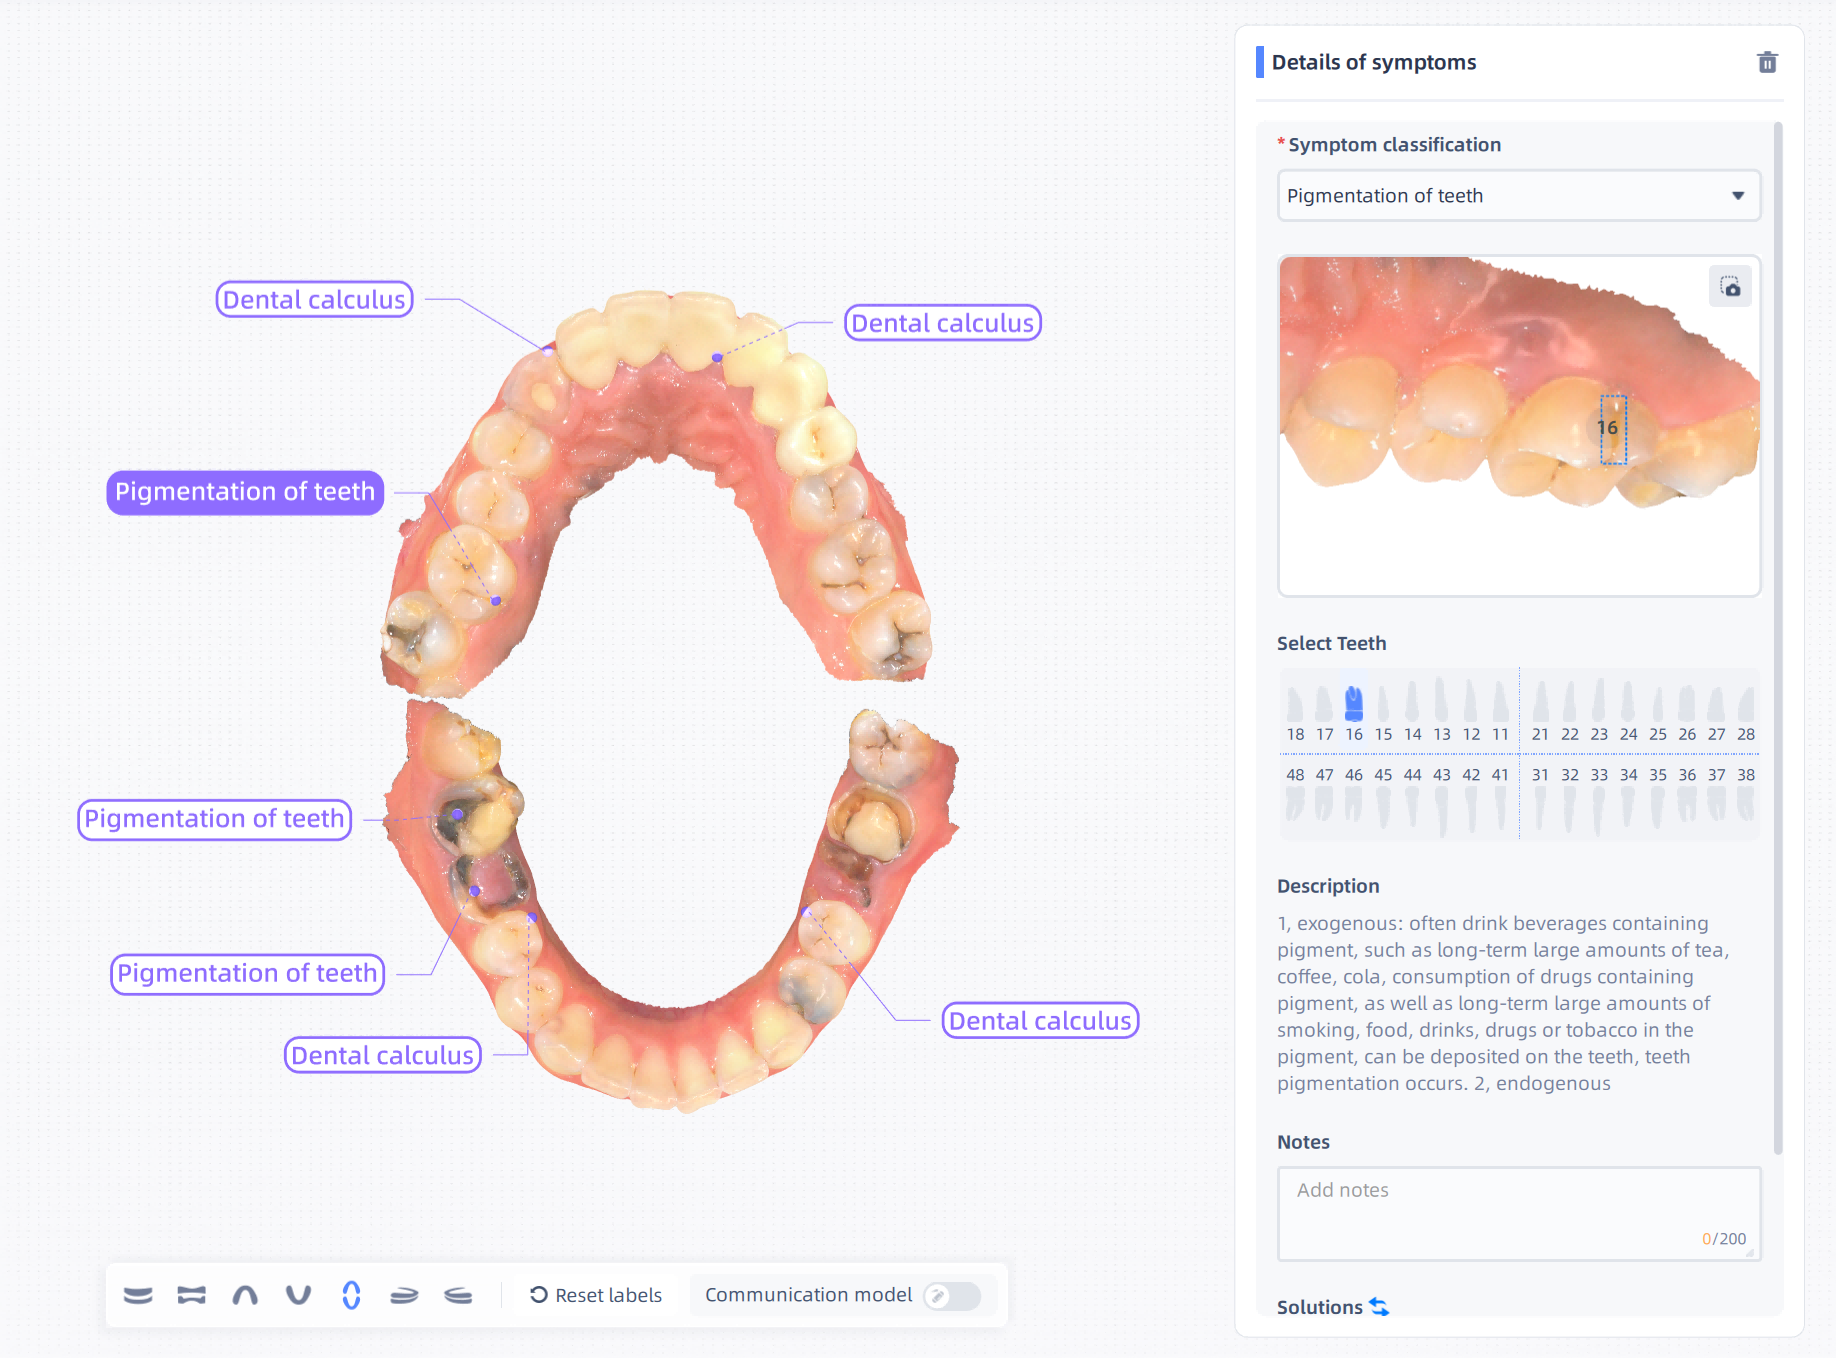
| Operation | Description |
|---|---|
| Move the label | Select a label to move it. |
| Edit the symptom | Select a label and check the symptom on the right side.
|
| Unselect the label | Click the label again to unselect it. |
Create symptom
Take snapshots of symptoms, including normal snapshots and infrared snapshots.
Steps:
- Click Create symptom and there is a window on the model.
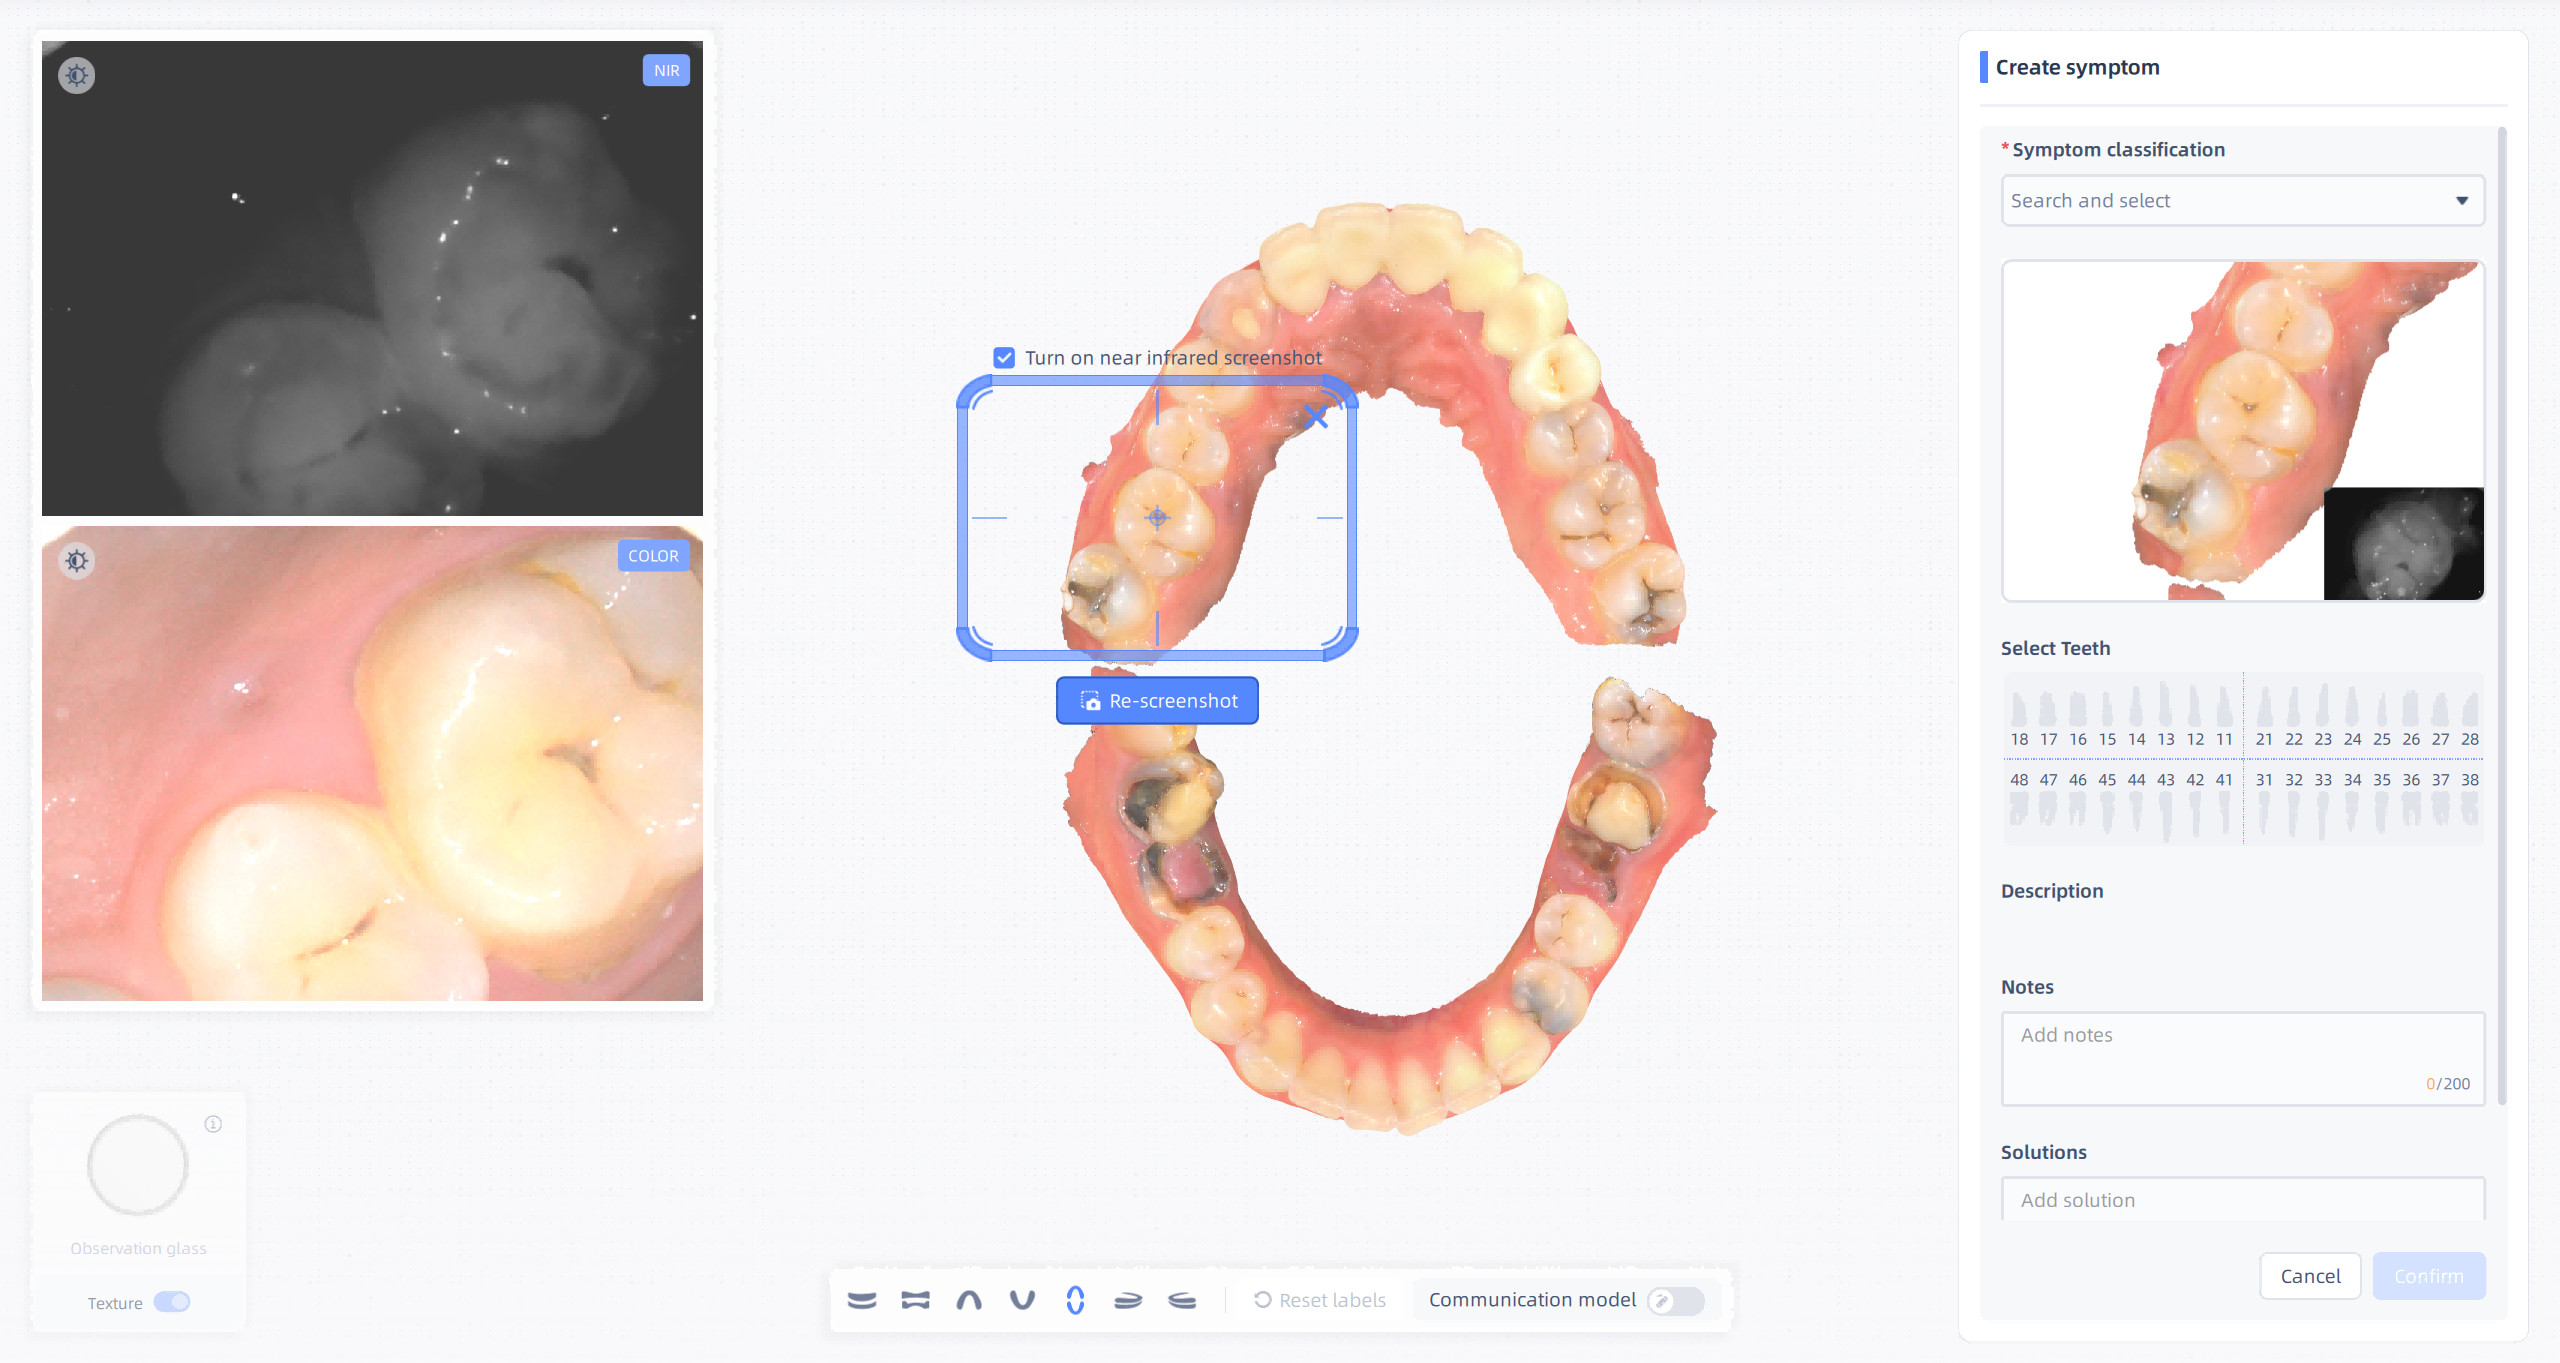
- Move the window to the symptom position until the window is displayed in blue. If the window is grey, please move it again.
- Zooming or rotating the model is supported to get the best screenshot. The size of the window can be adjusted when moving the cursor to the corners of the window.
- Click Create symptom to take a snapshot. Click Re-screenshot to change the snapshot.
- Enter symptom classification (necessary) on the right side. The dentist can add notes, solutions and tooth number. Moving the number to the right position is also supported.
- Click Confirm to save the snapshot. The created symptom is displayed on the symptom navigation. Or click × on the top right corner of the blue window to exit.
Note
- Near infrared screenshot is supported When the imported file includes near-infrared scanning data.
- The user can switch between the color snapshot and the near infrared snapshot when creating the symptom.
④ Model analysis
Caution
- After opening the Assist mode, the user can check the basic information of teeth.
- Model analysis is not supported when importing a single jaw.
- Dentition situation, dental crowding and bolton ratio are not supported if the report target is Child.
- The results are for reference only.
The basic information include Dentition situation, Dental crowding, Bolton ratio, Occlusion color map and Overbite and overjet.
| Name | Picture |
|---|---|
Dentition situation |
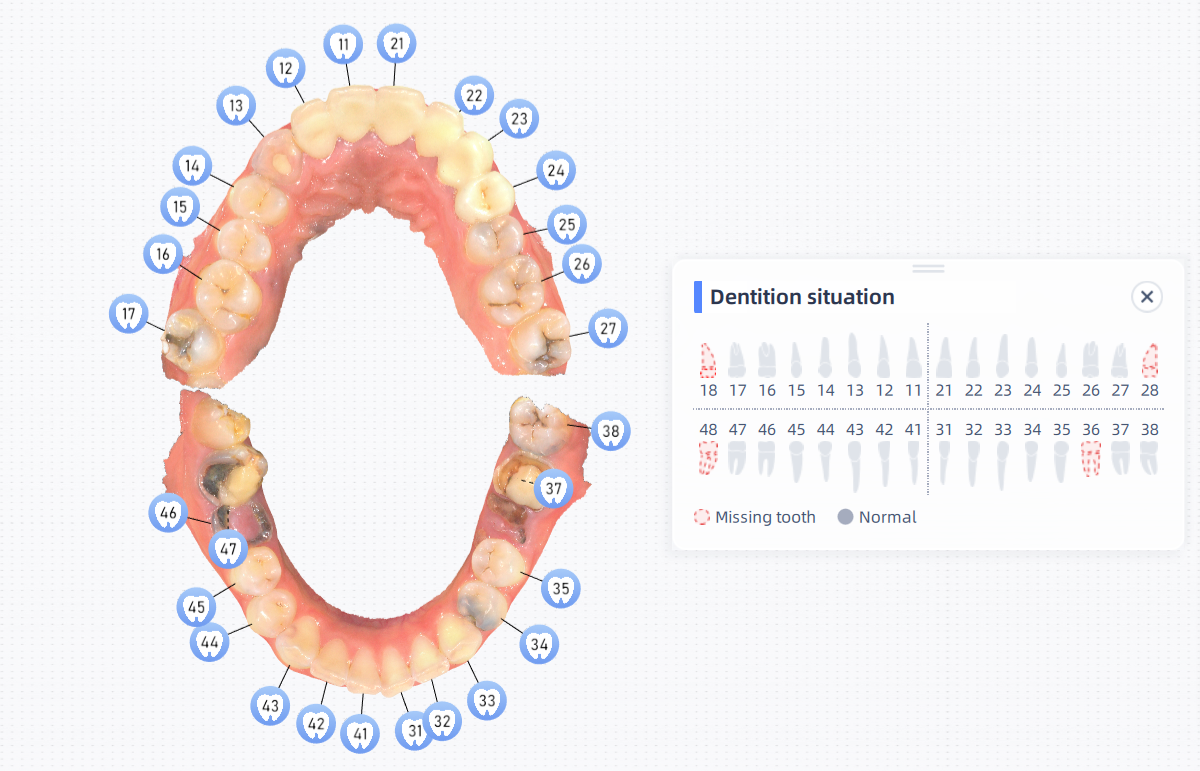 |
Dental crowding |
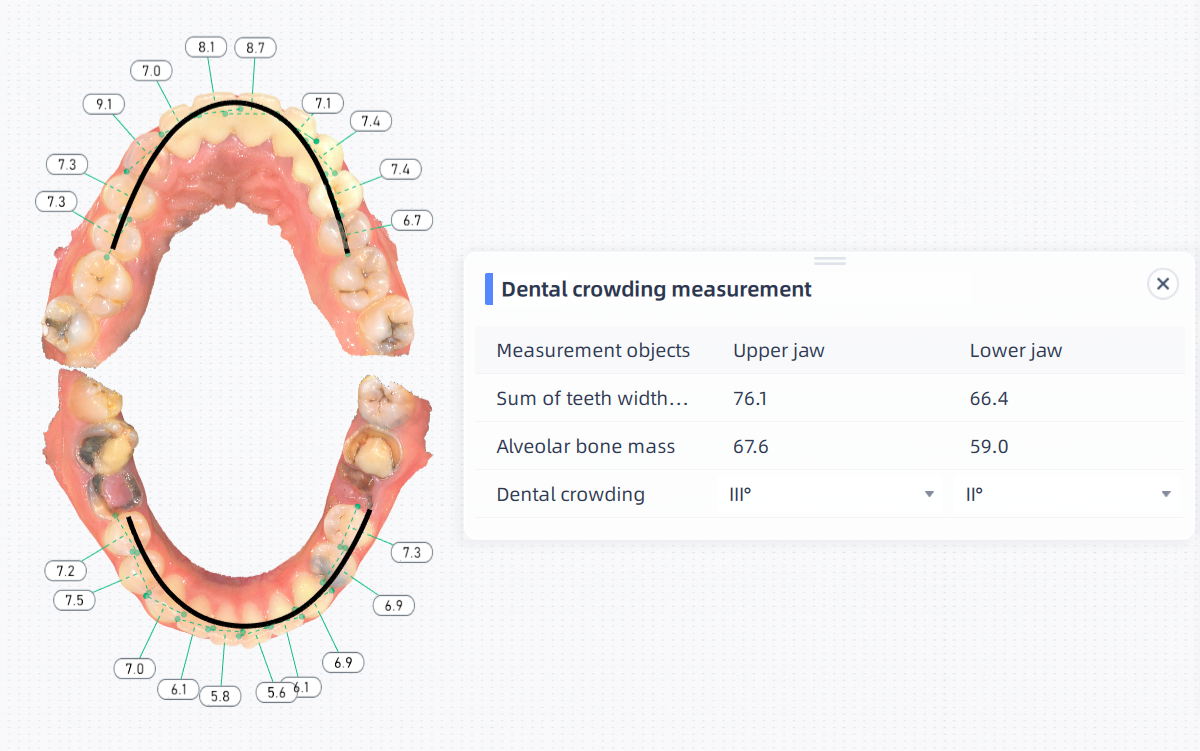 |
Bolton ratio |
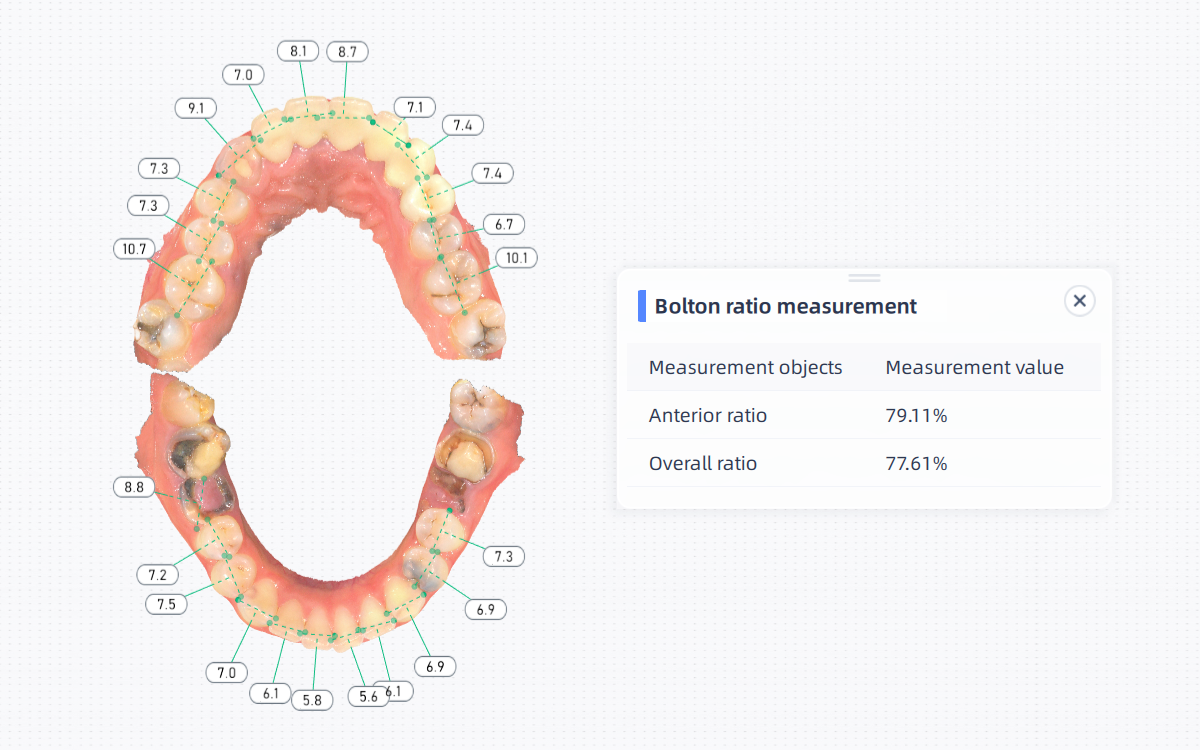 |
Occlusion color map |
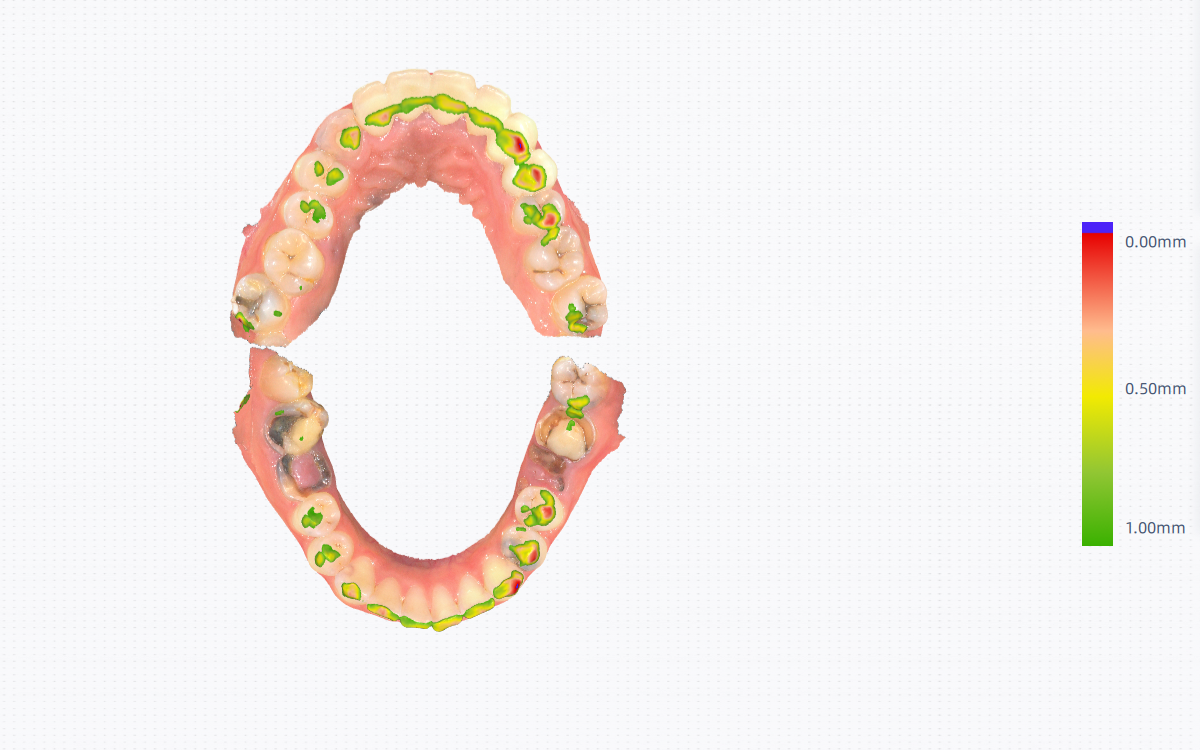 |
Overbite and overjet |
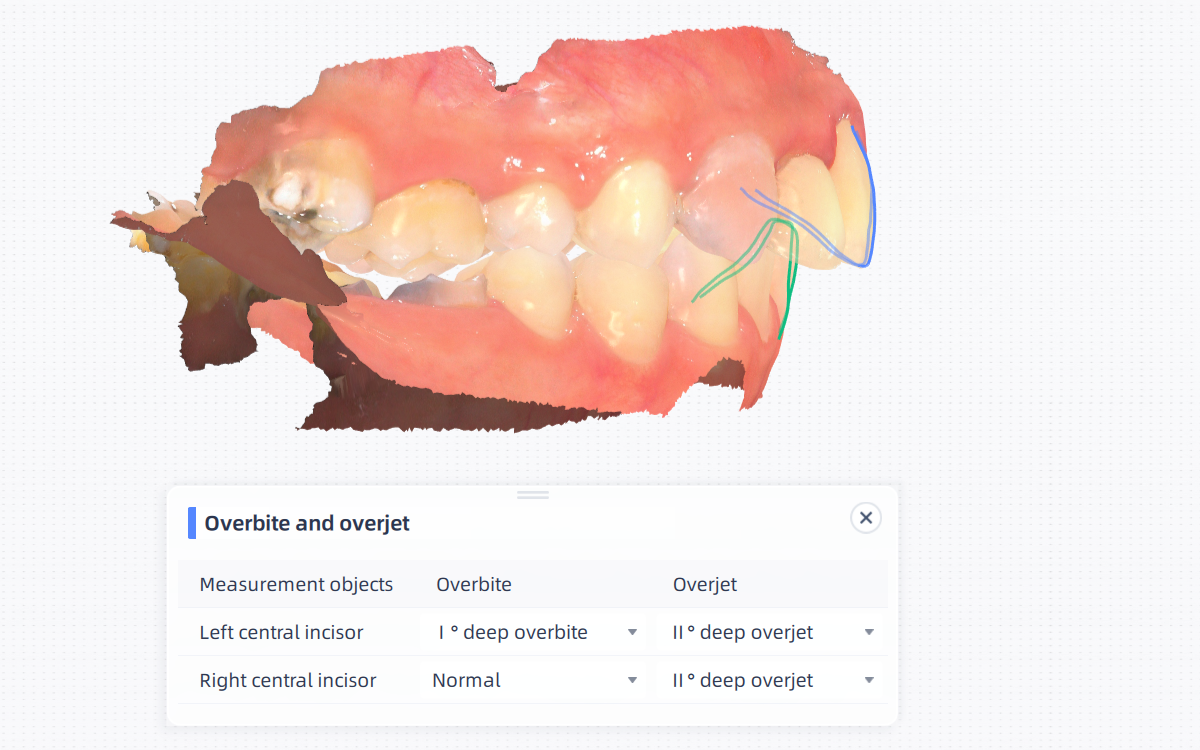 |
⑤ Texture
Check Texture to show the model texture.
Col
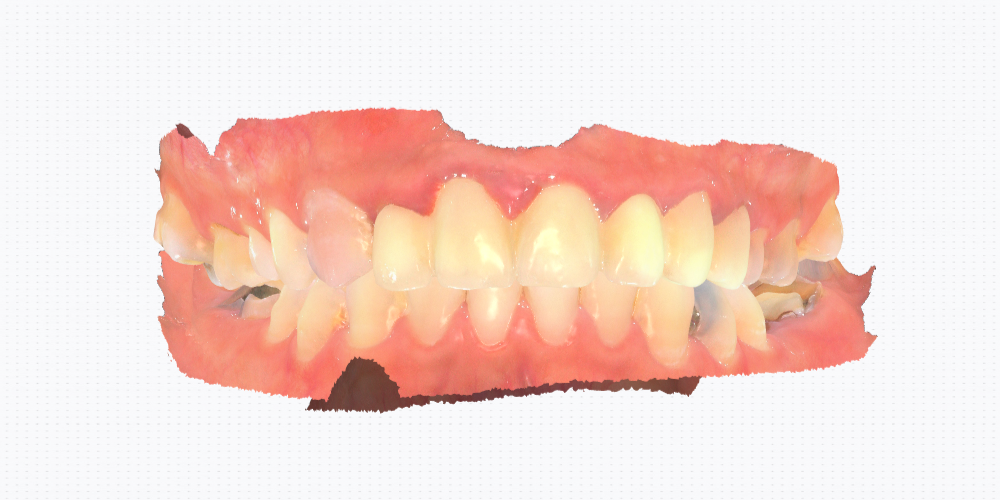 Texture
Col
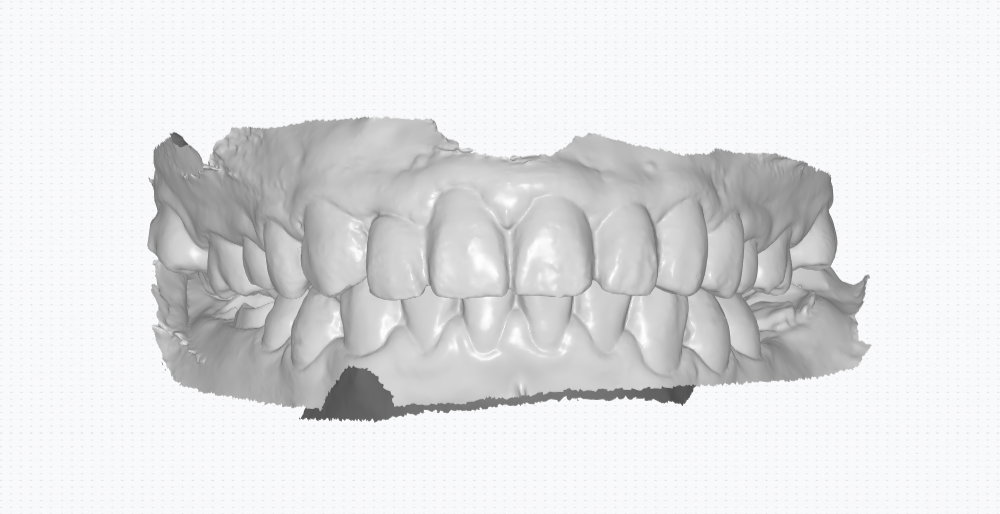 Without texture
⑥ Model views
Preview the model via various views.
⑦ Reset labels
One-click to reset the labels to the default positions.
⑧ Communication model
By using the communication model, the dentist can explain symptoms to patients easily. The communication model enables patients to have a comprehensive and overall understanding of their dental conditions. It is commonly used in clinical situations for real-time communication with the patients.
The marks of communication model will be faded away in 3 second.
| Mouse interaction | Touch screen interaction | |
|---|---|---|
| Draw marks | Press the left mouse button and move the cursor. | Touch the screen with one finger and move. |
| Rotate the model | Press the right mouse button and move the cursor. | Touch the screen with two fingers and move. |
⑨ Generate report
Click Generate report to generate personalized health report. Details in Generate report.