Create a case
After adding the patient profile, you can create a case for this patient.
Steps
You can create cases in several ways.
-
Go to the
 Patients. Click Create case
  in the Actions column to navigate to the create new case page.
 -
Go to the
Patients. Click Patient Name to navigate to detail page. Then click Create case to navigate to the create new case page. -
Go to the
Patients. Click Patient Name to navigate to detail page. Then click Data tab >  Select data >Create case to navigate to the create new case page.
 -
Go to the
 Scan Ticket. Then click Create case to navigate to the create new case page.
 -
Go to the
Scan Ticket. Click the case number to navigate to detail page. Then click Create case to navigate to the create new case page.
Interface
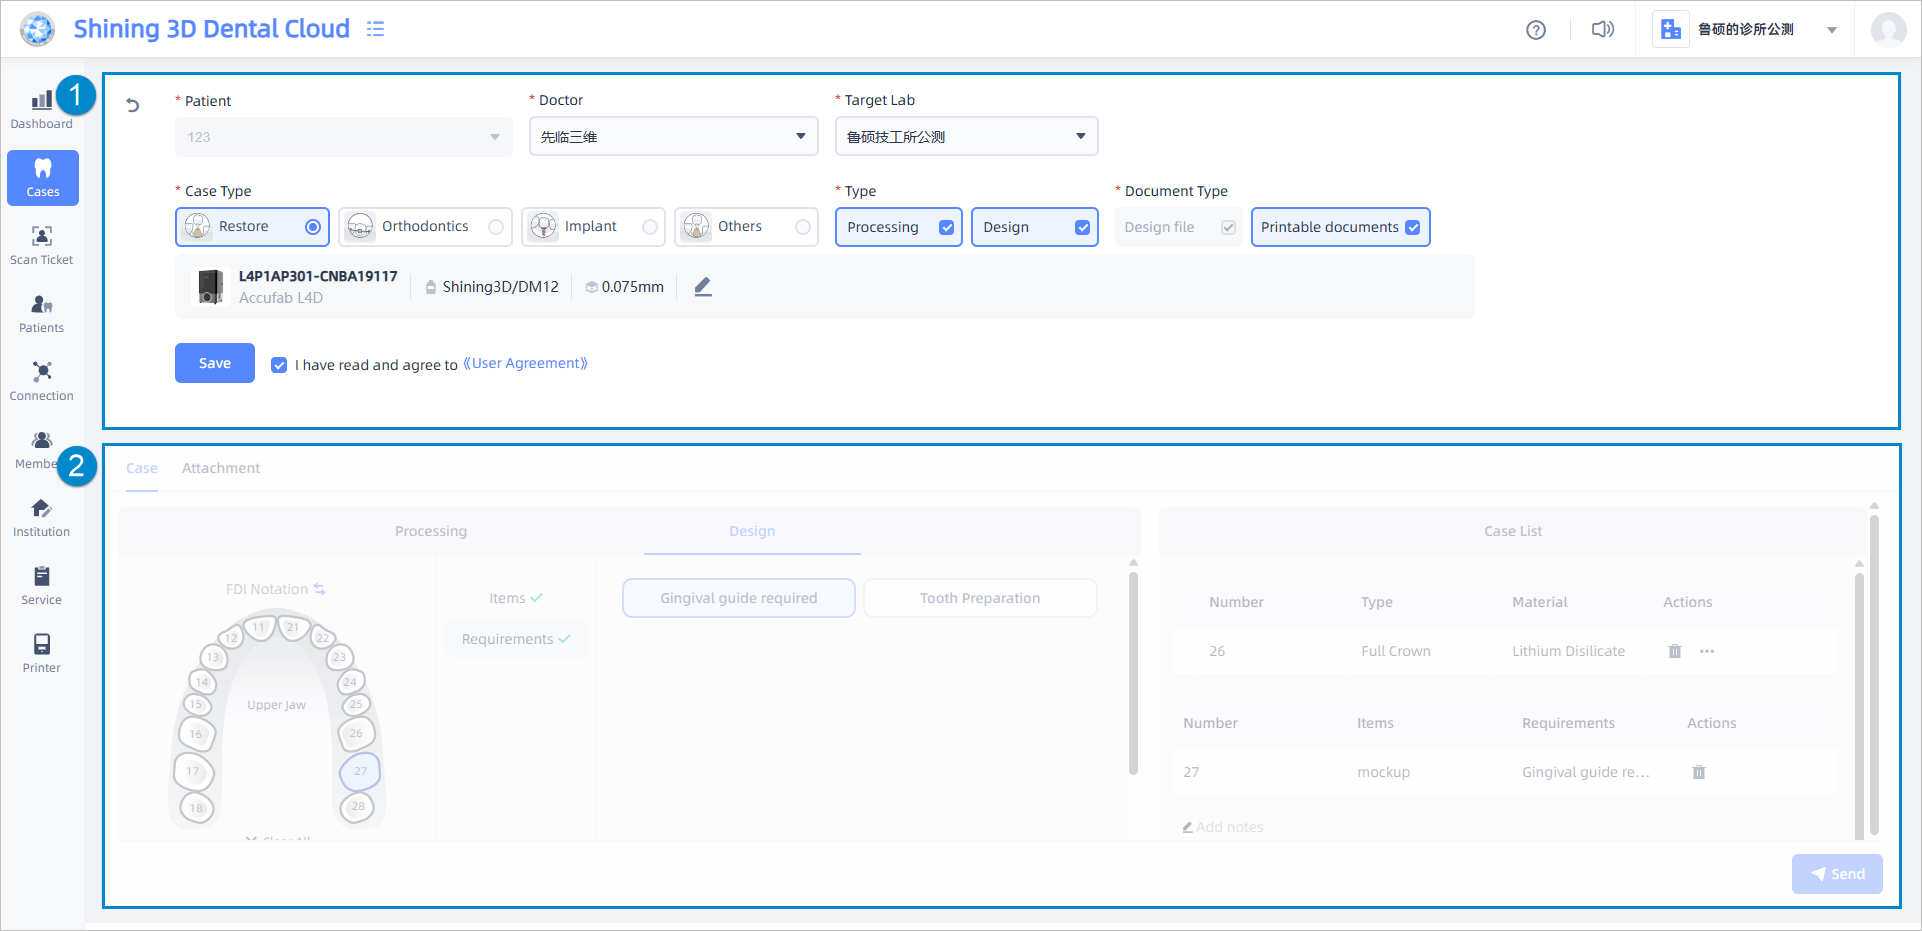
You need to select doctor, target lab, case type, type and document type (if the order type includes design type). Then check I have read and agree to User Agreement and click save to save the basic information.
Note
- When selecting printing parameters, you can only choose from the printers that are bound to your clinic. Please refer to Add printers for more details.
- After saving, you can click the Edit
 to edit the information again.
Complete the selection for all items under the corresponding type. For processing type, choose the type and stage. For design type, select the items and requirements. The modifications will be saved in the case list on the right side.
![]() Delete: Delete the items and requirements of the tooth number.
Delete: Delete the items and requirements of the tooth number.
![]() Ellipsis: Set a specific processing type and material as a favorite item star
Ellipsis: Set a specific processing type and material as a favorite item star ![]() , or quickly set the processing type and material for a specific tooth number as an existing favorite item.
, or quickly set the processing type and material for a specific tooth number as an existing favorite item.
Note
- If processing type is set to full crown, you also need to select the implant type.
- If processing type is set to antagonist, there is no need to select material.
- Deleting does not prompt for confirmation,please use it with caution。
- Only one favorite item can be set for type and material in the processing type.