Other Operations
On the left navigation bar, click Design> Design List to enter the design list interface.
Under the operation column of the case list, you can check the case details, cancel cases, initiate after-sales, download design files, and one-click printing.
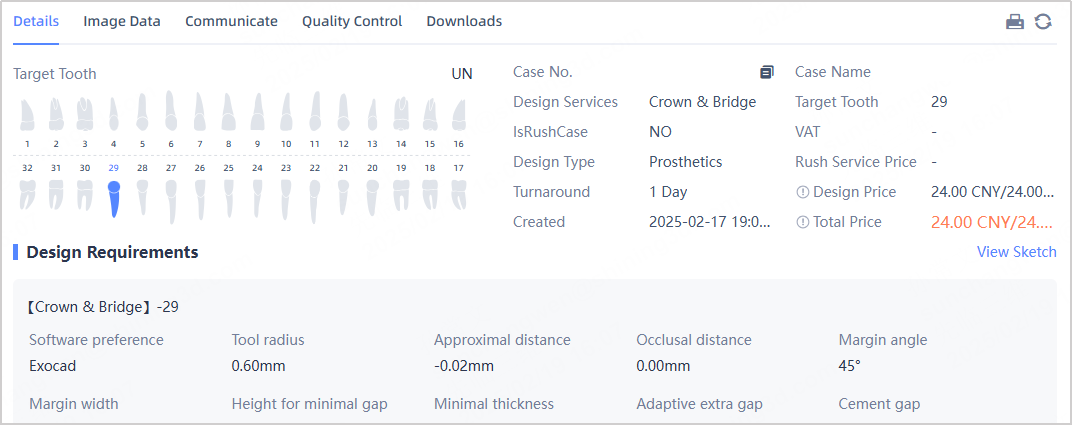
In the case list, select the case to be viewed. Under the operation column, click ![]() to view the detailed information of the selected case, including case details, image data, case communication, quality control and data downloads.
to view the detailed information of the selected case, including case details, image data, case communication, quality control and data downloads.
- Image data: Preview the original file uploaded by the user.
- Communicate: It is convenient for the user and the case taker to communicate the case design requirements, and inform the user of the case status in time.
Note
If the administrator suspends or refuses cases, users will receive information such as reasons and supplementary descriptions in the case communication.
- Quality control: The administrator uploads the inspection screenshot.
- Downloads: Download the case file that has been completed.
In the case list, select the case that needs to be cancelled. Under the operation column, click ![]() to cancel the submitted case.
to cancel the submitted case.
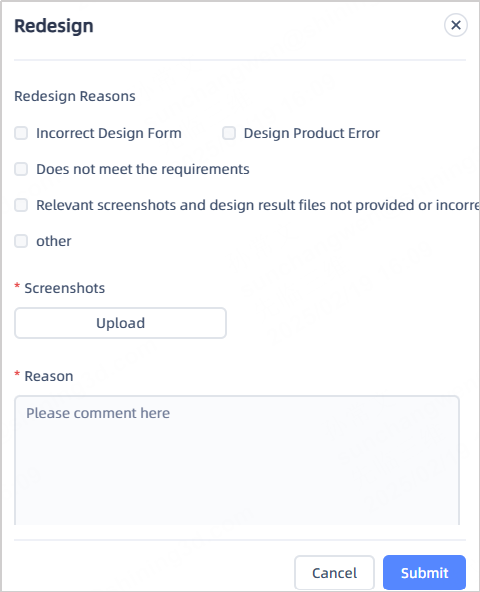
The case has been delivered to the user, but due to the unsatisfactory post-printing or processing effect, the user can initiate after-sales and the designer team will redesign the case.
- In the case list, select the case that requires after-sales service.
- In the operation column, click
 , the redesign window will pop up.
 -
Upload the screenshots and input the redesign reasons.
-
Click Submit.
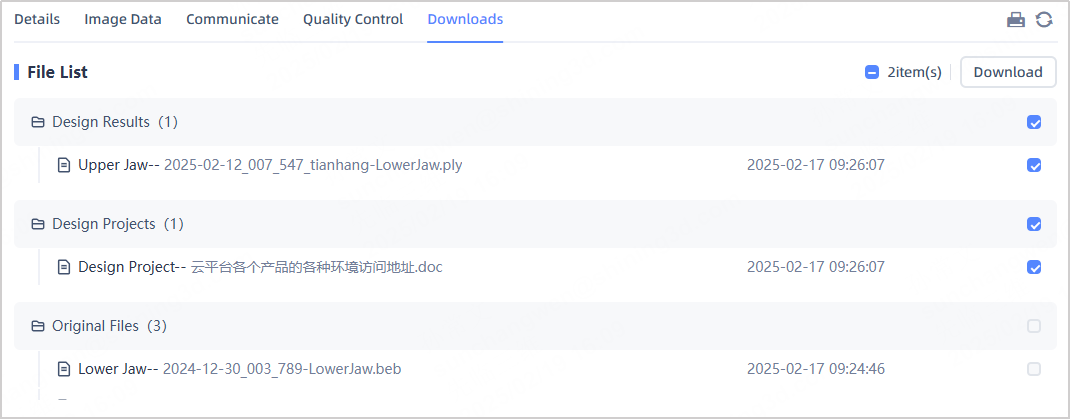
Once the case design is completed, users can download the design files for printing prosthetics or auxiliary treatment products.
- In the case list, select the cases to be downloaded.
-
Under the operation column, click
 to download cases.
Caution
The design files can only be downloaded when the case status is Finished.
-
On the download page, tick the design files that require downloading, and click Download in the top right corner.
Note
The download page includes original files, design result files, and design project files, which can be downloaded according to specific requirements.
For cases that have been designed or redesigned, users can directly print the design files using a printer.
- In the case list, select the case that needs to be printed.
-
Under the operation column, click
 to initiate document printing.
Caution
Only when the case status is Finished can the design files be printed.
-
In the list to be printed on the right, select the design file to be printed.
-
Choose AccuWare or Slicing on Cloud to slice.
Caution
- Please slice the design files before sending them to the printer.
- If choosing AccuWare to slice, please complete the local installation before slicing.
- If choosing Slicing on Cloud, it will automatically redirect to the Printer > Slicing interface.
-
Follow the interface guidance to complete the printing. For more information, please refer to the Printer.
For cases that have been designed or redesigned, users can perform milling on the files.
- In the case list, select the case that needs milling.
-
Under the operation column, click
 to initiate file milling.
Caution
Milling can only be performed when the case status is Finished.
-
In the list to be milled on the right, select the design file to be milled.
-
Choose the command-line interface access.
Caution
To use the milling function, you need to first create and publish an application in the Dental Open Platform console, and then authorize it in Institution > Third Party.