Printer
On the Printer, you can slice the model file, view and manage the printers and their states of current institution in real time.
Note
All data on Dental Cloud are from printers, and all data are updated in real time.
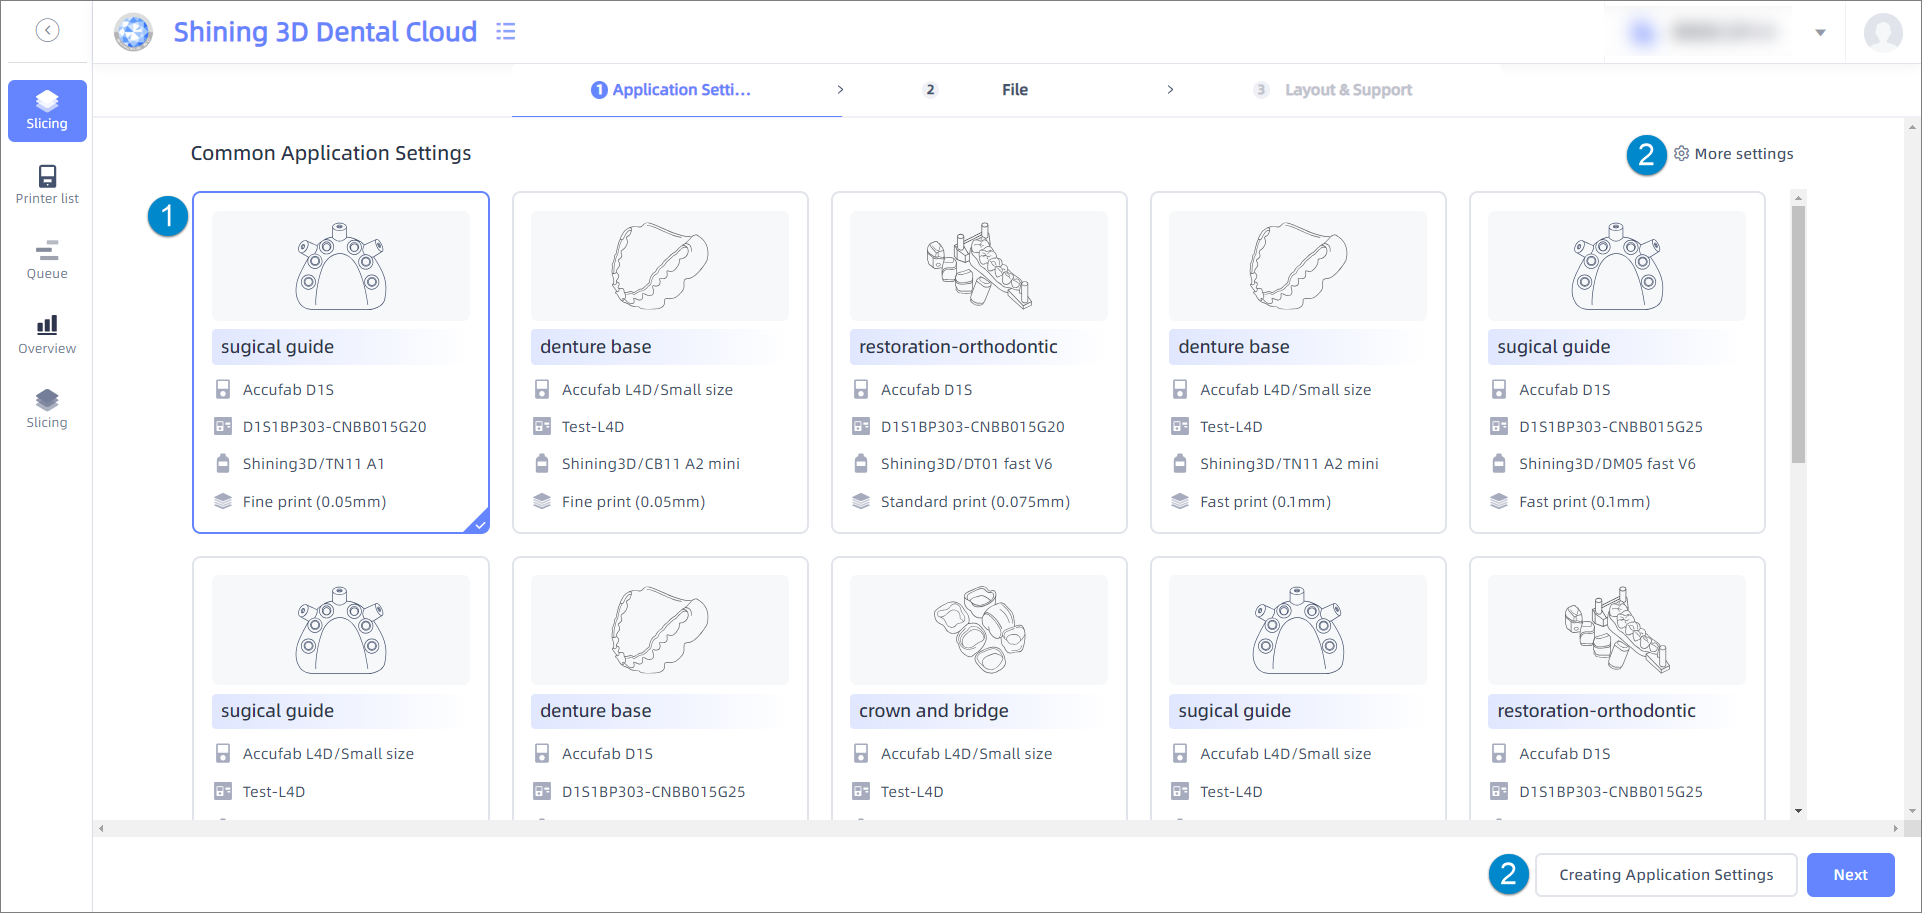
On the Slicing page, you can select the uploaded design files or import local model files, and proceed with one-click layout, support, slice, and send to queue or start printing. For more, please see Slicing.
Note
- This function is available to authorized users only; please contact technical support if needed.
- You can also click Slicing
 button on the Design page of the order to slice the designated design file.
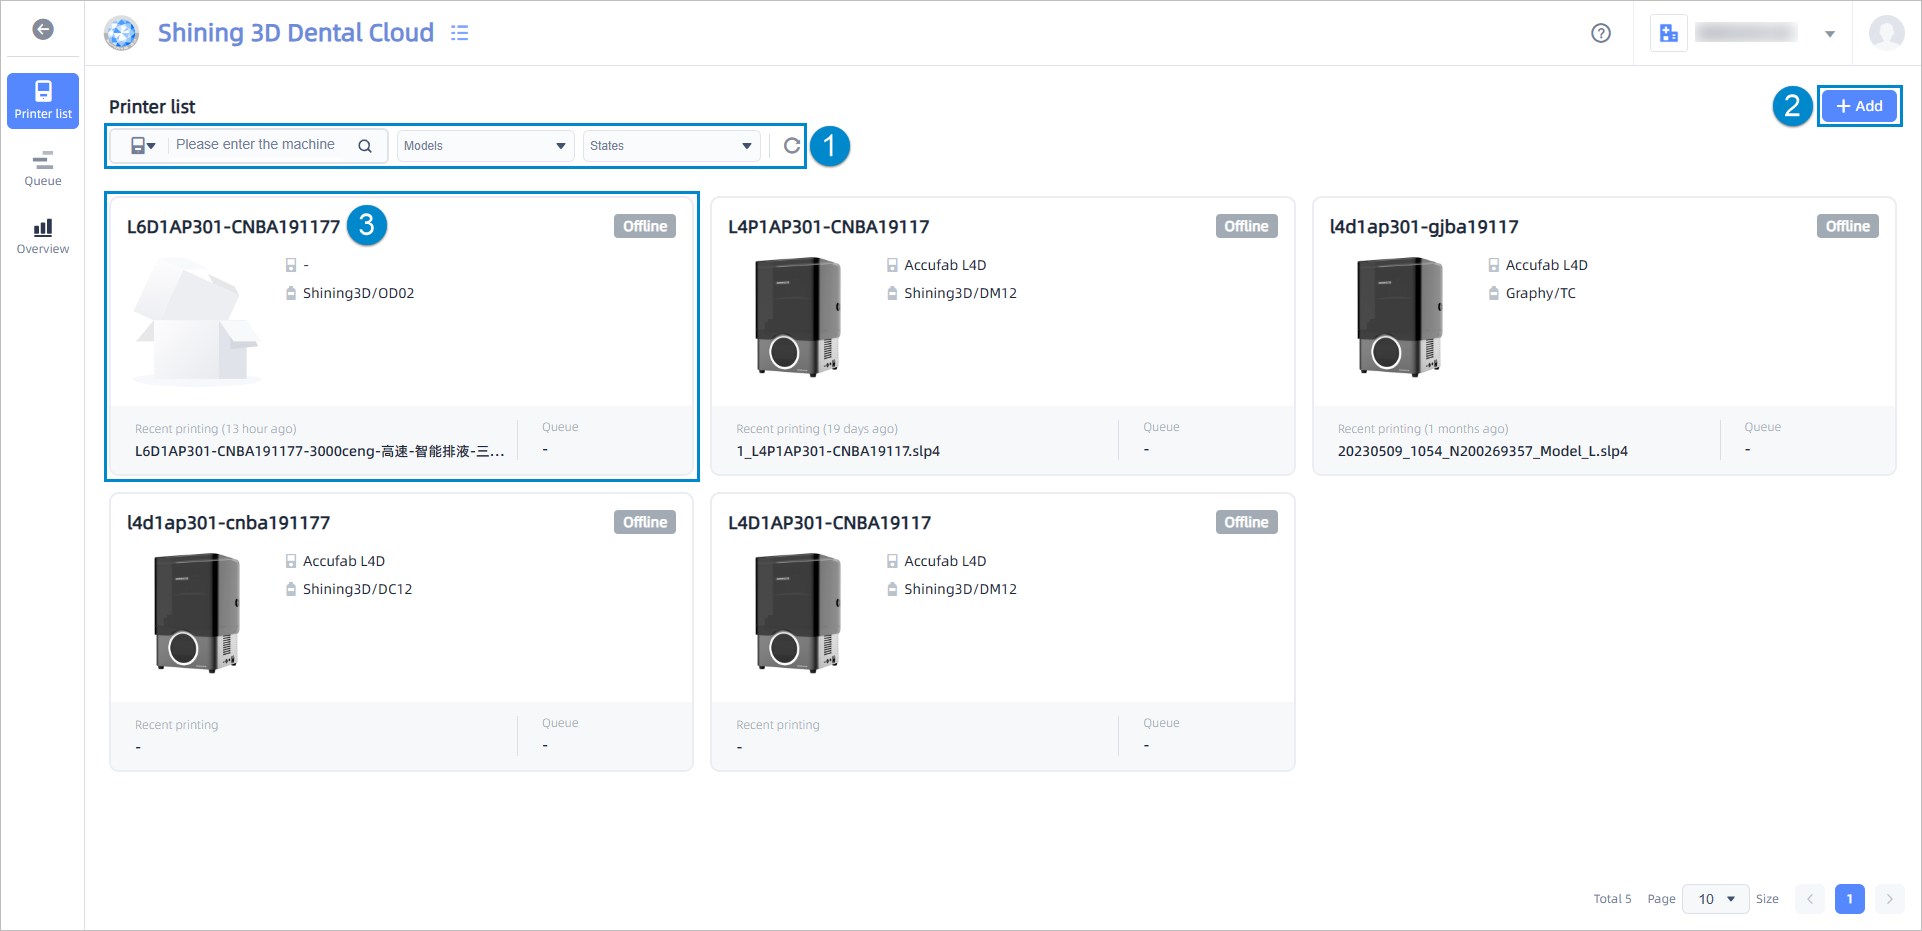
Display all the basic information of printers in certain institution, which are arranged in descending order based on the most recent print end time and printer status.
①: You can filter printers by model or state. For specific printer, you can find it by entering the name or serial number. To reset filter, click Reset ![]() .
.
② Add printer: Click Add and an Add printer dialog will pop up, follow the instruction and enter the printer's dynamic code, then click connect to Bind printers.
③ Printer card: Displayed serial number, appearance, model, recent print file name, pending print files. Click a printer card and a drawer will appear from the right margin to display the information of printer:
Col
 : Printer type.
 : Printer serial number.
- Resin brand and model.
 : Current chamber temperature.
 : Current chamber humidity.
  : Total print count.
 : Total resin usage.
 : Total resin usage.
This drawer also display the software and firmware version of printer, resin tank usage, material package version and recent printing files.
Col

- Buttons introduction: Click ellipsis
 in the up right corner and you can view the printer sndev file, unbound the printer, and upload the log. Click history and a Printing history window will pop up to show the preview thumbnail for 3D model, model file name, start time, end time, resin model, layer height, printing operator.

Display all the printing history of all the printers from current institution. You can drag and drop task cards to adjust print queuing order.
①: A list of printers from the institution
②: Timeline.
③: Print task card. You can click the card to view the detailed information about printing tasks, including print layer, layer height, total printing time, etc.
Note
- The length of task cards that aren't in queue corresponds to the actual printing time. For queued tasks, the cards are evenly arranged, and their length matches the estimated printing time.
- In-progress tasks cannot be canceled, while queued tasks can be manually canceled or deleted.
- If a pending task on the printer is canceled due to insufficient storage space or other reasons, the corresponding task card will also disappear. You can resend the task from the pending tasks list.
④ Pending tasks: You can view the task name and corresponding printer information for the printable files that are already available but have not been issued yet.
- You can filter print jobs by serial number or enter the task name to search the print job.
- Click each item to navigate to the corresponding detail page of case.
-
Click Issued to send print task to printer.
Note
If the issuing process was unsuccessful, please refer to the Pending tasks list to check for the reasons behind the failed issue.
You can find targeted tasks quickly in the timeline by using the tools below:
-
Zoom in and out on the timeline: Use ⑥ zoom component.
-
Navigate through time: Press and hold the left mouse and drag horizontally to view historical tasks and pending tasks.
-
Reset the timeline: Click ⑦ to navigate to ⑤ the current time.
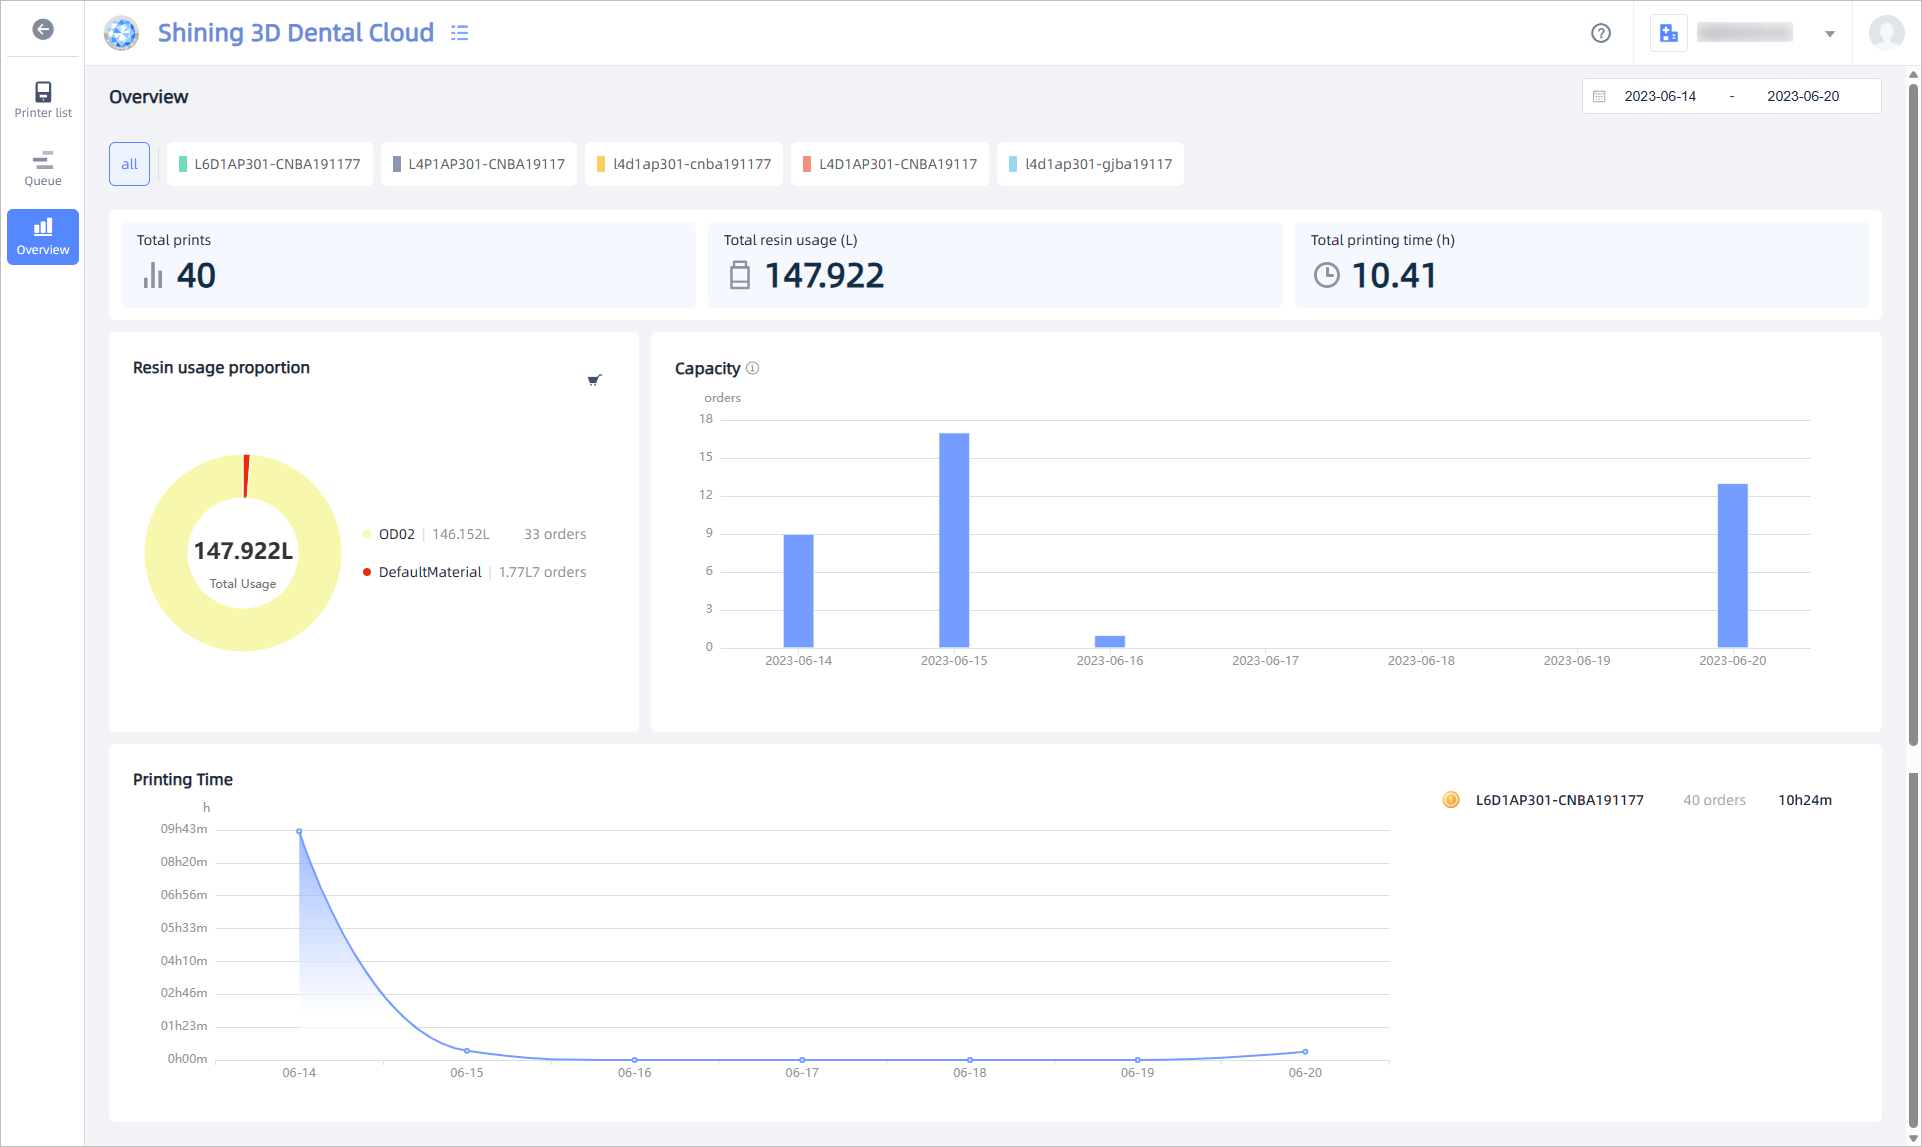
Display the data of all printers from the institution including total print count, resin usage, printing time and printer capacity.
Note
You can click Mall ![]() button in the top-right corner of the Resin usage proportion module to go to the official shop.
button in the top-right corner of the Resin usage proportion module to go to the official shop.
①: You can filter presented printer data by printer model. The default selection is "All" to show data for all printer models.
②: You can filter presented printer data by setting a time range. You can choose from options such as today, last 7 days, last 30 days, or customize a time range within a maximum of 7 days.