Scan ticket
On the Scan ticket, you can view and manage the scan tickets of certain institution. Click Number on each row to navigate to the detail page.
Note
If a user is an ordinary member, only the patients of user under certain institution can be managed.
Scan ticket list
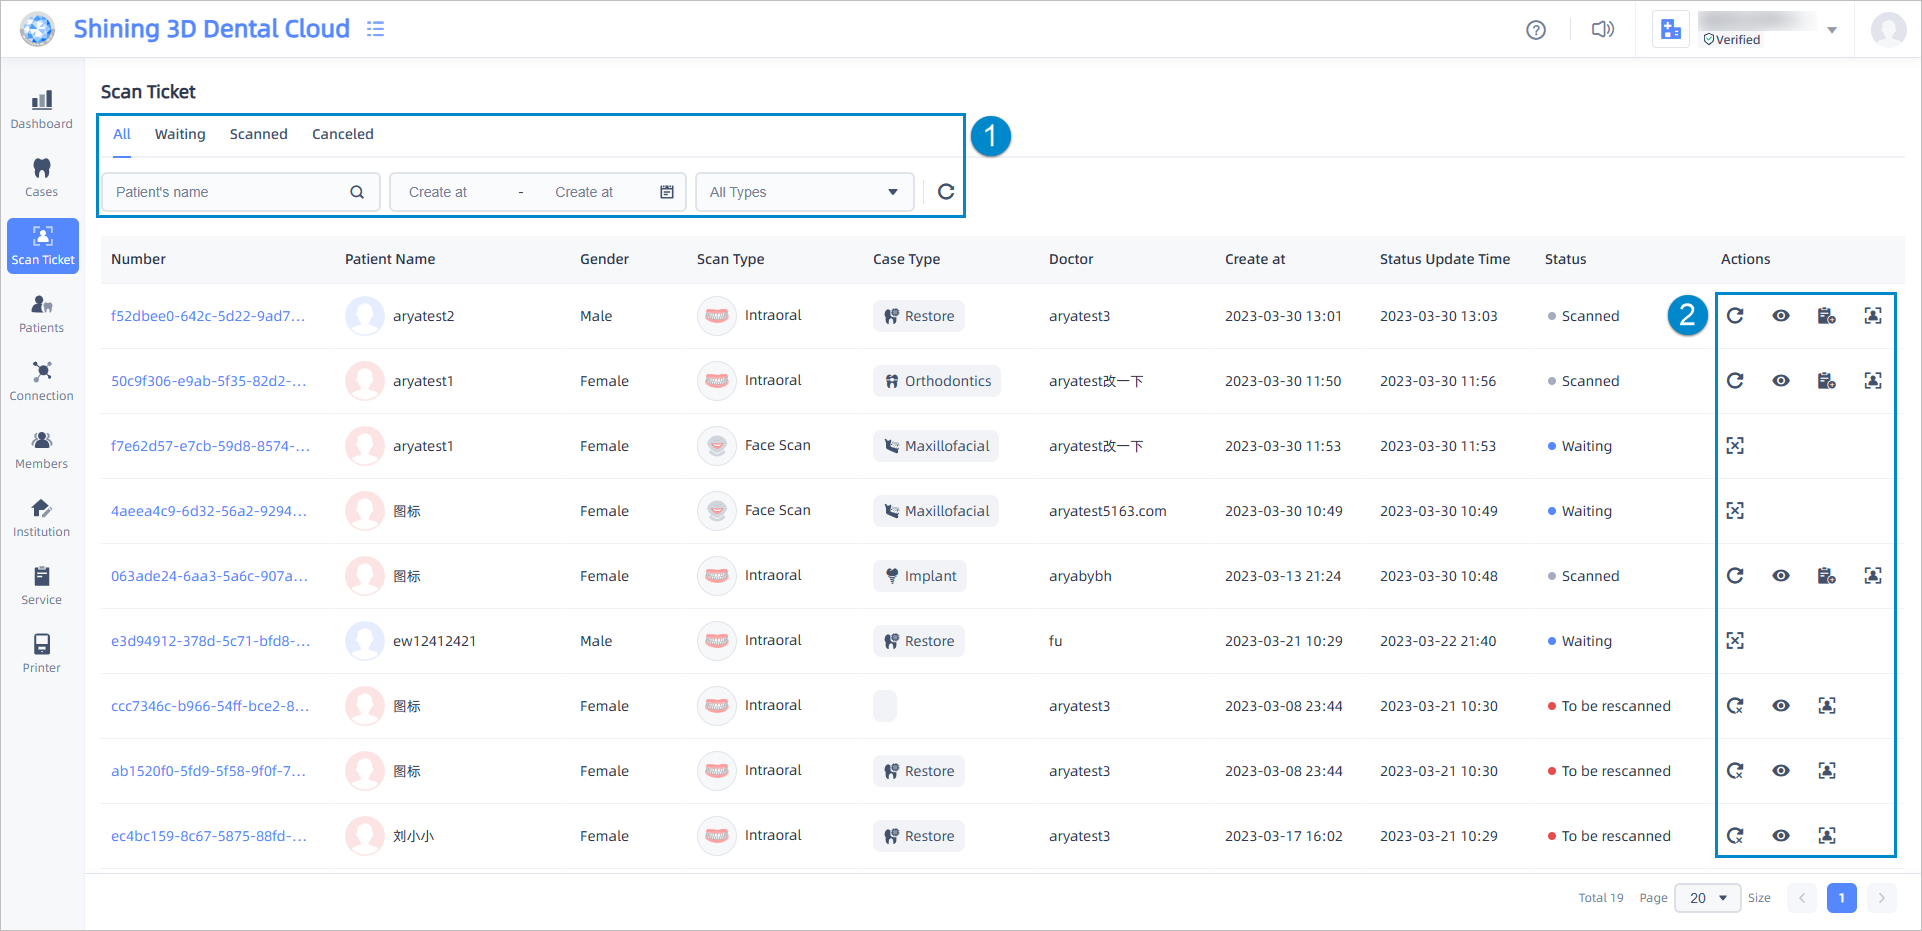
① You can filter scan tickets by patient's name, status, type, and creation time. To reset filter, click Reset ![]() .
.
② Buttons introduction:
 Request a rescan: Require rescan. Click this button, and a window for a second confirmation will pop up. Then click Confirm to require rescan.
 -
 View details: Click this button to navigate to the detail page.
Note
You can click the Case Number to navigate to the detail page.
-
 Create case: Click this button to navigate to the Create Case page.
Note
Model files will be uploaded as attachment of the cases.
-
 Create face scan: To do it, you need to fill in case type, visit type, doctor, and other information, and then click Create. In intraoral cases, click this button to create a case of face scan, and vice versa.
  Cancel scan: Click this button, and a window for a second confirmation will pop up. Then click Confirm to cancel scan.
  Undo rescan: Click this button, and a window for a second confirmation will pop up. Then click Confirm to undo rescan.
Detail page
① Basic information
Icons below the case number:
![]() : Patient.
: Patient.
![]() : Doctor.
: Doctor.
![]() : Clinic.
: Clinic.
![]() : Upload time.
: Upload time.
![]() : Case type.
: Case type.
Note
You can click rotate-left ![]() in the ① to return to the case list.
in the ① to return to the case list.
You can click icons on the Actions column to manage scan tickets:
![]() : Cancel scan.
: Cancel scan.
![]() : Require rescan.
: Require rescan.
![]() : Create case.
: Create case.
![]() : Create case of face scan or intraoral scan.
: Create case of face scan or intraoral scan.
![]() : Undo rescan.
: Undo rescan.
You can find the scanner, scan time, case creator and creation time, dental notation and note here.
② Detailed information
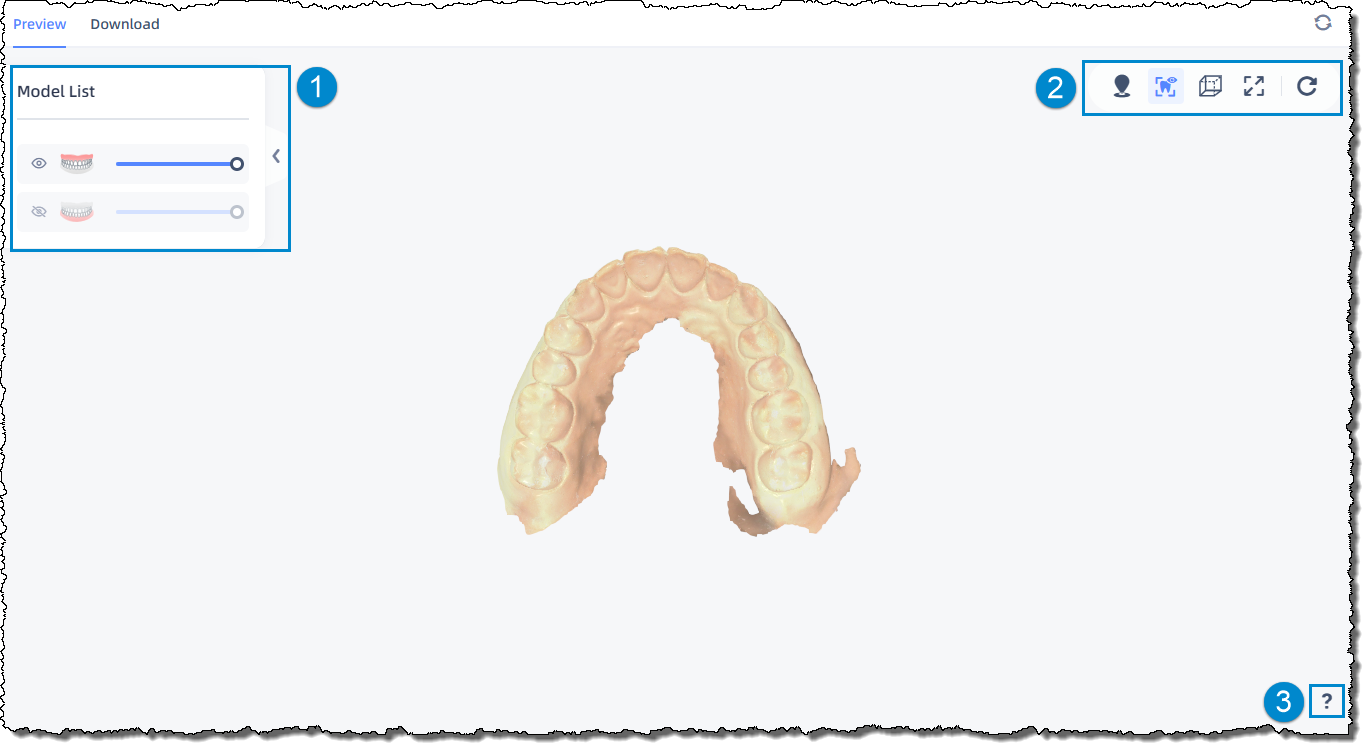 Show a model list associated with the case, the working jaw is shown first.
① Model list:
You can click Hide ![]() (Default) or View
(Default) or View ![]() to hide or view the selected model; Drag the slider to adjust it's opacity.
to hide or view the selected model; Drag the slider to adjust it's opacity.
Note
The model list unfolds by default, and click Unfold ![]() on the right side of the interface to hide it.
on the right side of the interface to hide it.
② Buttons introduction:
 Display label: Indicate the label is hidden, and the upper right numbers (if have) indicates the number of label.
 -
 Hide label: Click to show a pop-up label list where all label items are displayed; At the same time, their corresponding markers show on the model. Click the markers
  or a label item to show a comment box. And the model itself zooms in or out to the size when the marker was added.
- Add label: Click in the label list and move the cursor to the target position on the model and then add a marker and write comment.
- Delete a single label: Hover over a specific label item, and click Delete
 that appears in the right-upper corner to delete the label.
 - Delete labels in batches: Click Batch select
 in the right-upper corner of the label list, check the label items that need to be deleted, and then click Delete to delete them in batches.
Note
- You can close the comment box by pressing Esc.
- If you are editing the content, press Esc to undo.
- Label is added only for one model. If a model is hidden, its labels will also be hidden.
- Click chevron-right
 to hide the label list.
 - Press Up or Down to switch labels.
-
 Display texture: Indicate the texture is hidden. The model show texture (if has) by default.
 -
 Hide texture: Indicate the texture is displayed.
 -
 Switch perspective view: Switch to camera perspective. The default is
  camera orthographic view. The illustration of two perspectives is shown in the follows.
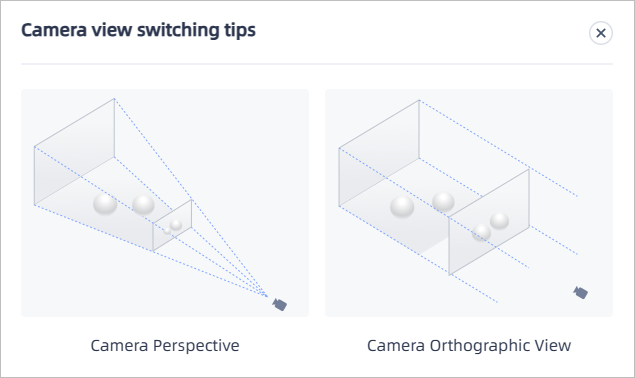
-
 Full screen: Click this button to preview the model in full screen. To exit full screen, click exit full screen
  , or move the cursor to the top of the screen to appear the circle-xmark
  and click it. Or just press Esc to exit full screen.
 -
Reset: If the view or position of a model is adjusted, click this button to reset the model to the initial state.
③ Operation introduction:
- Rotate: Hold down the Left Button or Right Button and drag in the direction you want.
- Zoom: Hover over a model, scroll up the Middle Button to zoom in the model, and scroll down the Middle Button to zoom out the model.
- Pan: Press Shift and hold Left Button and drag in the direction you want.
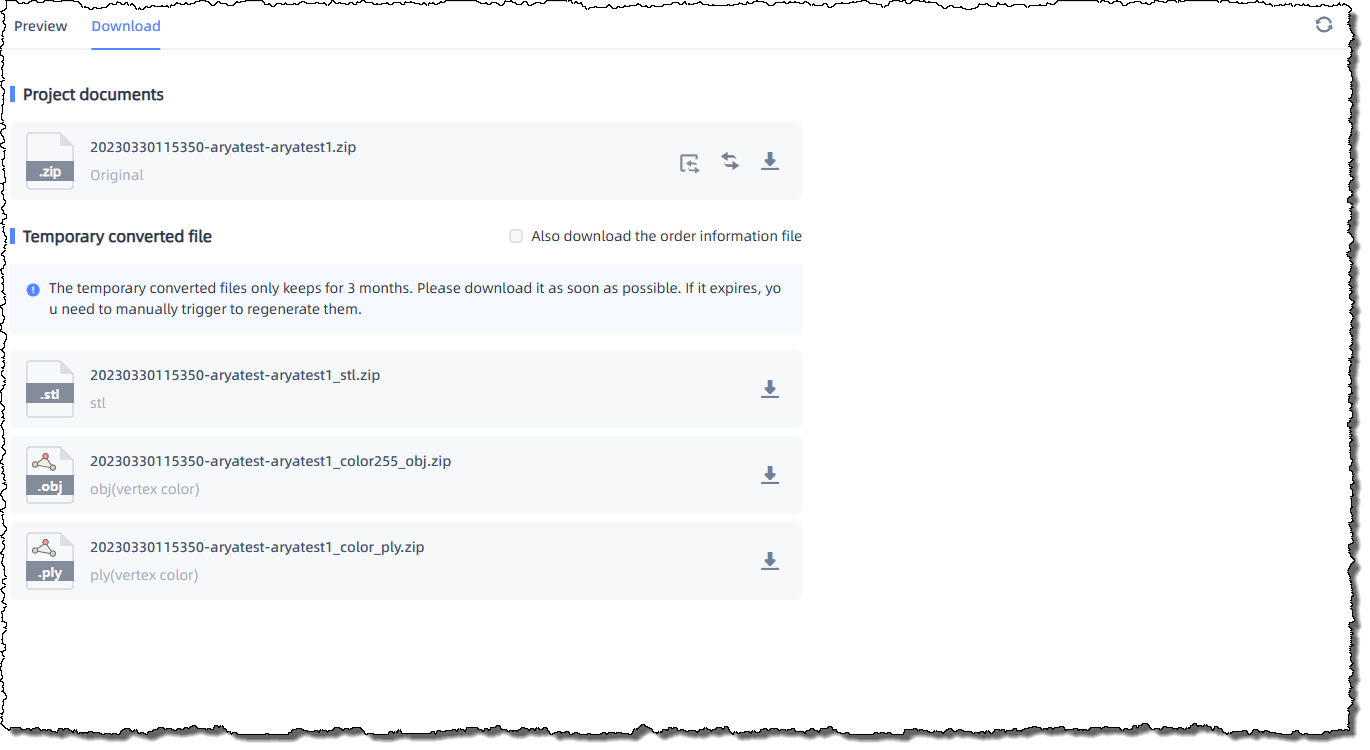
Show model files of scan tickets and other downloadable project documents and temporary converted file.
 : Convert project documents to other file formats, with support for formats such as PLY, STL, OBJ, and more.
Note
- Different target formats can be selected simultaneously for conversion, and you have the option to check for notification upon completion.
- Temporary converted files will be stored for 15 days. After expiration, they will need to be reconverted.
 : Download project files or temporary converted files.