Members
On the Members, you can view and manage the members of current institution.
Note
If an user is an ordinary member, the user have no right to view institution members.
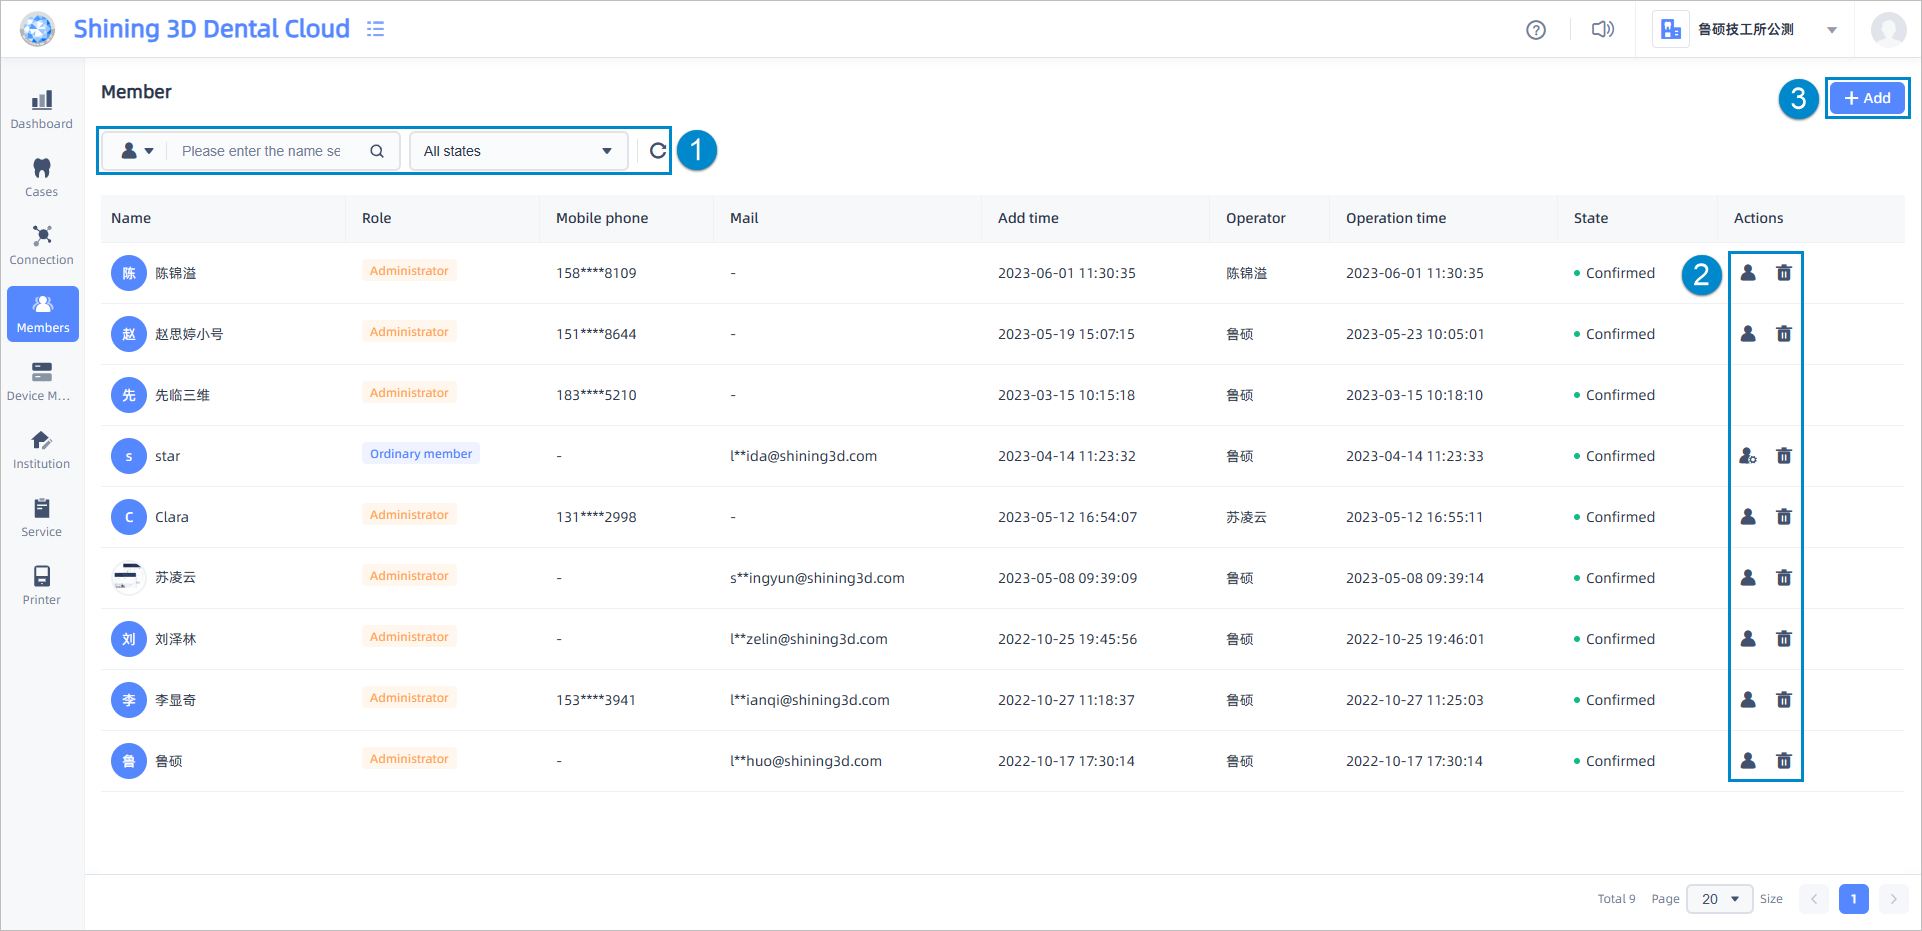
This page shows the name, role, contact information, add time, operator, operation time and state.
①: You can filter members by state. For specific member, you can find it by entering the name, mobile phone or mail. To reset filter, click Reset ![]() .
.
② Buttons introduction:
![]() Accept member: Click this button and a two-step confirmation window will pop up. Then click Confirm to accept the member into the institution.
Accept member: Click this button and a two-step confirmation window will pop up. Then click Confirm to accept the member into the institution.
![]() Reject member: Click this button and a two-step confirmation window will pop up. Then click Confirm to refuse the member to join the institution.
Reject member: Click this button and a two-step confirmation window will pop up. Then click Confirm to refuse the member to join the institution.
![]() Change role to ordinary member: Click this button and a two-step confirmation dialog will pop up. Then click Confirm to apply the change.
Change role to ordinary member: Click this button and a two-step confirmation dialog will pop up. Then click Confirm to apply the change.
![]() Change role to administrator: Click this button and a two-step confirmation dialog will pop up. Then click Confirm to apply the change.
Change role to administrator: Click this button and a two-step confirmation dialog will pop up. Then click Confirm to apply the change.
![]() : Delete member. Click this button and a two-step confirmation dialog will pop up. Then click Confirm to delete member.
: Delete member. Click this button and a two-step confirmation dialog will pop up. Then click Confirm to delete member.
③ Add:
Click this button and an Add member dialog will pop up; Enter the mobile phone or mail and set the role. After submission, an SMS/email will be sent.