Layout and Support
On the ③ Layout & Support page, all uploaded models will be processed with auto layout and added supports, and supports one-click slicing and sending to print.
Note
- You can return to the ② File step after auto layout & support; if you add, duplicate or delete models, the auto layout & support will be implemented again.
- You can return to the ① Application Settings to adjust printing settings after auto layout & support; if you switch the application card after importing model files, please follow the pop-up to delete or retain models.
- If you exit the current page after importing model files, a pop-up reminder will appear; and when entering the
 Slicing page again, you can directly proceed with the incomplete slicing procedure by following the pop-up instruction.
Caution
- During the auto layout & support process, any other operations are not supported and the process can not be cancelled.
- If an error pop-up occurs during the auto layout & support process, please follow the prompts to open/download the AccuWare to continue the slicing process.
Interface Introduction
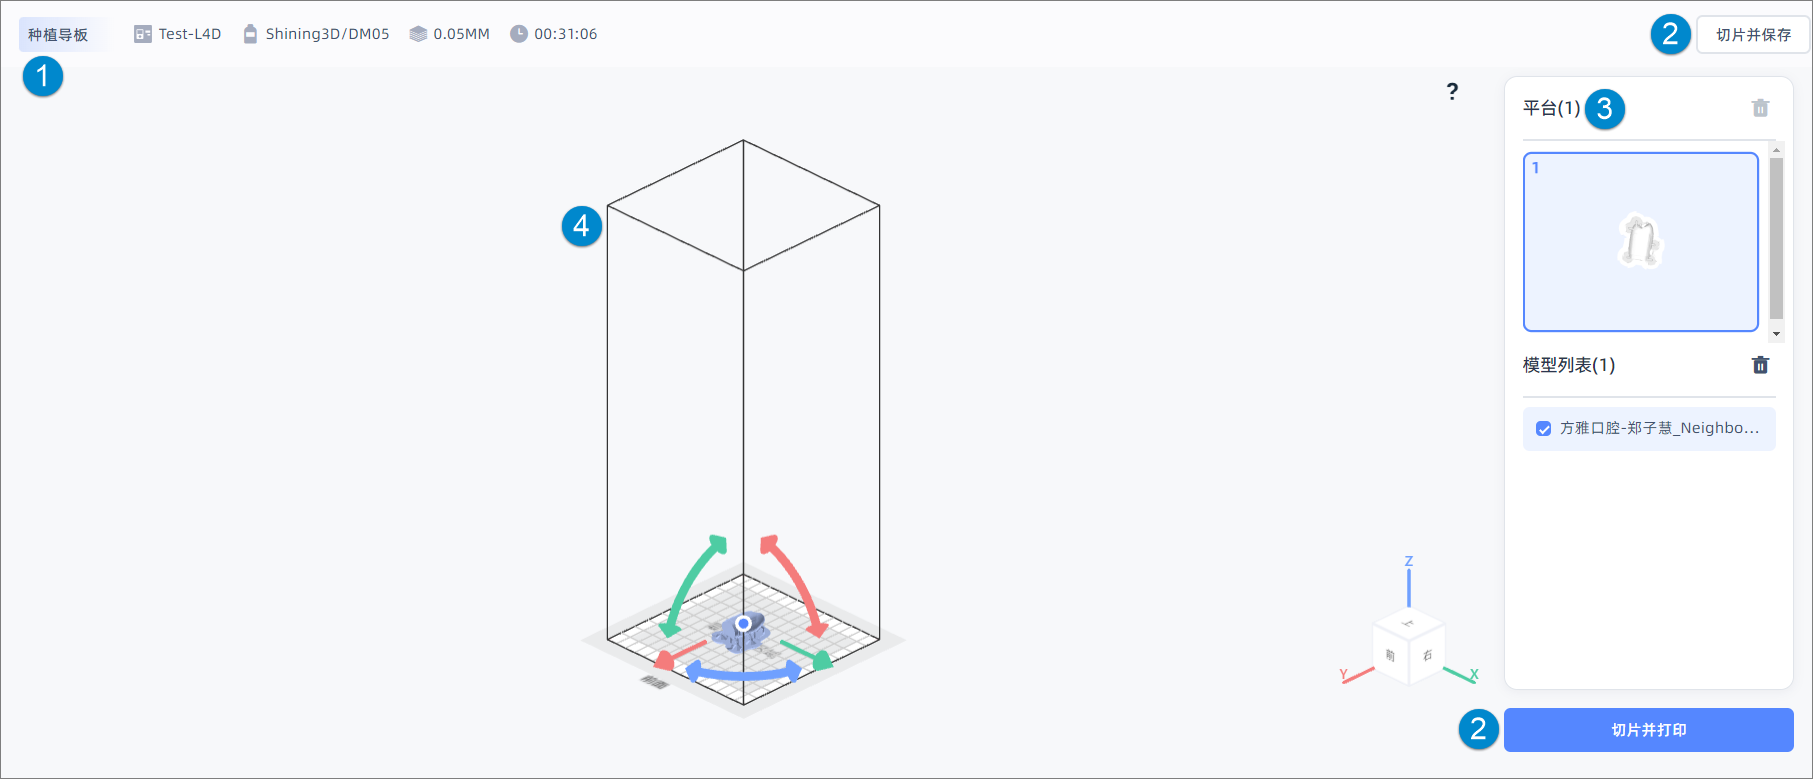
Display application type, ![]() printer serial number,
printer serial number, ![]() resin,
resin, ![]() mode and
mode and ![]() predicted printing time1.
predicted printing time1.
Click Slice and Save or Slice and Print button to enter the slicing process, and supports saving the slice file locally or sending the slice file to queue.
After auto layout & support, you can view the thumbnails of the models automatically distributed to platform(s) in the Platform list on the right side.
The Model list displays the models distributed to the current selected platform.
Note
The first platform is selected as default; if the number of platforms exceeds 4, you can slide to view more platforms.
For the introduction to icon buttons, please see file.
For the introduction to platform and model operation, please see file.
Caution
If you adjust the layout by the model controller manually, please confirm whether to generate new supports.
Slice and Save
Click Slice and save button in the top right corner, a second confirmation prompt will appear, and click Confirm again to enter the slicing process and download the slice file to your browser's default download location.
Slice and Print
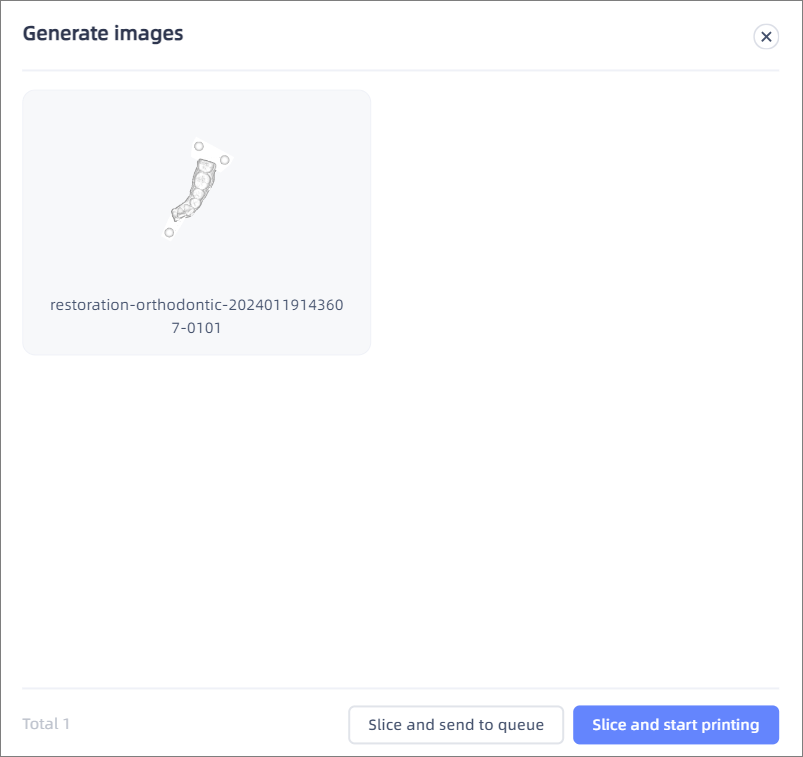
Click Slice and print button,and the Generate images window will appear, displaying the thumbnail of all platforms (supports editing the name).
● Slice and send to queue: Click to enter the slicing process, and the slice file will be sent to the printer's queue when the slice completes.
● Slice and start printing: Click to enter the slicing process, and the slice file will be sent to the printer and printed directly. Note
Note
The Automatic slicing and sending function can be enabled in More settings: After the automatic layout & support process is complete, the model file will be sliced and queued, and once the queueing is complete, you will be automatically redirected to the Queue page.
Caution
- The size limit for sliced files is 1.5 GB, and files exceeding this size cannot be sent to the queue.
- If the Slice and start printing button is grayed out, it indicates that the selected printer in the application settings is not ready.
-
Only shows after model files have been imported. ↩