All-in-one Case
All-in-one (Sectioned Model) Case
Create the Order
For steps to create an order, see Sectioned Model Case.
Start Scanning
1 Click ![]() in the scanning interface.
in the scanning interface.
2 Check All-in-one and click Sectioned Model.
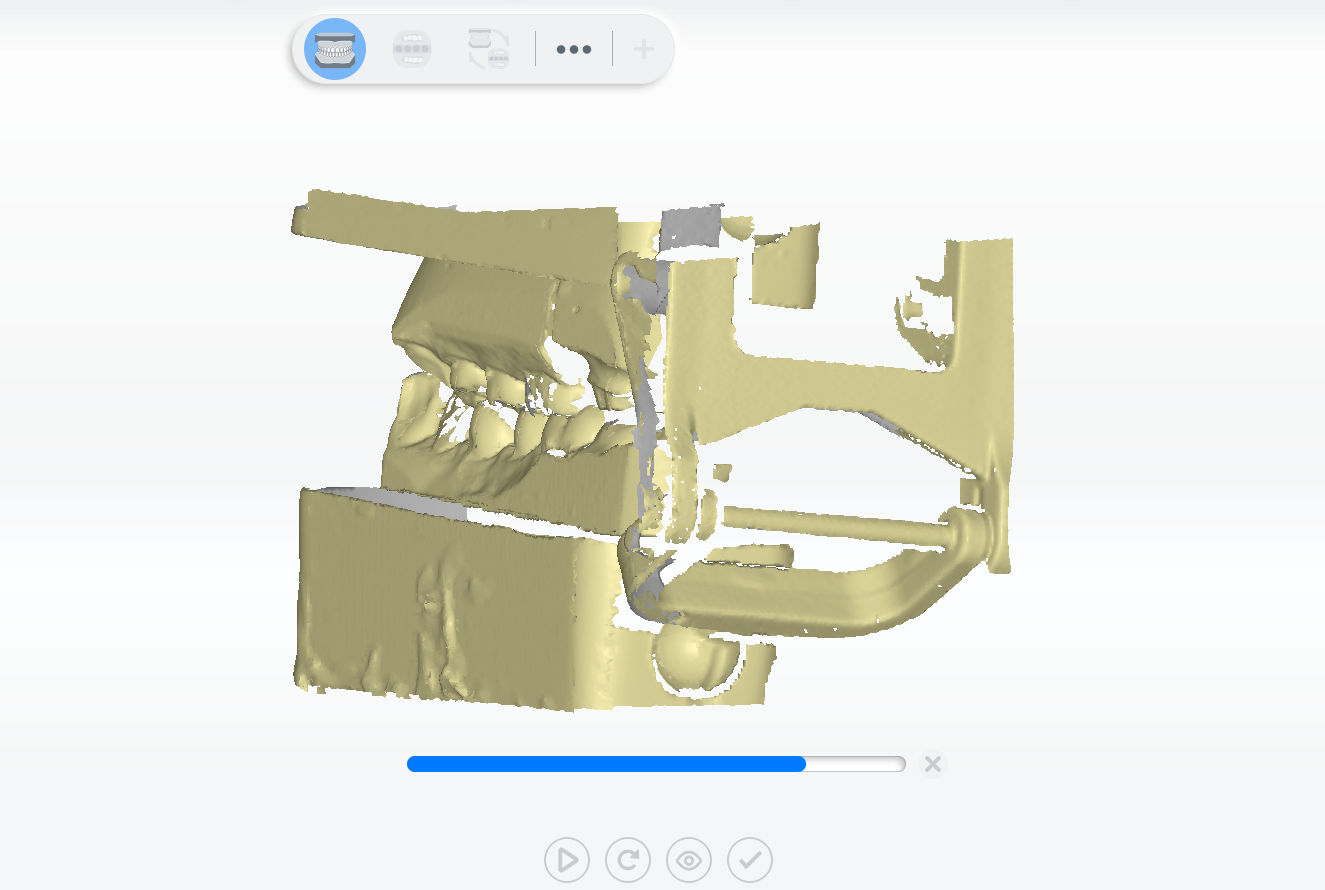
 Total Jaw Scan
1 Follow the guidance on the interface to place the height adaptor, the fixture and the model.
2 Set the configuration in the camera window. For steps to set parameters, see Parameters.
3 (Optional) Turn on additional functions. For more, see Function.
● ![]() : Enabled by default in Total Jaw Scan. This function could add scanning paths and process a multi-angle scan.
: Enabled by default in Total Jaw Scan. This function could add scanning paths and process a multi-angle scan.
● ![]() : Add details and process a high-quality scan.
: Add details and process a high-quality scan.
4 Click ![]() or press the space key to start scanning.
or press the space key to start scanning.
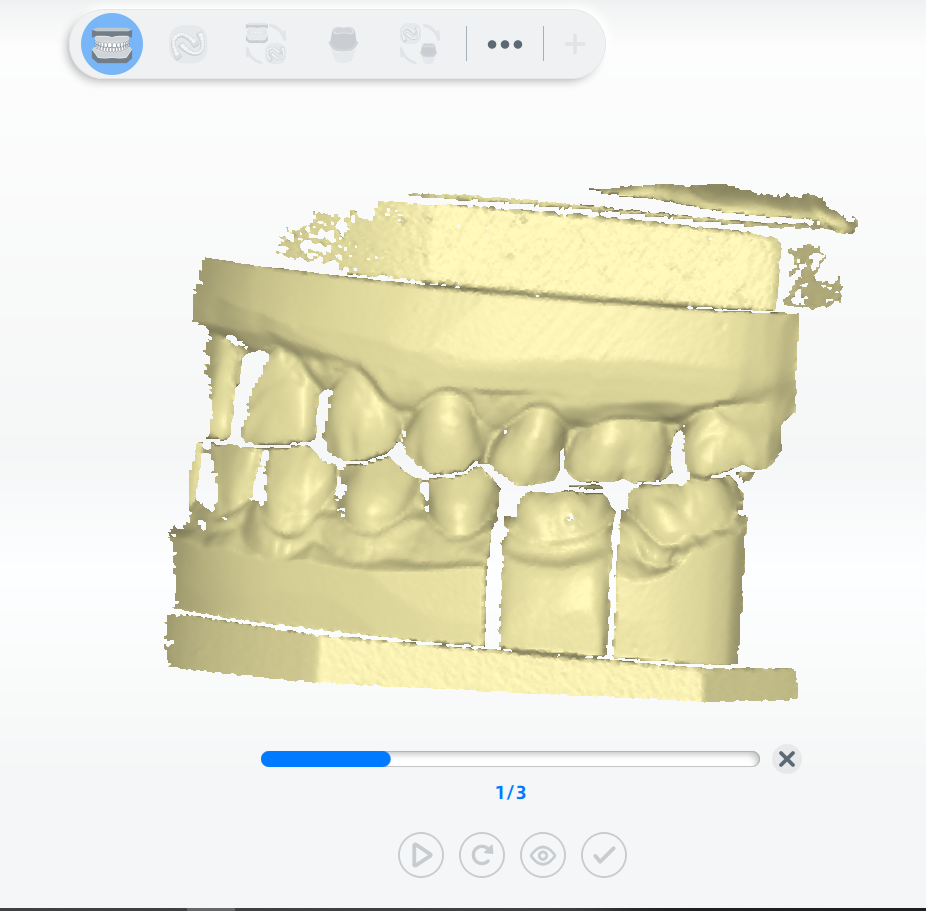
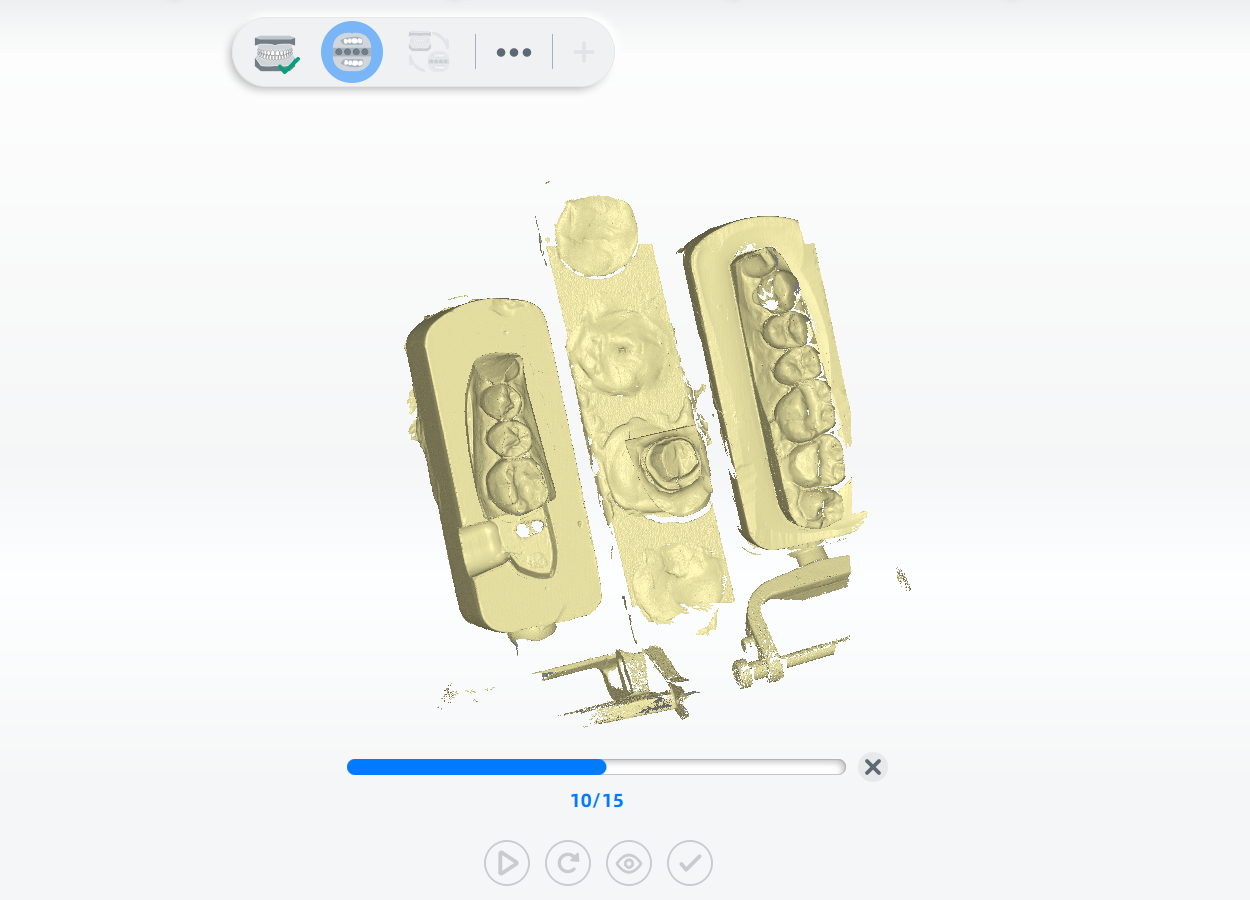
5 After scanning, move or rotate the cutting plane to cut the model.
6 Click  to edit the model. For more, see Function.
7 Click  to save the edit and return to the scanning interface.
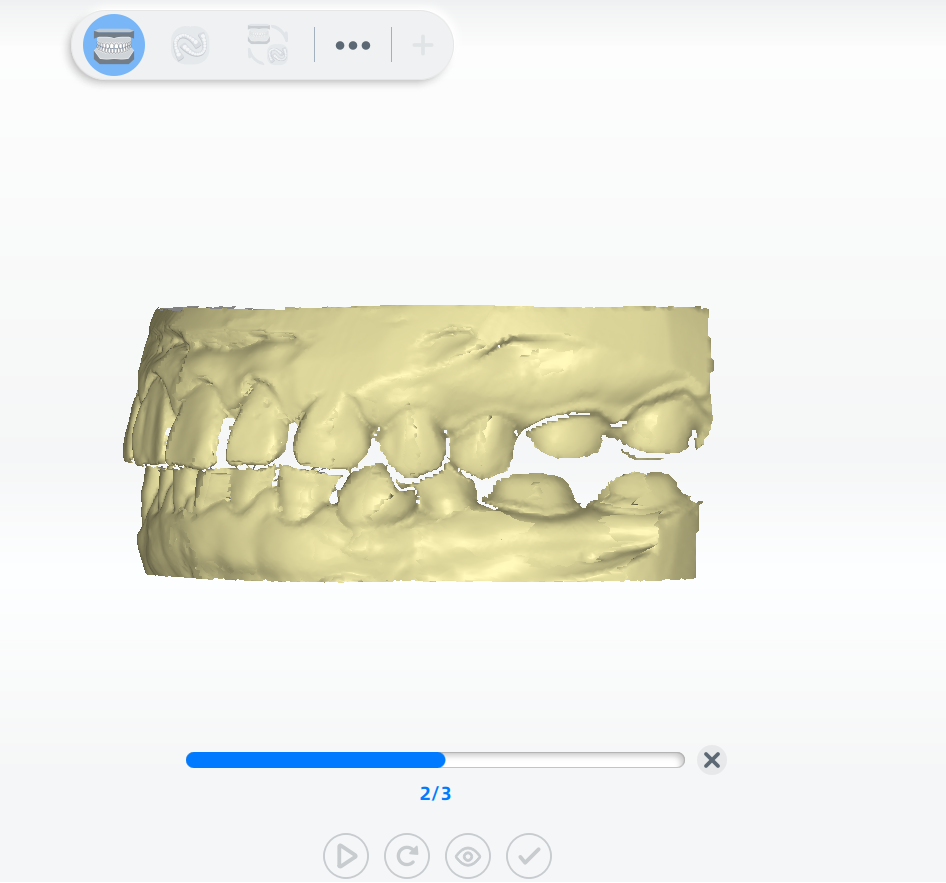
8 Click ![]() to preview the scanned model;
or click
to preview the scanned model;
or click ![]() to rescan;
or click
to rescan;
or click ![]() to finish.
to finish.
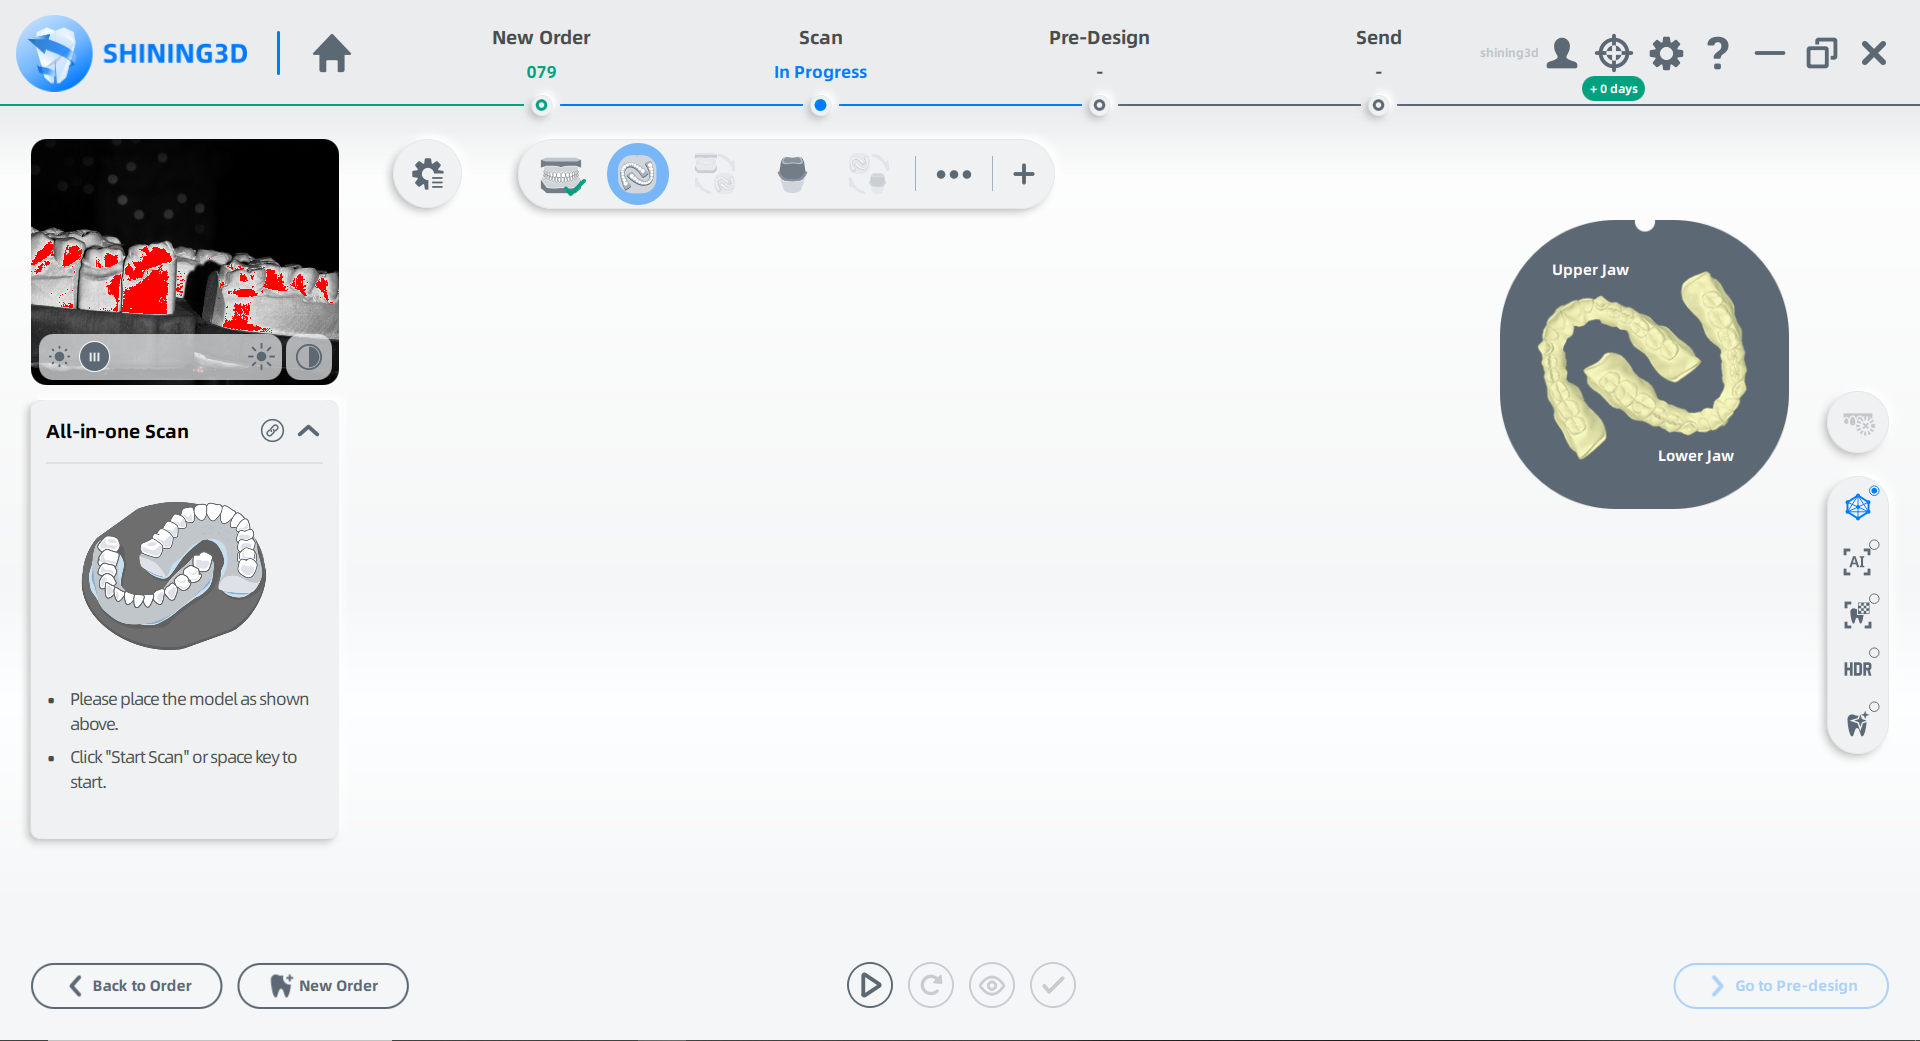
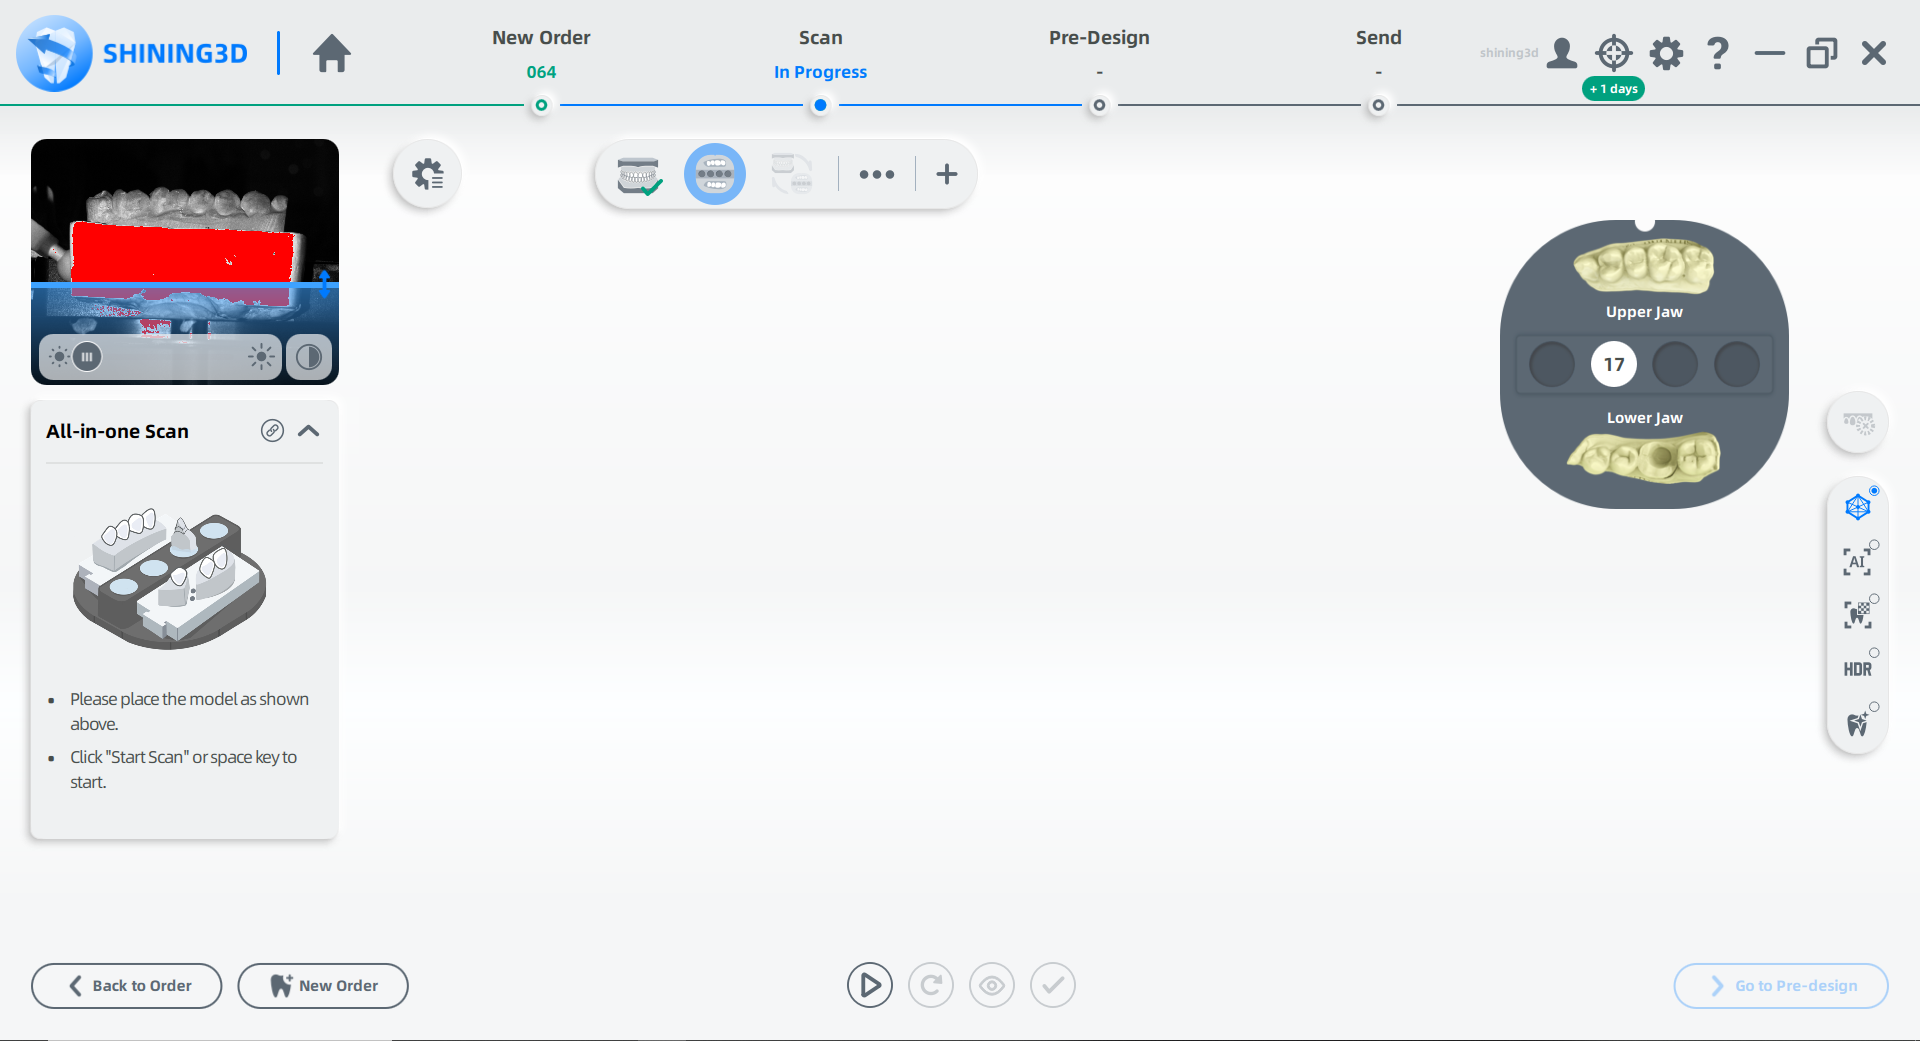
 All-in-one Scan
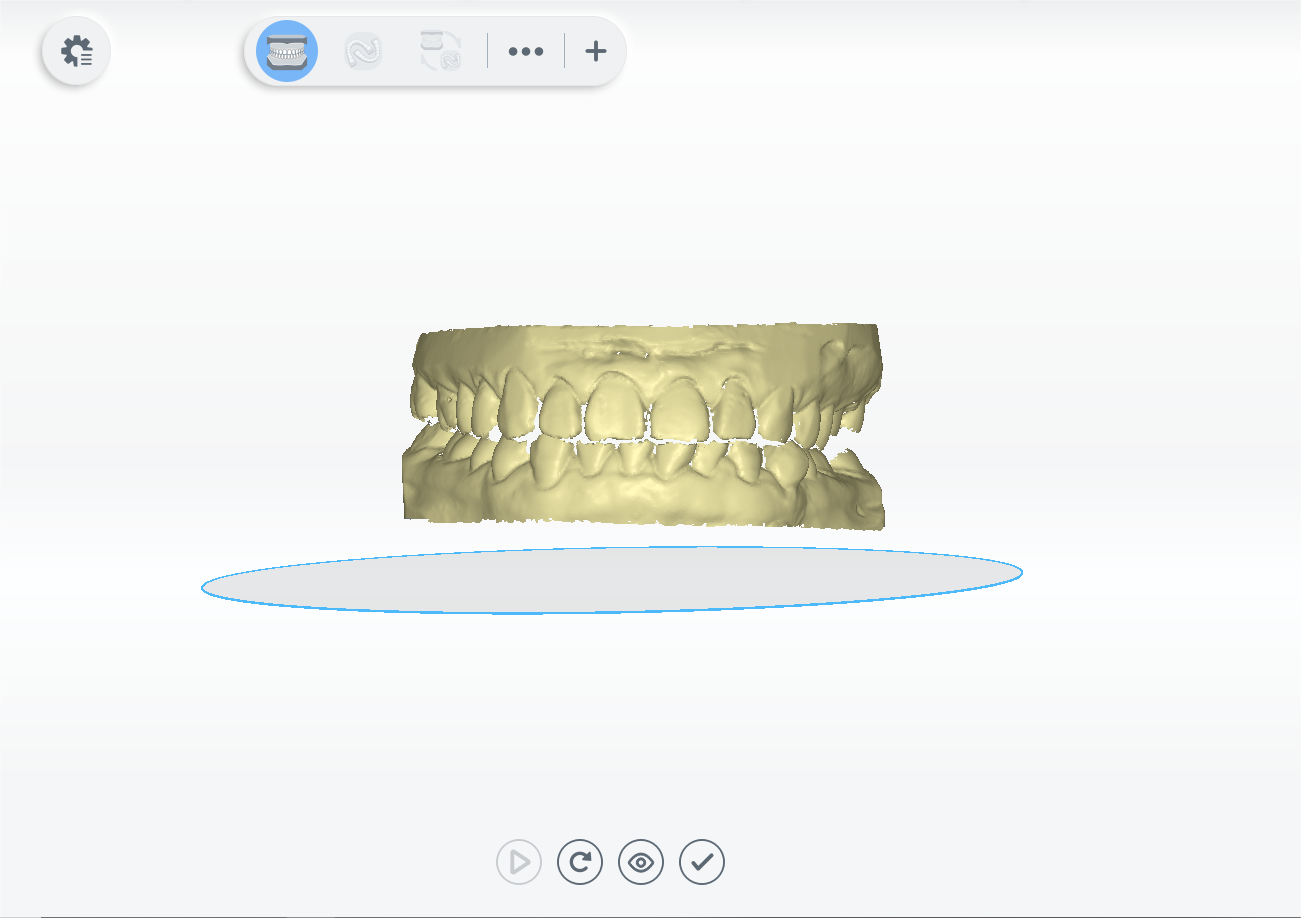
1 Follow the guidance on the interface to place the model.
2 (Optional) Turn on additional functions.
● ![]() : Add details and process a high-quality scan.
: Add details and process a high-quality scan.
3 Click ![]() or press the space key to start scanning.
or press the space key to start scanning.
4 If the scanned data is incomplete, click ![]() to padd more data to the existing scan. For steps to add scan, see Function.
to padd more data to the existing scan. For steps to add scan, see Function.
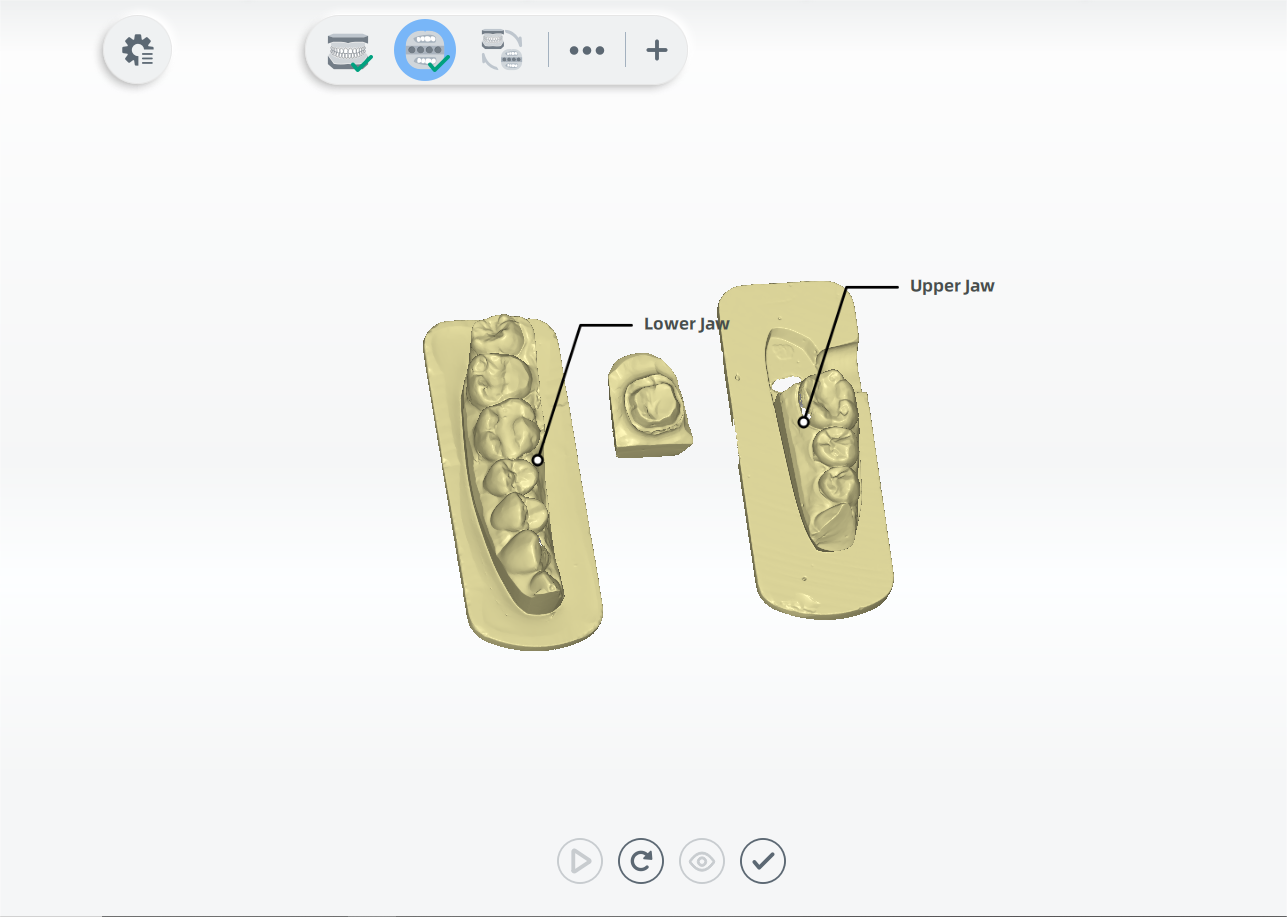
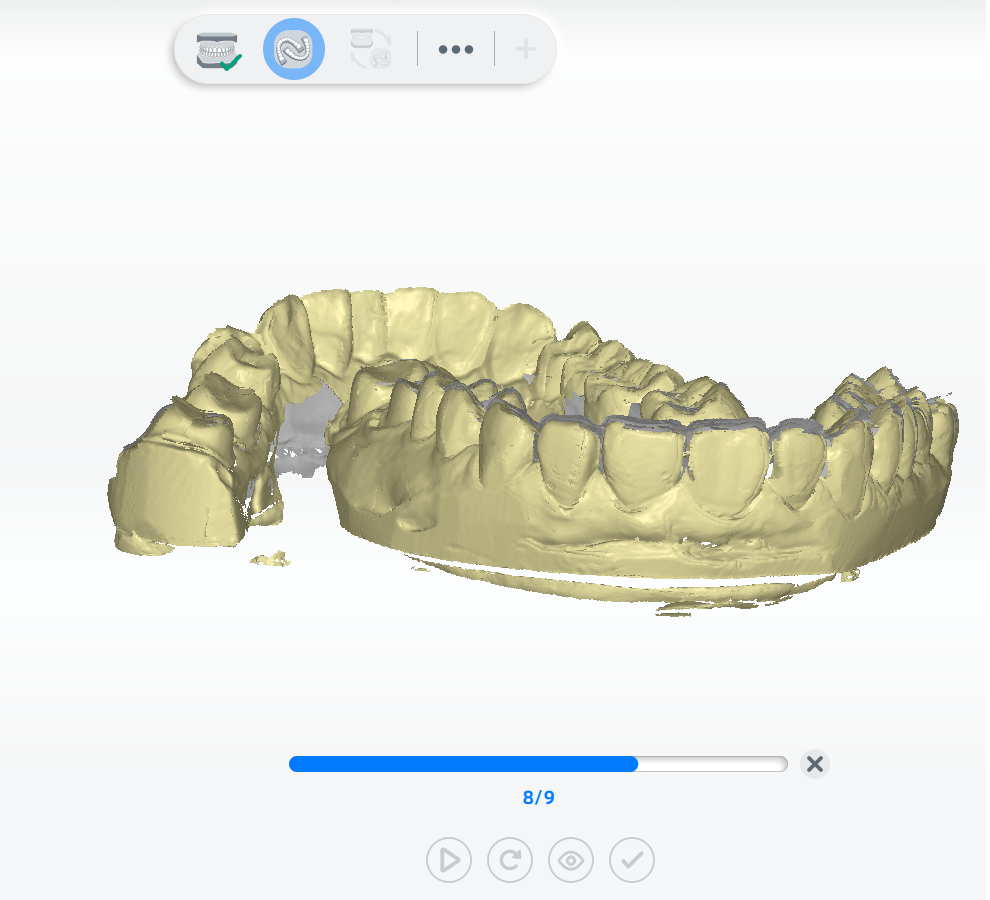
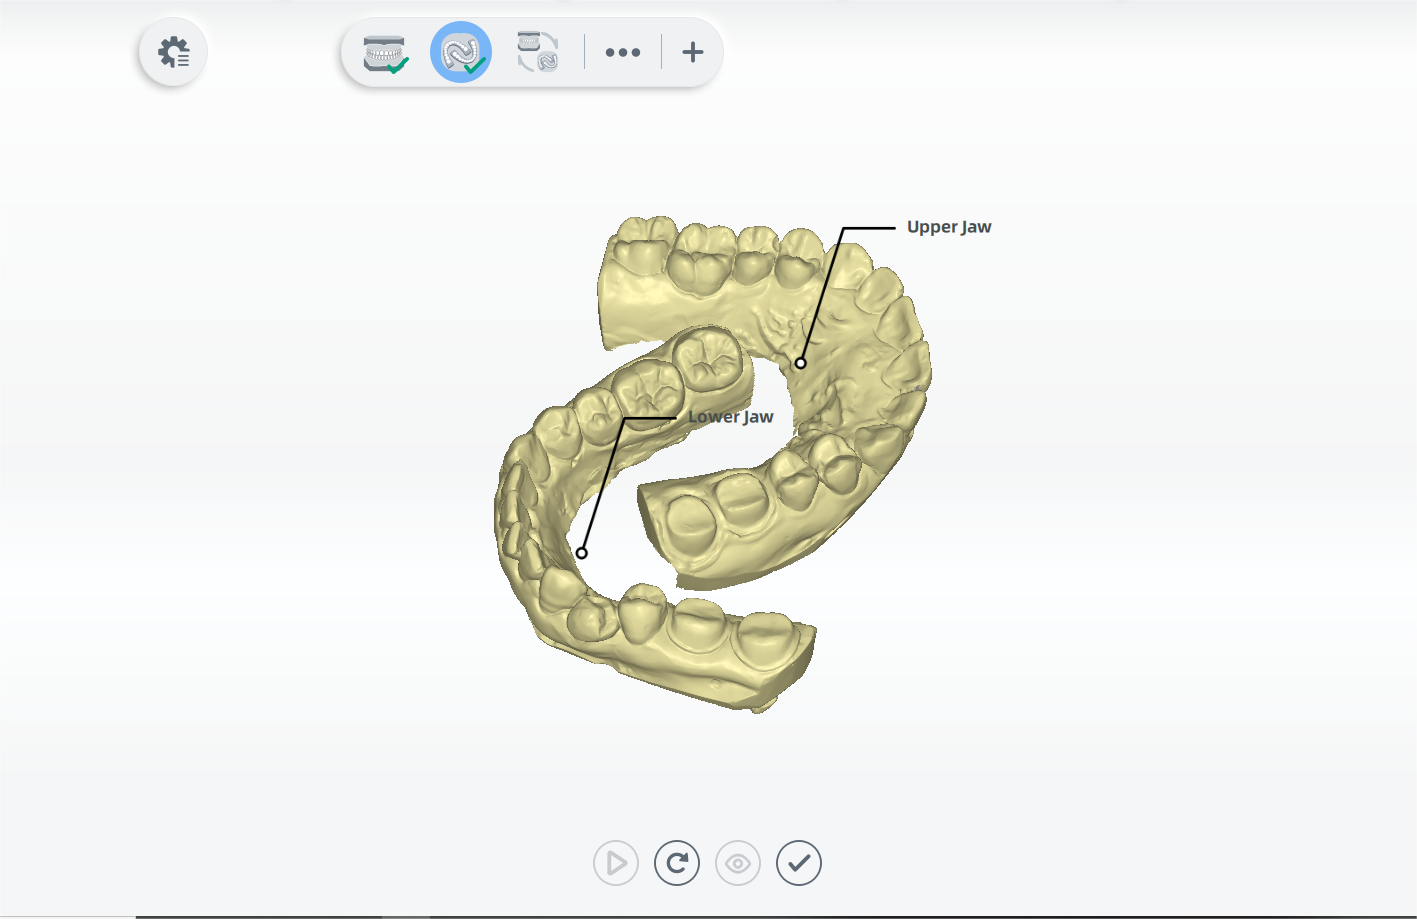
5 After scanning, cut and edit the scanned data for a cleaner scan.
6 (Optional) If the upper and lower jaw tags are displayed incorrectly, click ![]() to swap jaws.
to swap jaws.
7 Click ![]() to finish.
to finish.

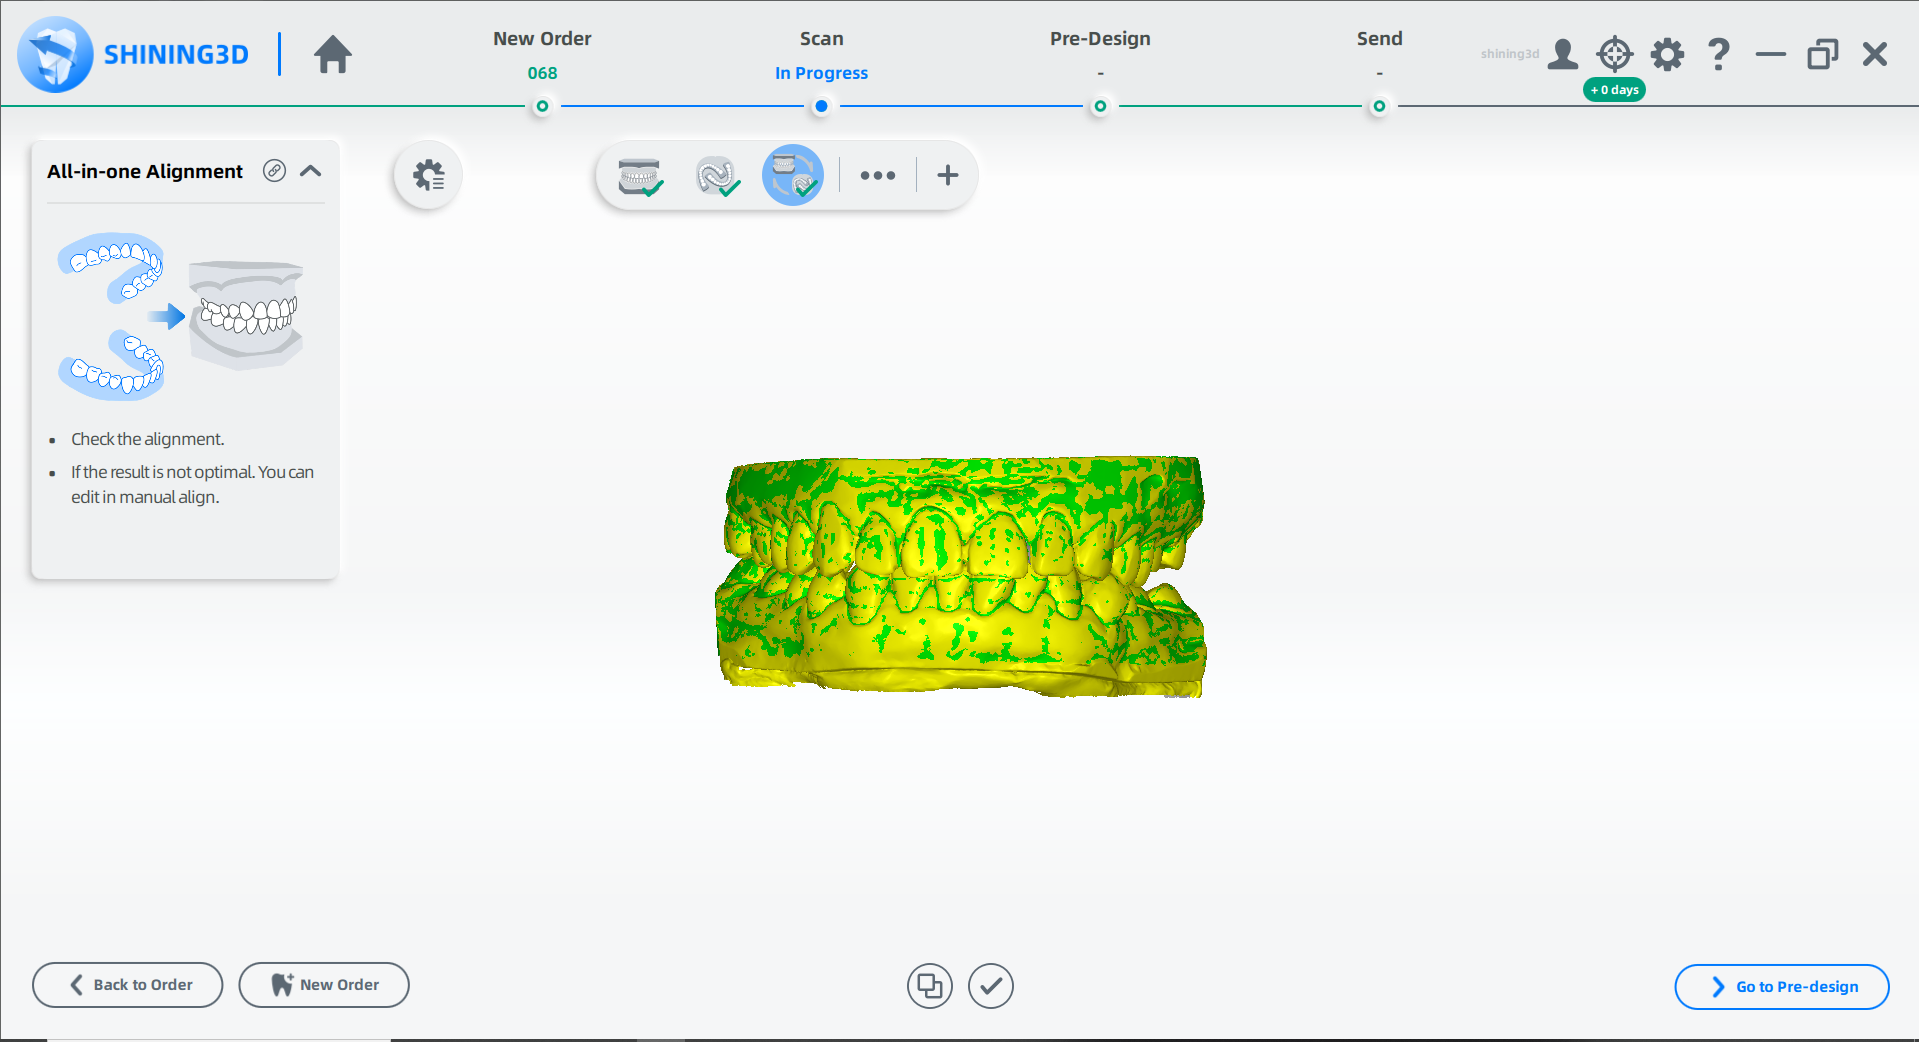
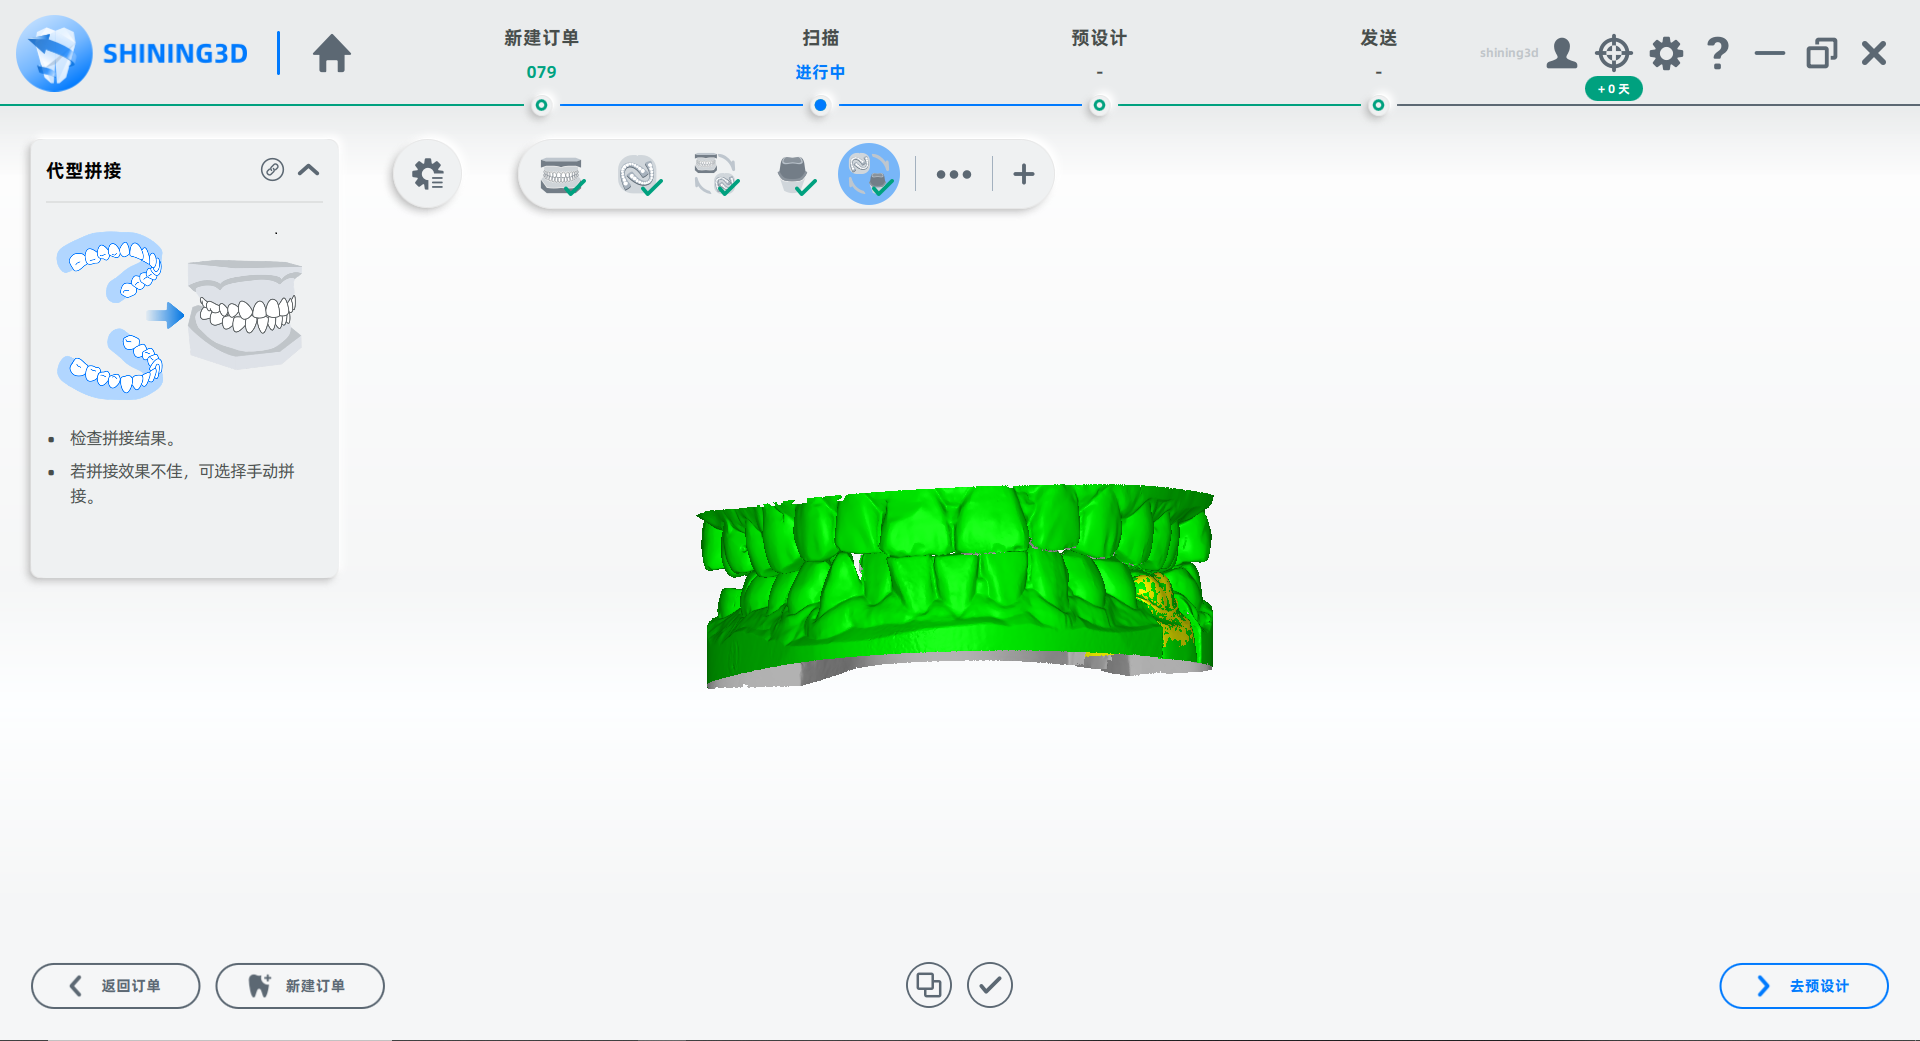
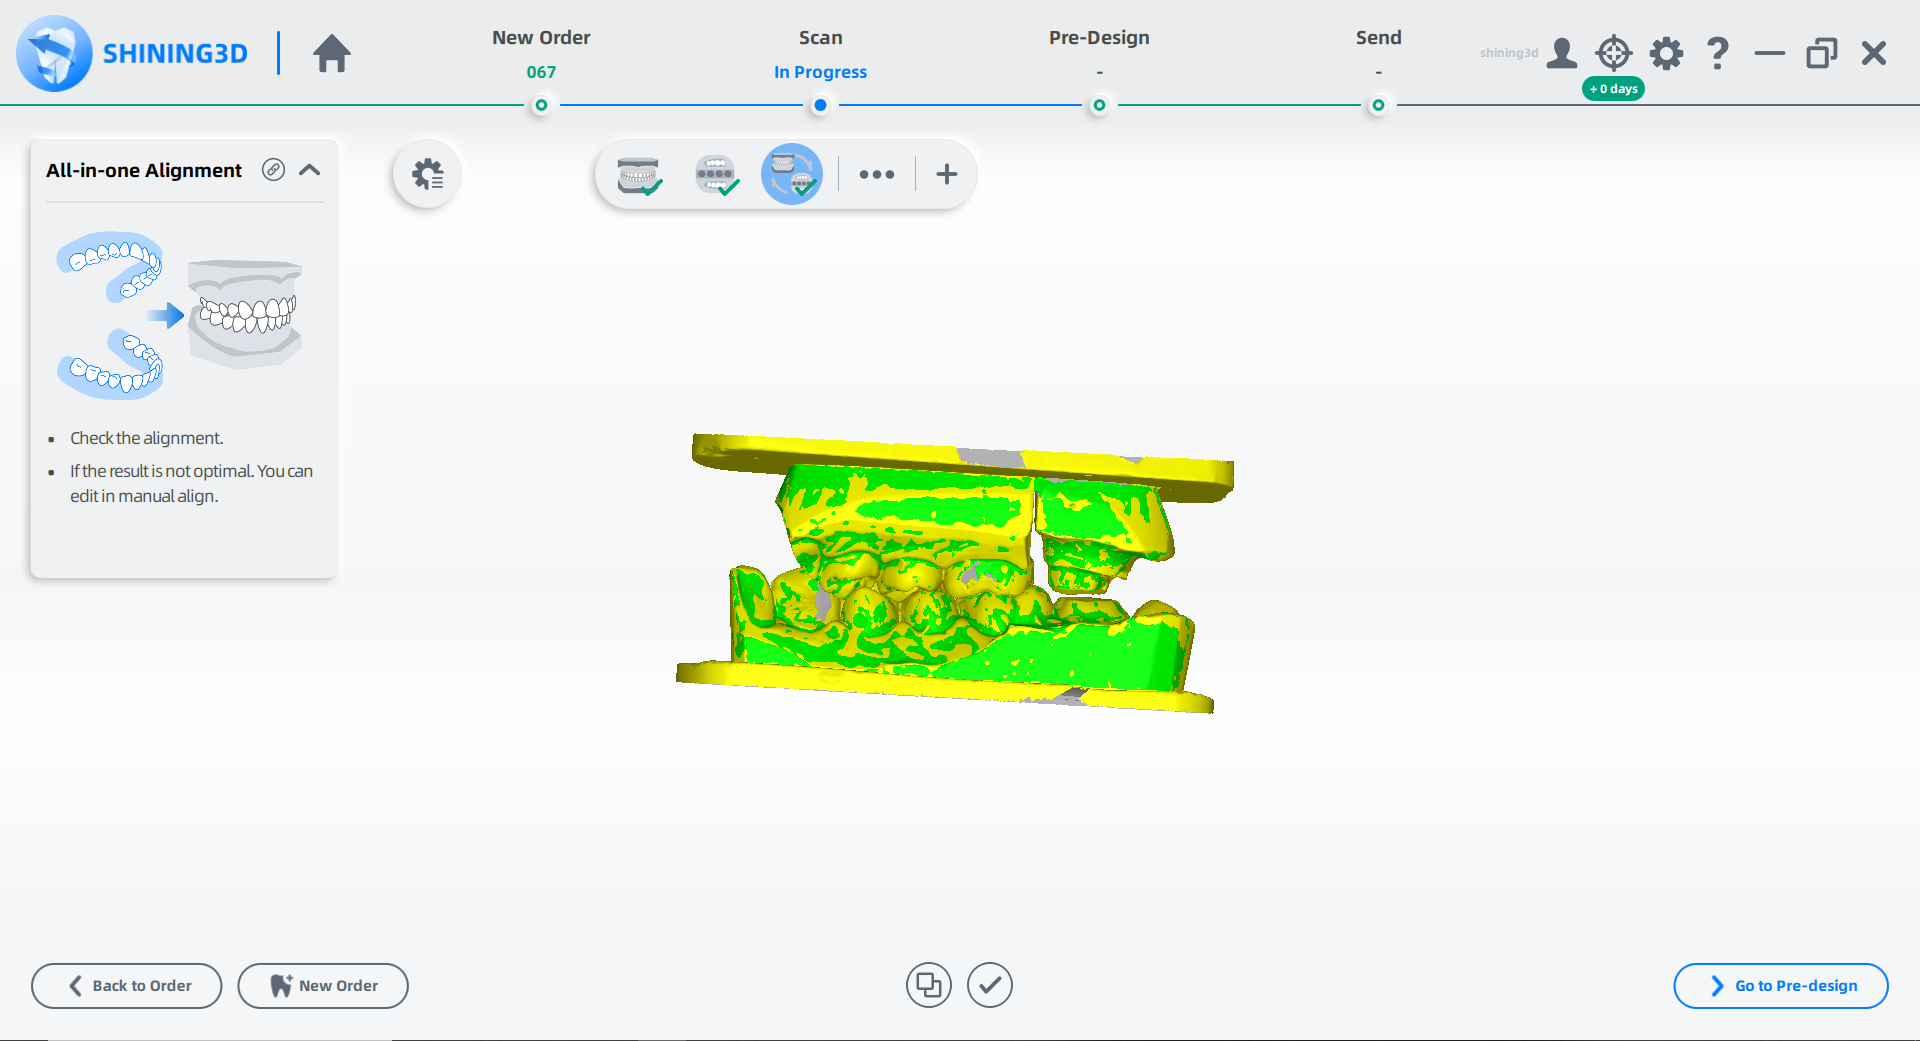
 All-in-one Alignment
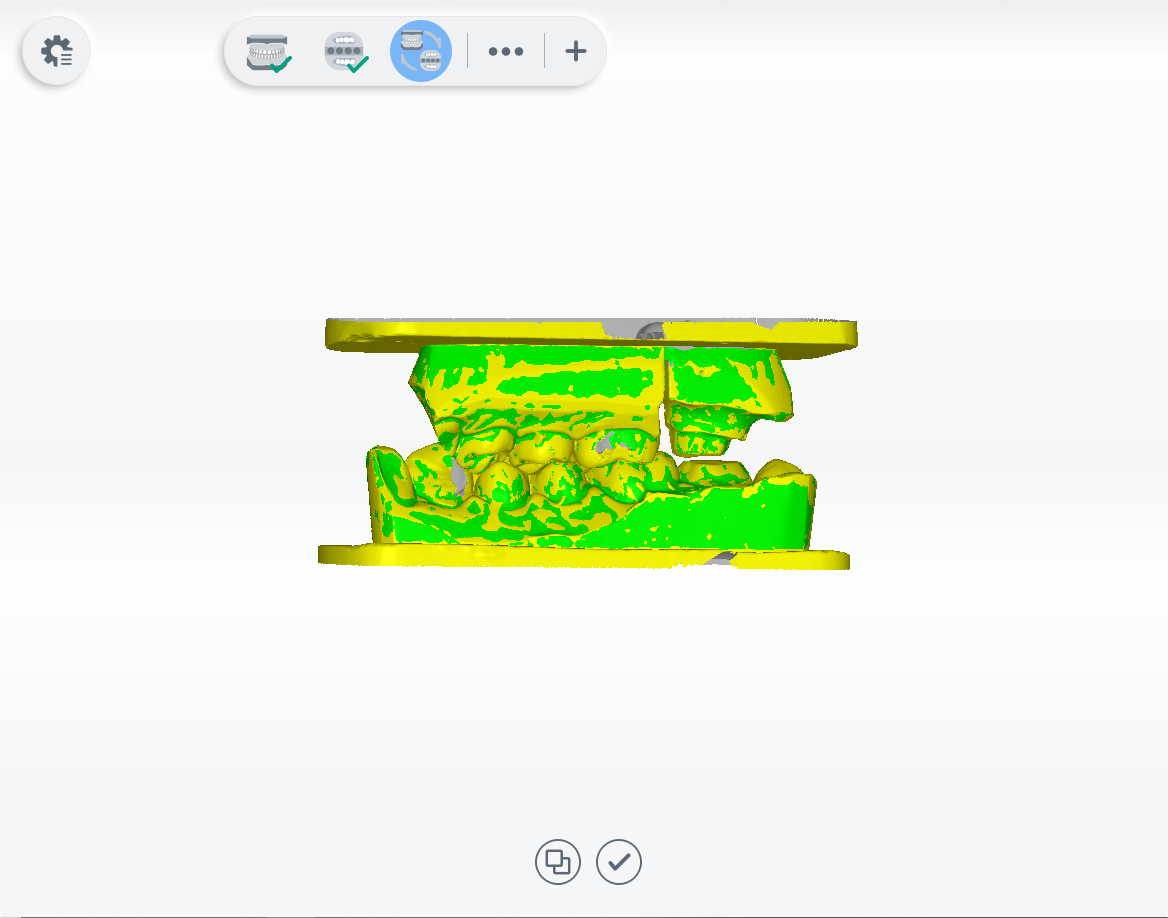
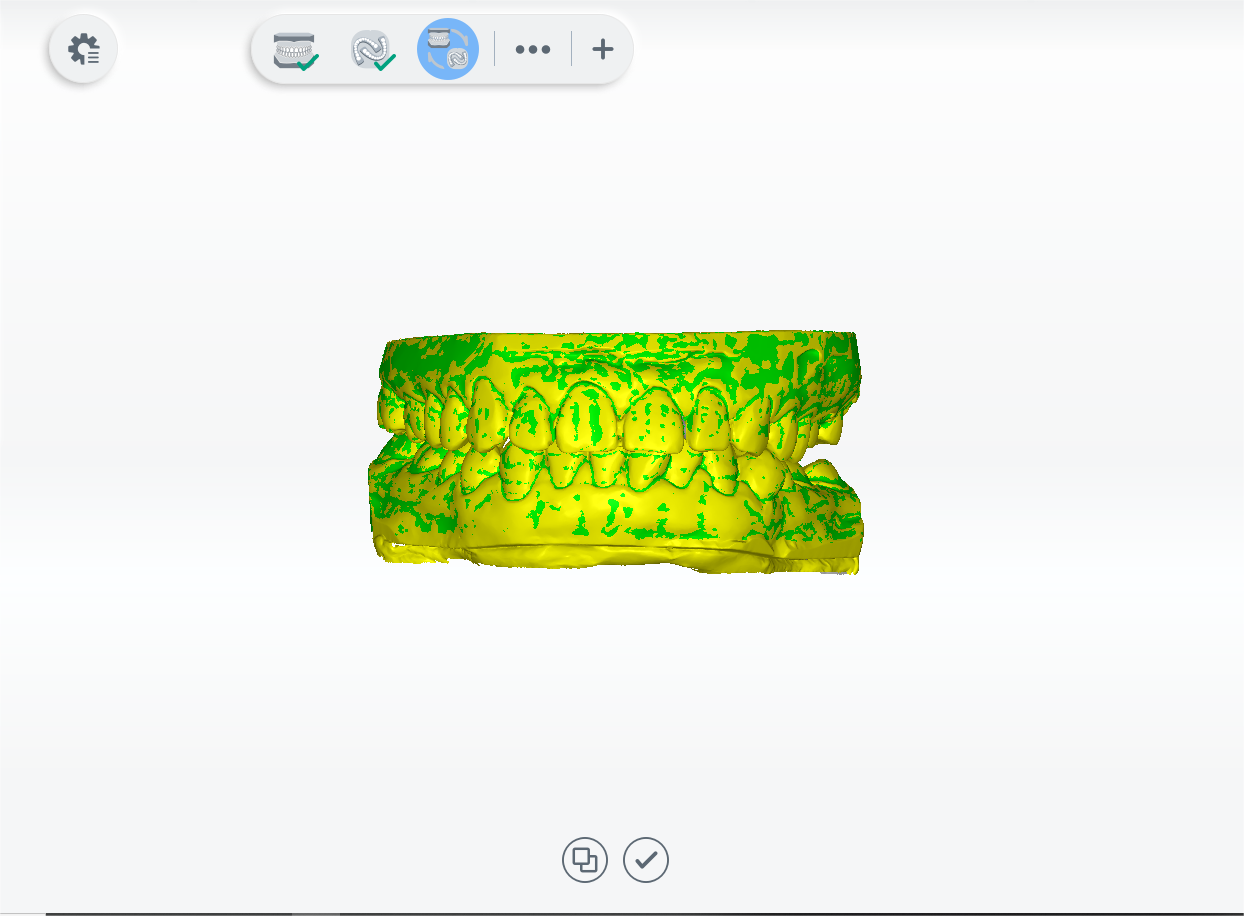
1 Check the automatic alignment and click ![]() to finish.
to finish.
2 If the result is not optimal, click ![]() and align the scanned data manually.
and align the scanned data manually.
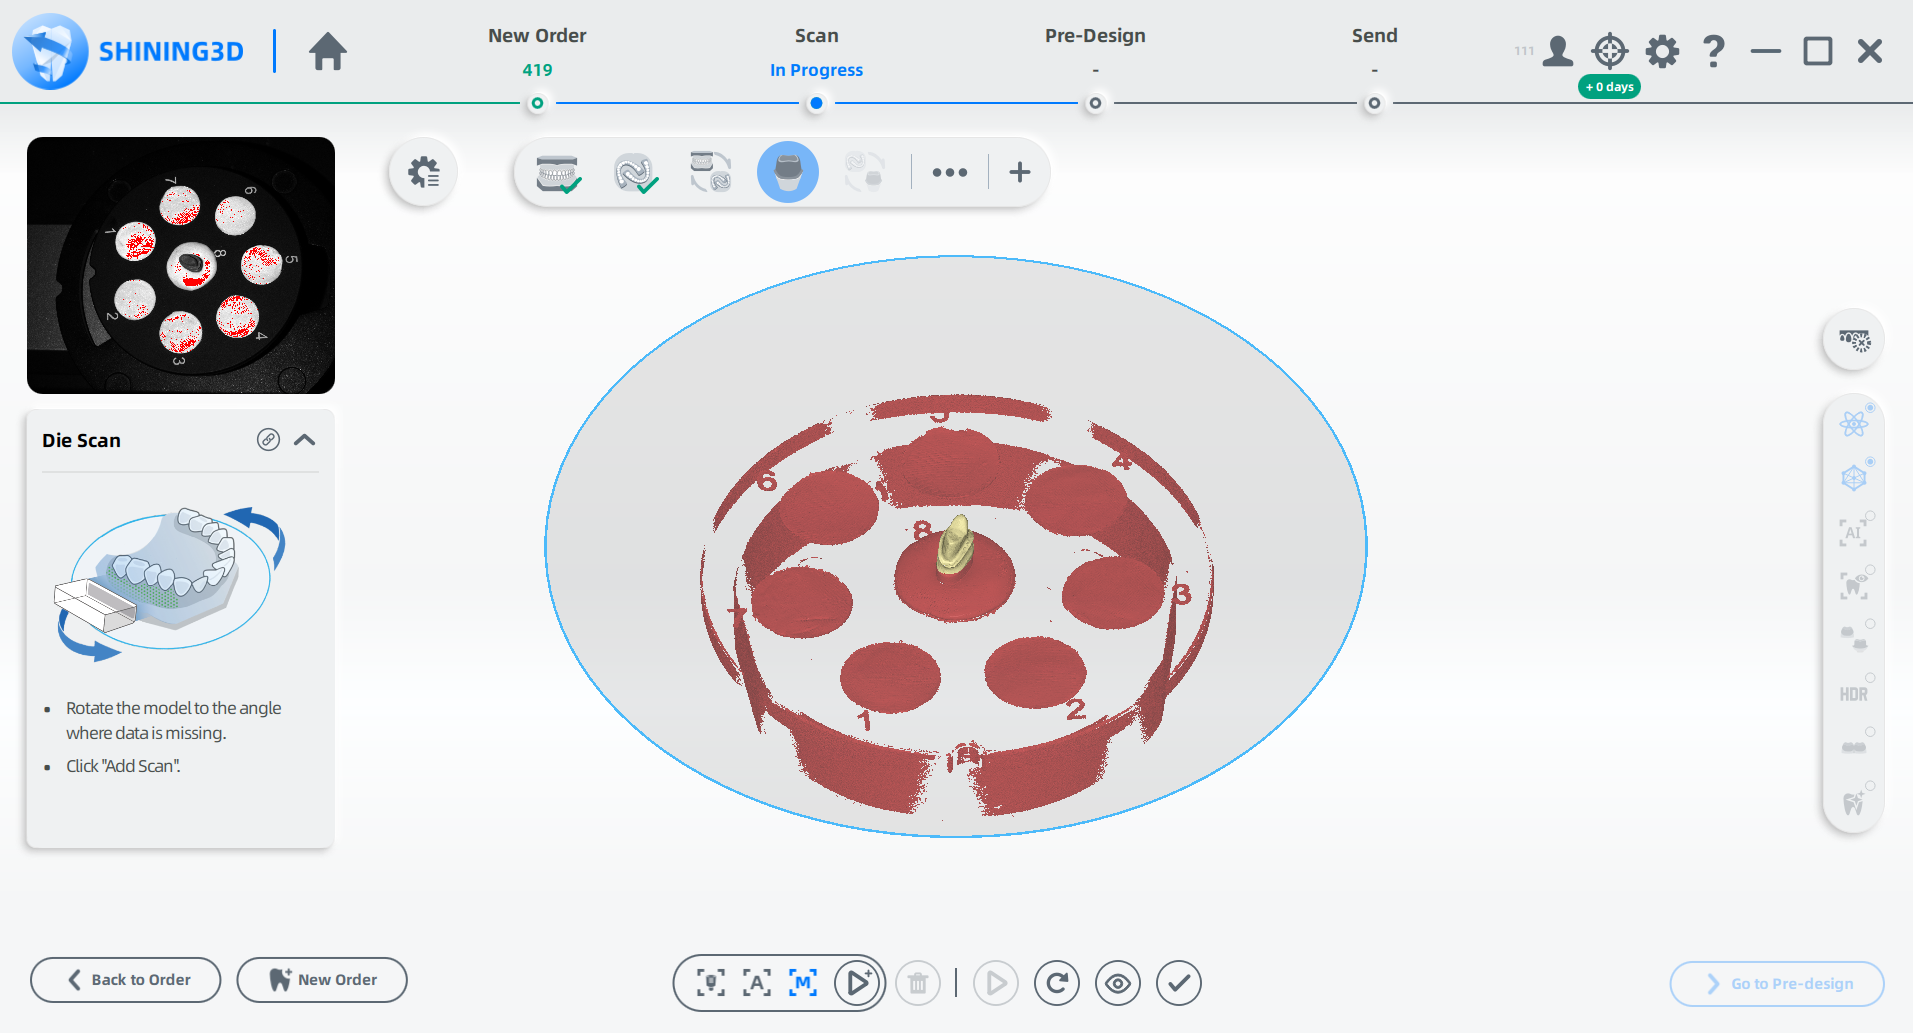
 Die Scan
1 Follow the guidance on the interface to place the model.
2 Set the configuration in the camera window.
3 Click ![]() or press the space key to start scanning.
or press the space key to start scanning.
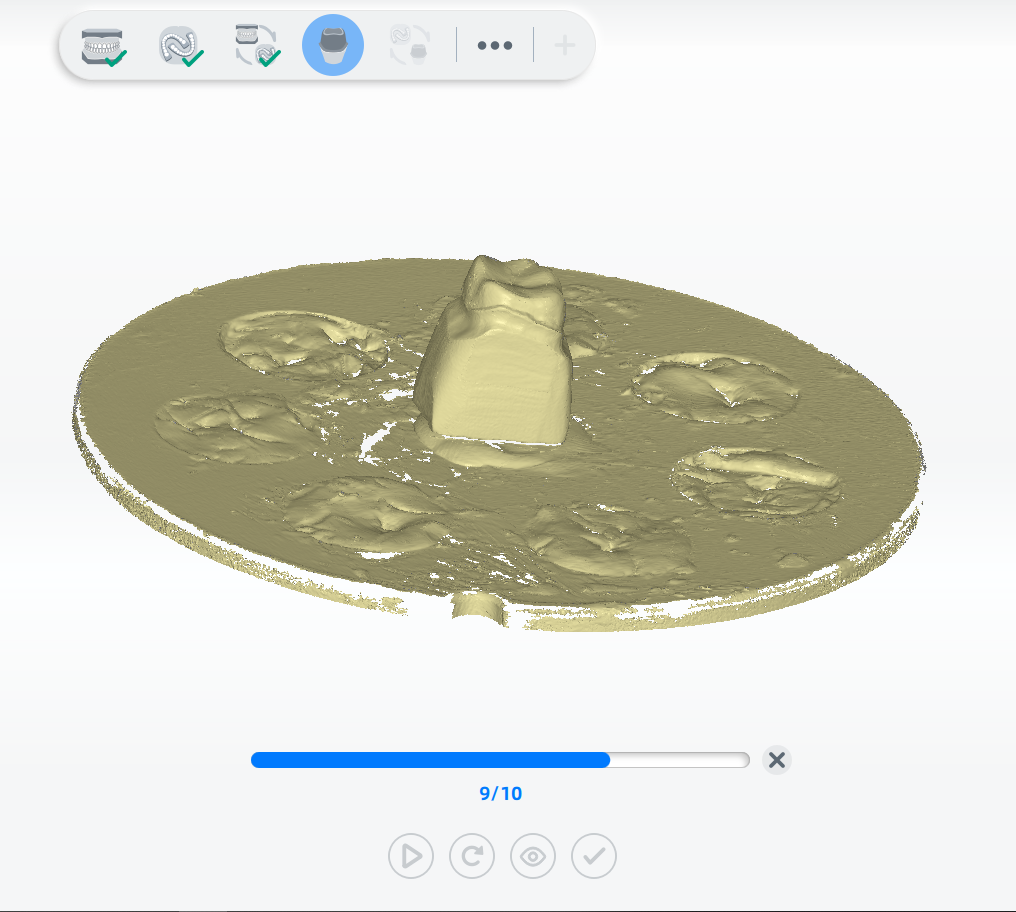
4 After scanning, move or rotate the cutting plane to cut the model.
5 Click to edit the model.
6 Click to save the edit and return to the scanning interface.
7 Click ![]() to finish.
to finish.
 Die Alignment
1 Check the automatic alignment and click ![]() to finish.
to finish.
2 If the result is not optimal, click ![]() and align the scanned data manually.
and align the scanned data manually.
Finish Scanning
After finishing the scanning process,click on Go to Pre-design to edit the scanned data.
1/4 All-in-one Case
Create the Order
For steps to create an order, see Sectioned Model Case.
Caution
A maximum of 4 teeth can be selected.
Start Scanning
1 Click ![]() in the scanning interface.
in the scanning interface.
2 Check All-in-one and click Quarter Sectioned Model.
Total Jaw Scan
1 Follow the guidance on the interface to place the height adaptor, the fixture and the model.
2 Set the configuration in the camera window.
3 (Optional) Turn on additional functions.
4 Click ![]() or press the space key to start scanning.
or press the space key to start scanning.
5 After scanning, move or rotate the cutting plane to cut the model.
6 Click to edit the model.
7 Click to save the edit and return to the scanning interface.
8 Click ![]() to preview the scanned model;
or click
to preview the scanned model;
or click ![]() to rescan;
or click
to rescan;
or click ![]() to finish.
to finish.
 All-in-one Scan
1 Follow the guidance on the interface to place the model.
2 (Optional)Turn on additional functions.
3 Click ![]() or press the space key to start scanning.
or press the space key to start scanning.
4 If the scanned data is incomplete, click ![]() to add more data to the existing scan.
to add more data to the existing scan.
5 After scanning, cut and edit the scanned data for a cleaner scan.

6 (Optional) If the upper and lower jaw tags are displayed incorrectly, click ![]() to swap jaws.
to swap jaws.
7 Click ![]() to finish.
to finish.
 All-in-one Alignment
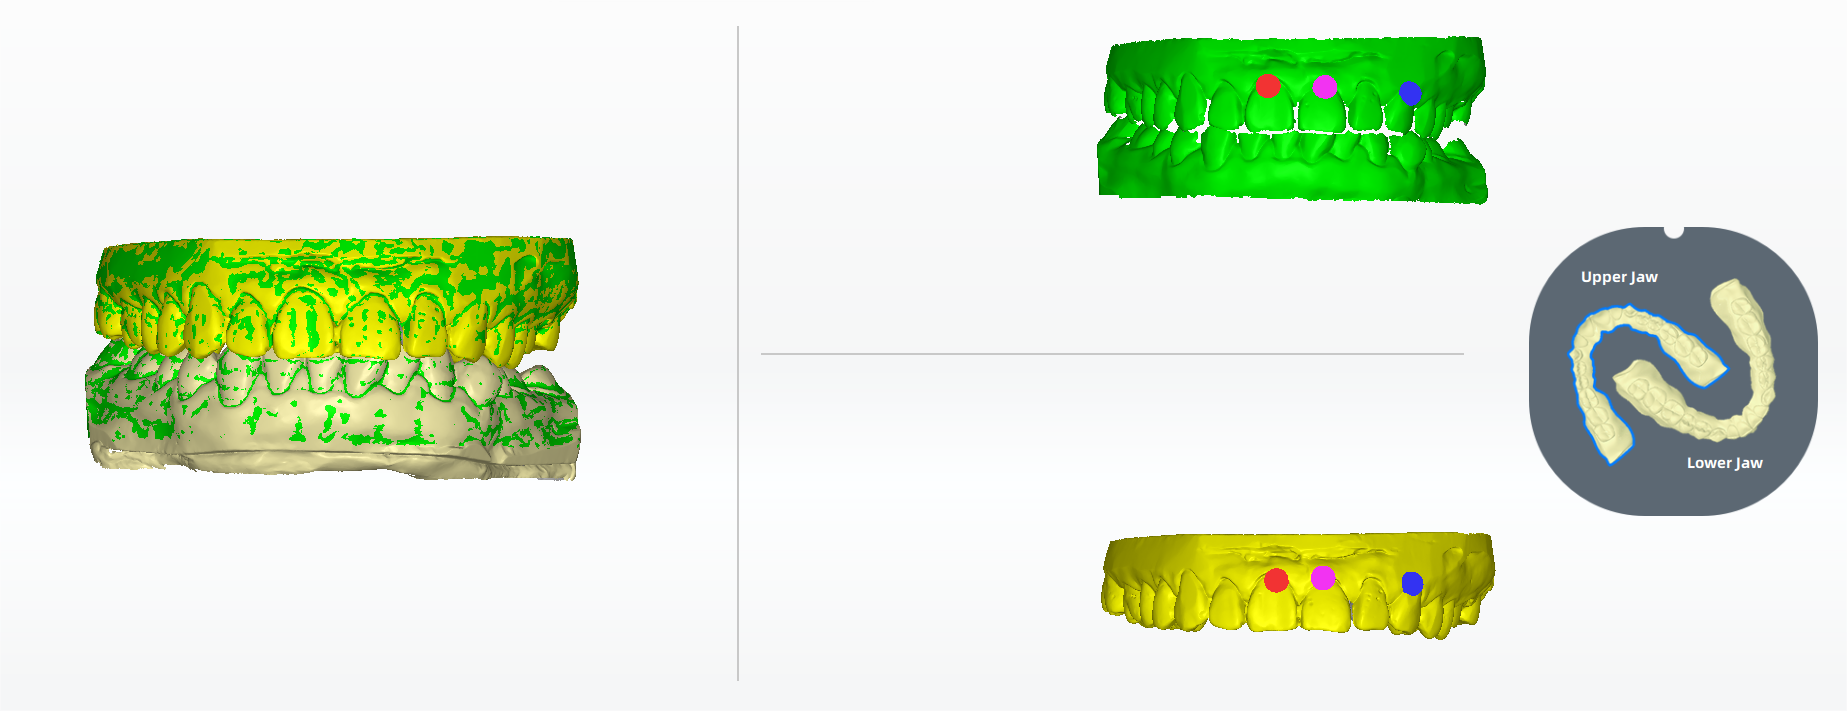
1 Check the automatic alignment and click ![]() to finish.
to finish.
2 If the result is not optimal, click ![]() and align the scanned data manually.
and align the scanned data manually.
 |
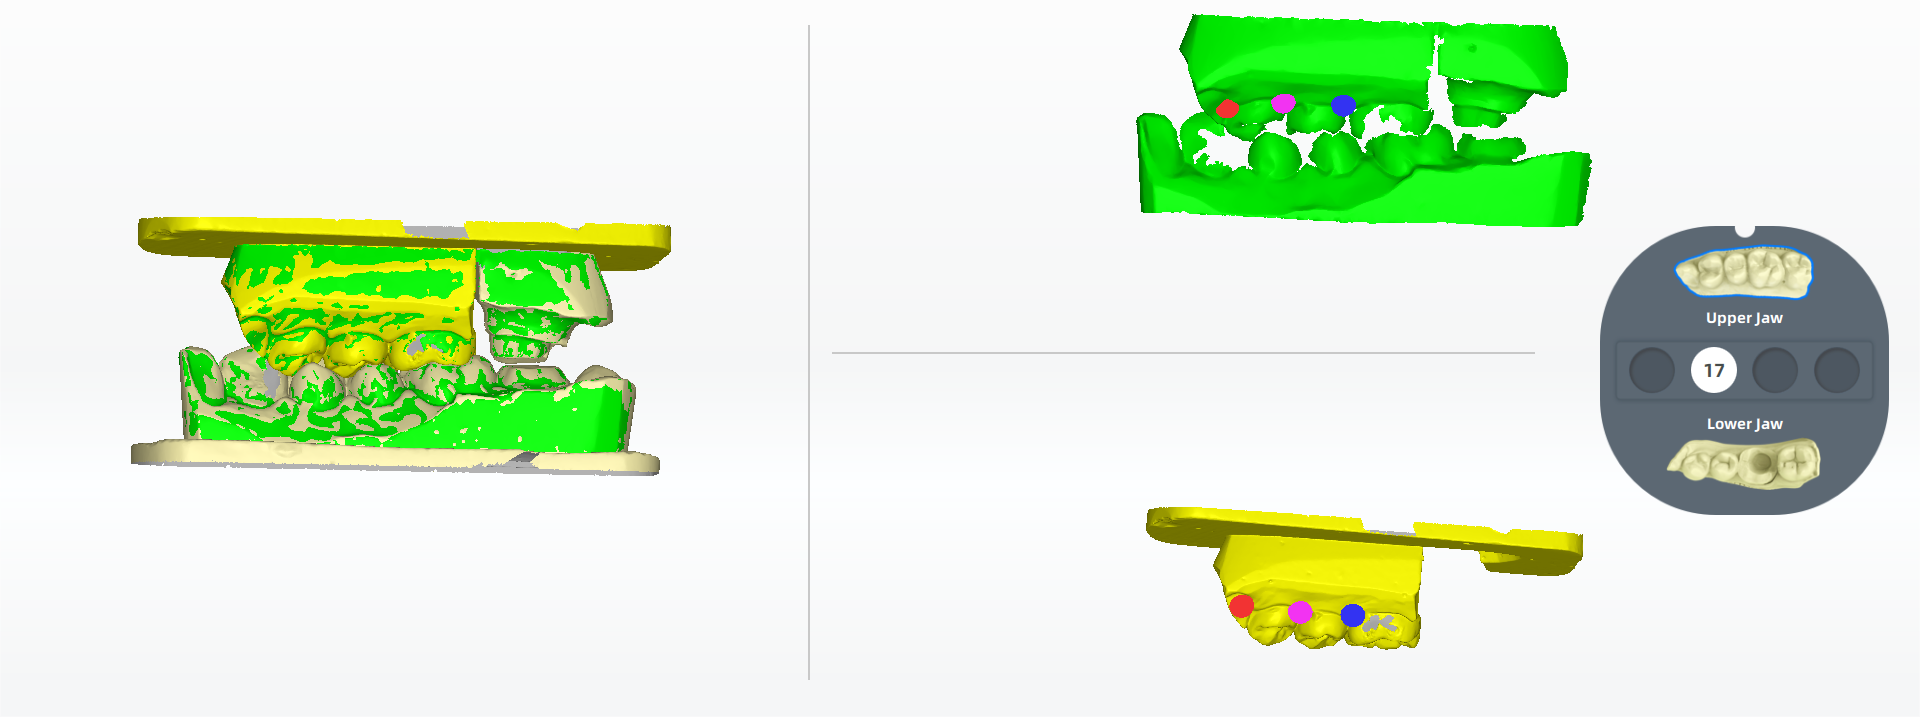 |
|---|---|
| Automatic Alignment | Manual Alignment |
Finish Scanning
After finishing the scanning process,click on Go to Pre-design to edit the scanned data.
All-in-one (Unsectioned Model) Case
Create the Order
For steps to create an order, see Unsectioned Model Case.
Start Scanning
1 Click ![]() in the scanning interface.
in the scanning interface.
2 Check All-in-one and click Unsectioned Model.
Total Jaw Scan
1 Follow the guidance on the interface to place the height adaptor, the fixture and the model.
2 Set the configuration in the camera window.
3 (Optional) Turn on additional functions.
4 Click ![]() or press the space key to start scanning.
or press the space key to start scanning.
5 After scanning, move or rotate the cutting plane to cut the model.
6 Click to edit the model. For more, see Function.
7 Click to save the edit and return to the scanning interface.
8 Click ![]() to preview the scanned model;
or click
to preview the scanned model;
or click ![]() to rescan;
or click
to rescan;
or click ![]() to finish.
to finish.
All-in-one Scan
1 Follow the guidance on the interface to place the model.

2 (Optional) Turn on additional functions.
3 Click ![]() or press the space key to start scanning.
or press the space key to start scanning.
4 If the scanned data is incomplete, click ![]() to add more data to the existing scan.
to add more data to the existing scan.
5 After scanning, cut and edit the scanned data for a cleaner scan.

6 (Optional) If the upper and lower jaw tags are displayed incorrectly, click ![]() to swap.
to swap.
7 Click ![]() to finish.
to finish.
All-in-one Alignment
1 Check the automatic alignment and click ![]() to finish.
to finish.
2 If the result is not optimal, click ![]() and align the scanned data manually.
and align the scanned data manually.
 |
 |
|---|---|
| Automatic Alignment | Manual Alignment |
Finish Scanning
After finishing the scanning process,click on Go to Pre-design to edit the scanned data.