Implant-based(Scanbody) Case
Create the Order
Order Information
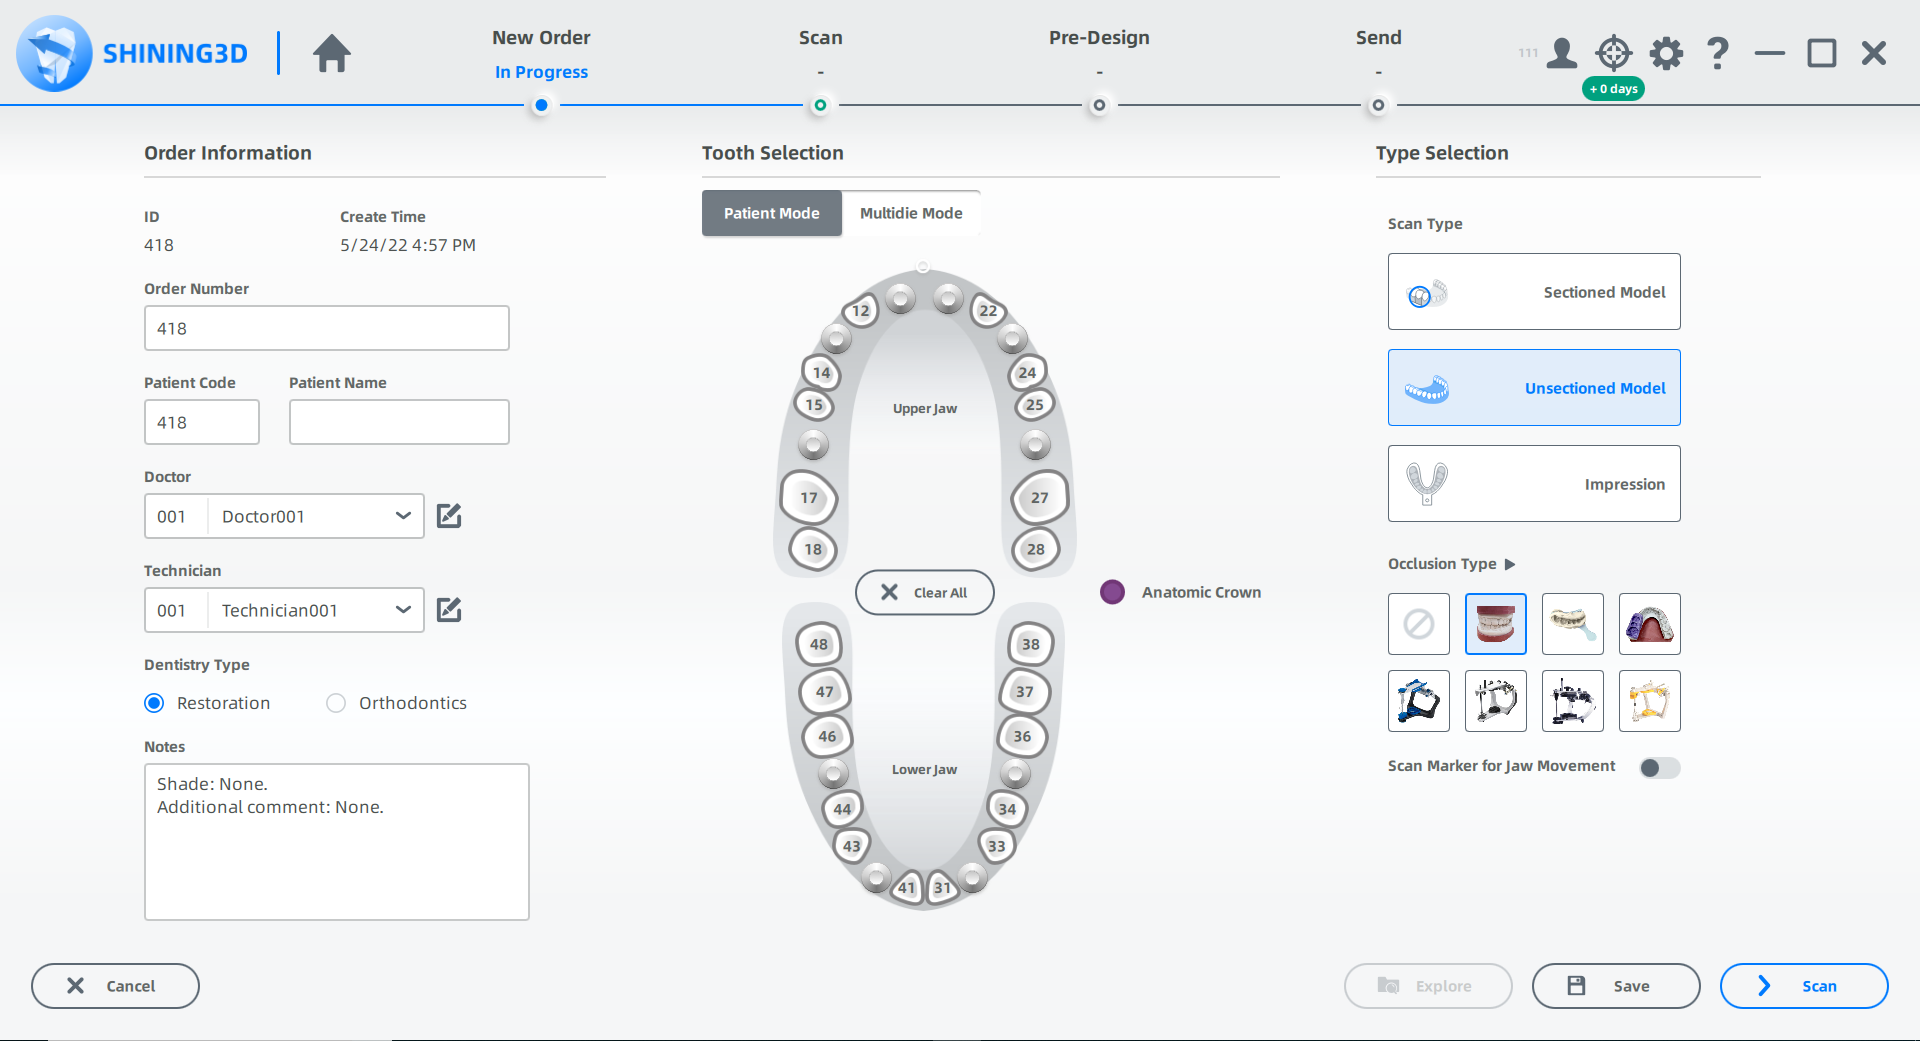
1 Click to enter the order page.
2 Fill in the blanks and select the doctor and the technician from the list. If there is no targeted doctors and technicians, click to add them.
3 Select Restoration as the dentistry type.
4 (Optional) Add notes.
Tooth Selection
1 Select Patient Mode.
2 Click the tooth to select the type of restoration.
3 (Optional)Click the slider to add scanning steps(pre-op scanning step and gingiva separately scanning step).
4 Click Custom Abutment, Screw Retained or On substructure scan in Implant-Based.
5 Select restoration material.
6 Select the tooth color.
7 Click Finish.
Type Selection
1 Select Unsectioned Model.
2 Select Occlusion Type according to the reality.
Note
Click the slider to scan the movement marker if needed.
3 Click Scan to start or click Save to save the order and scan it later.
Start Scanning
 Articulator Scan
1 (Optional)Click, Click Articulator and check Transfer.
2 Click to turn on/off Articulator Dynamic Scan.
| Product | Fixture Installation under the Static Articulator Scan Mode | Fixture Installation under the Dynamic Articulator Scan Mode |
|---|---|---|
| EX | ||
| MIX | 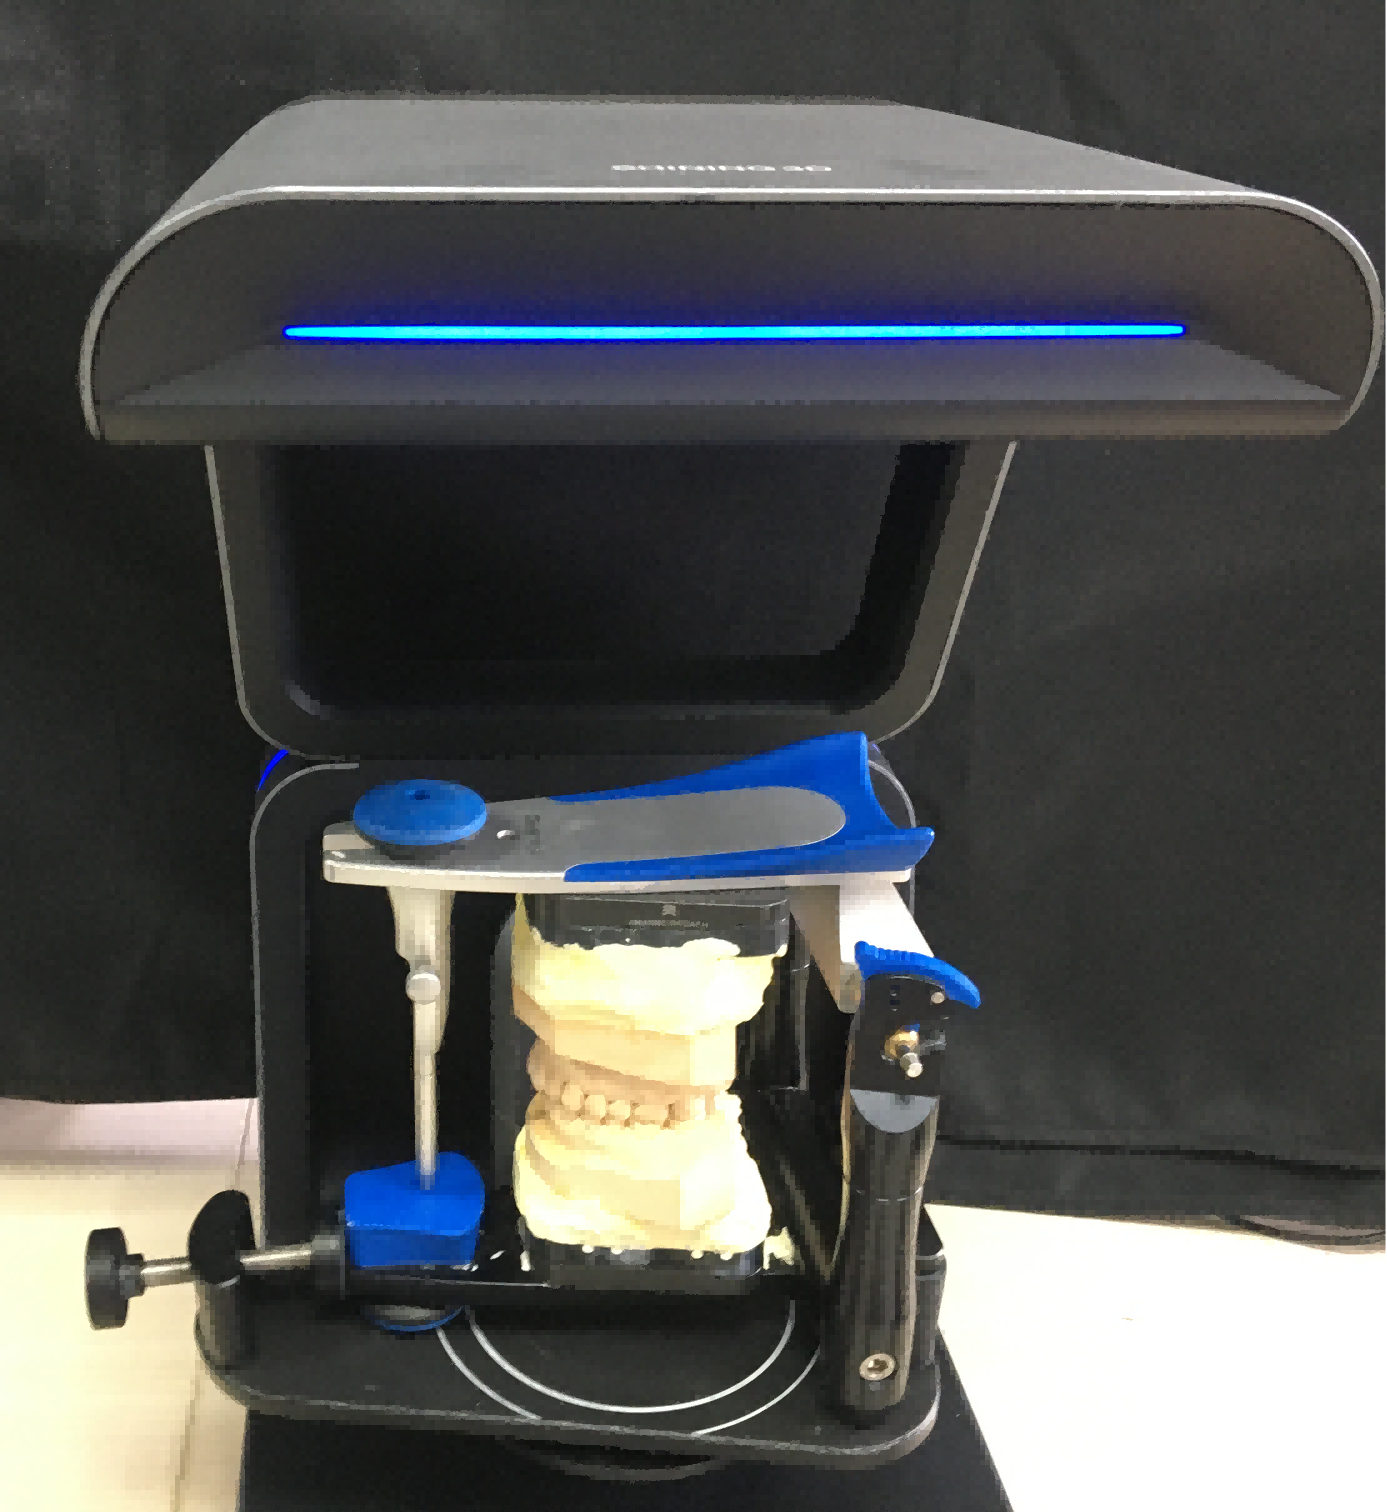 |
3 Place articulator and model as shown in step 2 and set the configuration in the camera window. For steps to set the configuration, see Parameters.
4 Click or press the space key to start scanning.
5 The jaw frame model is turned 180° in the lateral direction.
6 Click or press the space key to start scanning.
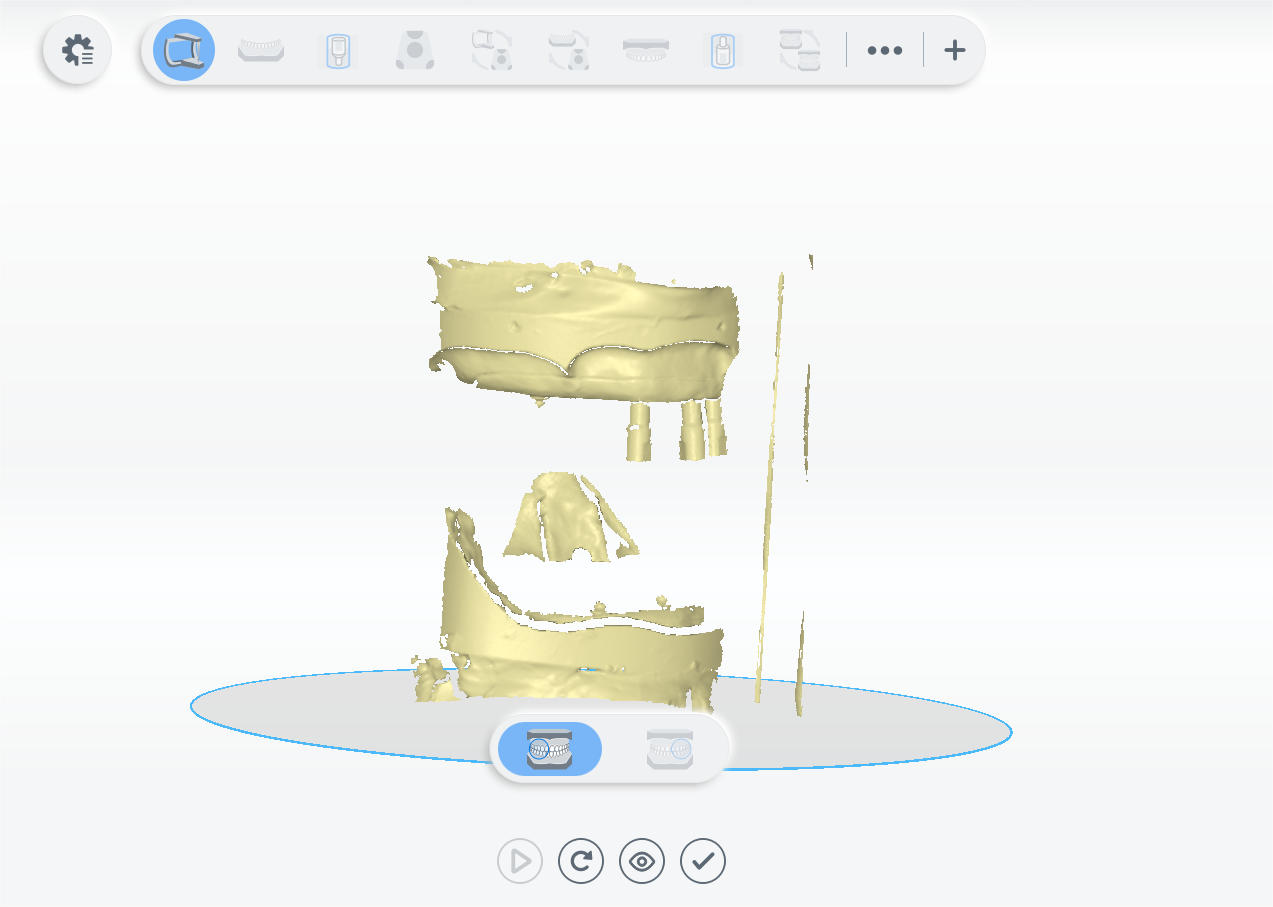
7 Click to preview the scanned model;
or click
to rescan;
or click
to finish.
 Lower Jaw Scan
1 Follow the guidance on the interface to remove the articulator and place the fixture and the model.
Note
If the scanbody is not recognized correctly, click to edit it.(Enable
first).
2 Click or press the space key to start scanning.
3 If the scanned data is incomplete, click to add more data to the existing scan.
4 Click to edit the model. For more, see Function.
5 Click to finish.
 Lower Jaw Scanbody Extract
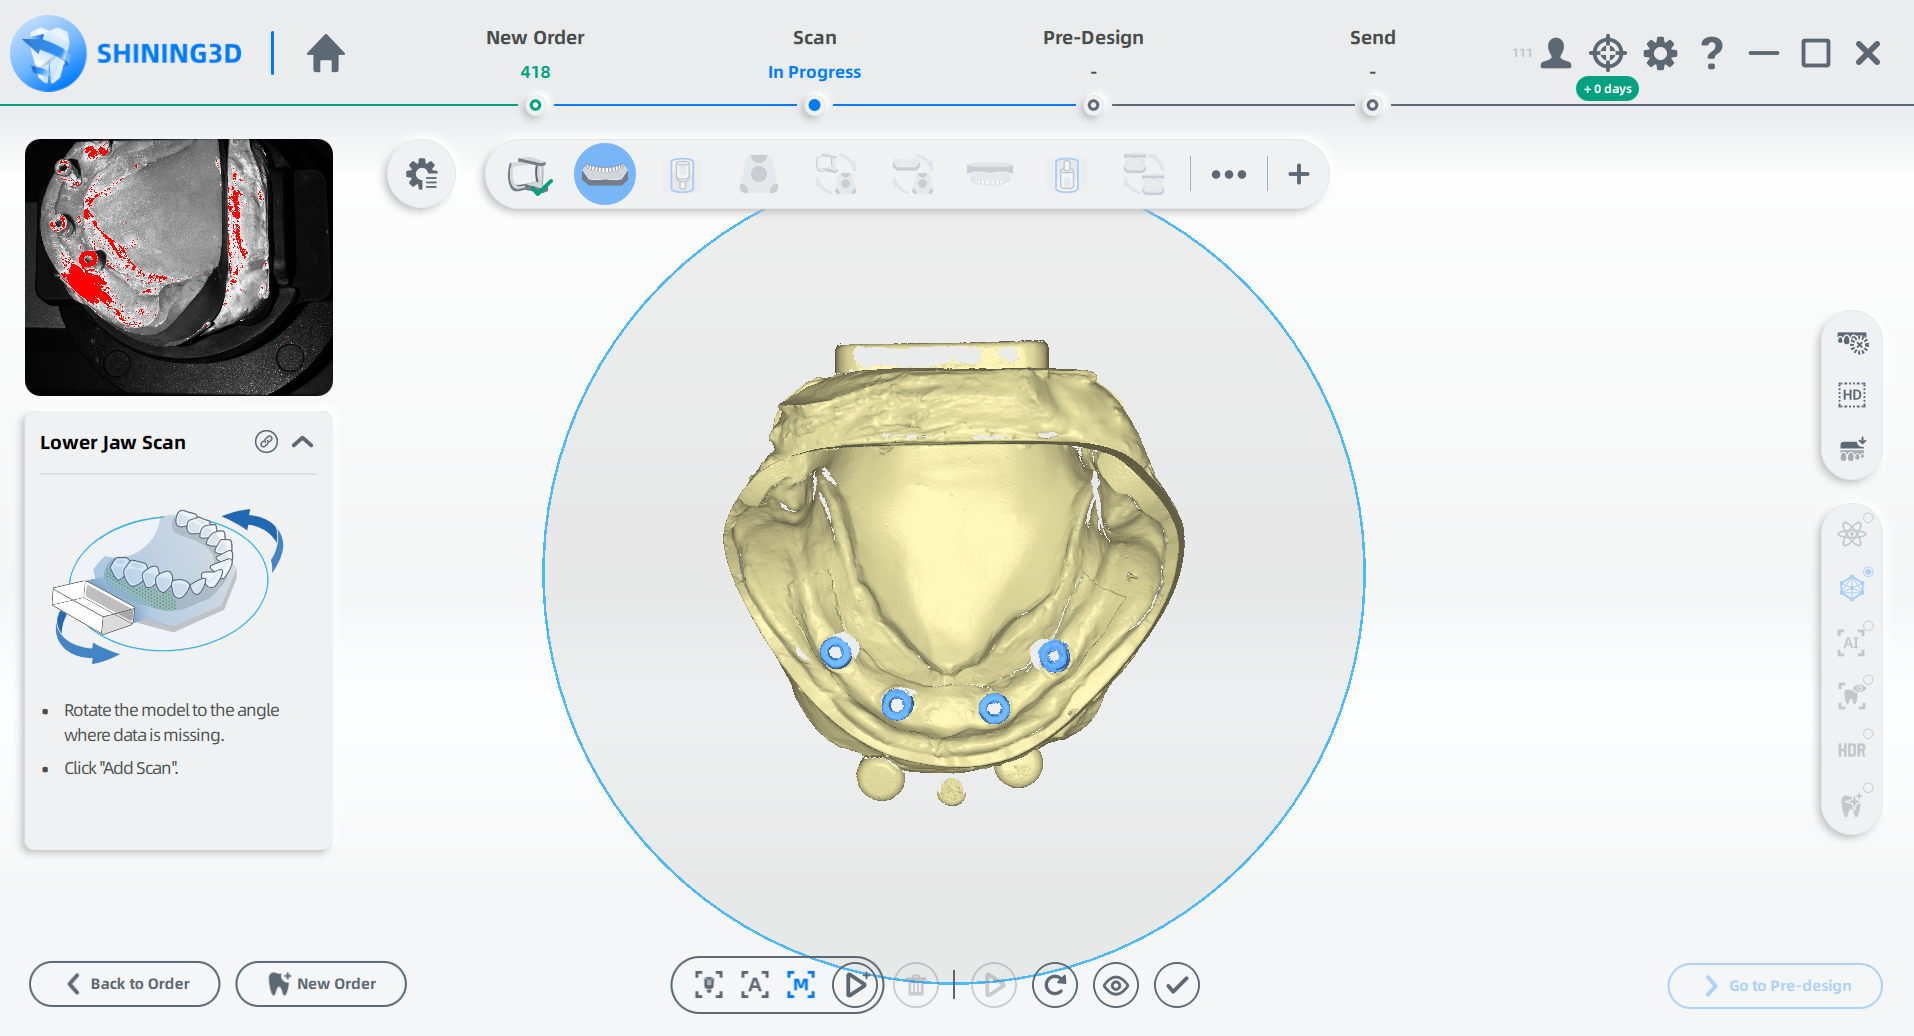
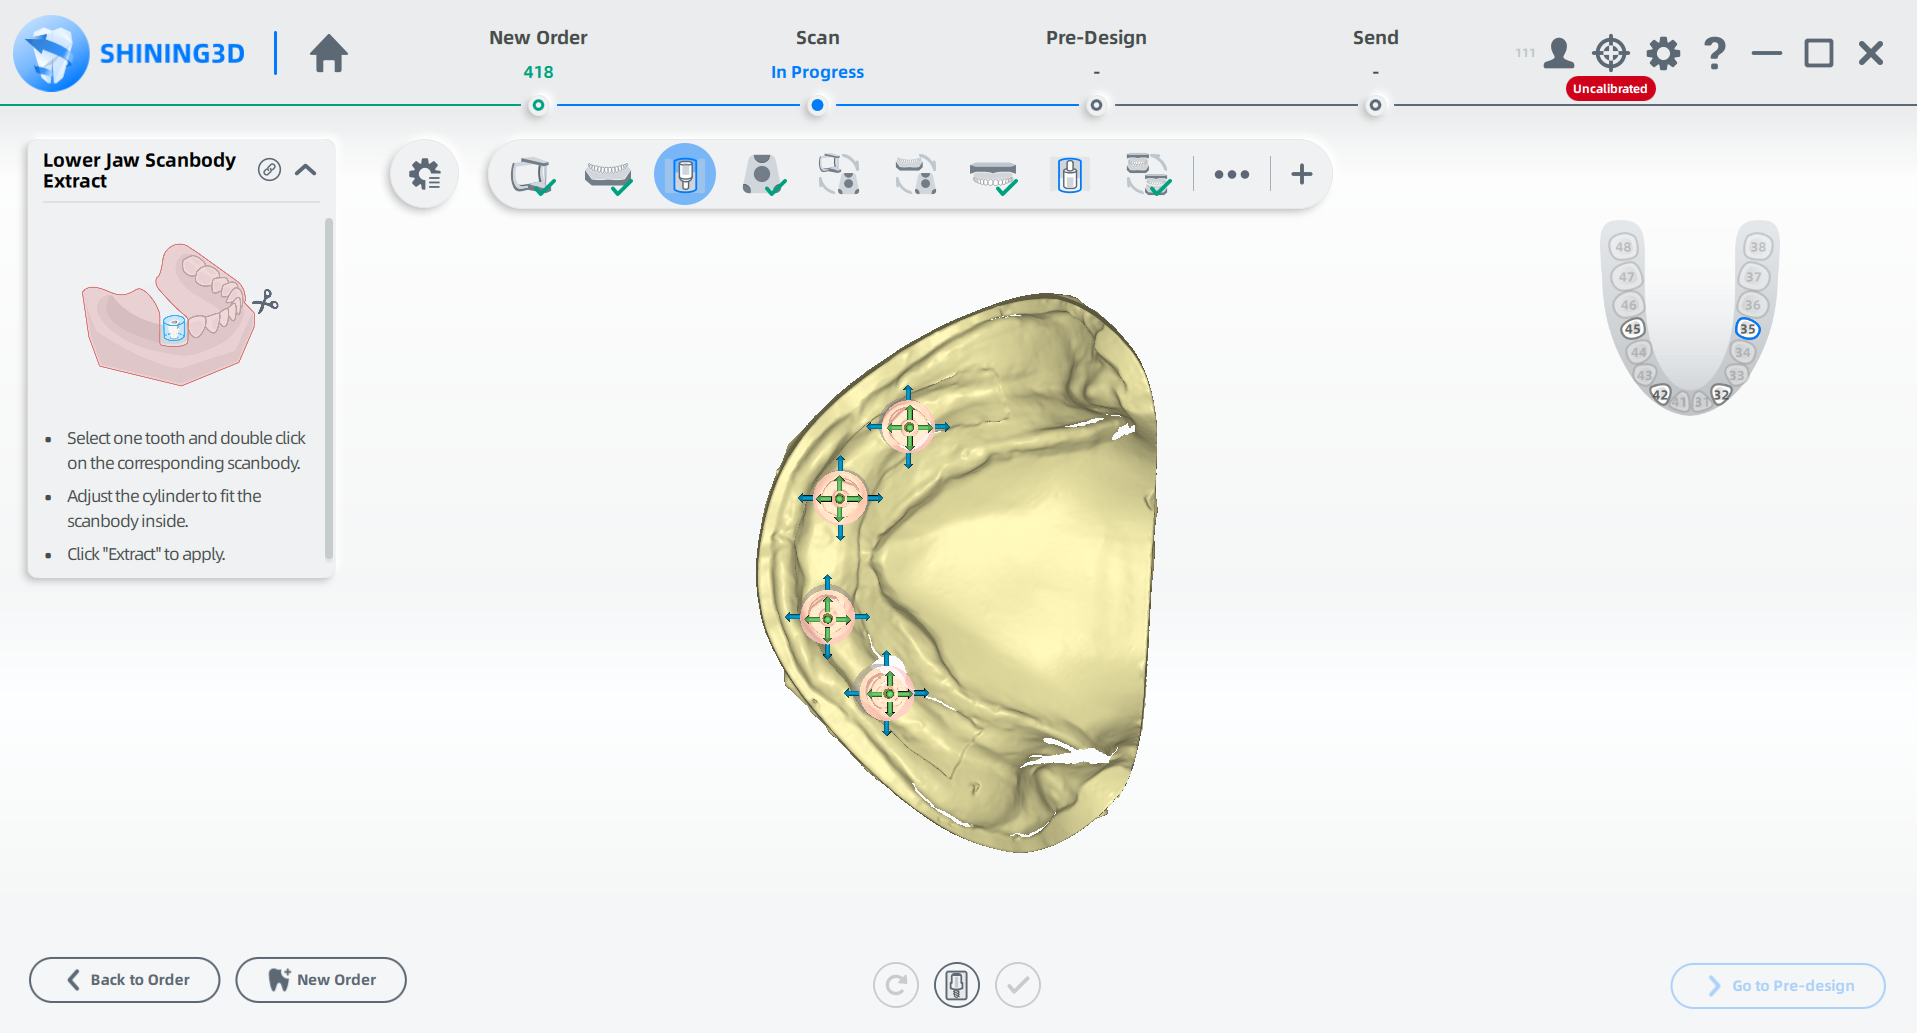
1 Select the tooth and double click on the corresponding scanbody.
2 Adjust the cylinder to cover the scanbody.
Note
● Press and hold the left mouse button(LMB) on the cylinder to move it.
● Press and hold the left mouse button(LMB) to adjust the height of the cylinder by the yellow arrow.
● Press and hold the left mouse button(LMB) to adjust the scope of the cylinder by blue arrows.
● Press and hold the left mouse button(LMB) to rotate the cylinder by green arrows.
3 Click to extract the scanbody.
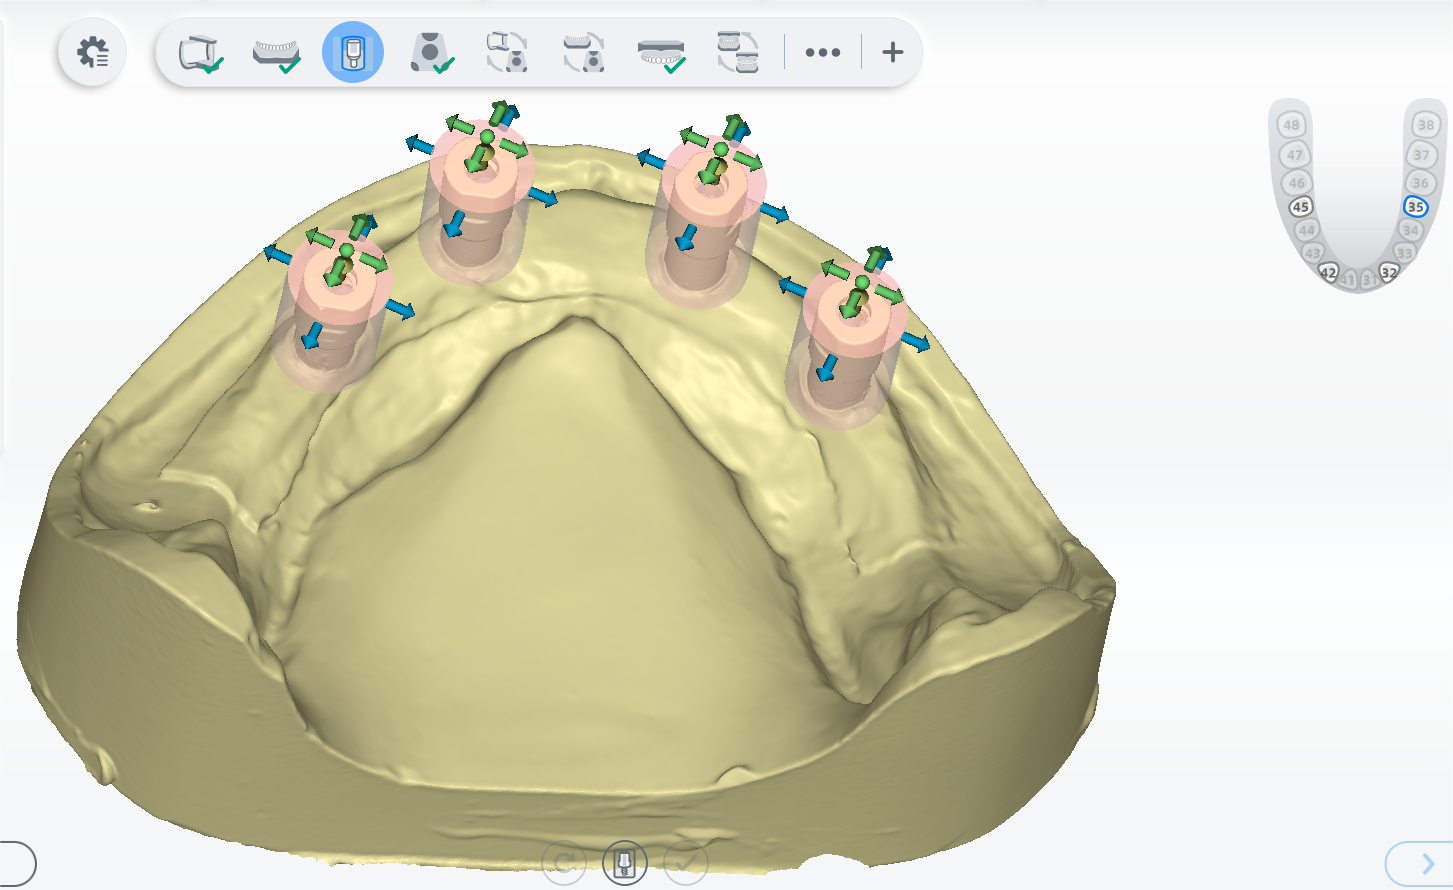
4 Click to finish.
 Lower Jaw Bottom Scan
1 Follow the guidance on the interface to place the fixture and the model.
2 Click or press the space key to start scanning.
3 If the scanned data is incomplete, click to add more data to the existing scan.
4 After scanning, move or rotate the cutting plane to cut the model.
5 Click to edit the model.
6 Click to save the edit and return to the scanning interface.
7 Click to finish.
 Upper Jaw Scan
1 Follow the guidance on the interface to place the height adaptor, the fixture and the model.
2 (Optional) Turn on additional functions.
3 Click or press the space key to start scanning.
4 If the scanned data is incomplete, click to add more data to the existing scan.
5 After scanning, cut and edit the scanned data for a cleaner scan.
6 Click to finish.
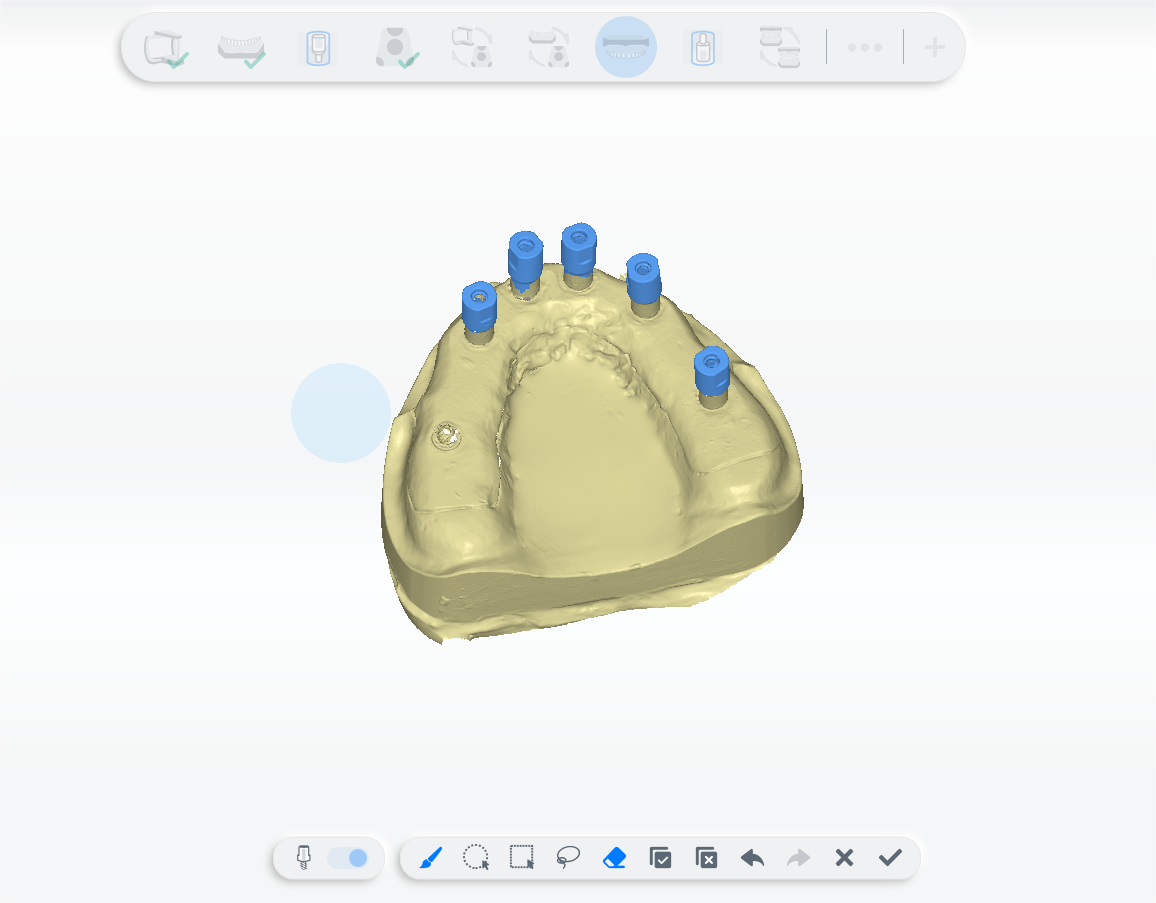
 Upper Jaw Scanbody Extract
1 Select the tooth and double click on the corresponding scanbody.
2 Adjust the cylinder to cover the scanbody.
3 Click to extract the scanbody.
4 Click to finish.
 Occlusion Alignment
1 Check the automatic alignment and click to finish.
2 (Optional) If the result is not optimal, click and align the scanned data manually.
 Transfer Plate Alignment
1 Check the automatic alignment and click to finish.
2 (Optional)If the result is not optimal, click and align the scanned data manually. For steps to align, see Alignment Operation.
 Lower Jaw Bottom Alignment
1 Check the automatic alignment and click to finish.
2 (Optional)If the result is not optimal, click and align the scanned data manually. For steps to align, see Alignment Operation.
Finish Scanning
After finishing the scanning process,click on Go to Pre-design to edit the scanned data.