Die-in-one Case
In die-in-one order, dies of upper and lower jaws can be scanned on the same scanning tray without the need to operate separately.
Create Order
Note
- Select Restoration as the dentistry type.
- Select Patient Mode.
- Select Sectioned Model.
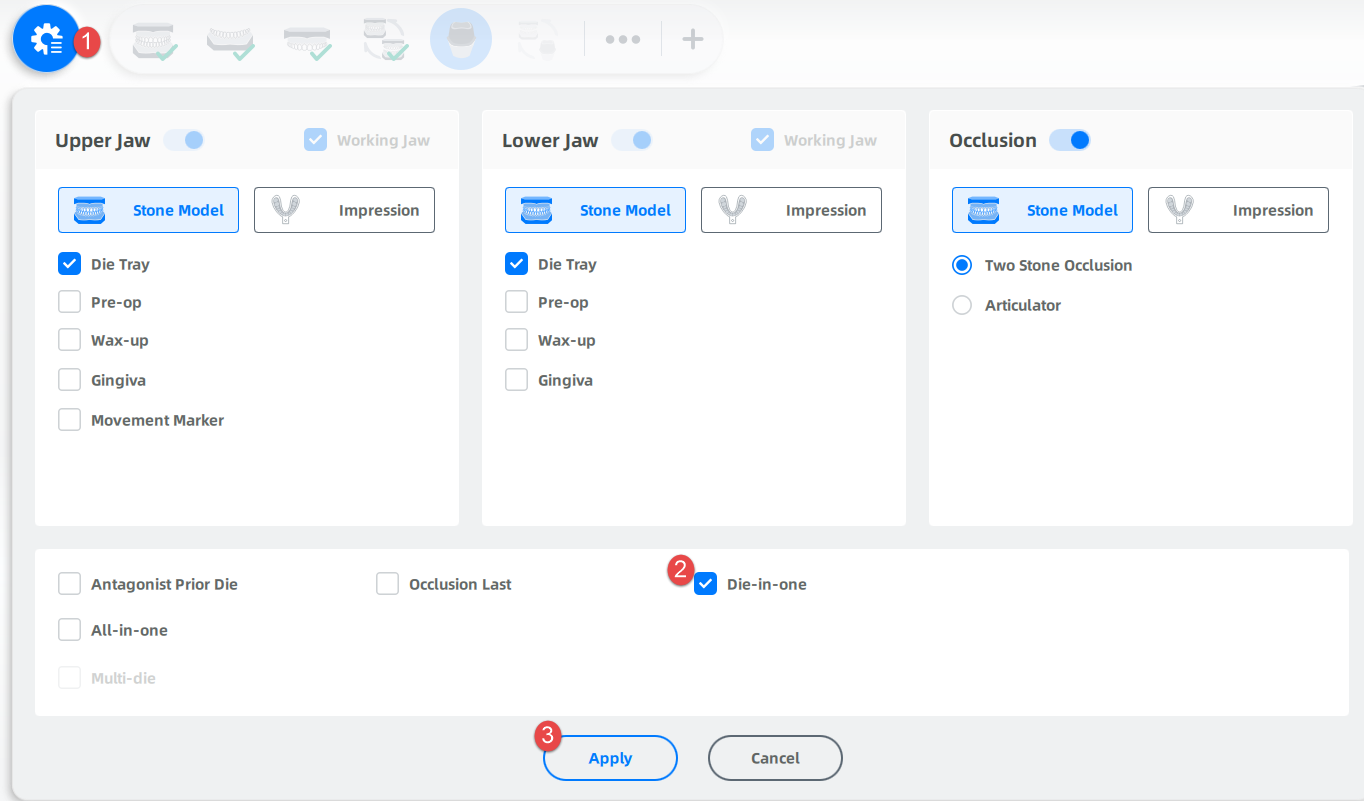
- Select Occlusion Type according to the specific case.
- Put 8 dies at most for upper and lower jaw restorations, as the scanning tray can hold up to 8 teeth.
- Click
 to check Die-in-one.
More details can be found in Scan Strategy Configuration.
Click Scan to start or click Save to save the created order for future scanning.
After saving the order, click Explore to check the order content.
Start Scanning
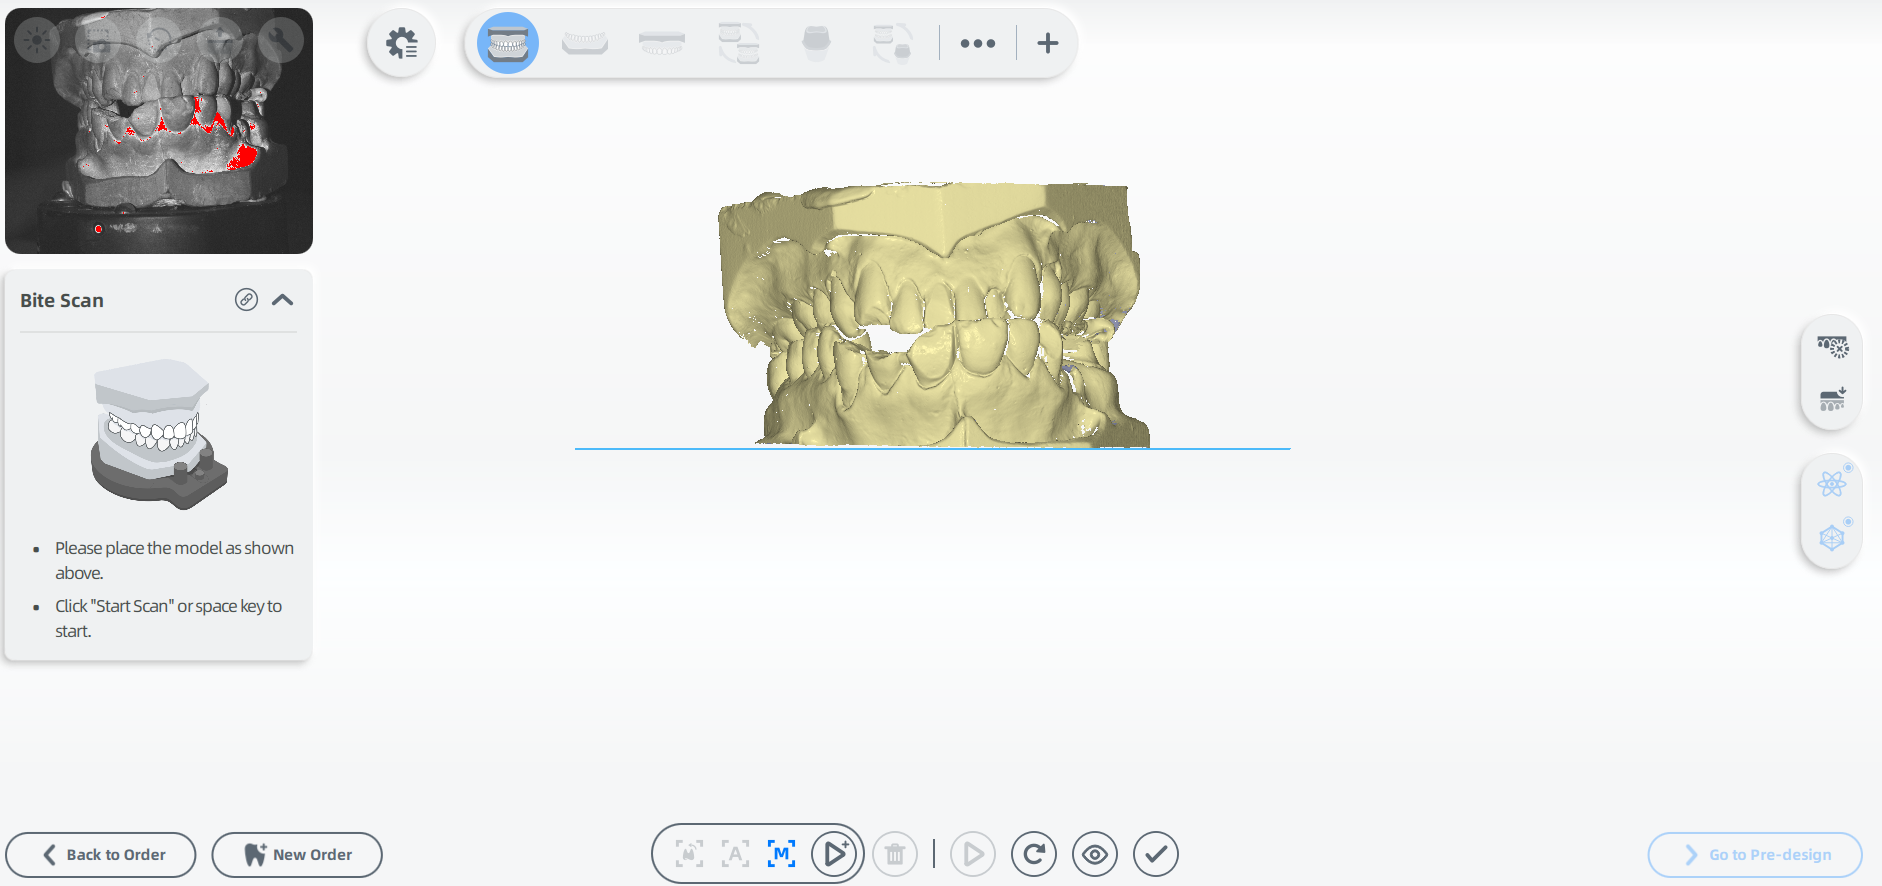
The lower jaw and upper jaw are working jaws in this order.
 Total Jaw Scan
-
Follow the guidance on the interface to place the height adaptor, the fixture and the model.
-
Set the configuration in the camera window. For steps to set parameters, see Camera Window.
-
Click
 or press Space / Enter to start scanning.
 -
After scanning, move or rotate the cutting plane to cut the model.
-
Click
 to edit the model.
Related operations:
| Icon | Description |
|---|---|
 |
Apply the edit and exit. |
| View the data fusion effect. | |
| Finish the scanning and enter the next operation. | |
| Rescan. |
 Lower Jaw Scan
-
Click
or press Space / Enter to start scanning -
Click
to edit the model. For details, see Data Edit.
 Upper Jaw Scan
-
Click
or press Space / Enter to start scanning. -
Click the bottom to add more data if the scanned data is incomplete. For steps to add scanning, see Add Scan.
 Die Scan
- Place the upper and lower jaw dies according to the position shown in the interface.
- Adjust the brightness and height in the camera window.
-
Click
or press Space / Enter to start die scanning. For scanning in groups, see group scan.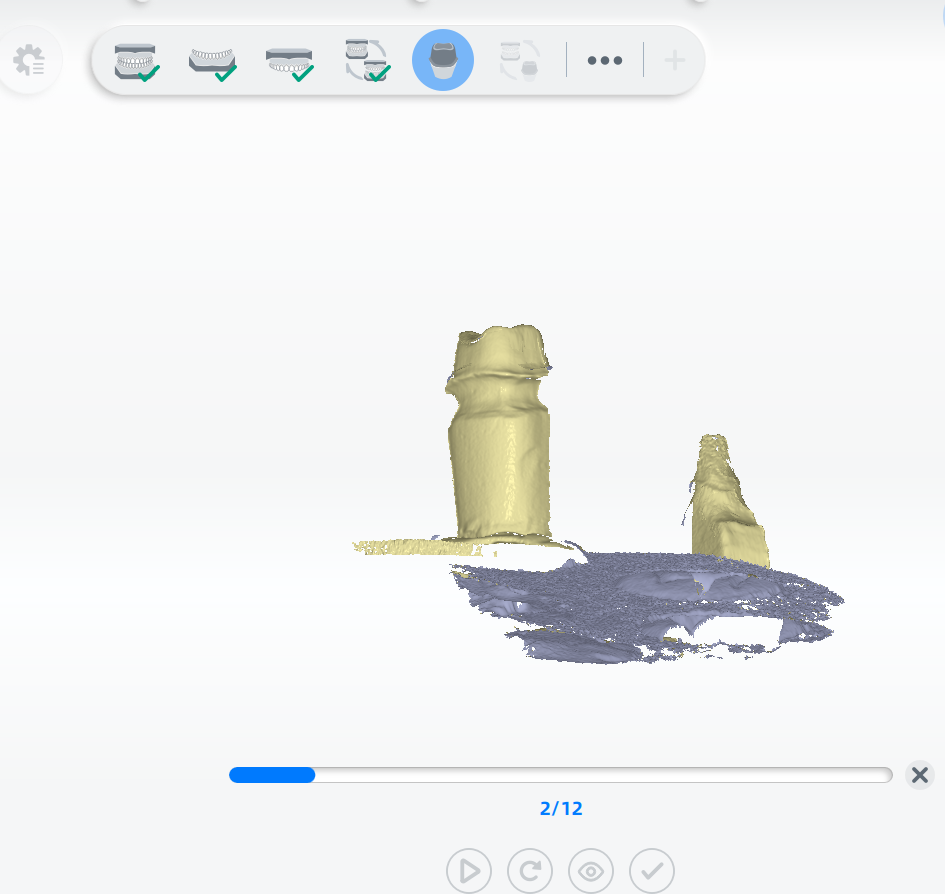
-
Click
to edit the model. - Click
 to finish scanning.
 Die Alignment
Check the automatic alignment, and click ![]() to finish alignment.
to finish alignment.
| Function | Description | Illustration |
|---|---|---|
| Tooth ID Adjustment | If an error exists in alignment, check Tooth ID Adjustment. Click the tooth number and the corresponding data will be displayed in blue. Right-click to select a correct number again from the list. | 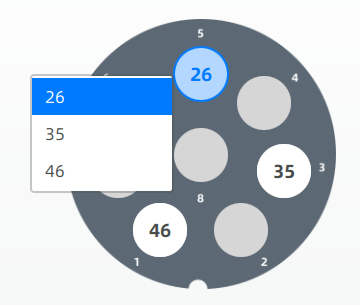 |
| Hide Jaw Model | Click Hide Jaw Model to hide the jaw model. Only the die model is visible. |  |
If the result is not optimal, click ![]() to manual alignment.
to manual alignment.
 Occlusion Alignment
Check the automatic alignment.
If the alignment result is not good, click ![]() to manual alignment. For steps to align, see Alignment.
to manual alignment. For steps to align, see Alignment.
Note
According to the specific needs, you can enable or cancel the bite optimization (highlighted in red). When enabled, it will automatically adjust and optimize occlusion data.

Finish Scanning
After finishing the scanning process, click Go To pre-design to edit the scanned data.