Multidie Case
Die Order
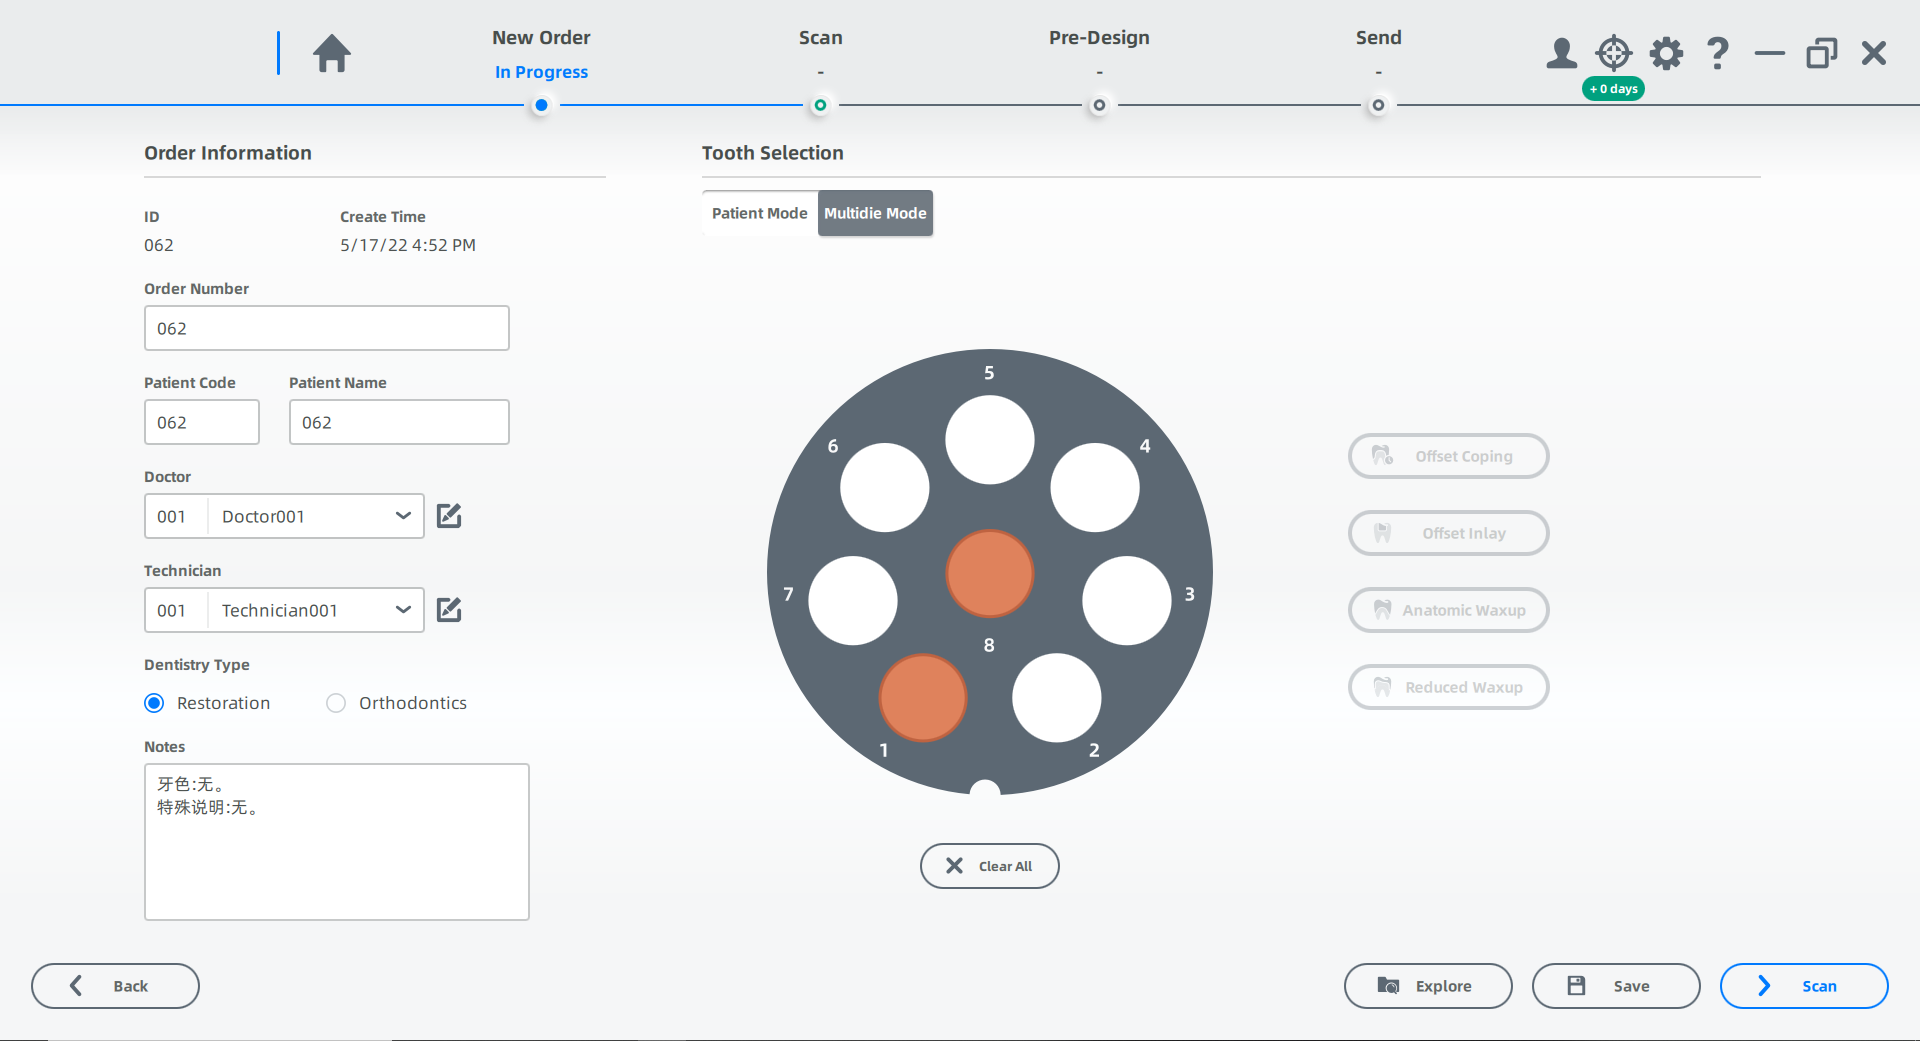
Create the Order
Note
- Select Restoration as the dentistry type.
- Select Multidie Mode.
More details can be found in Scan Strategy Configuration.
Click Scan to start or click Save to save the order and scan it later.
Start Scanning
 Die Scan
- Follow the guidance on the interface to place the height adaptor and the model.
- Set the configuration in the camera window.
- (Optional) Turn on additional functions.
-
 : Add details and process a high-quality scan.
 -
Click
 or press Space / Enter to start scanning.
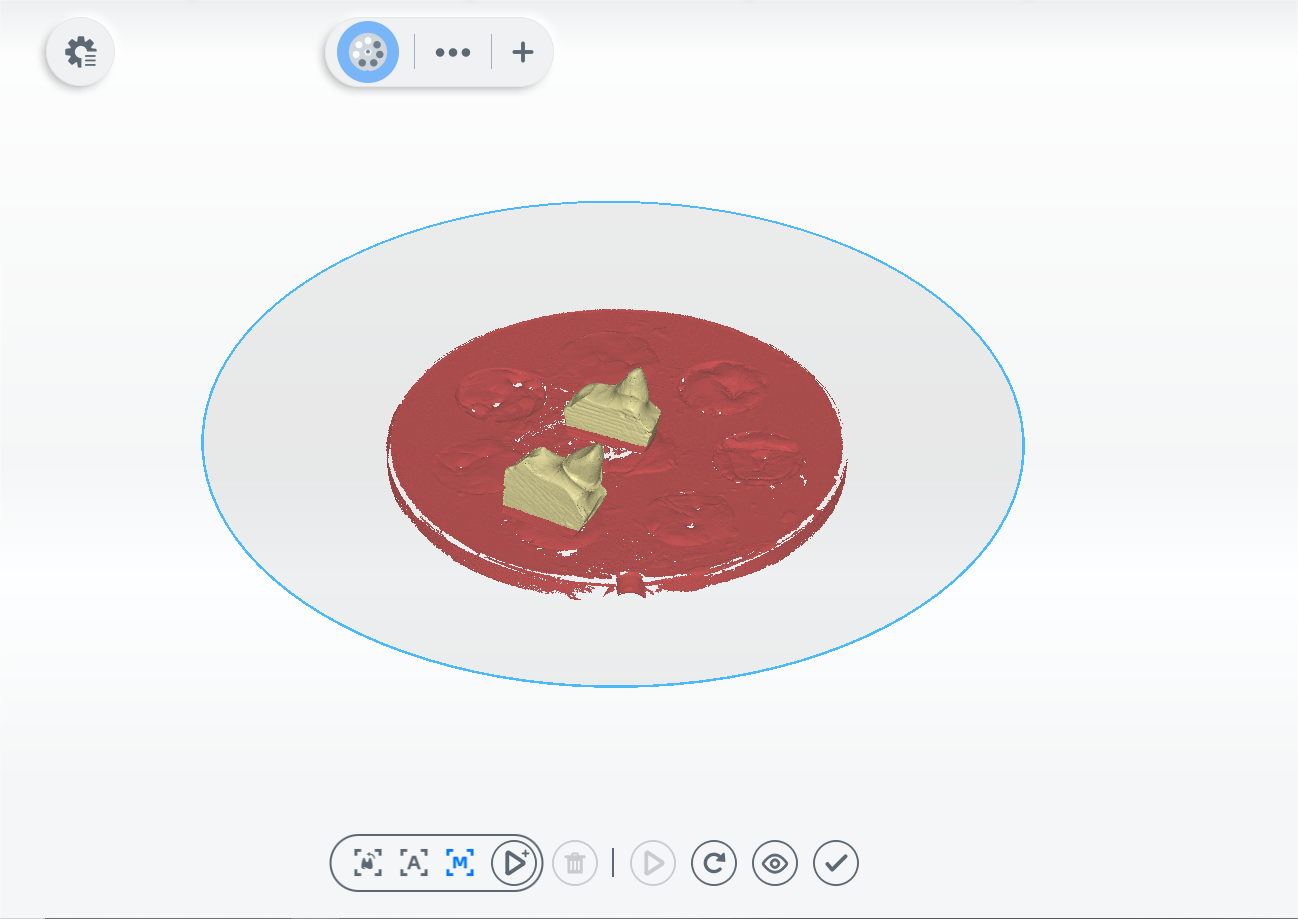
 - After scanning, move or rotate the cutting plane to cut the model. Failure to remove the unnecessary jig data (the red part in below picture) may cause misalignment later.
- Click
 to edit the model.
 - Click
 to save the edit and return to the scanning interface.
 - Click
 to preview the scanned model;
or click
to preview the scanned model;
or click  to rescan;
or click
to rescan;
or click  to finish.
Finish Scanning
After finishing the scanning process, click on Go to Pre-design to edit the scanned data.
Waxup Order
Create the Order
For steps to create a multidie order, see Multidie Case-Create the Order.
Start Scanning
 Wax-up Scan
- Follow the guidance on the interface to place the height adaptor and the model.
- Set the configuration in the camera window.
- (Optional) Turn on additional functions.
- Click or press Space / Enter to start scanning.
- After scanning, move or rotate the cutting plane to cut the model.
- Click to edit the model.
- Click to save the edit and return to the scanning interface.
- Click to preview the scanned model;
or click to rescan;
or click to finish.
Die Scan
- Follow the guidance on the interface to place the height adaptor and the model.
- For scanning details, see the last scanning step on Wax-up Scan.
 Wax-up Alignment
- Check the automatic alignment and click to finish.
- If the result is not optimal, click
 and align the scanned data manually.
Finish Scanning
After finishing the scanning process, click on Go to Pre-design to edit the scanned data.