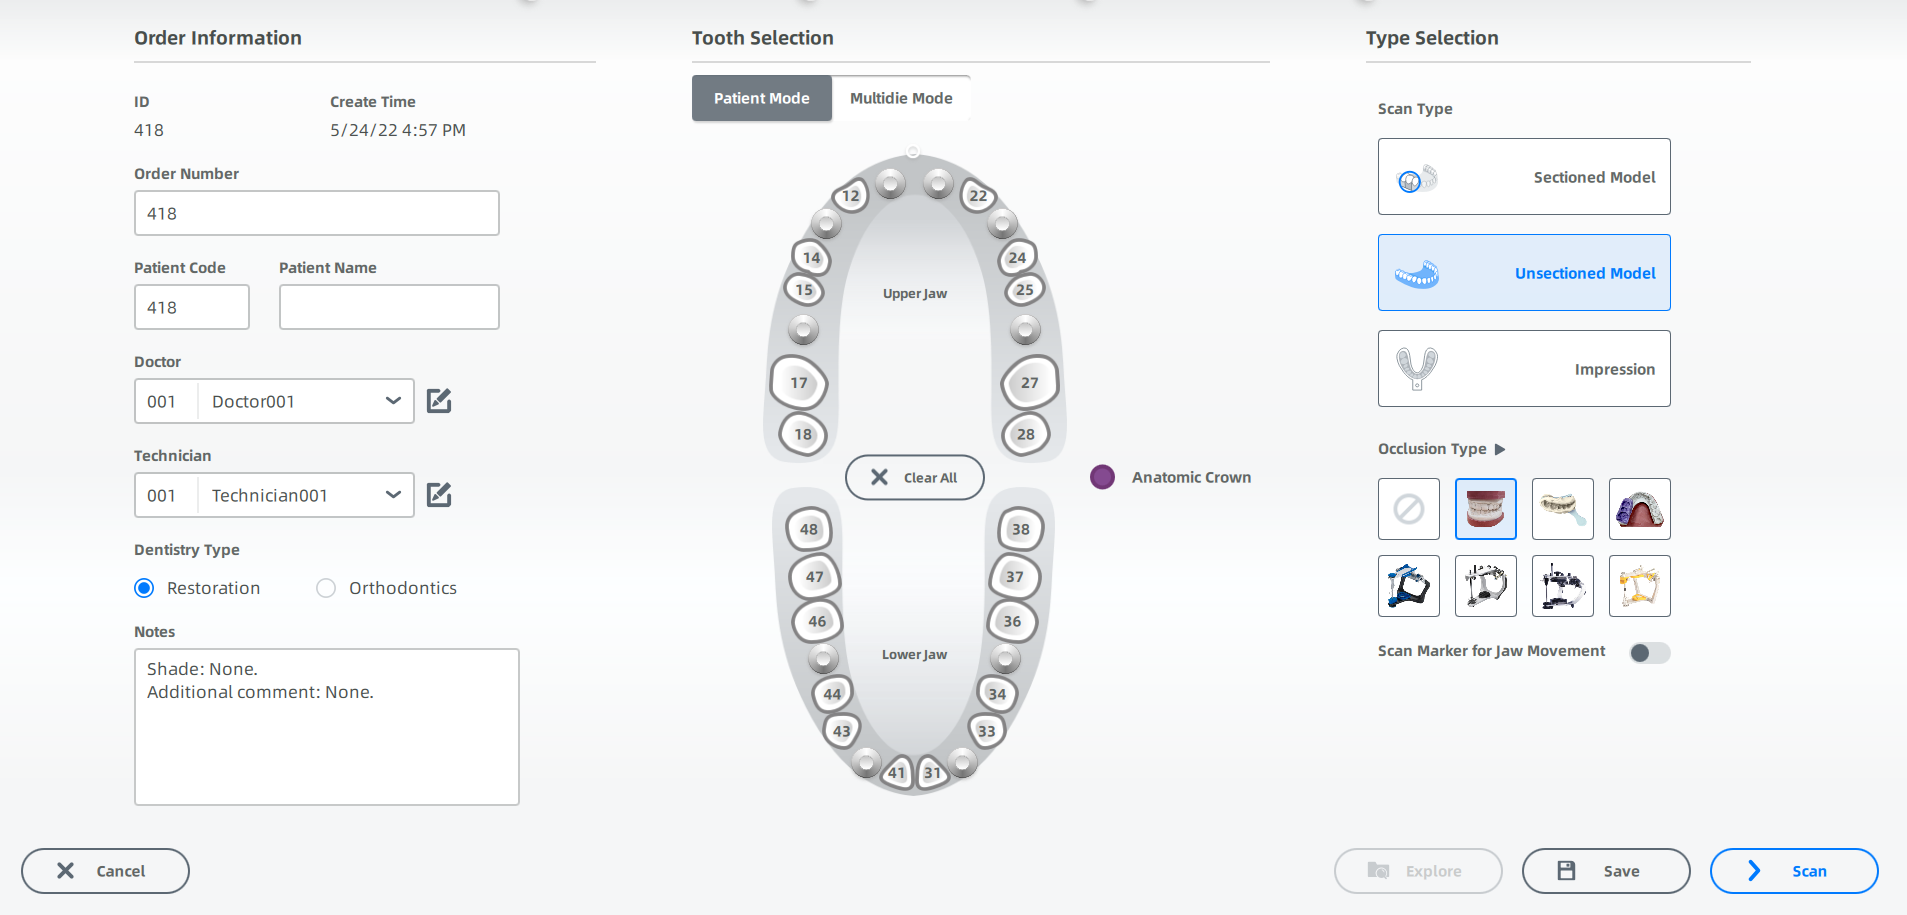
Implant-based(Scanbody) Case
Create the Order
Note
- Select Restoration as the dentistry type.
- Select Patient Mode.
- Click Custom Abutment, Screw Retained or On substructure scan in Implant-Based.
- Select Unsectioned Model.
- Select Occlusion Type according to the reality.
More details can be found in Scan Strategy Configuration.
Click Scan to start or click Save to save the order and scan it later.
Start Scanning
 Articulator Scan
-
(Optional)Click
 , Click Articulator and check Transfer.
-
Click
 to turn on/off Articulator Dynamic Scan.
Product Fixture Installation under the Static Articulator Scan Mode Fixture Installation under the Dynamic Articulator Scan Mode EX 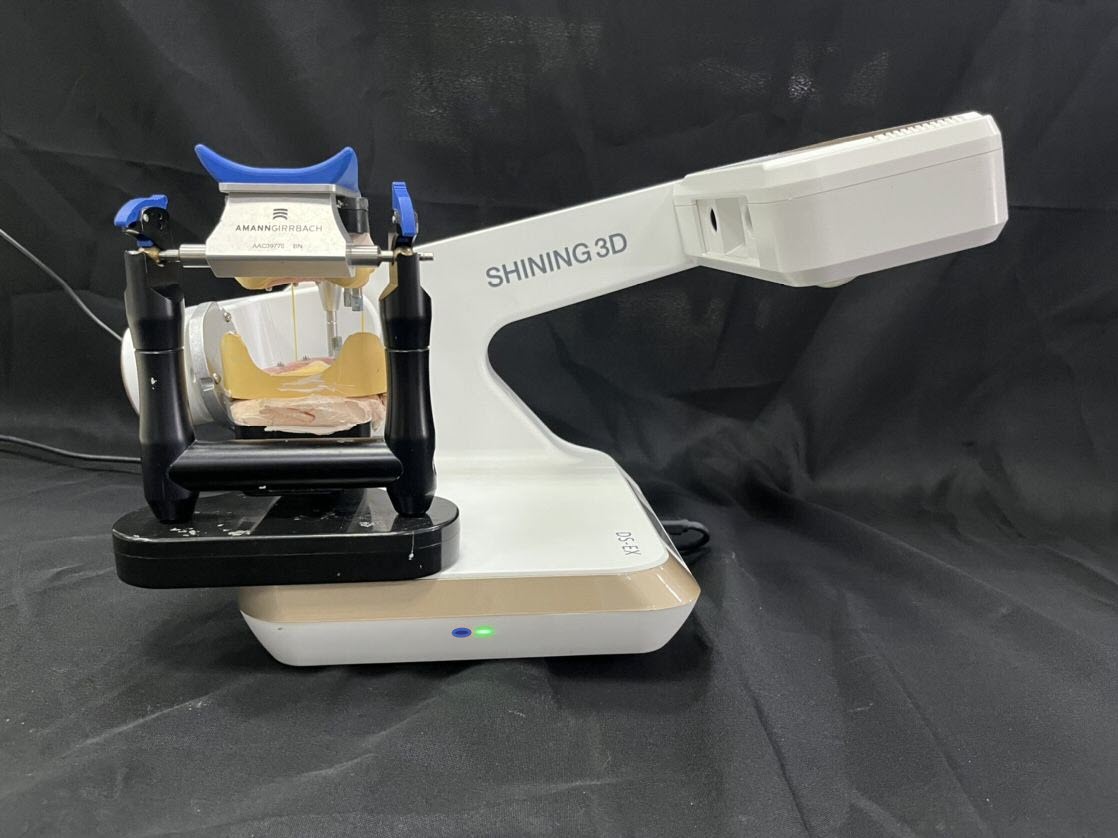

MIX 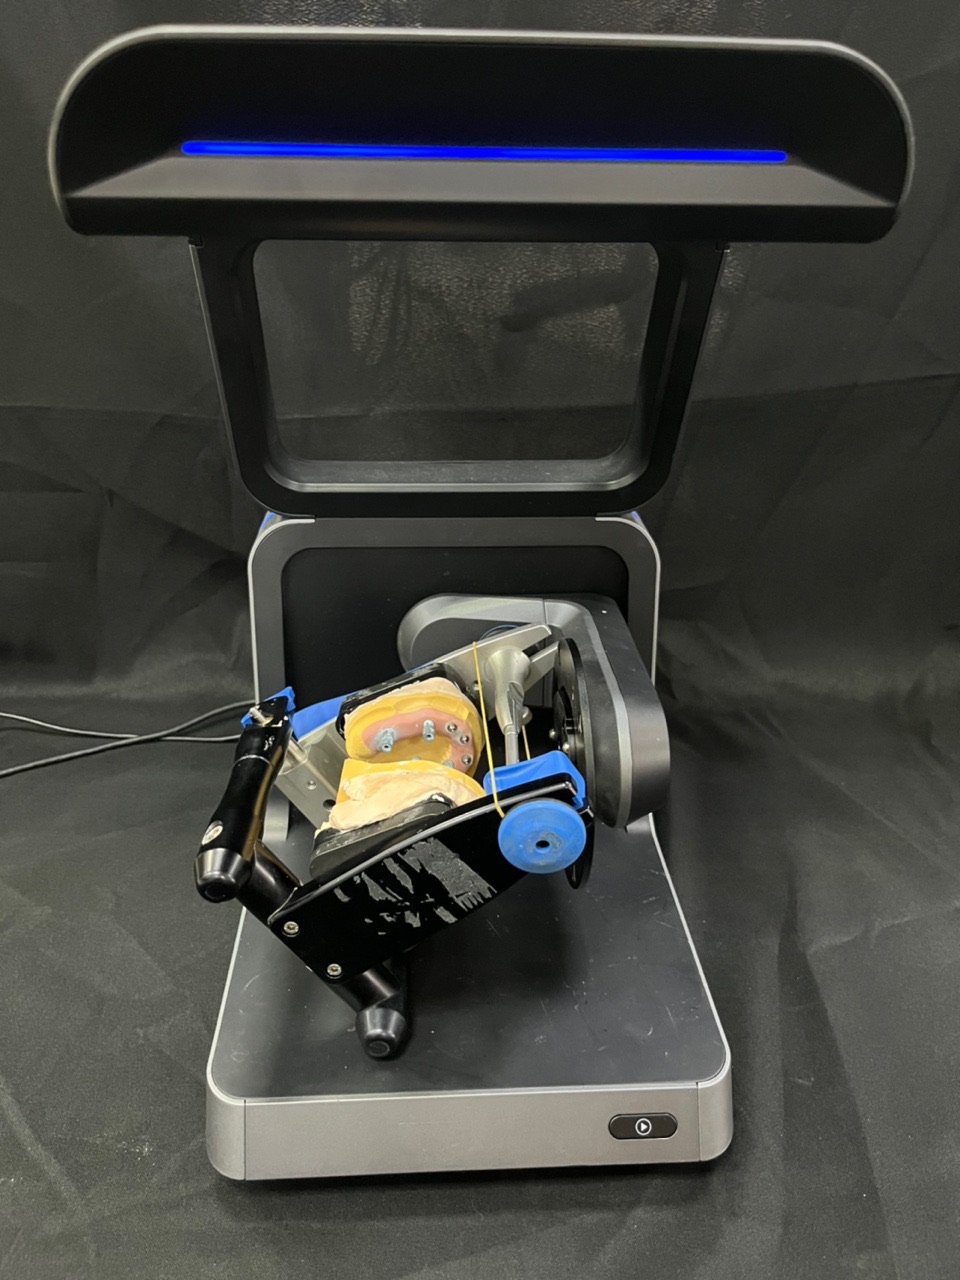
-
Place articulator and model as shown in step 2. and set the configuration in the camera window. For steps to set the configuration, see Parameters.
- Click
 or press Space / Enter to start scanning.
 - The jaw frame model is turned 180° in the lateral direction.
- Click or press Space / Enter to start scanning.
-
Click
 to preview the scanned model;
or click
to preview the scanned model;
or click  to rescan;
or click
to rescan;
or click  to finish.
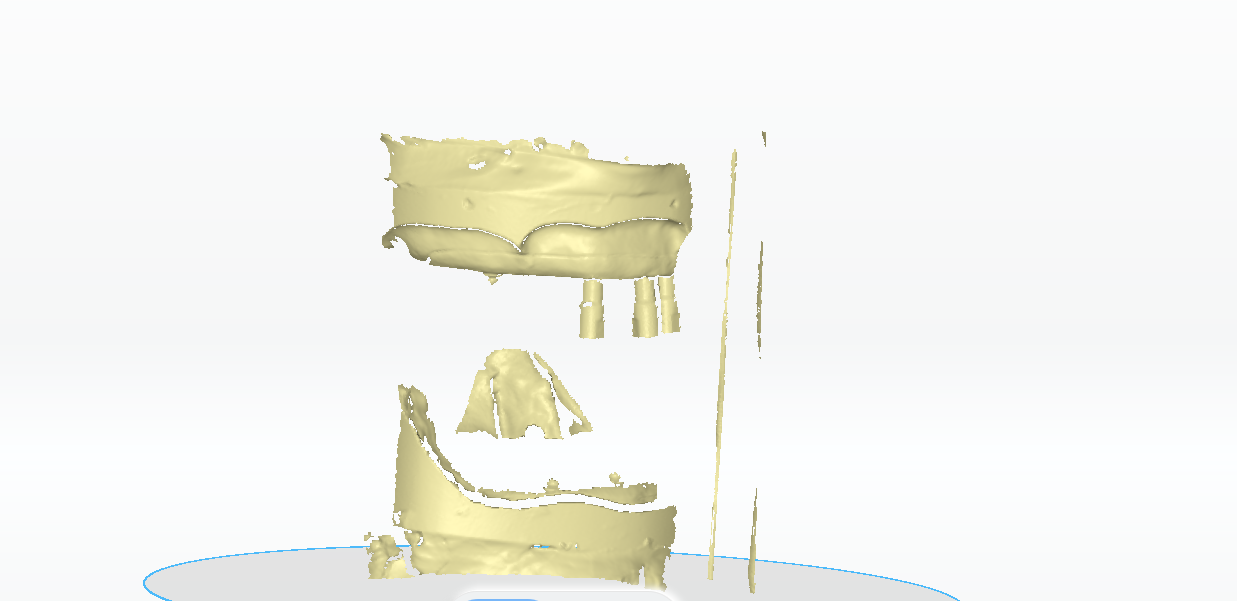
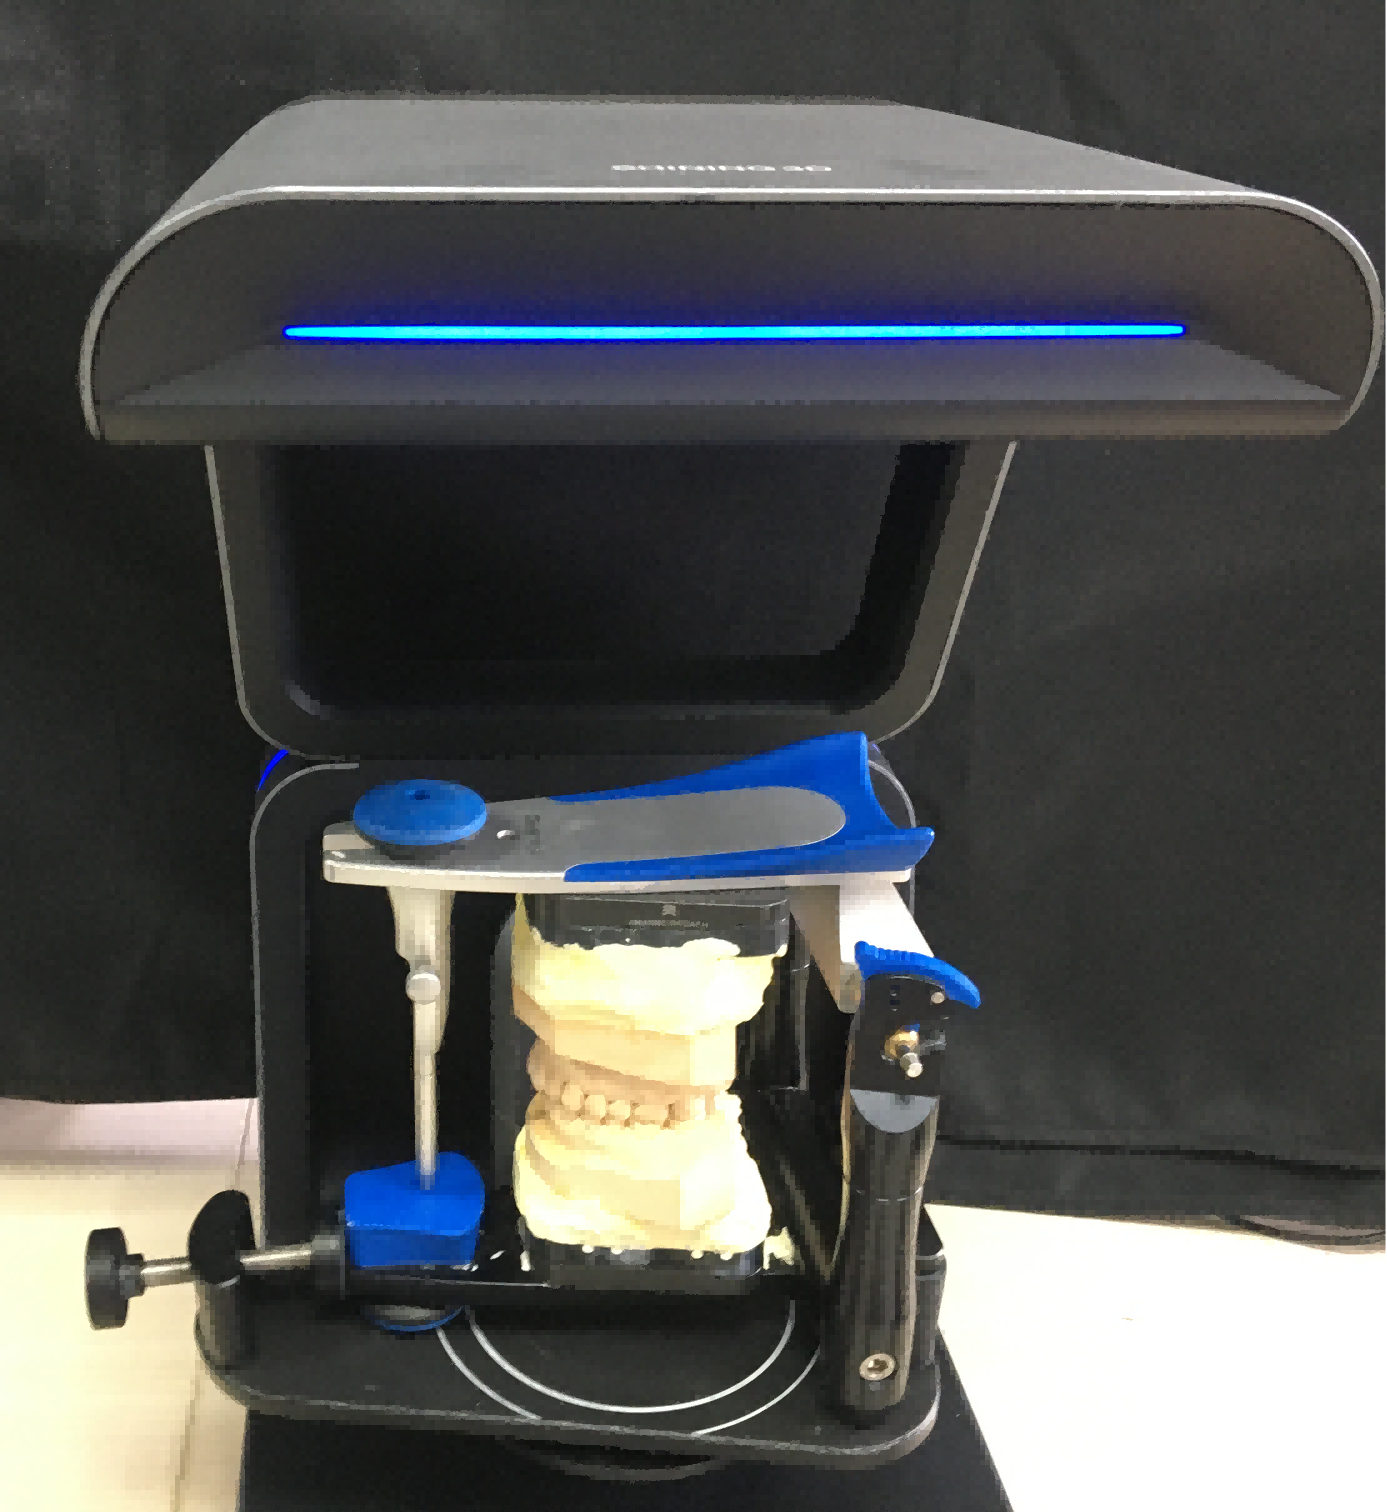
 Lower Jaw Scan
-
Follow the guidance on the interface to remove the articulator and place the fixture and the model.
Note
If the scanbody is not recognized correctly, click
 to edit it.(Enable
  first).
 -
Click
or press Space / Enter to start scanning. - If the scanned data is incomplete, click
 to add more data to the existing scan.
 - Click
 to edit the model. For more, see Function.
 -
Click
to finish.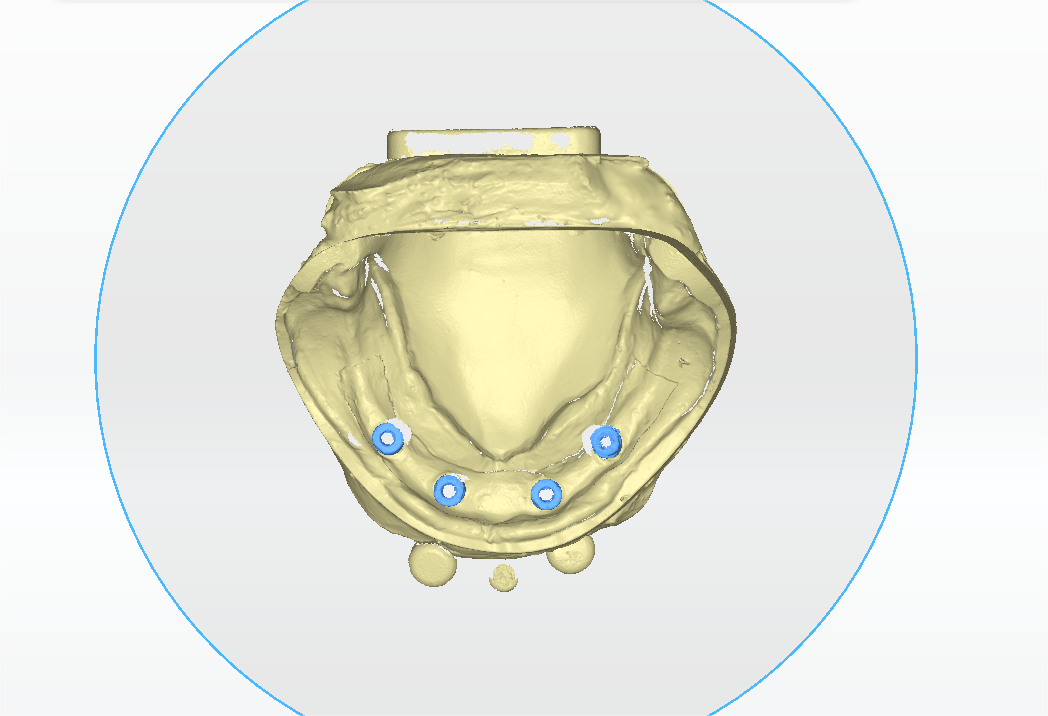
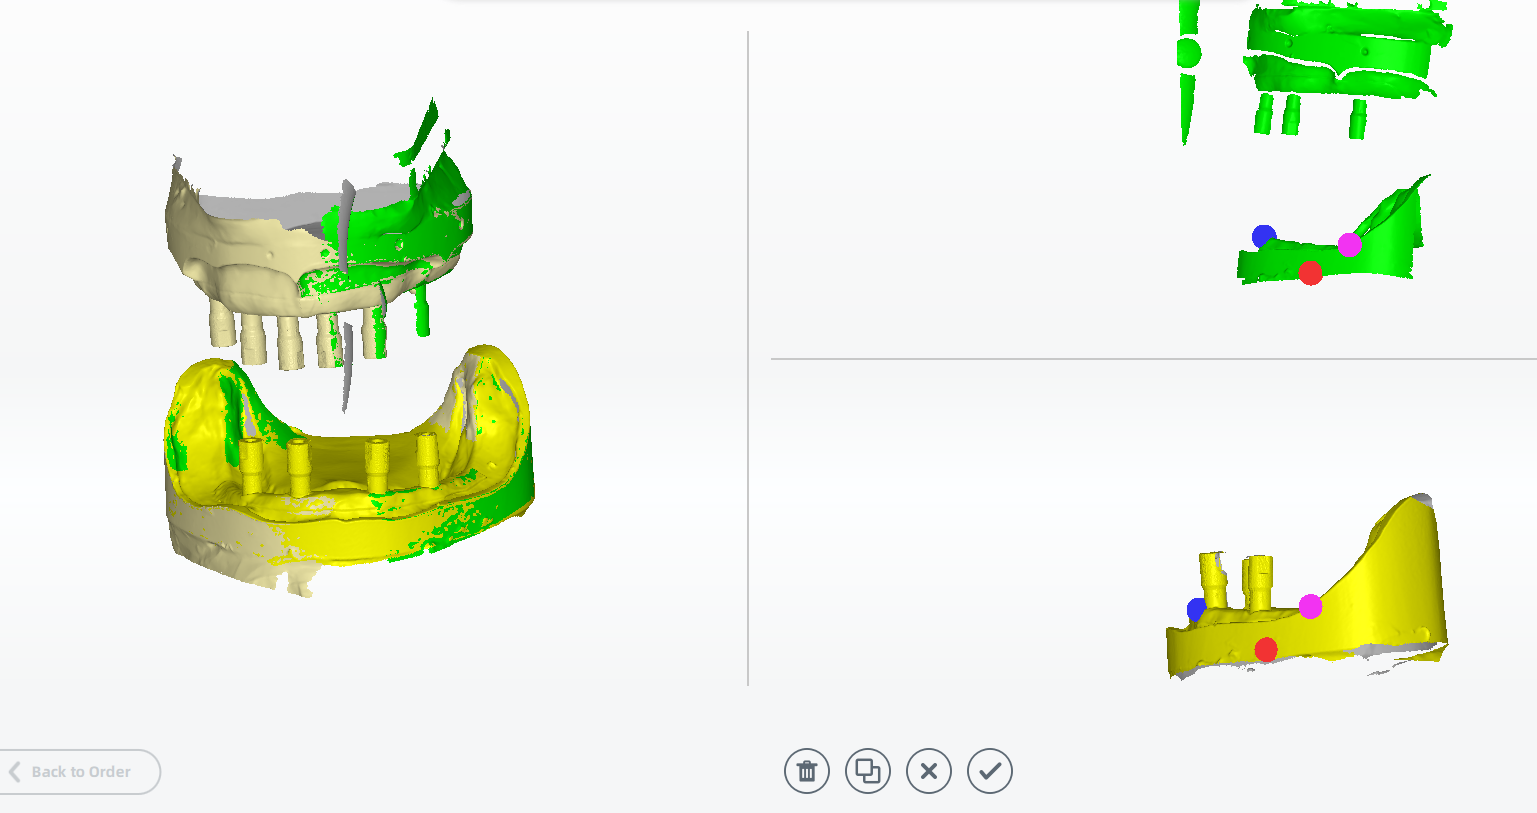
 Lower Jaw Scanbody Extract
- Select the tooth and double click on the corresponding scanbody.
-
Adjust the cylinder to cover the scanbody.

Note
- Press and hold the left mouse button(LMB) on the cylinder to move it.
- Press and hold the left mouse button(LMB) to adjust the height of the cylinder by the yellow arrow.
- Press and hold the left mouse button(LMB) to adjust the scope of the cylinder by blue arrows.
- Press and hold the left mouse button(LMB) to rotate the cylinder by green arrows.
-
Click
 to extract the scanbody.
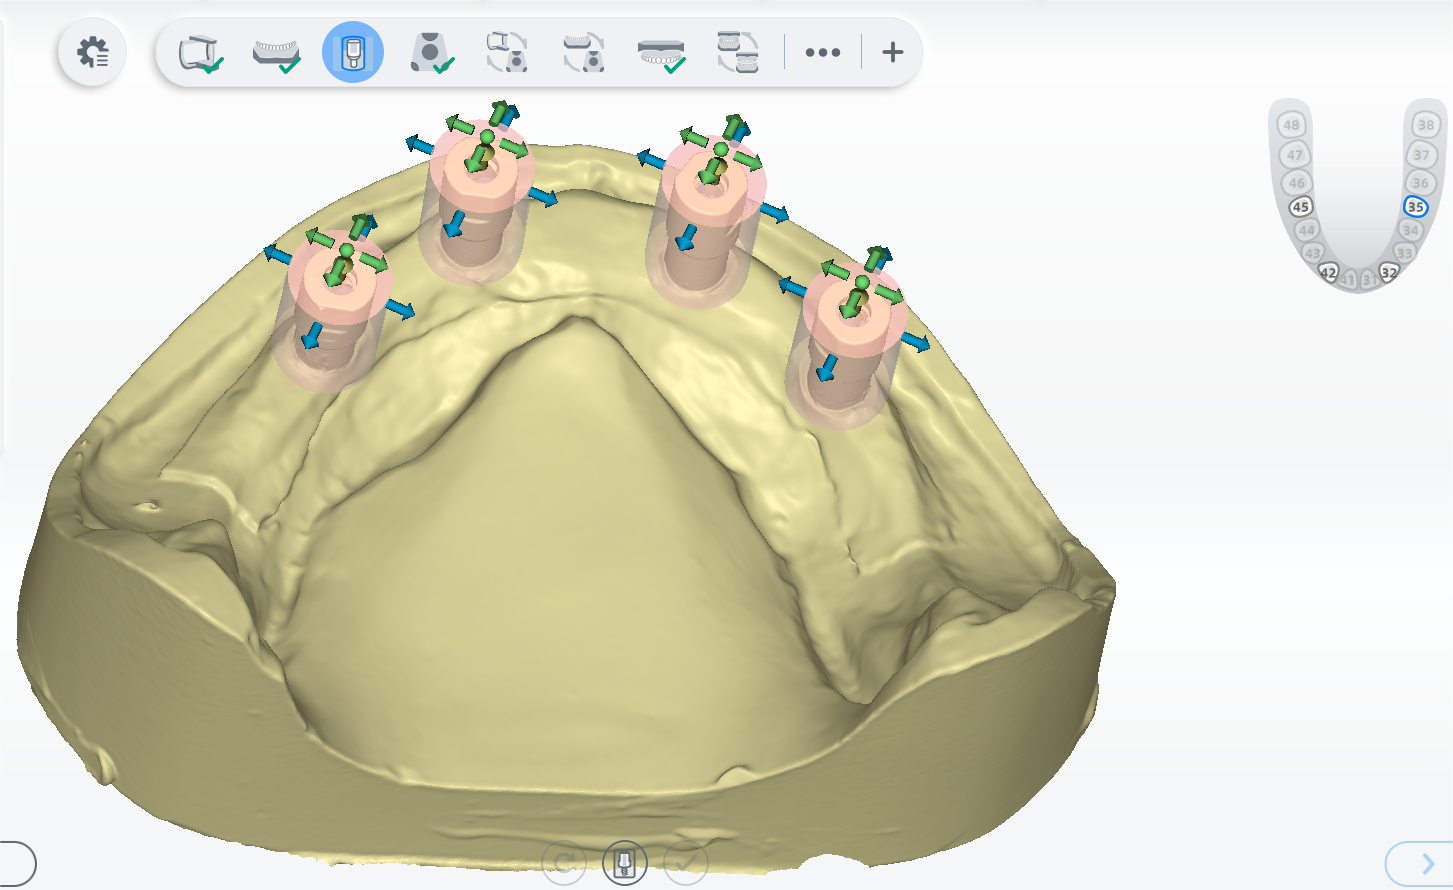
-
Click
to finish.
 Lower Jaw Bottom Scan
- Follow the guidance on the interface to place the fixture and the model.
- Click or press Space / Enter to start scanning.
- If the scanned data is incomplete, click to add more data to the existing scan.
- After scanning, move or rotate the cutting plane to cut the model.
- Click to edit the model.
- Click
 to save the edit and return to the scanning interface.
 -
Click
to finish.
 Upper Jaw Scan
- Follow the guidance on the interface to place the height adaptor, the fixture and the model.
- (Optional) Turn on additional functions.
- Click or press Space / Enter to start scanning.
- If the scanned data is incomplete, click to add more data to the existing scan.
- After scanning, cut and edit the scanned data for a cleaner scan.
- Click to finish.

 Upper Jaw Scanbody Extract
- Select the tooth and double click on the corresponding scanbody.
- Adjust the cylinder to cover the scanbody.
- Click to extract the scanbody.
- Click to finish.
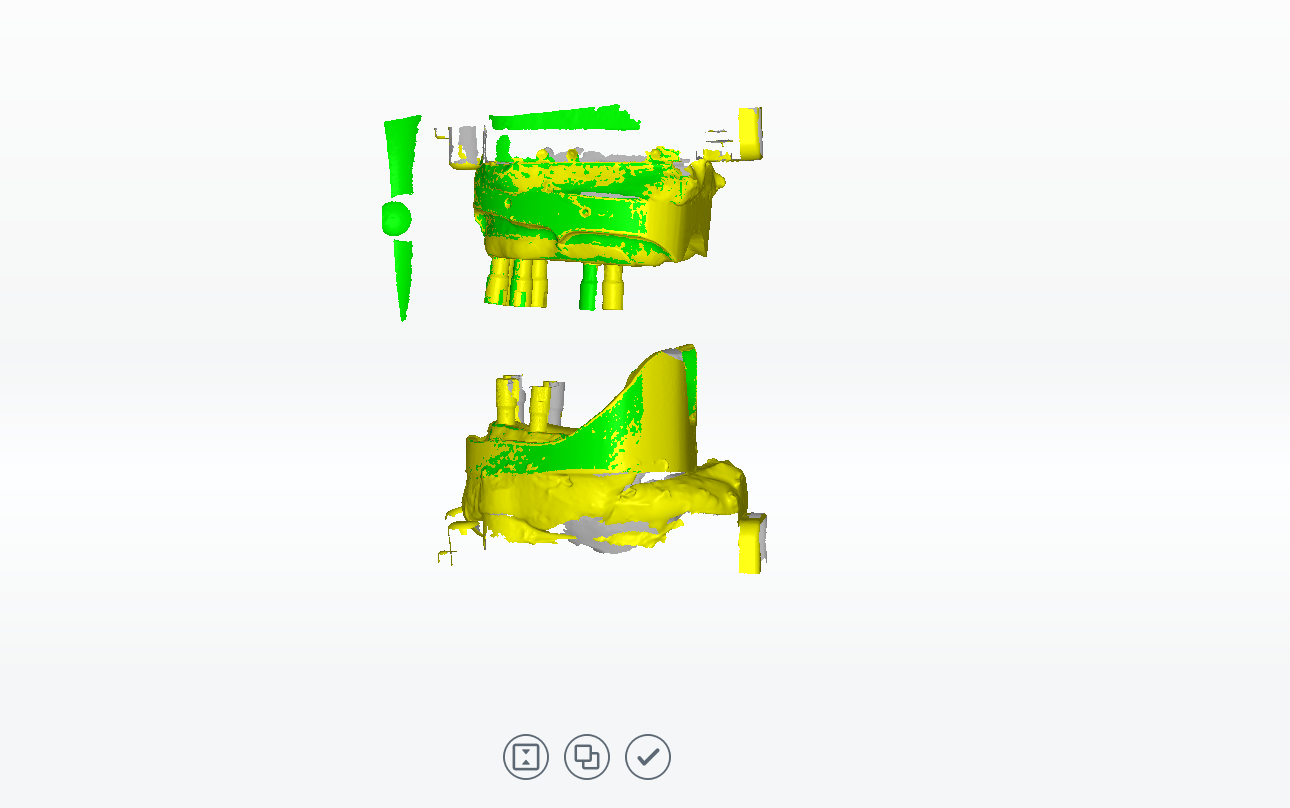
 Occlusion Alignment
- Check the automatic alignment and click to finish.
-
(Optional) If the result is not optimal, click
 and align the scanned data manually.
Col
Automatic AlignmentCol
Manual Alignment
 Transfer Plate Alignment
- Check the automatic alignment and click to finish.
-
(Optional)If the result is not optimal, click
and align the scanned data manually. For steps to align, see Alignment Operation.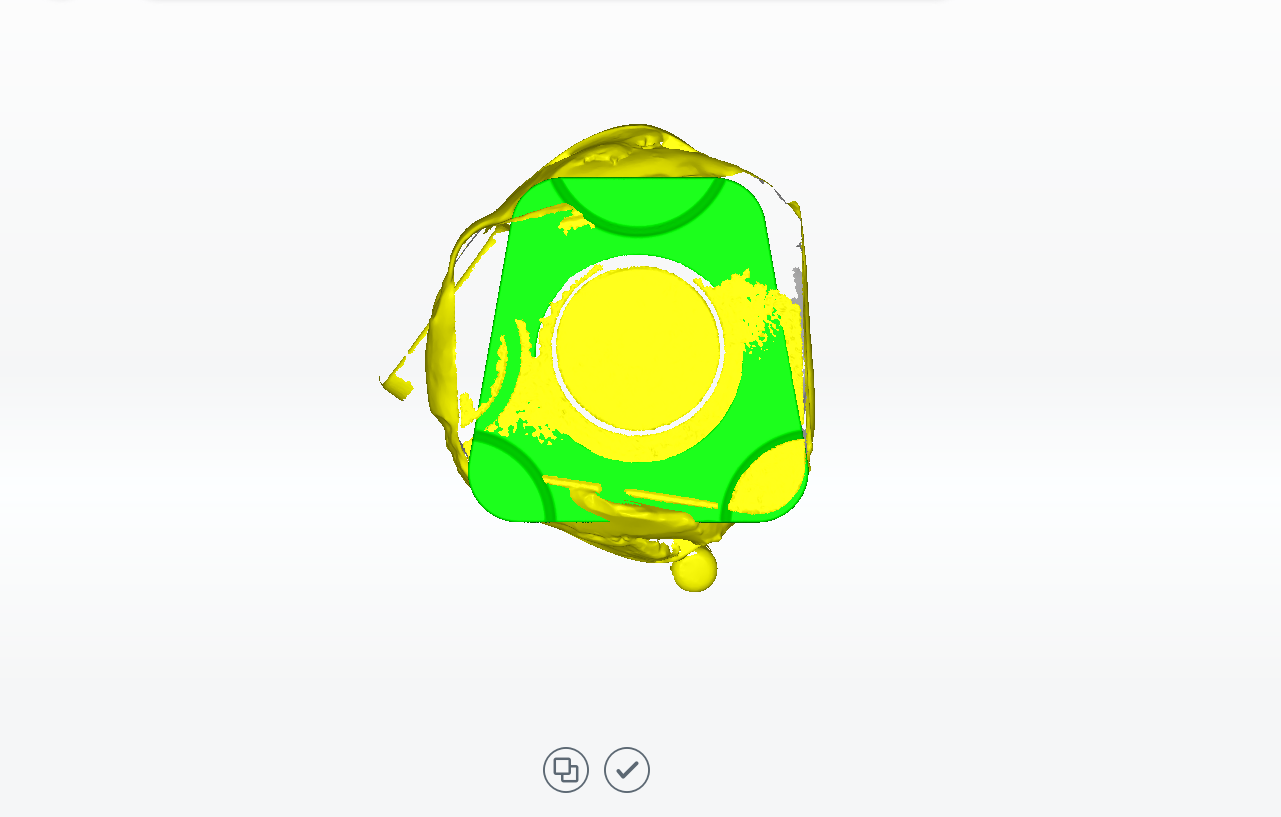
 Lower Jaw Bottom Alignment
- Check the automatic alignment and click to finish.
- (Optional)If the result is not optimal, click and align the scanned data manually. For steps to align, see Alignment Operation.
Finish Scanning
After finishing the scanning process, click on Go to Pre-design to edit the scanned data.