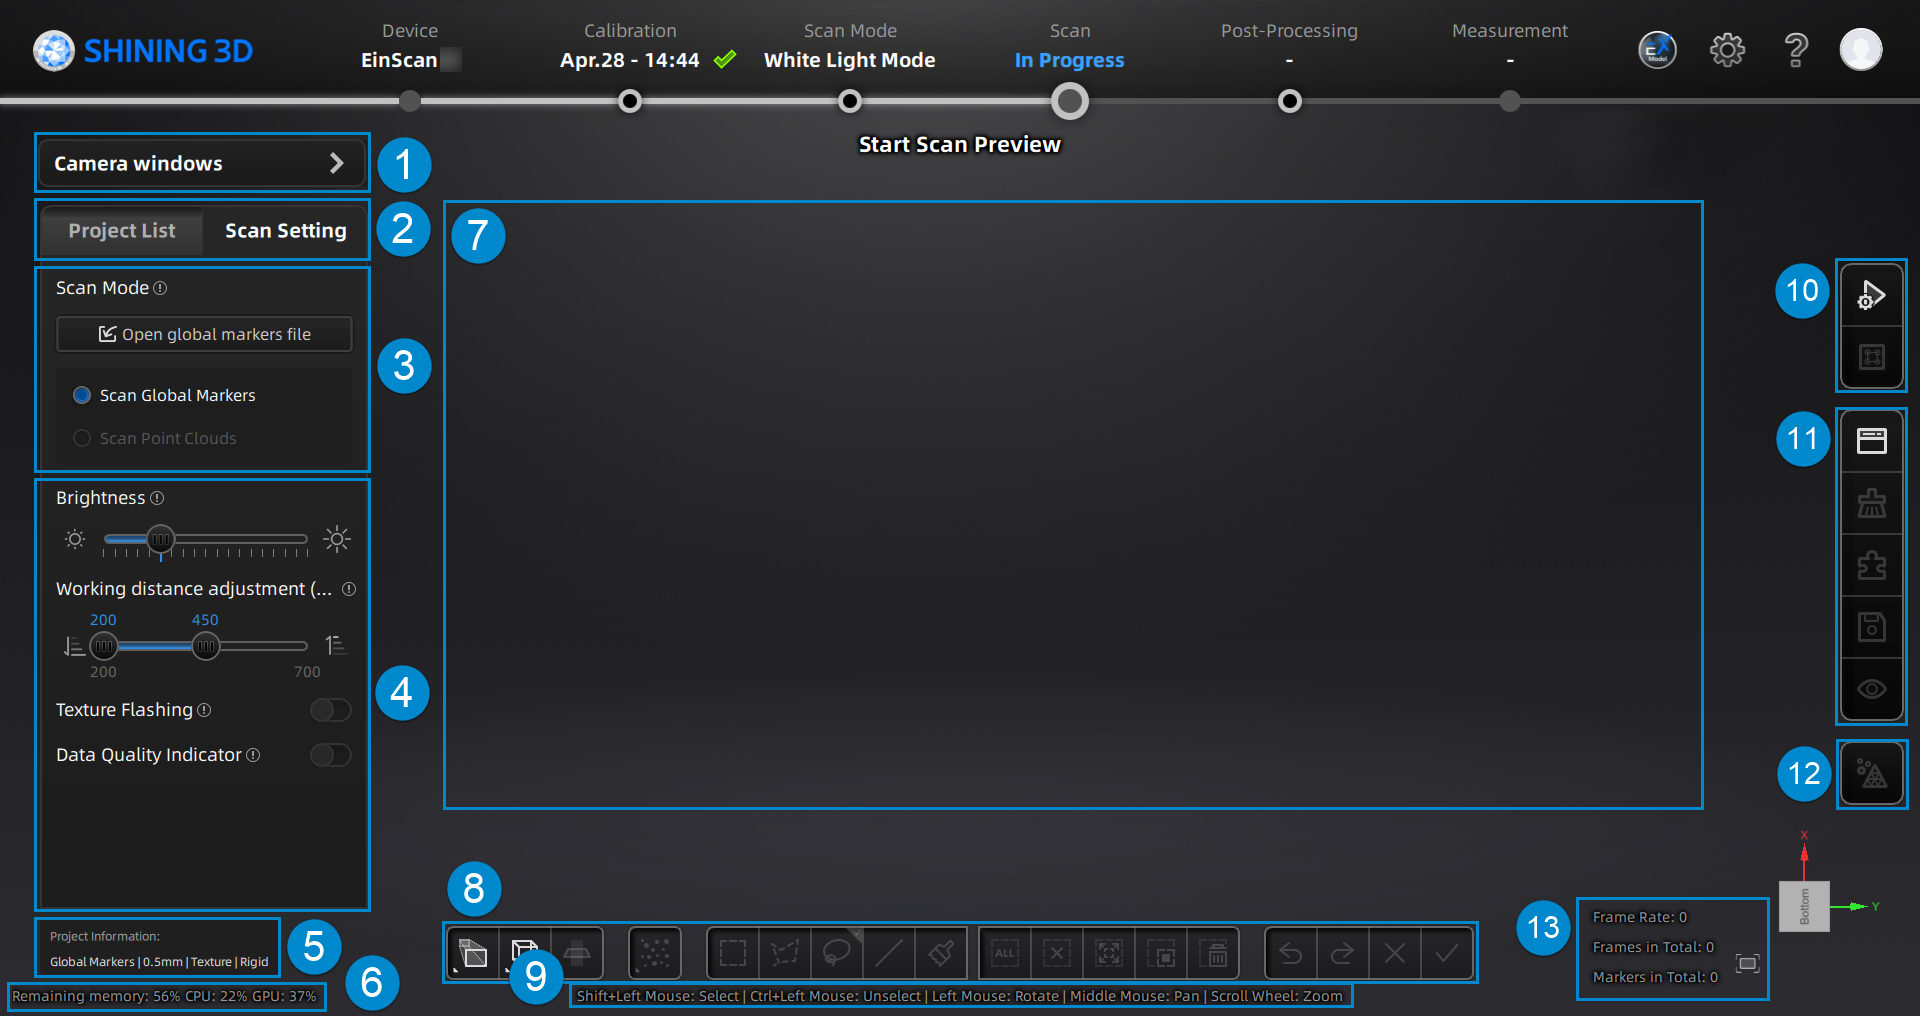
Scan Interface
Interface Overview
Note
For the introduction to the top navigation bar and Settings & Help buttons in the top right corner, please see software interface.
① Camera Windows
Check the actual scanning scenarios captured by bottom camera and texture camera so as to adjust parameters accurately.
Note
The window for texture camera is disabled by default and can be enabled through the menu of the right mouse button.
② Project List and Scan Setting
Switch Project List and Scan Setting.
③ Scan Mode
Support Open global markers file or directly Scan global markers:
-
White Light Mode > Global Markers.
-
IR Mode > Object > Global Markers.
④ Parameter Settings
Set Brightness, Working distance adjustment and other scanning parameters, for more see scanning settings.
⑤ Project Information
Display the Mode of Alignment, Resolution, state for Texture Scan & Non-rigid algorithm buttons.
Note
- The project set in foot station alignment mode does not display project information.
- Only the project set in hybrid mode alignment mode (excluding markers) supports setting non-rigid algorithm.
⑥ Remaining Memory, CPU & GPU
- Remaining Memory: Display the remaining memory space.
- CPU: Indicate the amount of computer's CPU resources it occupies during runtime.
- GPU Usage: Graphics card usage.
Note
If the program's memory usage is excessively high, it is recommended that you close other non-scanner software and wait patiently.
⑦ Previewing / Scanning Window
Windows for viewing the pre-scan results and the scanned model effects.
⑧ Data Editing Toolbar
Edit the scanned data and adjust the perspective, for more see data editing.
⑨ Shortcuts
Adjust the angle of models, move models and select data quickly, for more see shortcuts.
⑩ Scan and Generate Point Clouds
Preview, Start & Pause Scan and Generate Point Clouds, for more see start scanning.
⑪ Side Function Bar
Import the Project Group, Projects Alignment, Delete & Save Your Scan, and Show/Hide Texture, for more see side function bar.
⑫ Mesh Model
See more details in mesh model.
⑬ Others
Display the Frame Rate, Frame in Total and Points in Total of the current project.
Click ![]() Fitting View to adjust the model size automatically to fit the screen.
Fitting View to adjust the model size automatically to fit the screen.
Besides, a view controller is also provided in the lower right corner to help switch perspectives conveniently, as shown in the right figure.