Quick Calibration
Calibration recalculates the scanner parameters, which not only ensures the accuracy of the scanner but also enhances the quality of scanning.
Caution
- Do not move the calibration board during the calibration.
- The scanning distance in the IR Rapid and IR Adaptive scan mode is greater than that in Laser HD scan mode. It refers to the distance between the scanner and the object being scanned.
Steps
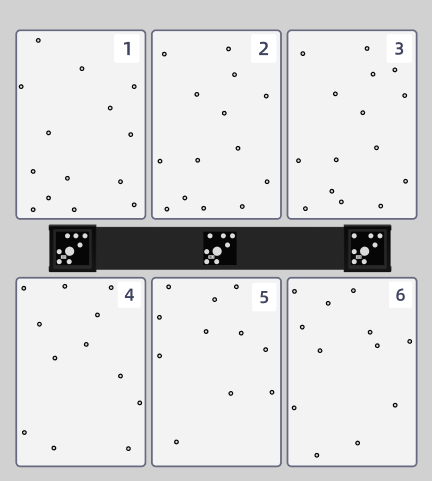
- Place the calibration boards and scale bar as shown in the image below.

-
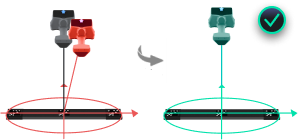
Follow the on-screen calibration guide, hold the handheld scanner horizontally and aim it towards the center of the scale bar. Slowly raise the scanner.
Caution
According to the guide, ensure that the height, horizontal position, and scan projection range of the scanner align with the illustrated instructions. Once all three position indicators satisfy the prompts, the software will automatically proceed to calibration.

-
Hold still and press the start button on the scanner to start calibration.
-
Move the scanner up and down slowly until all distance indicators turn full green.
-
Move the scanner to the right side of the scale bar and switch to each of the four directions (forward, backward, left tilt, right tilt) for calibration.
-
Move the scanner to the left side of the scale bar and switch to each of the four directions (forward, backward, left tilt, right tilt) for calibration.
-
Check the calibration result.
Note
- The tilt angle should be at 30°.
- After completing the rapid calibration, click Next in the lower-right corner of the screen to proceed to HD Calibration.
- Please calibrate again if the calibration fails.
- Please contact technical support if the calibration still fails after several attempts.