Software Interface
After opening the project file, you will enter the data processing interface.
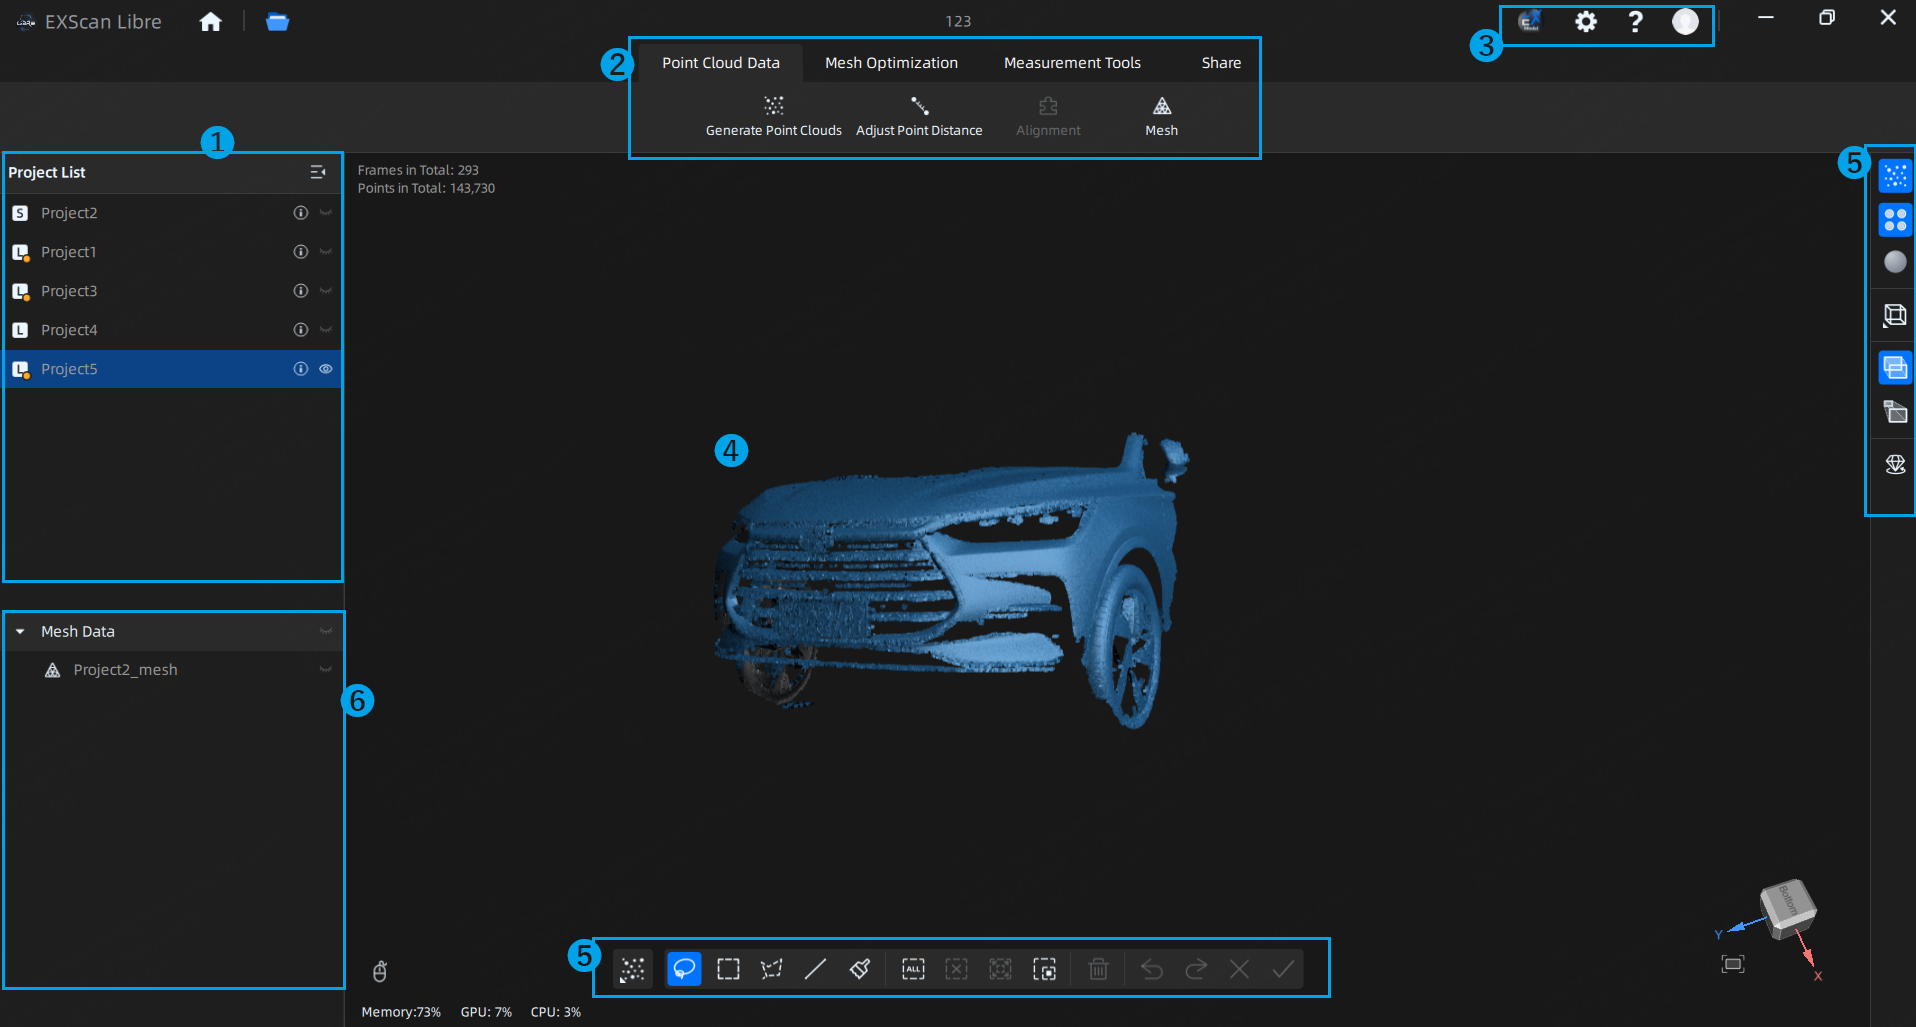
① Project List
Display all project files in the currently opened project group, including aligned projects and meshed projects.
- Delete/Rename: right click a project file to delete or rename it.
- Show/Hide scanned data: click
 to show scanned data, click again
  to hide it.
 - Show/Hide project list and mesh data panel: click
 to hide the project list.
Note
- The icon on the left side of the project name in the project list represents the scanning modes. L indicates the rapid scanning mode, S indicates the HD scanning mode, and a yellow dot indicates that the project has not generated a point cloud.
- The total number of frames and points in the selected project is displayed in the upper-left corner; the total number of triangles and vertexes in the selected mesh data is displayed in the upper-left corner when you select the mesh data.
- The function of creating a project group is not supported on the desktop client.
② Toolbar
| Function | |
|---|---|
| Import Mesh/ Project or Open Project Group | Click |
| Point Cloud Data | You can edit project data and adjust the distance, align multiple projects and mesh point cloud. CautionIf you adjust the distance of a project file, the distance of other project files within the same project group and with the same scanning mode will also be updated accordingly. CautionIf you adjust the distance of a project file, the distance of other project files within the same project group and with the same scanning mode will also be updated accordingly. |
| Mesh Optimization | After meshing, you can edit the mesh data. |
| Measurement Tools | In the measurement interface, you can perform measurements, coordinate adjustments, and other operations. |
| Share | In the sharing interface, you can save the processed data locally or share the data to third-party software. |
③ Settings and Feedback
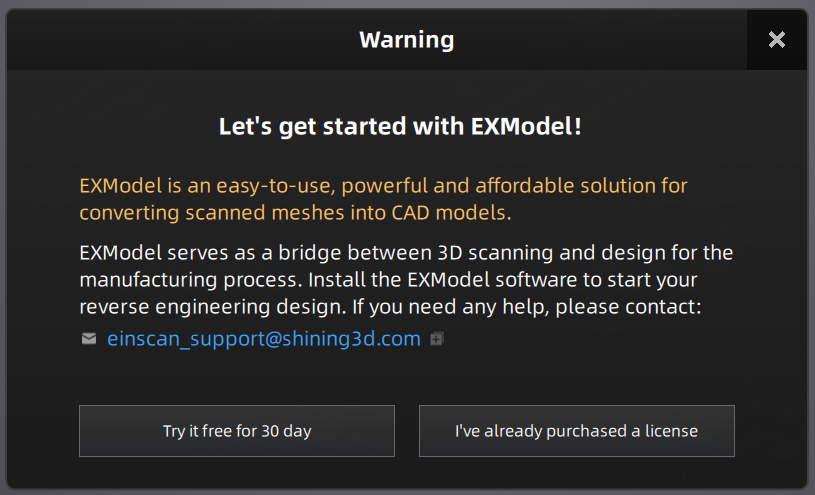
EXModel is an easy-to-use, powerful and affordable solution for converting scanned meshes into CAD models. EXModel serves as a bridge between 3D scanning and design for the manufacturing process.
Whether you click ![]() from the guide bar or click Export to EXModel to design in the post-processing interface, EXScan will ask you to download and install EXModel and activate it.
from the guide bar or click Export to EXModel to design in the post-processing interface, EXScan will ask you to download and install EXModel and activate it.
.
Supports selecting a language and modifying the default project file storage paths.
| Function | |
|---|---|
| About |
|
| System Diagnose | Check whether computer configuration meet the operating conditions. If it shows |
| Support |
|
| Function | |
|---|---|
| Reverse Engineering Service | By sending us the scanned project files and specific information, you can get our assistance in the reverse engineering. |
| My SHINING 3D Account | Click to enter the personal center. |
| Official Website | Click to visit the SHINING 3D official website for more products and information. |
| Join our EinScan Expert Facebook group to share and discuss with other EinScan users. |
④ View Window
To preview the model and check the scanned model.
Note
The information on system resource usage, including remaining memory, GPU, and CPU, is displayed in the lower-left corner of the screen.
⑤ Data Editing
Data editing tool bar provides various editing tools for data editing. For details, refer to data editing.
⑥ Mesh Data List
Display all mesh data files within the project group.
Note
- The software supports meshing multiple projects separately and mesh data will be save separately.
- Supports editing the mesh data.
- Supports hiding all the mesh data by one-click.
- The created features are displayed under the corresponding mesh.