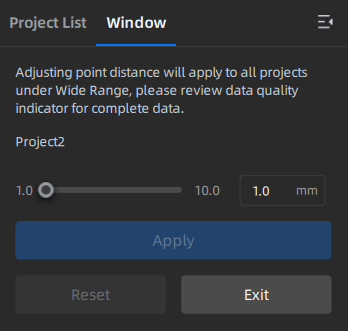
Adjust Point Distance
By adjusting the point distance, you can observe the scanning effect of the 3D model. Smaller point distances allow for more details. For models with less prominent features, increasing the point distance can help to reduce the file size.
Caution
If you adjust the distance of a project file, the distance of other project files within the same project group and with the same scanning mode will also be will be updated accordingly.
Steps
- Click Adjust Point Distance at the top of interface.

- Adjust the specific point distance value in the left window by sliding or entering a value.
- Click Apply to check the result.
- Click Exit to save the modified point distance and optimize the point clouds.
Note
- When adjusting the point distance, you can use the data quality indicator to assess the data quality of the model at different point distances. Blue indicates high-quality scanning data, while yellow indicates low-quality scanning data, indicating insufficient scanning.
- The more yellow there is, the higher the probability of data loss or abnormally display after adjusting the point distance.