Calibration
Calibration is a key step to ensure the accuracy and tracking of the device. It helps calibrate the system to improve scanning accuracy and data quality.
Access Calibration
You can choose from the following three methods to directly access the calibration interface.
- Tap
 on the home page.
 - Swipe down from the top of the screen to display the control center panel where you can tap Calibration.
- Tap Settings > My Libre > Calibration.
Caution
To ensure the performance, please calibrate the scanner at least every 14 days. If more than 14 days have passed since the last calibration, the calibration icon will be displayed in ![]() .
.
Calibration Mode
Calibration is divided into IR Mode Calibration and HD Mode Calibration; if you only use one of the scan modes, you can only perform the corresponding IR Mode Calibration or HD Mode Calibration and skip the other calibration mode.
Note
When performing IR Mode Calibration, the calibration distance is higher than that of HD Mode Calibration; the two calibration processes are roughly the same, and the following takes IR Mode Calibration as an example.
Steps
Note
Do not move the calibration board and scale bar during the calibration.
-
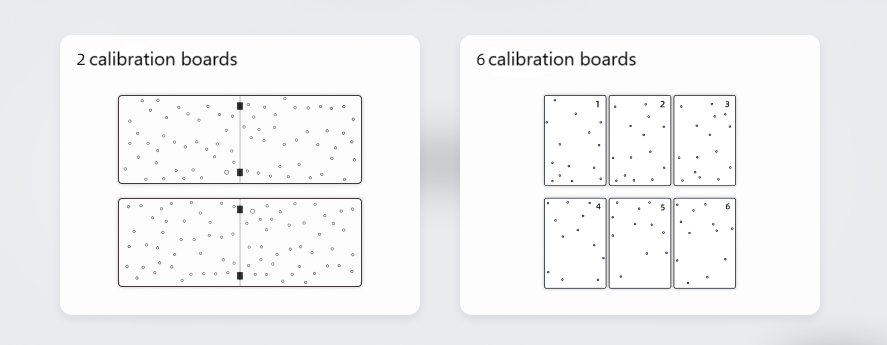
During your first entry into the calibration interface, please select the type of calibration boards.
-
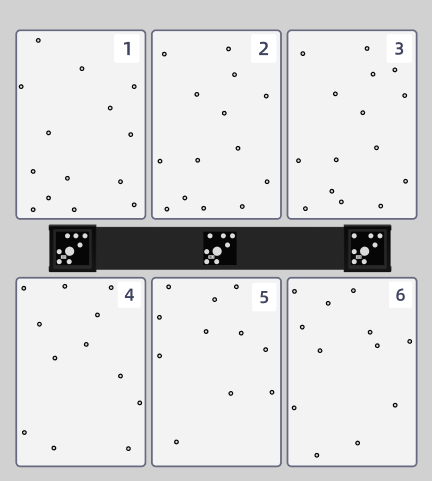
After taking out the calibration boards and scale bar, place them on a flat surface in the sequence indicated in the diagram below.
Col
Col

-
Ensure that the scale bar's serial number matches the scanner. Tap
 in the bottom right corner to perform calibration.
note
You can view the scale bar's serial number in Settings > My Libre or in the lower left corner of the calibration interface.
-
Tap
 to start calibration. During the calibration process, slowly move the scanner according to the 3D guide until it aligns with the target position.
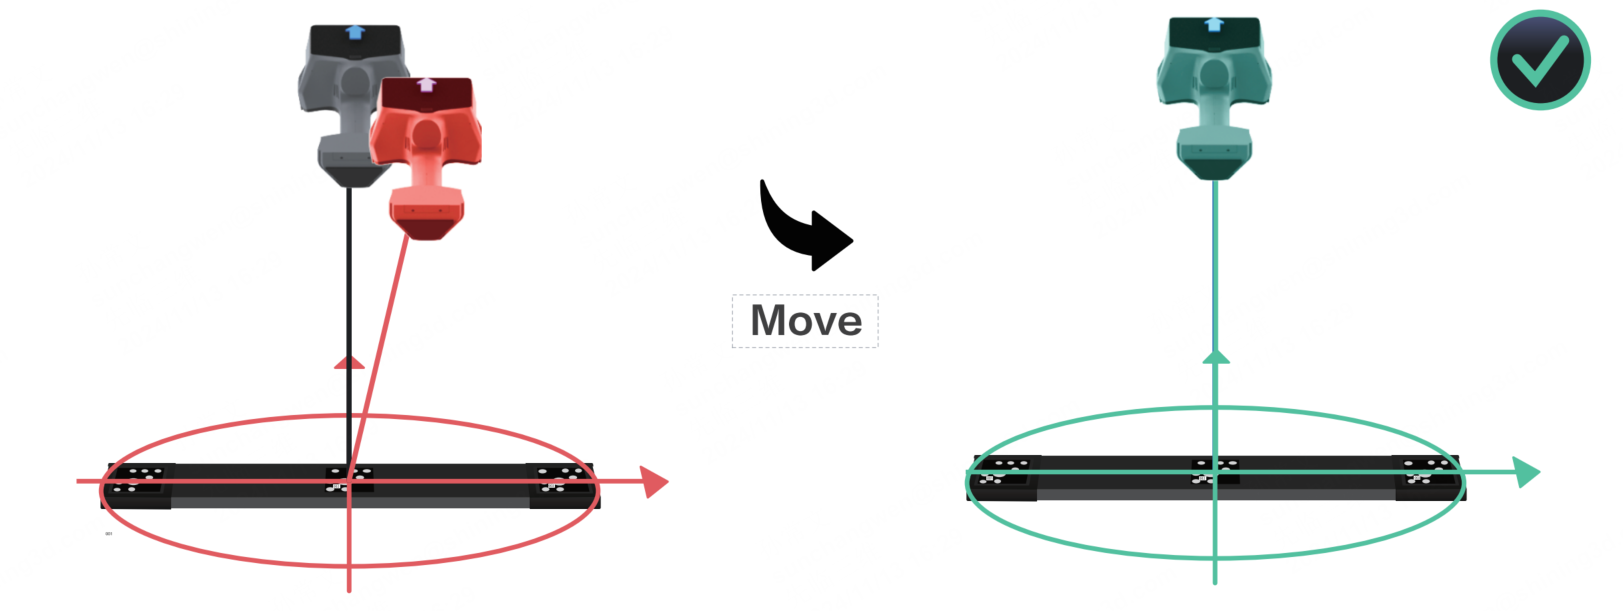
Caution
- Please avoid calibrating on a highly reflective floor.
- Ensure there are no other markers around the calibration environment.
-
After completing all calibration steps, if the calibration is successful, you can tap Next in the lower right corner of the screen to do HD Mode Calibration; or tap Exit in the lower left corner of the screen to do other operations.
Note
- Please calibrate again if the calibration fails.
- Please contact technical support if the calibration still fails after several attempts.
- After the calibration, please store the calibration boards properly in time for reuse.
Laser Plane Calibration
After completing the HD Mode Calibration, you may proceed to perform the Laser Plane Calibration to enhance the data quality in Laser HD Mode.
Note
The calibration steps differ between setups using two calibration boards and six calibration boards. Select the appropriate method based on your need.
Two Calibration Boards
Steps
- After completing the HD Mode Calibration, tap Calibrate Laser Plane to start.
- Follow the on-screen instructions to remove the scale bar and piece together the calibration boards.
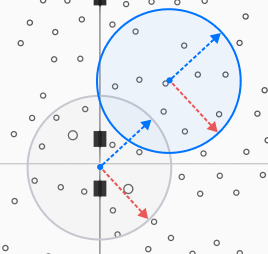
-
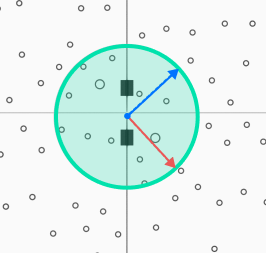
Adjust the scanner until the blue calibration ring aligns with the gray calibration ring. The rings will turn green upon successful alignment.
Col
Col
-
Slowly adjust the vertical distance between the scanner and the calibration boards to complete calibration at different heights.
-
After completing all calibration heights, tap Complete to exit if calibration succeeds; tap Retry to restart if calibration fails.
Note
Please contact technical support if the calibration still fails after several attempts.
Six Calibration Boards
Steps
- After completing the HD Mode Calibration, tap Calibrate Laser Plane to start.
-
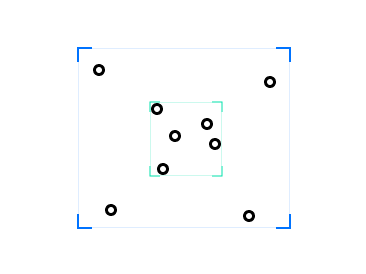
Place 9 markers in the size of 6 mm to a non-reflective, solid-color light surface as prompted.
-
Tap Ready to begin calibration.
- Slowly adjust the vertical distance between the scanner and the surface to complete calibration at different heights.
-
Tap Complete to exit if calibration succeeds; tap Retry to restart if calibration fails.
Note
Please contact technical support if the calibration still fails after several attempts.
White Balance Calibration
When the texture camera is turned on, it is recommended that you complete the white balance calibration after setting the proper texture brightness. For more details, refer to Brightness.