Interface
After completing the setup, the home page of the scanner will be displayed. Here, you can view all the data stored in the scanner and the current status of the device.
Home Page Overview
| Modules | Description |
|---|---|
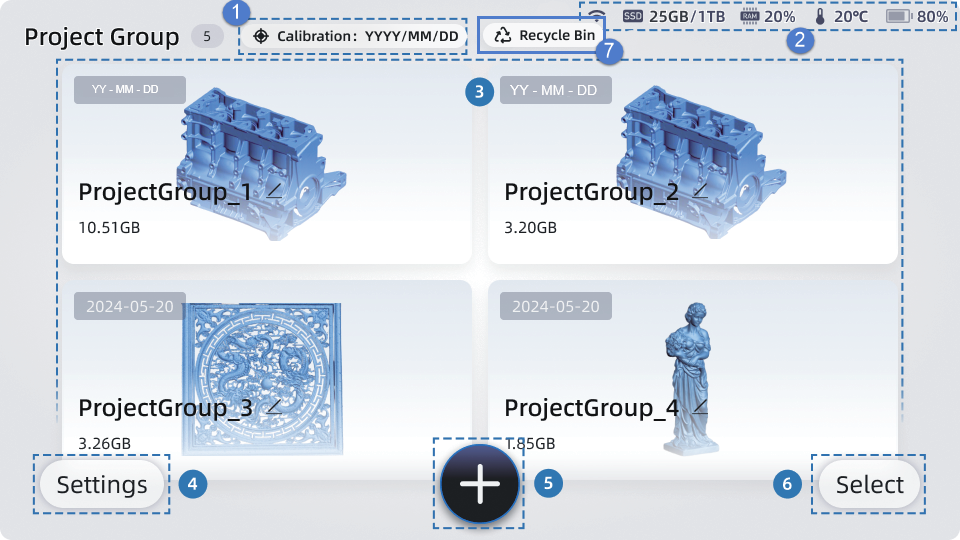
| Calibration | Display the calibration date. |
| Scanner Status | Display the current scanner information, including network, temperature, battery usage, and more. For more details, refer to icon guide. |
| Project Group List | Display the number of project group. |
| Settings | The settings allows you to perform calibration, network settings, and general device settings. |
| Create New Project Group | Create a new project group and a new project will be created within this project group. |
| Select Projects for Editing | Select to delete or export projects. |
| Recycle Bin | The Recycle Bin contains deleted project groups, projects, and HD images. |
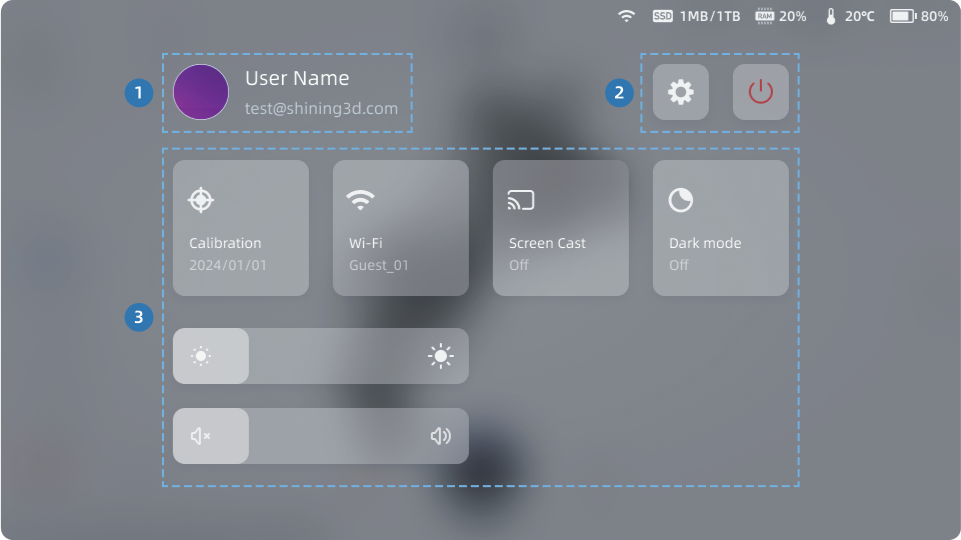
Swipe down from the top of the screen to display the control center panel. Here, you can quickly access and adjust common settings.
| Modules | Description |
|---|---|
| Your SHINING 3D Account | Display your account. |
| Settings / Power | You can quickly access the settings. |
| Quick Settings | You can adjust common settings, including calibration, Wi-Fi, screen cast and dark mode. |
Settings
Tap Settings > My Libre to view related device information, device serial number, scale bar SN, the last calibration date and authentication information.
Tap Settings > Network Settings to connect Wi-Fi. For detailed instructions, please refer to connect to Wi-Fi.
Tap Settings > Hotspot to enable it. The scanner will create a Wi-Fi network that other devices can join to share its internet connection.
Note
Your hotspot comes with a default password. For better security, please change it.
- Streaming devices can connect to EinScan Libre's hotspot to receive screen casting.
- PCs with EXScan Libre can join the hotspot to do data transfer.
Tap Settings > General Settings to set the software language, time zone, auto sleep, cast, volume and dark mode.
- Language: tap > to select a preferred display language.
- Time Zone: the time zone will be automatically set after network connected. To manually set the time zone, tap >, find the most appropriate city and tap Confirm.
-
Auto Sleep: when the device is not actively running or being used, it will enter the sleep mode. In sleep mode, the screen turns off and the scanner stops projecting light. To wake up the device, simply press the power button.
-
Cast: project the scanner screen onto an external screen.
Steps:
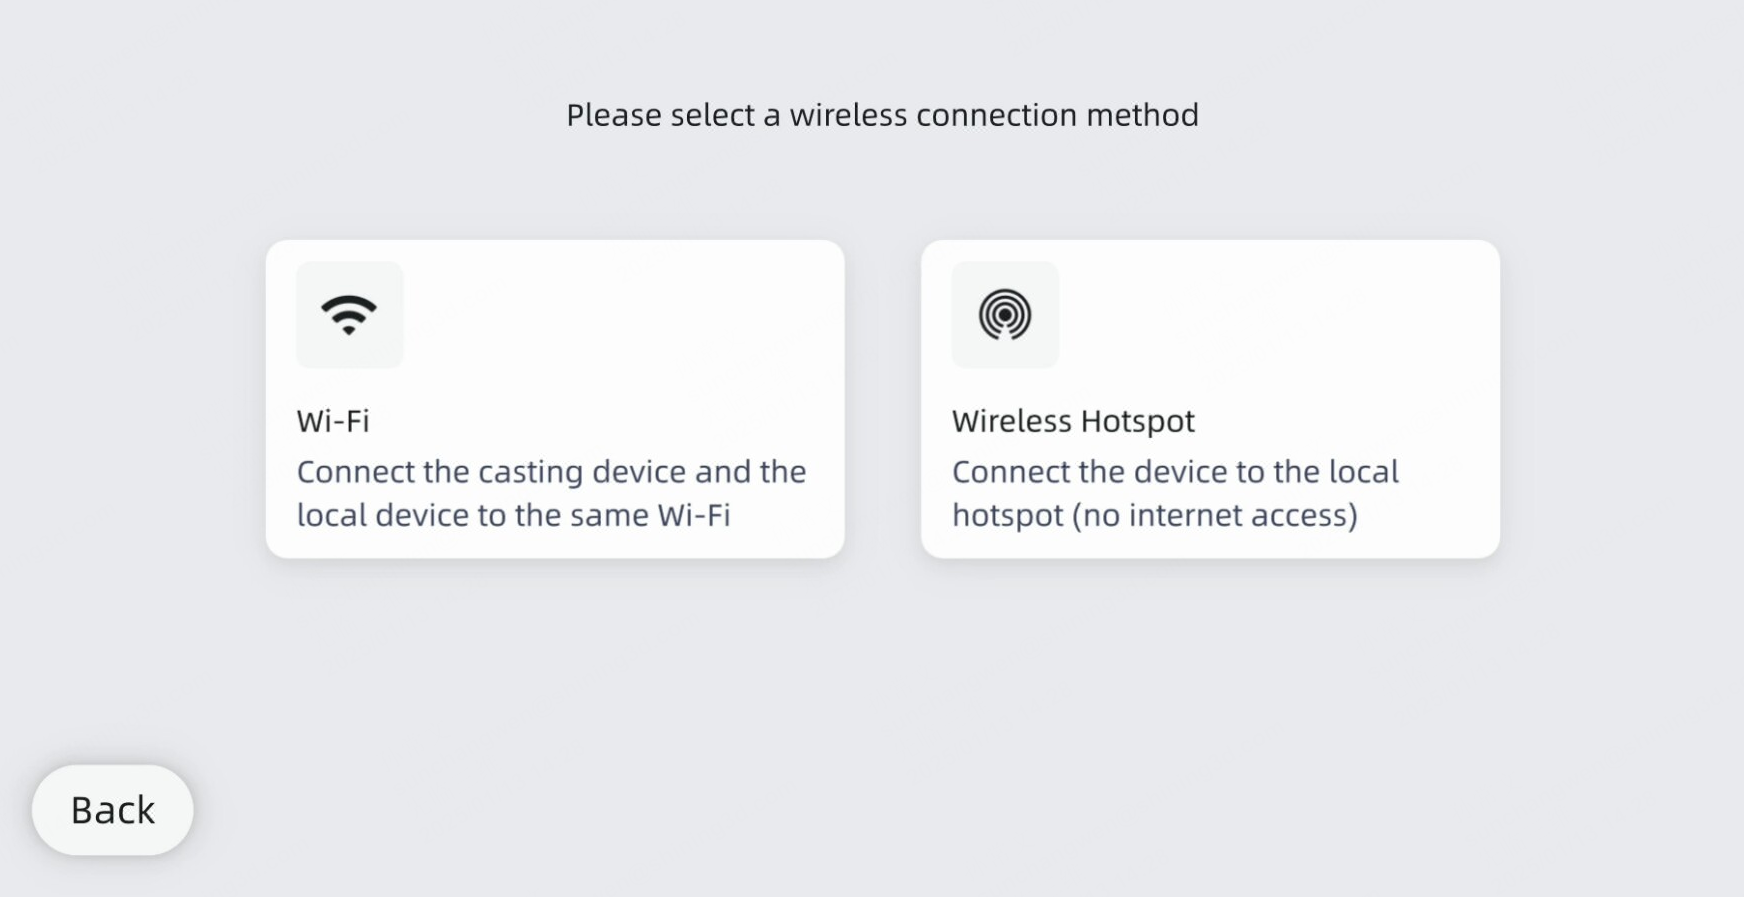
- Select your screen casting method. Both Wi-Fi and Wireless Hotspot options are supported.
-
Wi-Fi: connect the casting device and the local device to the same Wi-Fi.
-
Wireless Hotspot: connect the device to the local hotspot (no internet access).
Caution
-
If you choose to cast via Wi-Fi and it's not enabled, a network connection window will pop up automatically. If you choose to cast via hotspot and it's not enabled, your device's hotspot will turn on automatically .
-
Make sure the scanner and the target device are connected to the same local network.
-
To avoid connection issues and ensure multiple devices can cast screens simultaneously, connect all devices to a stable 5 GHz network.
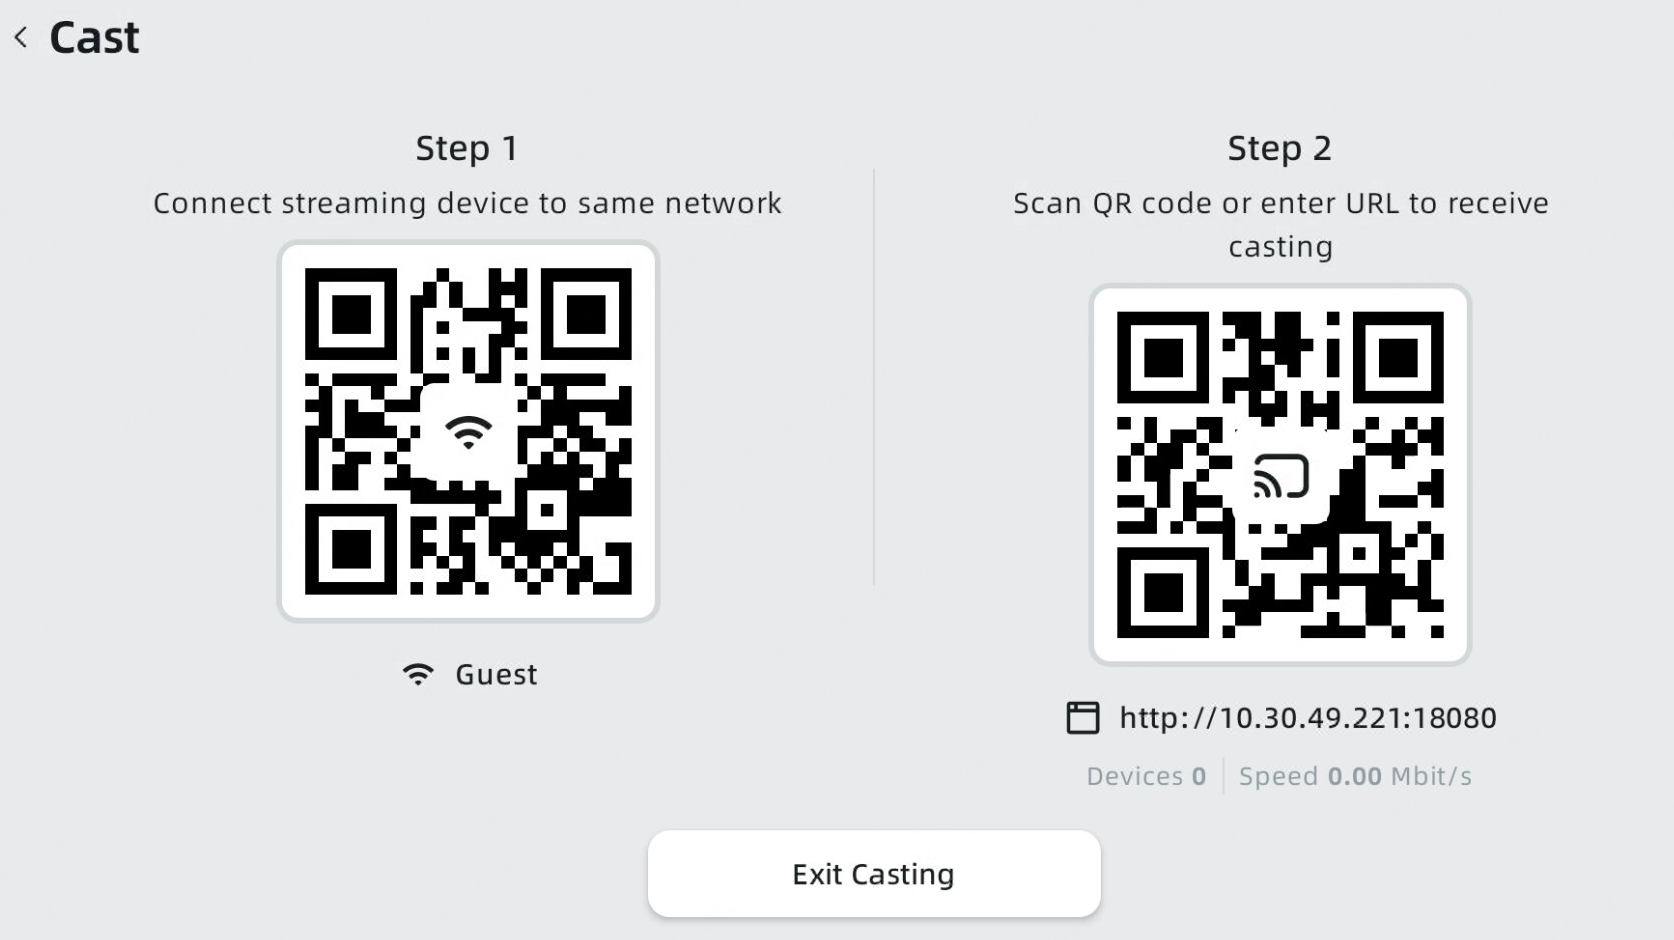
- Tap Start Screen Casting to start.
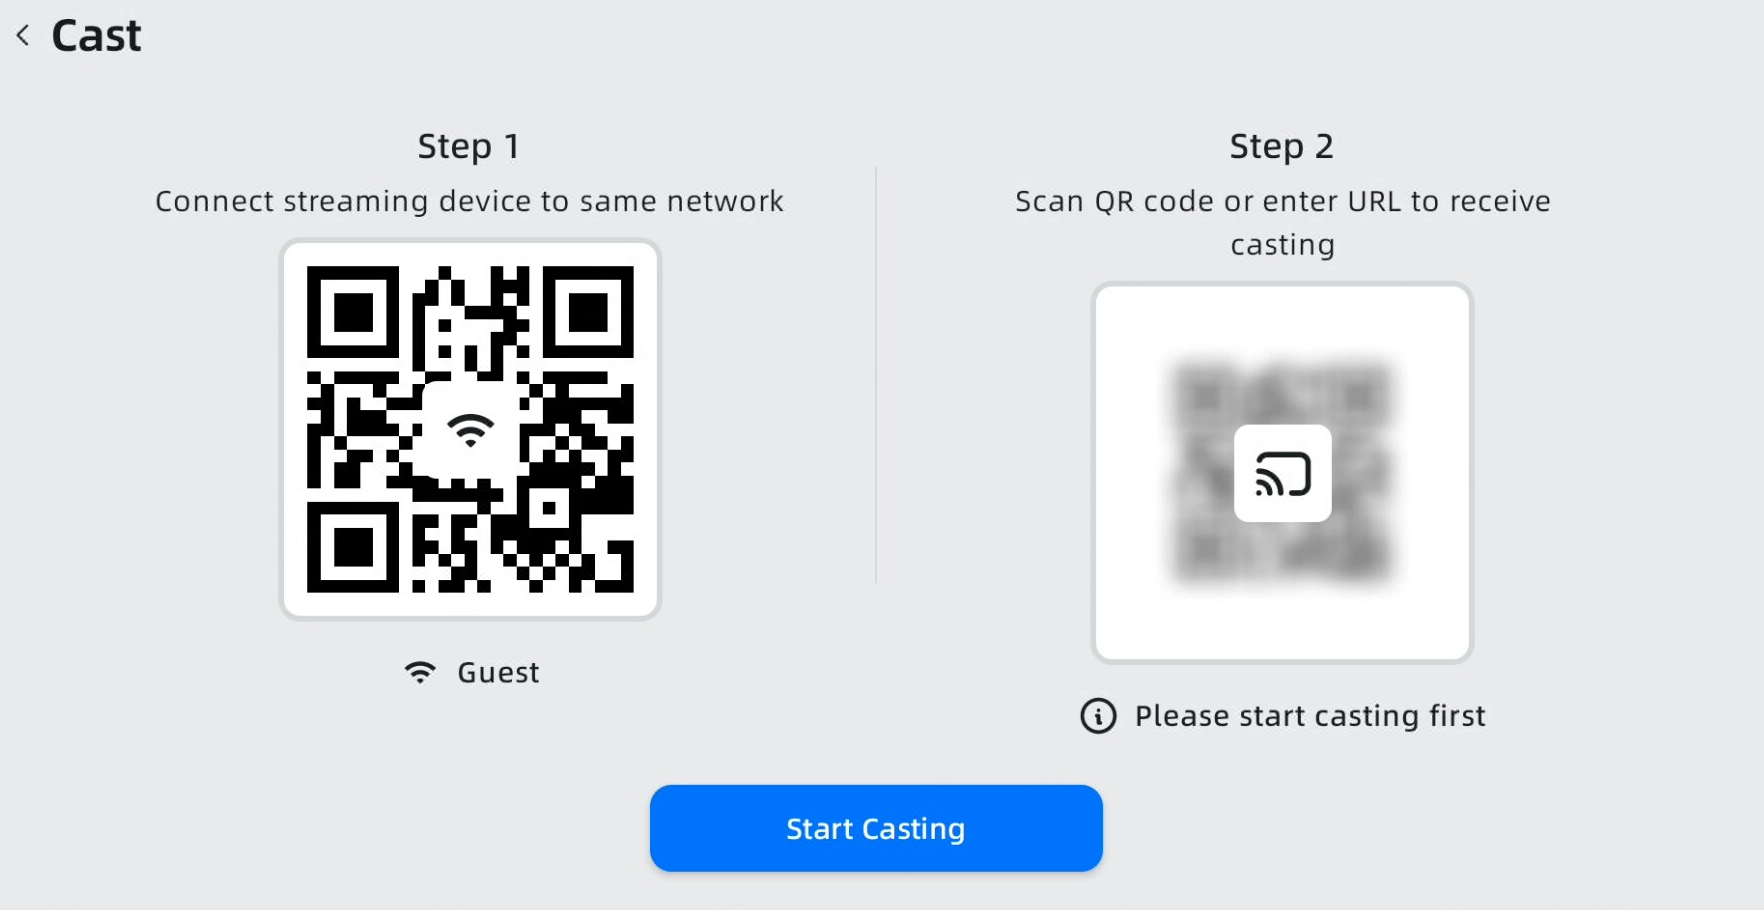
- Scan the QR code or enter the URL in your browser to view screen casting.
-
Volume: adjusting the volume of the scanner.
-
Dark Mode: when enabled, it switches to a dark UI for low ambient light environment use.
-
High-efficiency Mode: when enabled, it can effectively improve the speed of mesh and mesh optimization for large point distances. If the point distance is changed from large to small in a project, the effect may be worse. It is recommended to create a new project and rescan with a small point distance.
-
Lock Screen Password: you can set up a screen lock to help secure your device from unauthorized access. Each time you turn on your device or wake up the screen, you'll be asked to unlock your device with a password. If you have forgotten your password, please contact Technical Support for assistance.
- Tap User Manual to show the QR code and scan it by your phone to view the user manual.
- You can enable or disable Scan Wizard. When you enable it, after selecting a scanning mode, you can perform related operations according to the wizard to obtain better scanning results; when you disable it, the wizard will not appear before entering the scanning process next time.
- Check support contact information.
Tap Settings > Storage.
- Storage: displays the current storage used and available on the device.
-
Cache: displays the storage occupied by the cache. Tap Clear will permanently delete cache. Clearing the cache will not lead to scanner abnormal.
Cache Type Cleaned Data Range Logs Keep only the logs for the current day and delete other logs. Images from failed calibration All -
Recycle Bin: displays the storage occupied by deleted content. Files in the Recycle Bin will be permanently deleted after staying for more than 30 days and cannot be recovered. Tap Clear All to empty the Recycle Bin and free up storage space.
Tap Settings > Factory Default.
- Restore Scan Settings: all scan settings and project parameters will be restored to default.
- Factory Default: the scanner will display an initialization progress bar, once it is complete, you will be taken back to the startup interface. All project group files will not be deleted only if you check Delete all project group.
Caution
- All settings can be restored to the initial settings, please proceed with caution.
- If you check Delete all project group, all project files will be deleted and cannot be recovered. Please proceed with caution.
- The device must be unlocked with the screen lock password before performing a factory default.
Tap Settings > About.
- You can view related scanner information, software version and firmware version, and check for updates if the scanner is connected to internet, etc.
- You can tap Privacy Policy or User Experience to view the detailed information.
- Software update is to optimize software performance, add new functions or bug fixing. Please save your projects before updating.
Note
- If the scanner is not connected to the internet and the update fails, you can update the software using EXScan Libre on your PC.
- When prompted with New, it indicates that there is a new version waiting to be updated. You can tap Update Log to view the update instructions, and then tap Update to update the software.
Caution
If you are updating the software on the scanner, please ensure that it is successfully connected to the network and battery power (battery level > 20%).

Icon Guide
In the upper-right corner of the screen, you can view the scanner's current status.
| Icon | Name | Description |
|---|---|---|
| USB flash drive detected | ||
| SSD usage percentage | The total storage capacity of 1024 GB consists of system-reserved space, project file storage, and available free space. If the remaining space is less than 10 GB, it will be displayed in red, suggesting to clean up local project files or clear the cache in the settings. | |
| RAM usage percentage | If the usage is greater than 95%, it will be displayed in red, indicating that processing requires a significant amount of memory. It is recommended to create a new project for scanning. | |
| Display scanner temperature | Red indicates high temperature, it is recommended to pause scanning to cool down; For accuracy measurement, it is suggested to heat the scanner to 31℃ ~ 33℃ before calibration and scanning. | |
| Battery charge level | Red indicates battery level is ≤ 20%, it is recommended to charge or replace the battery. | |
| Power-saving mode | When the CPU temperature is too high, it will enter power-saving mode. Clicking on the icon can exit the mode. The scanner at reduced frame rate and processing speed. | |
| Calibrate | Red indicates that calibration is required. | |
| Wi-Fi connection status | When the Wi-Fi connection is unstable, it can impact wireless transmission speed. |