Preview and Settings
After powering on, you can enter the scan interface.
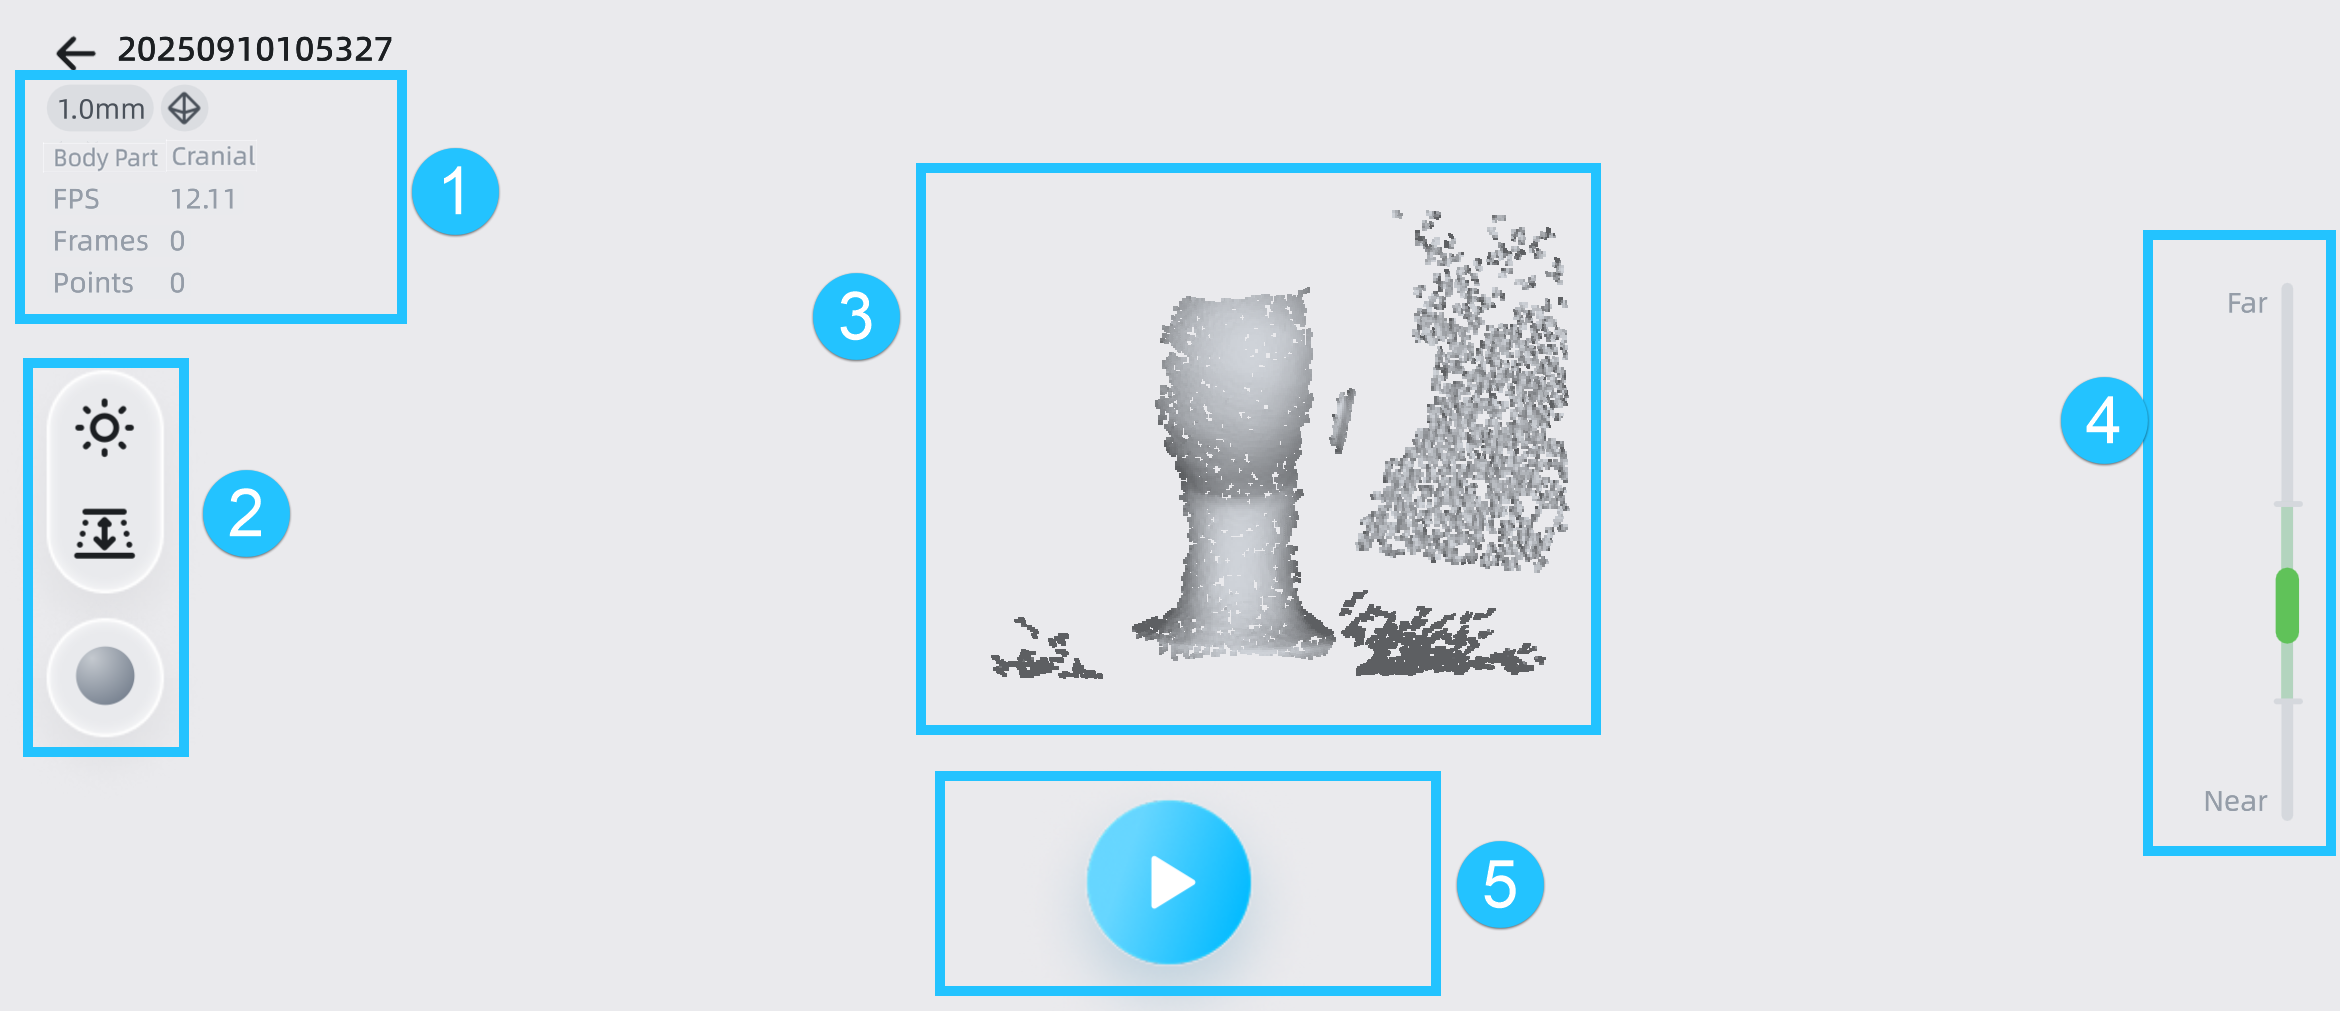
Interface Overview
Note
For an introduction to the top status bar, please see Status Bar.
① Project Information
Displays the scan type, data information, including fps, frames, points, markers (Marker Alignment or Global Markers), and parameter settings of the current project.
Note
You can long press the icon to display icon descriptions.
| Icon Meaning | |||
|---|---|---|---|
| IR Infrared Mode |
WL White Light Mode |
mm Resolution |
Acquire Texture |
Feature Alignment |
Texture Alignment |
Marker Alignment |
Global Markers Alignment |
② Scan Settings
You can set the scanning settings for the current scanning project in the scan interface.
Camera View
Note
- The texture camera view is only displayed when Acquire Texture is enabled.
- After starting the scan, you can adjust the camera brightness again based on the reality.
The red dots in the camera view indicate overexposed areas. To improve scanning quality, it is recommended that you lower down the camera brightness when there are large overexposed areas, or increase the camera brightness when the camera view is too dark.
| Function | |
|---|---|
When enabled, the scanner can adjust the brightness automatically according to the actual situation. Note NoteThis function is unavailable when scanning global markers or using markers alignment mode. |
Brightness adjustment methods support automatic exposure or manual adjustment:
- Automatic exposure
 : The device automatically adjusts exposure based on the scanning environment; if the automatic exposure effect is not good, you can manually adjust the brightness.
 - Manual adjustment: Tap the upper or lower part of the camera view or use the slider on the left side of the camera view to manually adjust the brightness.
Col
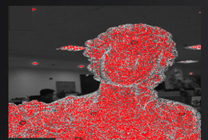
Brightness is too high
Col
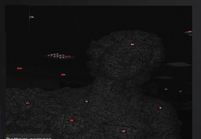
Brightness is too low
Col
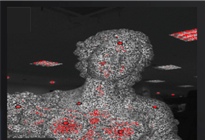
Brightness is proper
To enhance scanning quality and texture effects, it is recommended that you adjust brightness based on the camera view before scanning.
| Function | |
|---|---|
| When enabled, the scanner can adjust the brightness automatically according to the actual situation. | |
| Enable it when the environment light is too dark; then manually adjust the brightness of the LED supplement light. |
- Automatic exposure : The device automatically adjusts exposure based on the scanning environment; if the automatic exposure effect is not good, you can manually adjust the brightness.
- Manual adjustment: Tap the upper or lower part of the camera view or use the slider on the left side of the camera view to manually adjust the brightness.
Data Display Mode
Tap ![]() to expand the list, and you can choose a data display mode:
to expand the list, and you can choose a data display mode:
-
 Data Quality Indicator: Enabled by default for non-texture scanning. When enabled, it will differentiate scan quality in colors: blue represents high-quality scanned data and yellow represents insufficient scanned data that requires further scanning.
 -
 Texture Display: Enabled by default when you choose Acquire Texture.
Note
You can enable only one of these two display modes; ![]() indicates that both modes are disabled.
indicates that both modes are disabled.
Working Distance
Tap the ![]() button to enable the working distance adjustment function. You can adjust the working distance using the arc slider based on the distance value prompt. The scanner scans only within the set distance. This function can effectively filter out unnecessary noise data.
button to enable the working distance adjustment function. You can adjust the working distance using the arc slider based on the distance value prompt. The scanner scans only within the set distance. This function can effectively filter out unnecessary noise data.
③ Model Preview
Displays the pre-scanning effect of the model.
⑤ Distance Indicator
You can adjust the working distance based on the color indication of the distance bar and interface prompts during scanning.
- Green indicates that the distance is proper.
- Red indicates that the distance is too near.
- Blue indicates that the distance is too far.
- Bluish green indicates that the distance is close or far away.
⑥ Function Buttons
| Function | Description | Function | Description |
|---|---|---|---|
| Tap to start scanning. | Tap to pause scanning. | ||
| Tap to finish scanning. | Tap to delete current scan data. |