Scan Preview
After powering on, you can enter the scan interface.
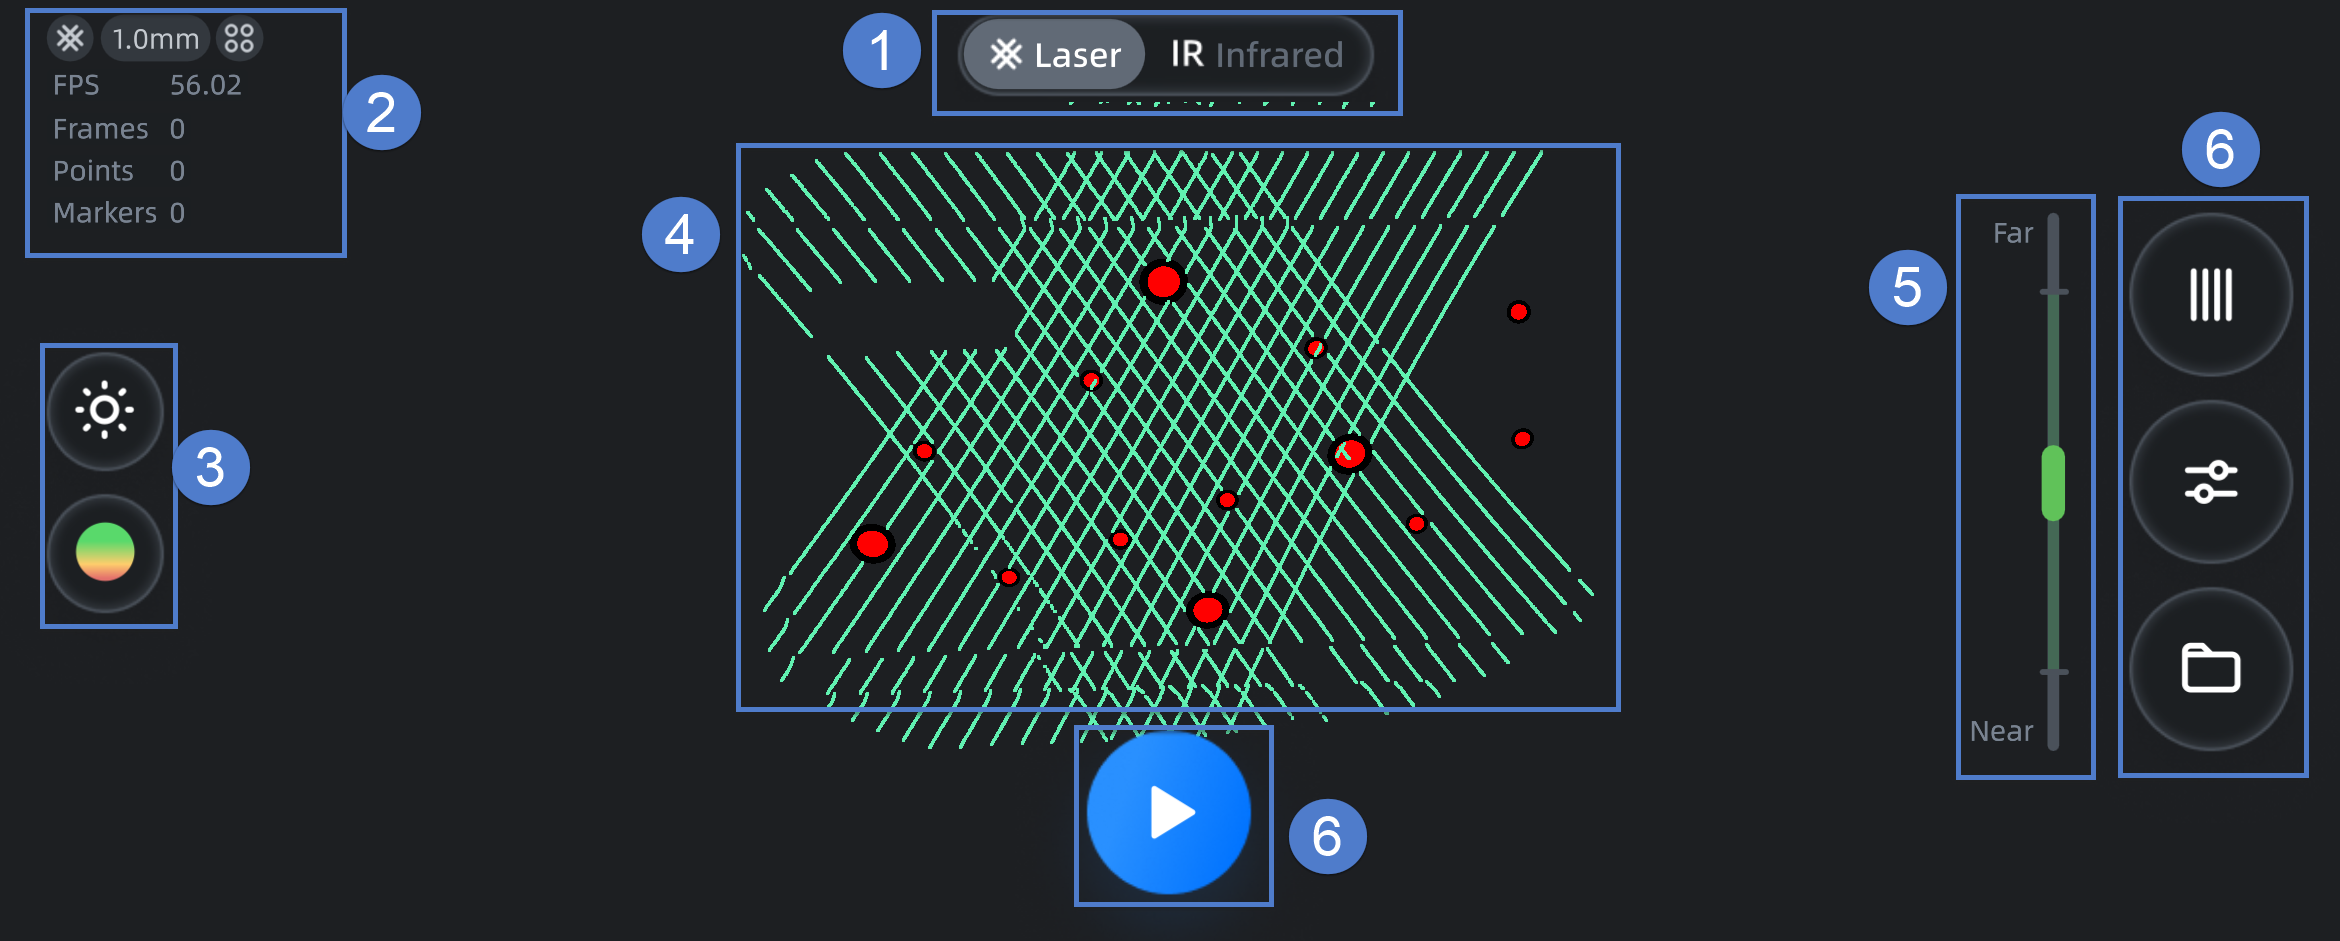
Interface Overview
Note
For an introduction to the top status bar, please see Status Bar.
① Scan Mode
Tap the button to switch the scan mode of the current project:
 : Laser Scan Mode (default).
 : IR Scan Mode.
② Project Information
Displays the data information, including fps, frames, points, markers (Marker Alignment or Global Markers), and parameter settings of the current project.
Note
You can adjust the project parameters by tapping the ![]() Advanced Settings button on the right; after setting the parameters, the corresponding icon will be displayed in the upper left corner of the project information.
Advanced Settings button on the right; after setting the parameters, the corresponding icon will be displayed in the upper left corner of the project information.
| Icon Meaning | |||
|---|---|---|---|
Object Scan Mode |
Portrait Scan Mode |
Acquire Texture |
|
Feature Alignment |
Texture Alignment |
Marker Alignment |
Global Markers Alignment |
③ Scan Settings
Set  camera view,
  scanning distance (also known as DOF),
  remove base,
 ![]() data quality indicator and
data quality indicator and ![]() texture display. For details, please see Scan Settings.
texture display. For details, please see Scan Settings.
④ Model Preview
Displays the pre-scanning effect of the model.
⑤ Distance Indicator
You can adjust the scanning distance based on the color indication of the distance bar and interface prompts during scanning.
- Red indicates that the distance is too near.
- Blue indicates that the distance is too far.
- Bluish green indicates that the distance is close or far away.
⑥ Function Buttons
| Function | Description |
|---|---|
| Tap to enter Advanced Settings. | |
| Tap to enter the File List. | |
| Tap to Start Scanning. | |
| Tap to create a new project group. |
Note
After scanning and returning to the scan interface, ![]() will appear in the upper right corner of the interface.
will appear in the upper right corner of the interface.