File List
On the right side of the Scan interface, tap the ![]() button to enter the
button to enter the ![]() Project Group interface.
Project Group interface.
Interface Overview
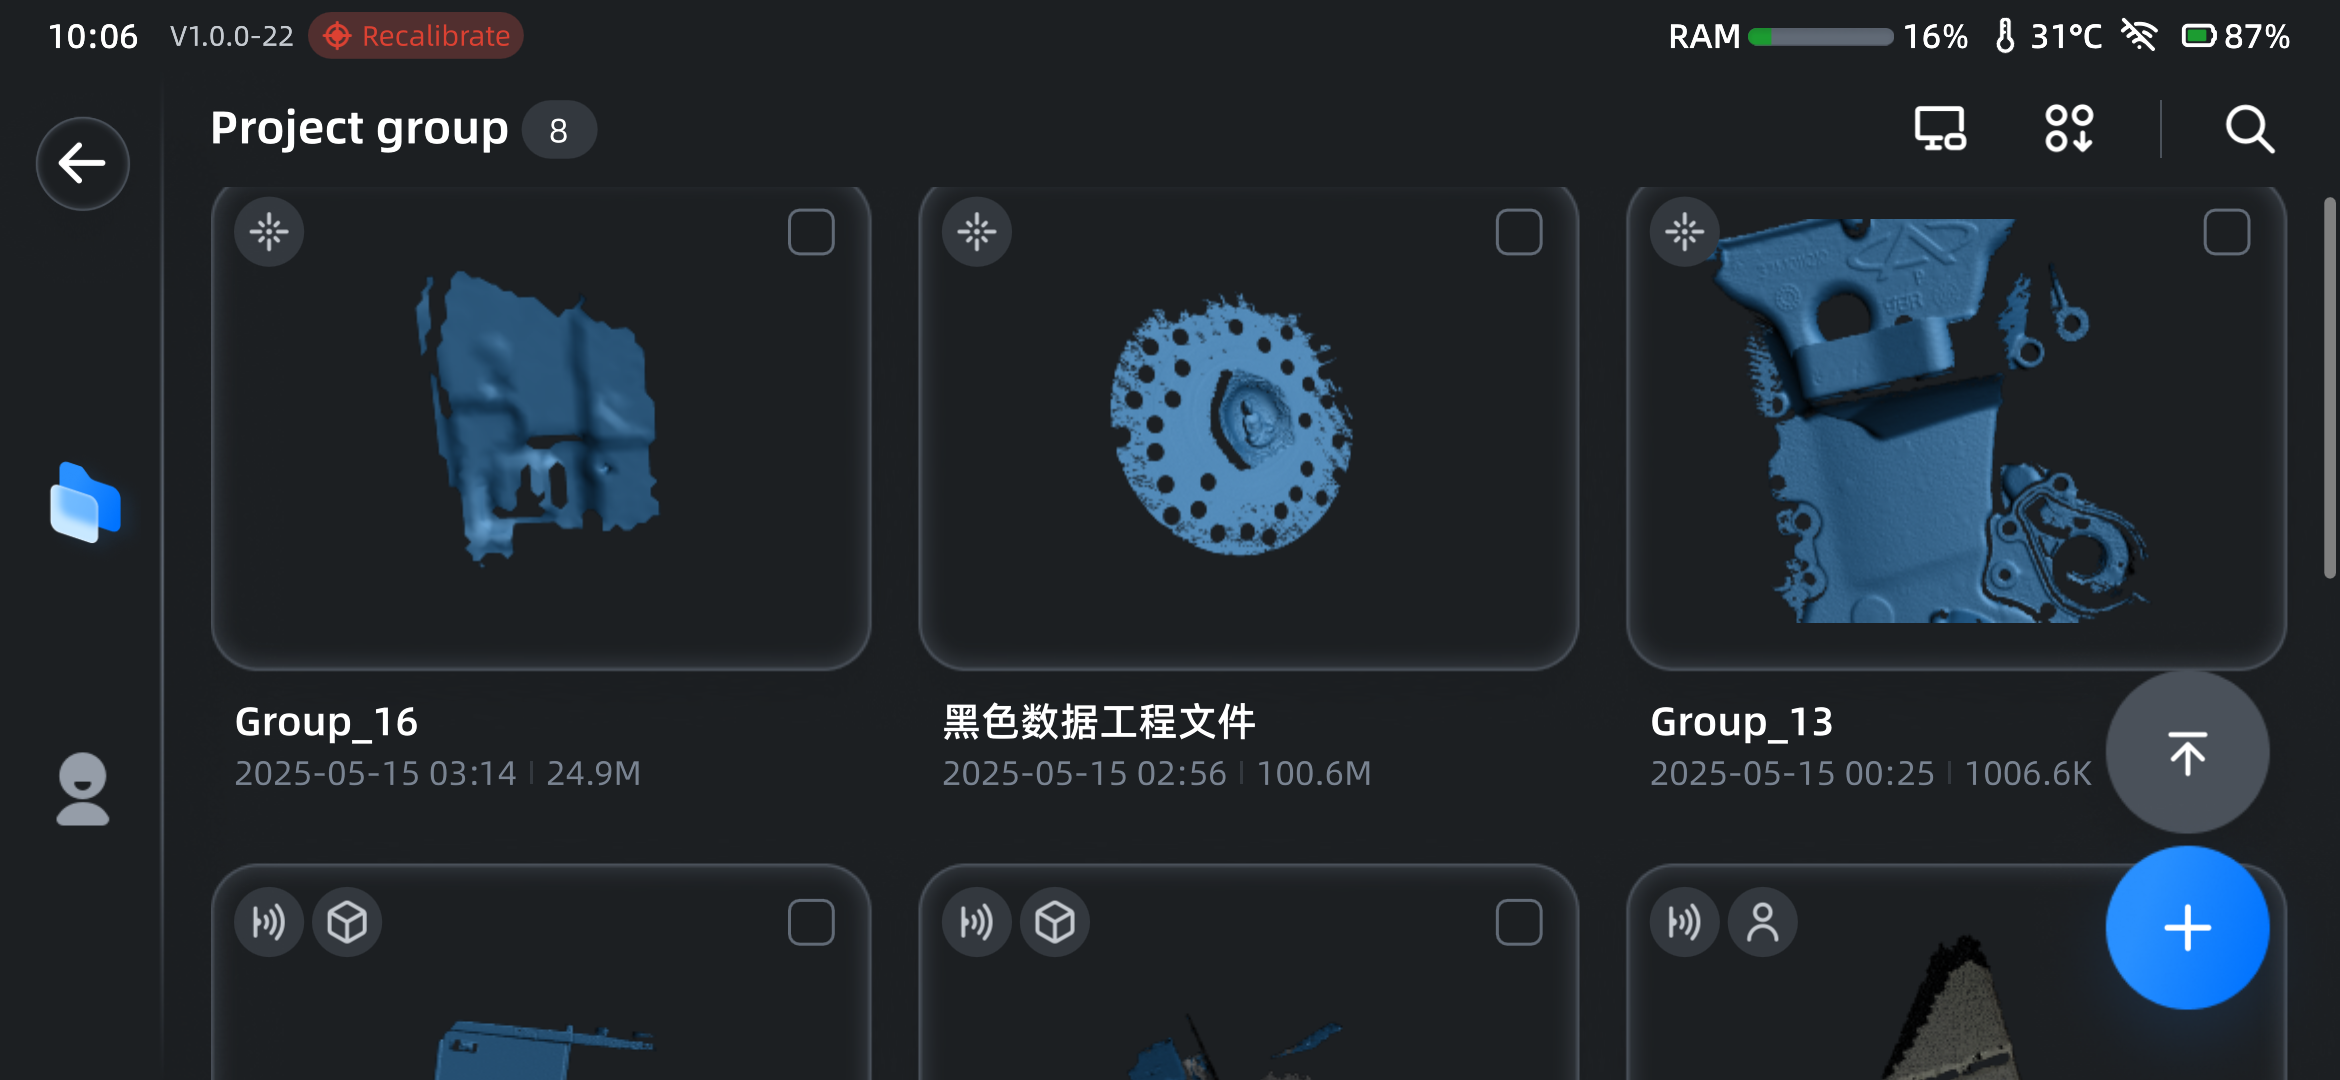
Left Navigation Bar
| Function | |
|---|---|
| Tap to return to the Scan interface. | |
| Tap to return to the Project Group interface. | |
| Tap to enter the User Center interface. |
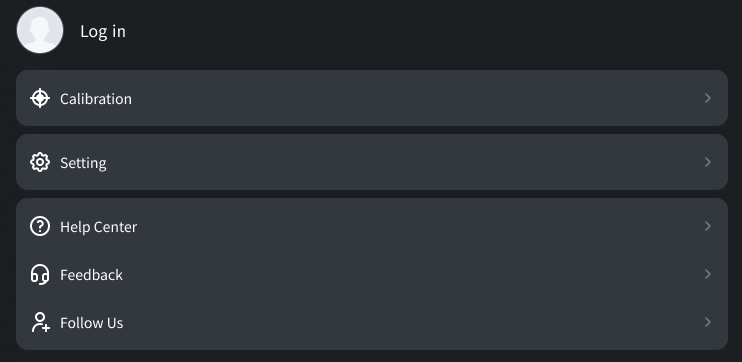
User Center
| Function | |
|---|---|
| Tap to enter the login interface. | |
| Tap to enter the Settings > Calibration interface. | |
 |
Tap to enter the Settings interface. |
| Tap to enter the Help Center, where you can view beginner tutorials and scan a QR code to access the user manual. | |
| Tap to enter the Feedback, where you can report issues via the e-mail or support website. | |
| Tap to view related QR codes and follow us. |
Other Interface Buttons
| Function | |
|---|---|
 |
Tap to pop up the search window. Note NoteIf there are no files in the current project group list, this function button will not be visible. |
| Tap to enter the connection interface; for specific operation instructions, see Device Connection. | |
| Tap to enter the global markers file interface, where you can delete or rename these files. | |
| After scrolling down the project group list, this button will appear on the right side of the interface; tap to return to the top of the interface. | |
| After tapping a project group card to enter the project interface, this button will appear on the right side of the interface; tap it to return to the project group list from the project interface. | |
| Rename | After selecting a project group or project, tap to pop up the rename window to rename the project. |
| Delete | After selecting a project group or project, tap to pop up the delete confirmation window; tap Confirm to delete. |
| Cancel | After selecting a project group or project, tap to cancel the selection. |
Card List
All saved model files are displayed in the format of file card, which are sorted by file update time in descending order.
Note
- Tap the project group card to enter the project interface.
- Tap the project card to enter the post-processing process.
Col
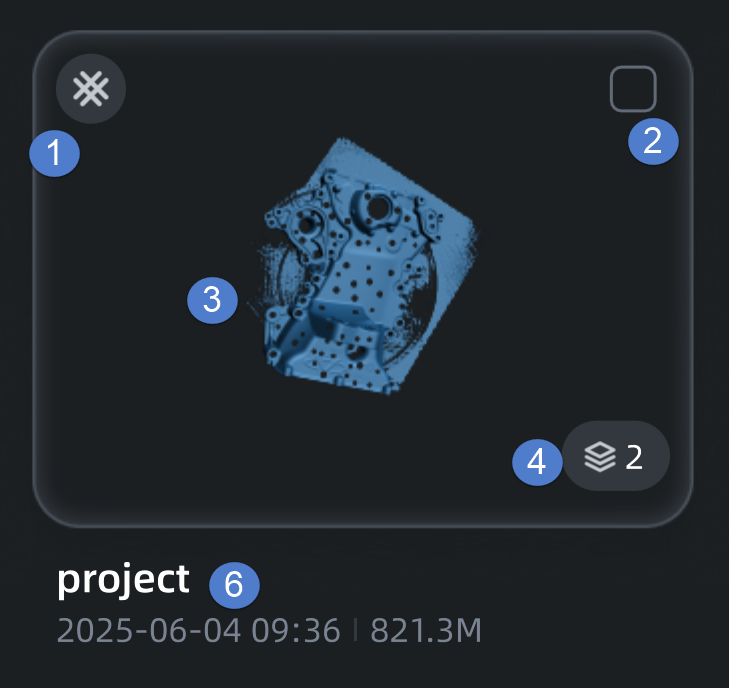
Project Group Card
Col
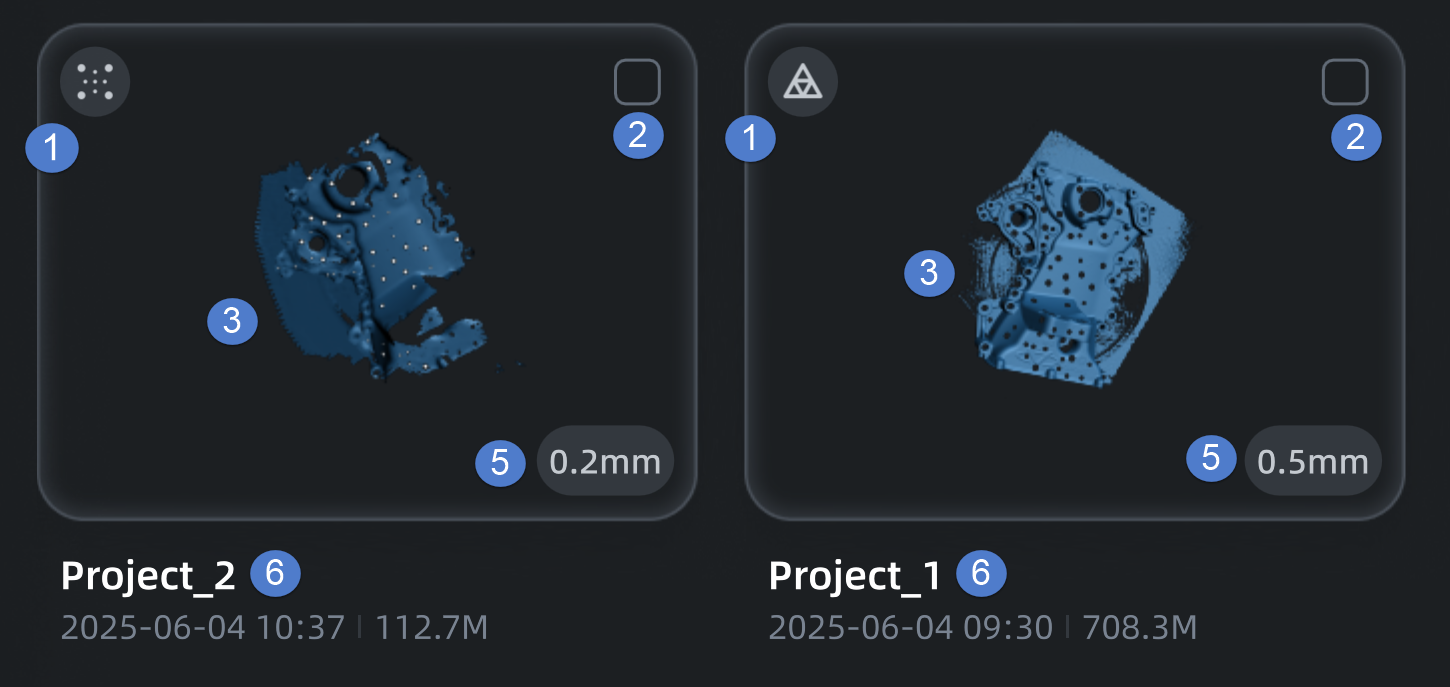
Project Card
 : Indicates that laser scan mode was used to scan this model.
 : Indicates that IR scan mode was used to scan this model.
 : Indicates that object scan mode was used to scan this model.
 : Indicates that portrait scan mode was used to scan this model.
 : Indicates that the model file contains point cloud data.
 : Indicates that the model file contains mesh data.
Check  or long press the card to select it for operations such as copying, deleting, or renaming.
Displays a thumbnail of the model; point cloud models with textures and mesh models with texture mapping will display as colored models, while other models will display in blue.
Note
If the file is corrupted, it will display as ![]() ; tapping this button will pop up a delete window prompt, and tapping Confirm will delete the file.
; tapping this button will pop up a delete window prompt, and tapping Confirm will delete the file.
Displays the number of projects in this project group.
Displays the point distance of the project.
Displays the name, last update time, and file size of the model file.