Device Calibration
With calibration, the scanner parameters are recalculated, which not only ensures the accuracy of the scanner, but also improves the quality of scanning. Thus, it is recommended to calibrate the device before each use.
Calibration is required under the following conditions:
-
When the scanner is used for the first time or there are more than 7 days since last calibration.
-
The scanner was severely shaken or shocked, such as shocked during transportation.
-
Severe accuracy reduction, such as frequent errors in alignment or unrecognized markers.
-
Incomplete data is acquired during the scanning or serious deterioration of the quality of scanned data.
Note
If the current device has not been calibrated for more than 14 days, a yellow exclamation mark will appear next to the calibration step button in the navigation bar. If it has been more than 20 days without calibration, a pop-up window will appear on this interface with the option to Calibrate now or set a reminder for 7 days later.
Warning
-
The calibration board is matched to the device. Doing the calibration with an incorrect calibration board will fail to generate good scan data or optimum accuracy.
-
Always make sure that both sides of the calibration board are clean and free of scratches.
-
Do not place heavy objects or sundries on the calibration board.
-
Keep the calibration board away from corrosives, metals and sharp objects to avoid corrosion or damage.
-
It is not recommended to wipe the calibration board. When cleaning the board becomes very necessary, gently wipe it with a piece of a clean damp cloth. Do not use a cloth with chemicals or alcohols to wipe the calibration board.
-
After using the calibration board, put it safely in a box or flannel bag.
Specific calibration steps are shown as follows:
During the calibration process, please follow the software guide to place the calibration board in five different orientations and capture five images at different heights of the device.
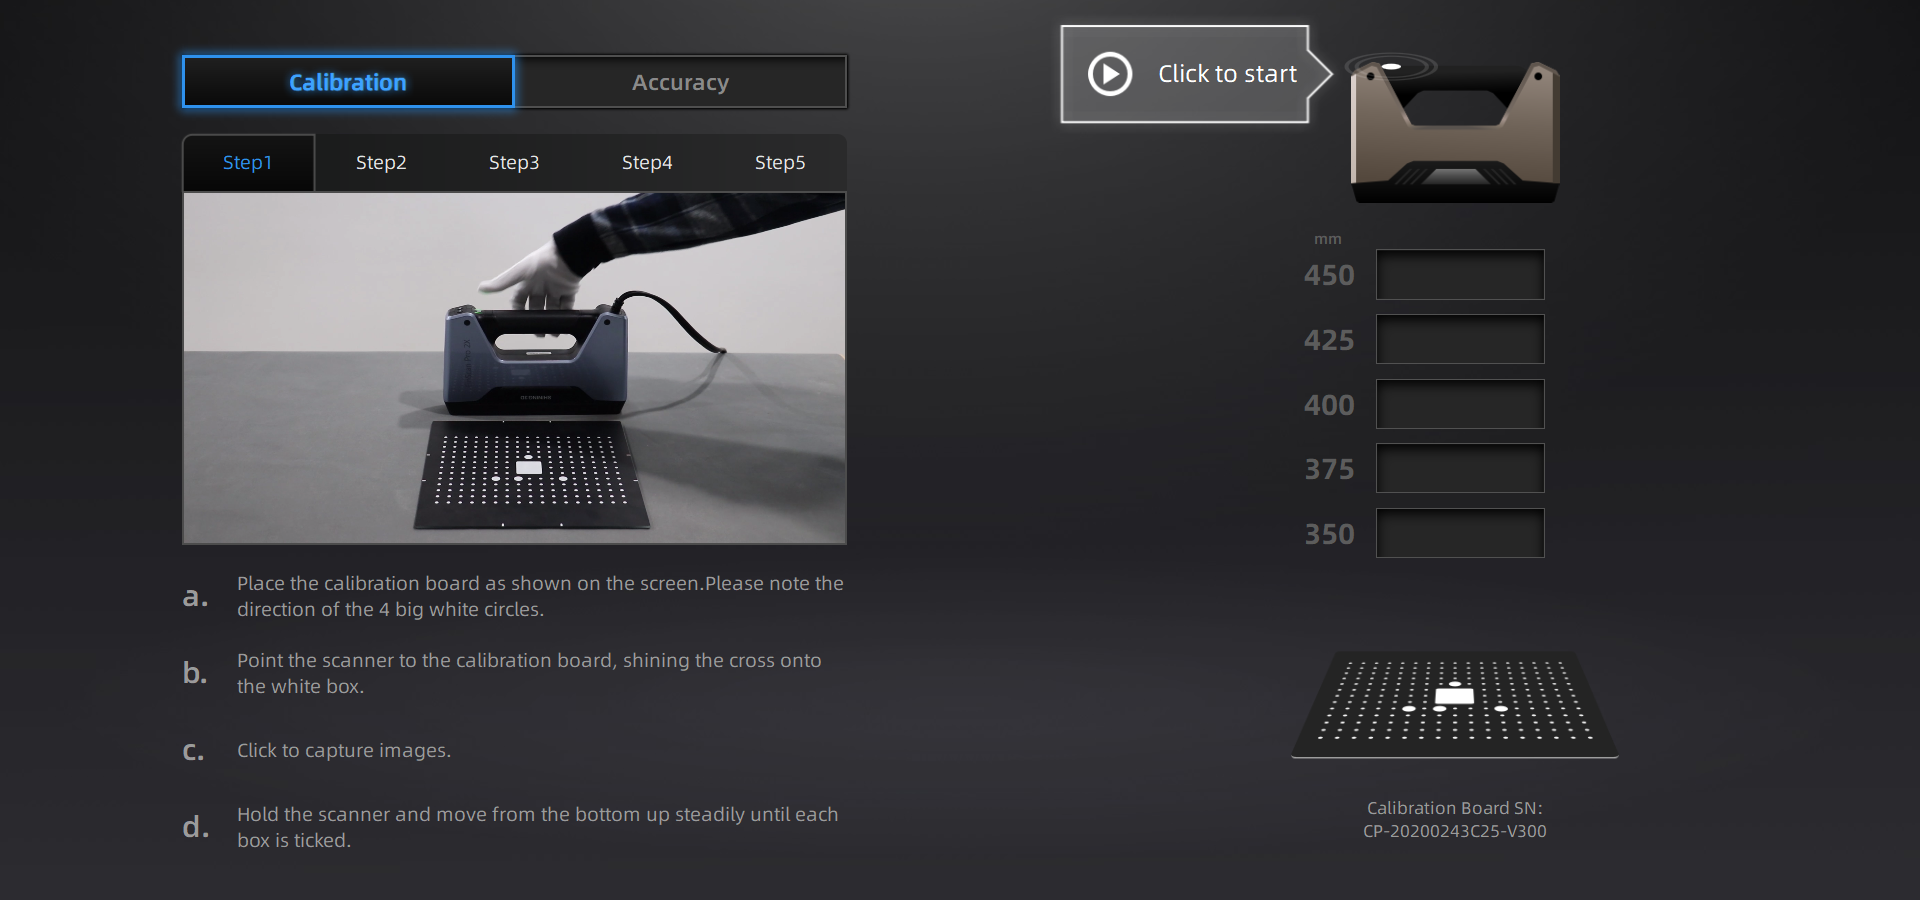
1.Place the calibration board with the front side (black background with white dots) facing up, flat on the table, and align it in the same orientation as shown in the diagram.
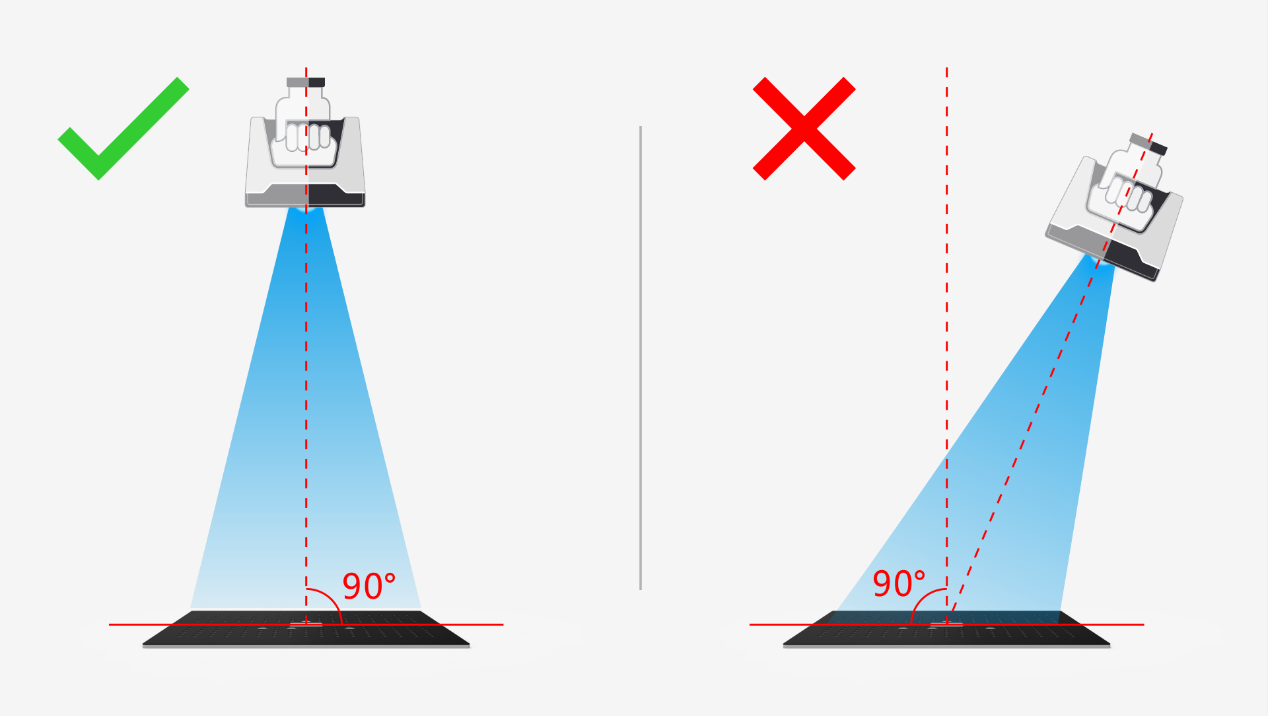
2.After picking up the scanner, move it above the calibration board. The scanner should be positioned vertically, facing directly towards the table, in the same direction as shown in the diagram. Ensure that the crosshair projected by the scanner is positioned within the white square at the center of the calibration board.
3.Click  Click to start or press button on the scanner to start calibration.
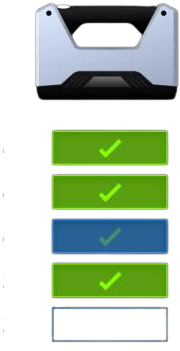
4.During the data collection process, you need to move the scanner up and down (ensuring that the crosshair remains within the white square) until the distance indicator on the software interface shows all green. Once the data collection is complete, the software will automatically exit the data collection mode, proceed to the next stage, and emit a beep sound as a notification.
Note
Lift the scanner up when the interface shows too close; move the scanner down when the interface shows too far.
5.Please continue to follow the instructions provided by the software to complete the subsequent steps.
Warning
- For positions 2 to 5, you will need to use the calibration board stand.
- You need to click button again to start capturing images for the new position.
- The scanner should not rotate with the calibration board, and it should remain in a vertical position throughout the scanning process.
Note
- If the calibration fails, please click recalculate.
- If you cannot get the pass result anyway, please contact your supplier or our support team.