Post-processing(StarVision)
To improve the flexibility and convenience of Einstar Vega Handheld Scanner, SHINING 3D has developed a desktop post-processing software ![]() StarVision, supporting importing model files in the device by one click and processing the imported models.
StarVision, supporting importing model files in the device by one click and processing the imported models.
Function List
| Function | Description |
|---|---|
| Device management | Connect / Disconnect the scanner. |
| File management | |
| Post-processing |
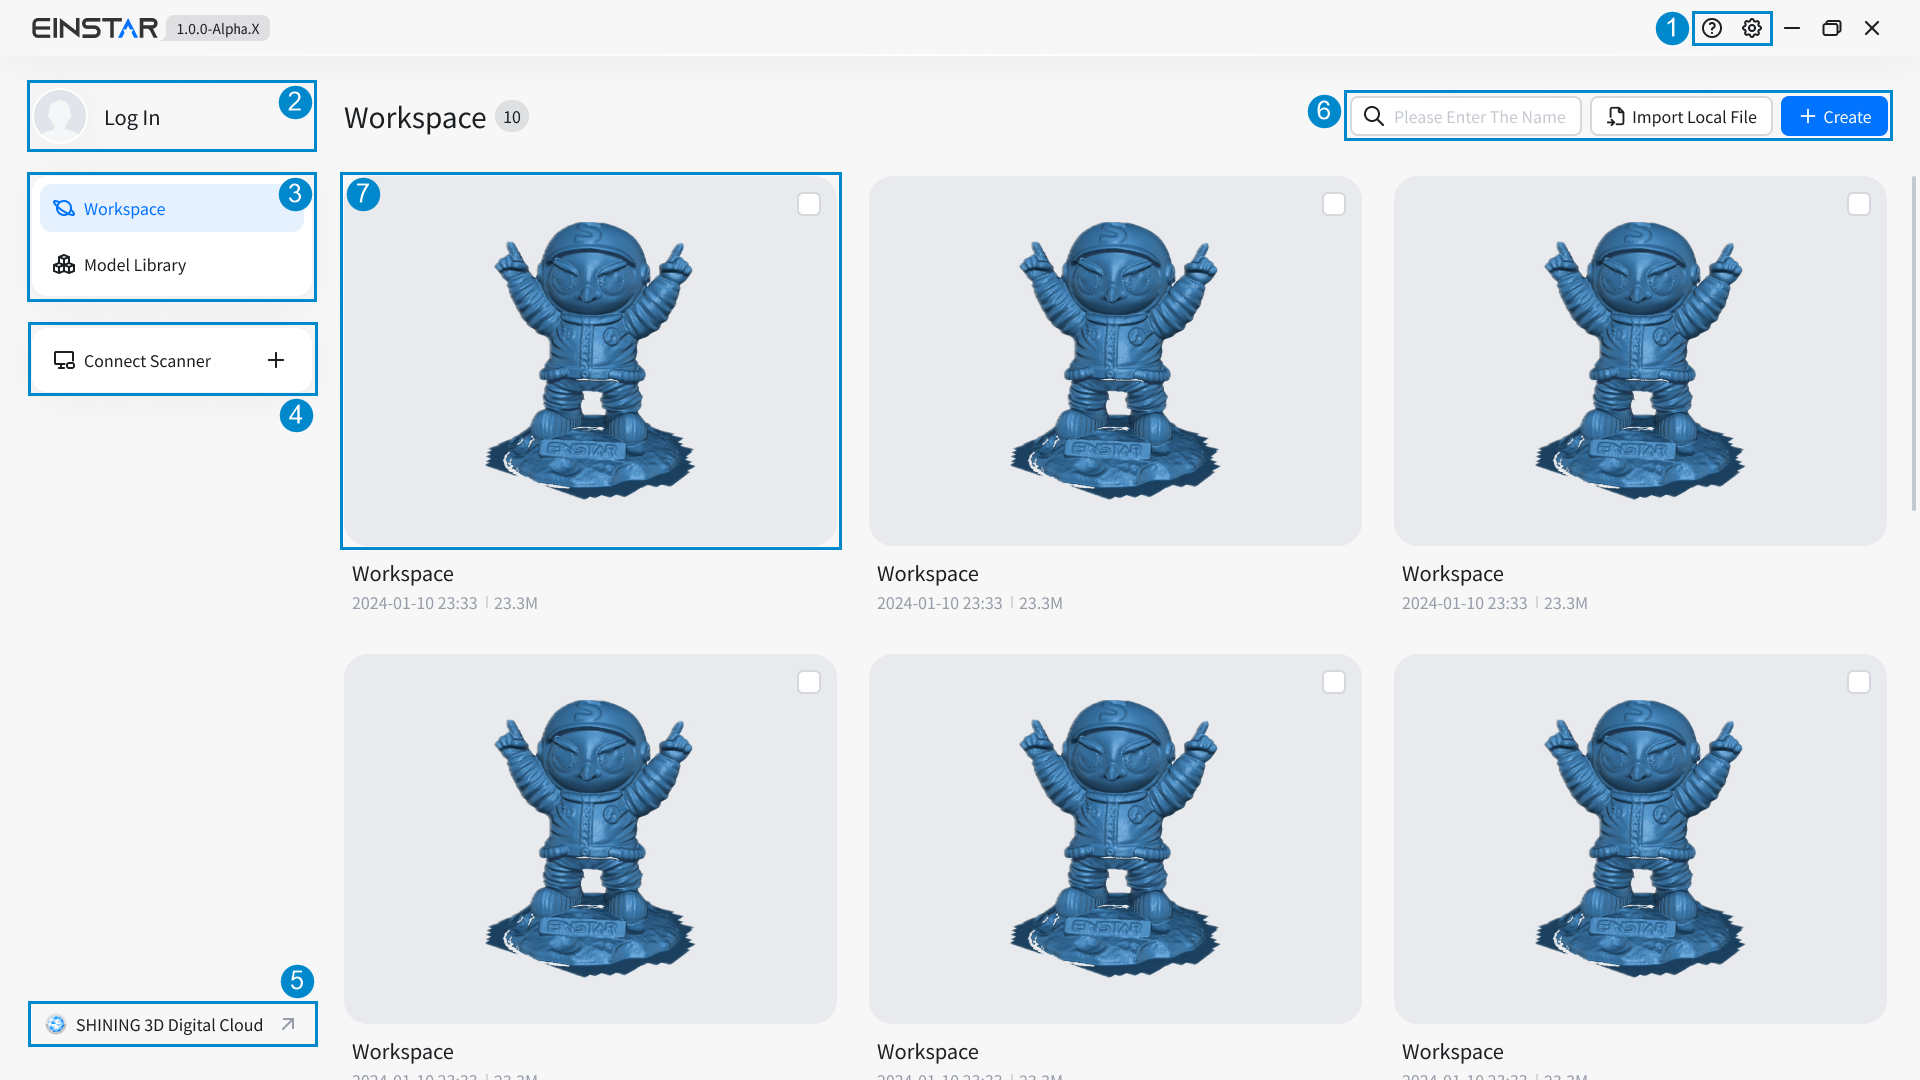
Interface Overview

Note
This illustration is for the workspace; and for the introduction to the difference between the file card list in the workspace and that in the model library, please refer to file card.
① Help and Settings
Click to expand the drop-down list, which provides the entrance to User Manual, the entrance to Open Log Directory and the ways to Contact Support.
-
Account: Login / view account, switch account, and log out.
-
Preference: Edit the data storage path (the default path is "C:/Program Files/TX3Editor/Project") and switch the language (Chinese / English) of the software.
Note
- MacOS system does not support editing the storage path.
- If it prompts that "Insufficient storage space", it means that the storage space in the new path is not enough to accommodate the current model library file, and please change the path.
-
Software Update: Manual check for update, download and install the update file.
Note
- Generally, after launching the software, it will automatically check for updates and display a pop-up window if available.
- When installing the update file, the current software will automatically exit. Please ensure that any necessary data is saved.
- If it prompts that "
 The current version is the latest", it means there is no need to update.
 - If it prompts that "
 Insufficient storage space", please clean the disk space and download again.
-
About: Check the privacy policy and user license agreement.
Note
When logging in, the new privacy policy / user license agreement window will also pop up (if available).
② Account
-
Not logged in: Click Log in and the SHINING 3D passport login window will pop up.
-
Logged in: Display the information of the logged account, click to enter Setting > Account.
③ Switch Workspace / Model Library
Workspace: Search, create, import / export projects, and perform post-processing on models.
Model Library: Search, preview, import / export model files, and import model files into the workspace.
④ Connect Scanner
Please use the cable to connect the scanner to your computer, and select the File Transfer mode.
Caution
If it prompts that "![]() Connection failed", please check the connection status of the cable.
Connection failed", please check the connection status of the cable.
-
All
wire-connected devices and
有线设备和
wireless-connected devices are displayed in the left device list (arranged from far to near based on the order of connection):
Note
When hovering the cursor over a device bar and it changes to
 , click
  button in the right side to display the device information, and you can click
 to update the device or export the log of the device, or click
 to disconnect.
 -
The right file card list displays all model files in the device, and supports searching, previewing models, as well as importing model files into the model library or the workspace.
-
Update the device:
 Auto Update: Auto-check for update > download the update file > install.
 Manual Update: Select the local update package > confirm update.
Note
- Only wire-connected devices can be updated.
- During the process of updating the device software, the top of the computer software interface will display the
 icon, indicating that the software is being downloaded. When hovering the cursor over a device bar and it changes to
  , it can provide information about the download progress.
Caution
During the process of updating the device software, please ensure that the device remains connected and do not exit the computer software.
⑤ Entrance to SHINING 3D Digital Cloud
Click to open SHINING 3D Digital Cloud.
Note
The mesh model can be uploaded to SHINING 3D Digital Cloud.
⑥ Project Management
- Click the
 search box and enter keywords to view search results.
 - Click the
 Create button to create a new workspace.
 - Click the
Import local file button to open the file selection window and import project files (.proj); in the model library, you can also click the
 Import from scanner button to select the scanner and open the scanner model file dialog to import model files.
⑦ File Card

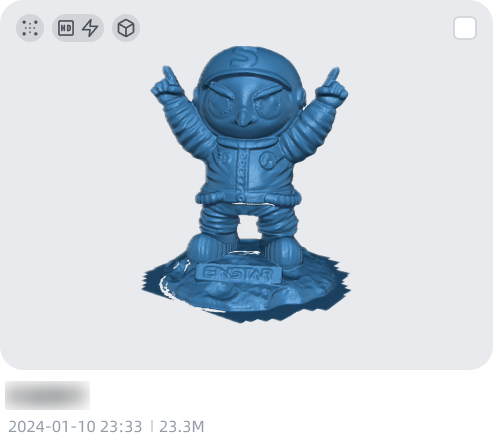
Display the model's thumbnail, project information (point /
mesh,
object /
portrait), the name, size and the latest update time for projects or model files.
Check  in the upper right corner of the card to select the card; left-click on the card to open the workspace (for point cloud data edit and post-process or model preview); right-click on the card to open the menu, where you can rename / export / delete the file, as well as import the file into workspace or model library.
Note
- The supported operations on file cards may vary slightly between the workspace, model library, and device file list. Please refer to the actual interface for accurate information.
- After scrolling down the file card list, you can click
 on the right side to return to the top of the list.