Home Screen
After running the software, you will automatically go to the home screen. You can access recent files, create or open project groups, and quickly navigate to other interfaces.
Overview
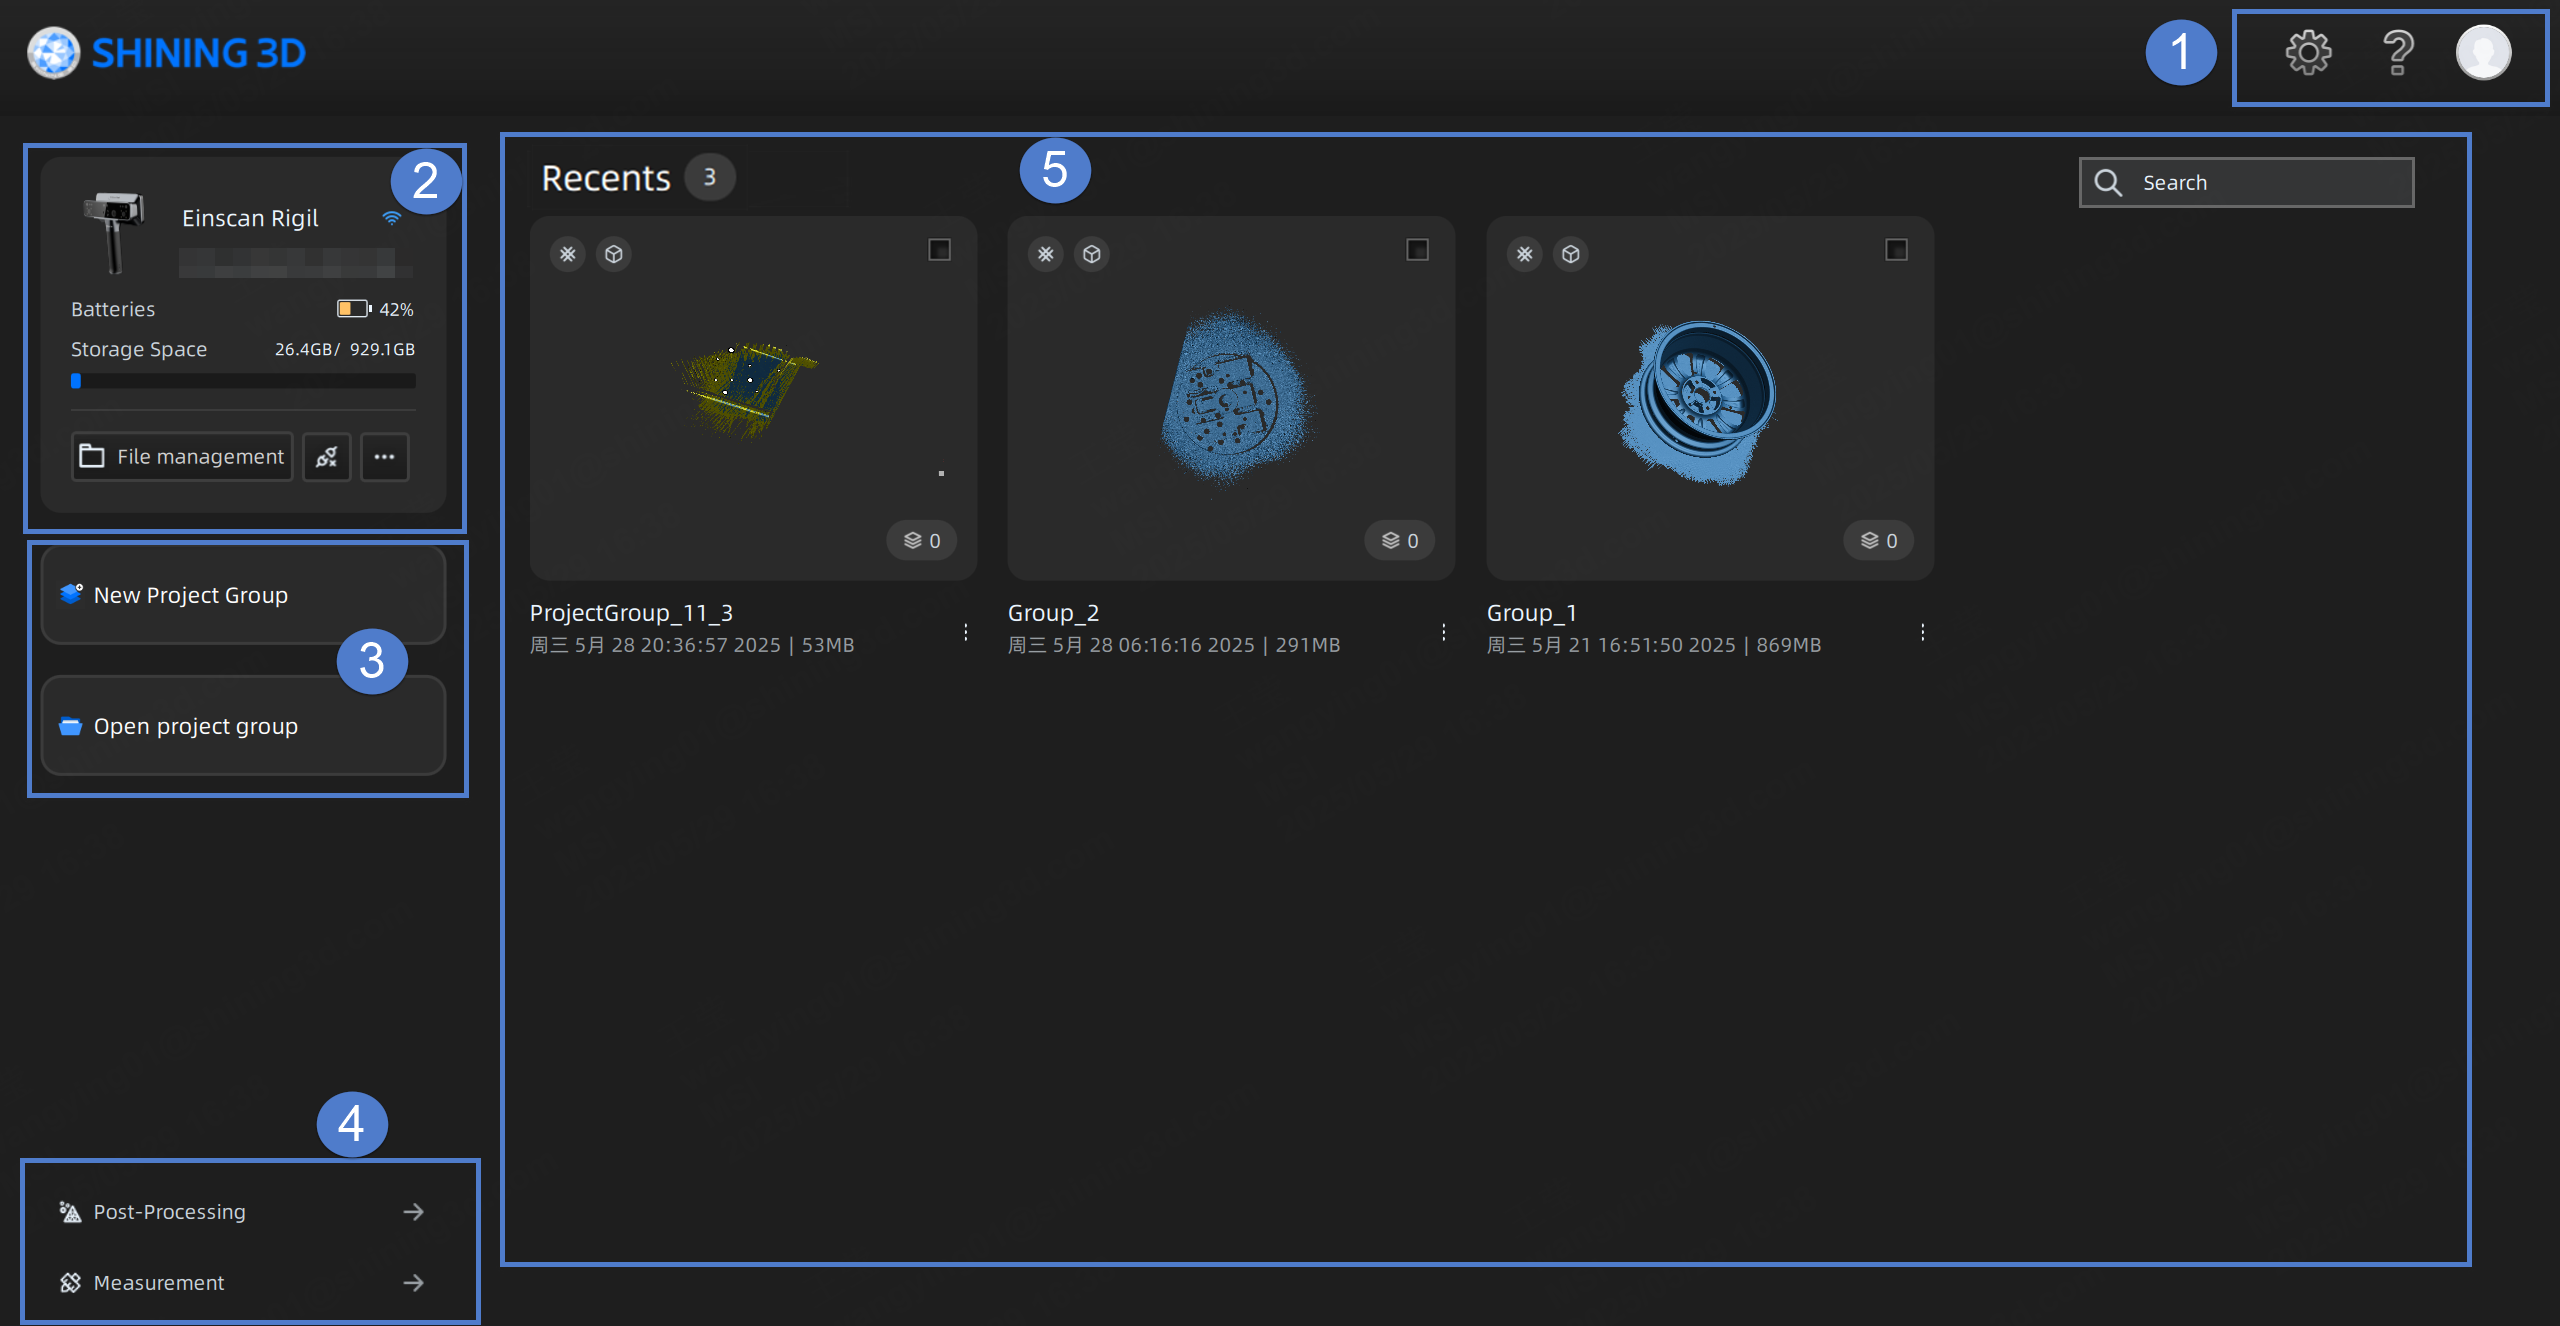
① Settings and Help
- Select Language: Set the language displayed in the software.
- Compatible with 3Dconnexion SpaceMouse: When enabled, you can quickly rotate, pan, zoom, and perform other shortcut operations on models in a 3D scene with the 3Dconnexion SpaceMouse. See 3Dconnexion SpaceMouse for more details.
- Data Import Path: It displays the import path of the device project file. Click
 to change the import path.
 - Factory Default: Click Recover to initialize all settings and the software will restart automatically.
- About: You can view the device name, serial number, calibration board, software version and other information. After checking Download UPdates Automatically, it will detect the update and prompt you to install. Otherwise, you will need to manually download and update the software to the new version.
- System Diagnose: Check whether your computer configuration meets the running requirements. If
 appears, it means that the configuration meets the requirements. If
  appears, it means that there are some issues that should be resolved. Click Refresh to diagnose again.
 - Support: You can open the user manual, get remote assistance (TeamViewer) and check contact information here.
Note
If the software displays a pop-up stating "No TeamViewer detected" when you use remote assistance function, click Select Path in the dialog box and choose TeamViewer's .exe file to update the launch path for TeamViewer.
If you have not logged in to the passport, you can click here to log in; if you have already logged in, you can perform the following operations.
- Reverse Engineering Service: By sending us the scanned project files and specific information, you can get our assistance in reverse engineering.
- Account: You can view login status, account information, and authorization period.
- Login: You can log in / log out of your account.
- My SHINING 3D Account: Click to enter the personal center.
- Official Website: Click to visit our official website for more products and information.
- Facebook: Enter our Facebook to view product introduction and learn other operations.
- Shining 3D Digital Cloud: Upload your model to SHINING 3D Cloud.
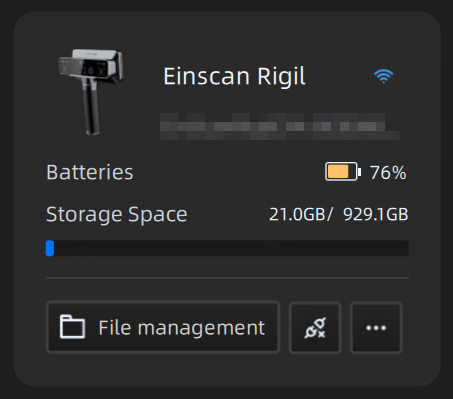
② Device Information
If the device is successfully connected, the name, serial number, power and storage space of the connected device will be displayed here; if the device is not connected, please connect the device wirelessly or wired.
Connected
Col
Col
After the device is connected successfully, the upper left corner will display the device information of the device. You can import the device project, export the device log and do other operations.
Click here to manage the projects in EinScan Rigil.
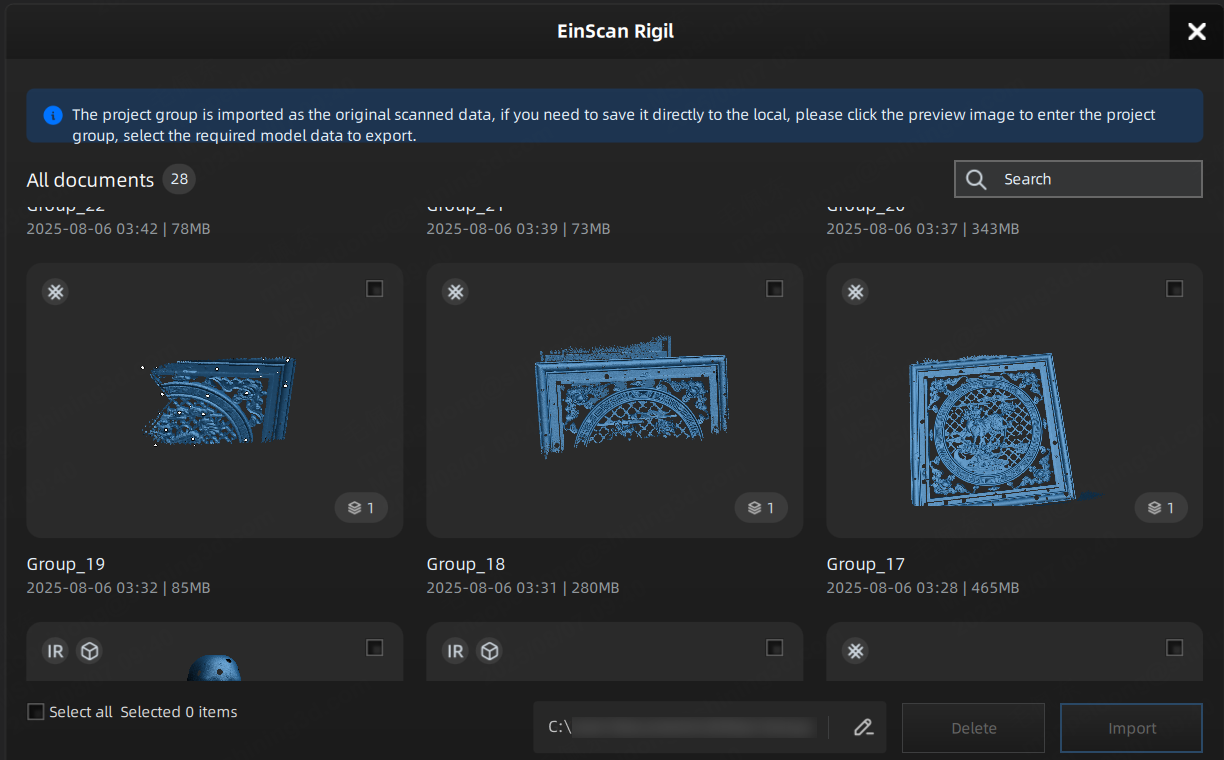
- Check the project group to import the original scan data of the project group into EXScan Rigil.
- Double-click the project group card and select the project to be saved locally and the type of project file (point cloud or mesh).
- Click
 to bring up the settings window, and then click to change the import path of the device project.
Click this button to choose whether to disconnect the device.
Click this button and select Export device log.
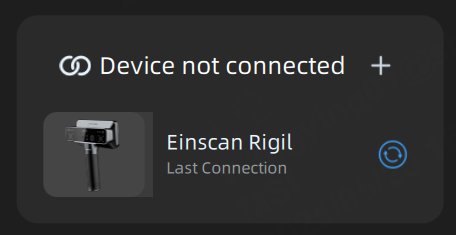
Not Connected
Col
Col
Click + to view the wireless and wired connection instructions; for specific operation instructions, please see Connection.
Note
If the scanner is disconnected, click the ![]() button to reconnect the scanner immediately, or wait for the scanner to reconnect automatically.
button to reconnect the scanner immediately, or wait for the scanner to reconnect automatically.
③ Project Group
Click here to quickly create or open a project group.
New Project Group
- Click New Project Group.
- In the prompt window, name the project group and click Browse to select the save path.
- Click Confirm and all scanned data will be saved to the folder with the name you just set.
Open Project Group
- Click Open Project Group.
- Select Open Local File or Open Device File.
- In the prompt window, select the project group.
- Click Open to import the project group into the software.
Note
- For projects imported from EinScan Rigil, only the point clouds are retained.
- For projects imported from EinScan Rigil, the software does not support re-scanning. You can only generate point clouds and meshes or measure the model in the software.
④ Quick Links
Click here to quickly navigate to the corresponding interface for Post-Processing or Measurement, where you can perform the relevant operations.
⑤ Project Group List
Recently opened or newly created project group files with relevant information (name, operation time, and file size) are displayed here.
| Function | |
|---|---|
| You can enter the name to quickly find the project or project group. | |
| Delete | This button will appear after selecting a project or project group. Click this button to delete the selected project or project group. Once deleted, it cannot be restored. |
| Click to quickly return to the top of the project list. |