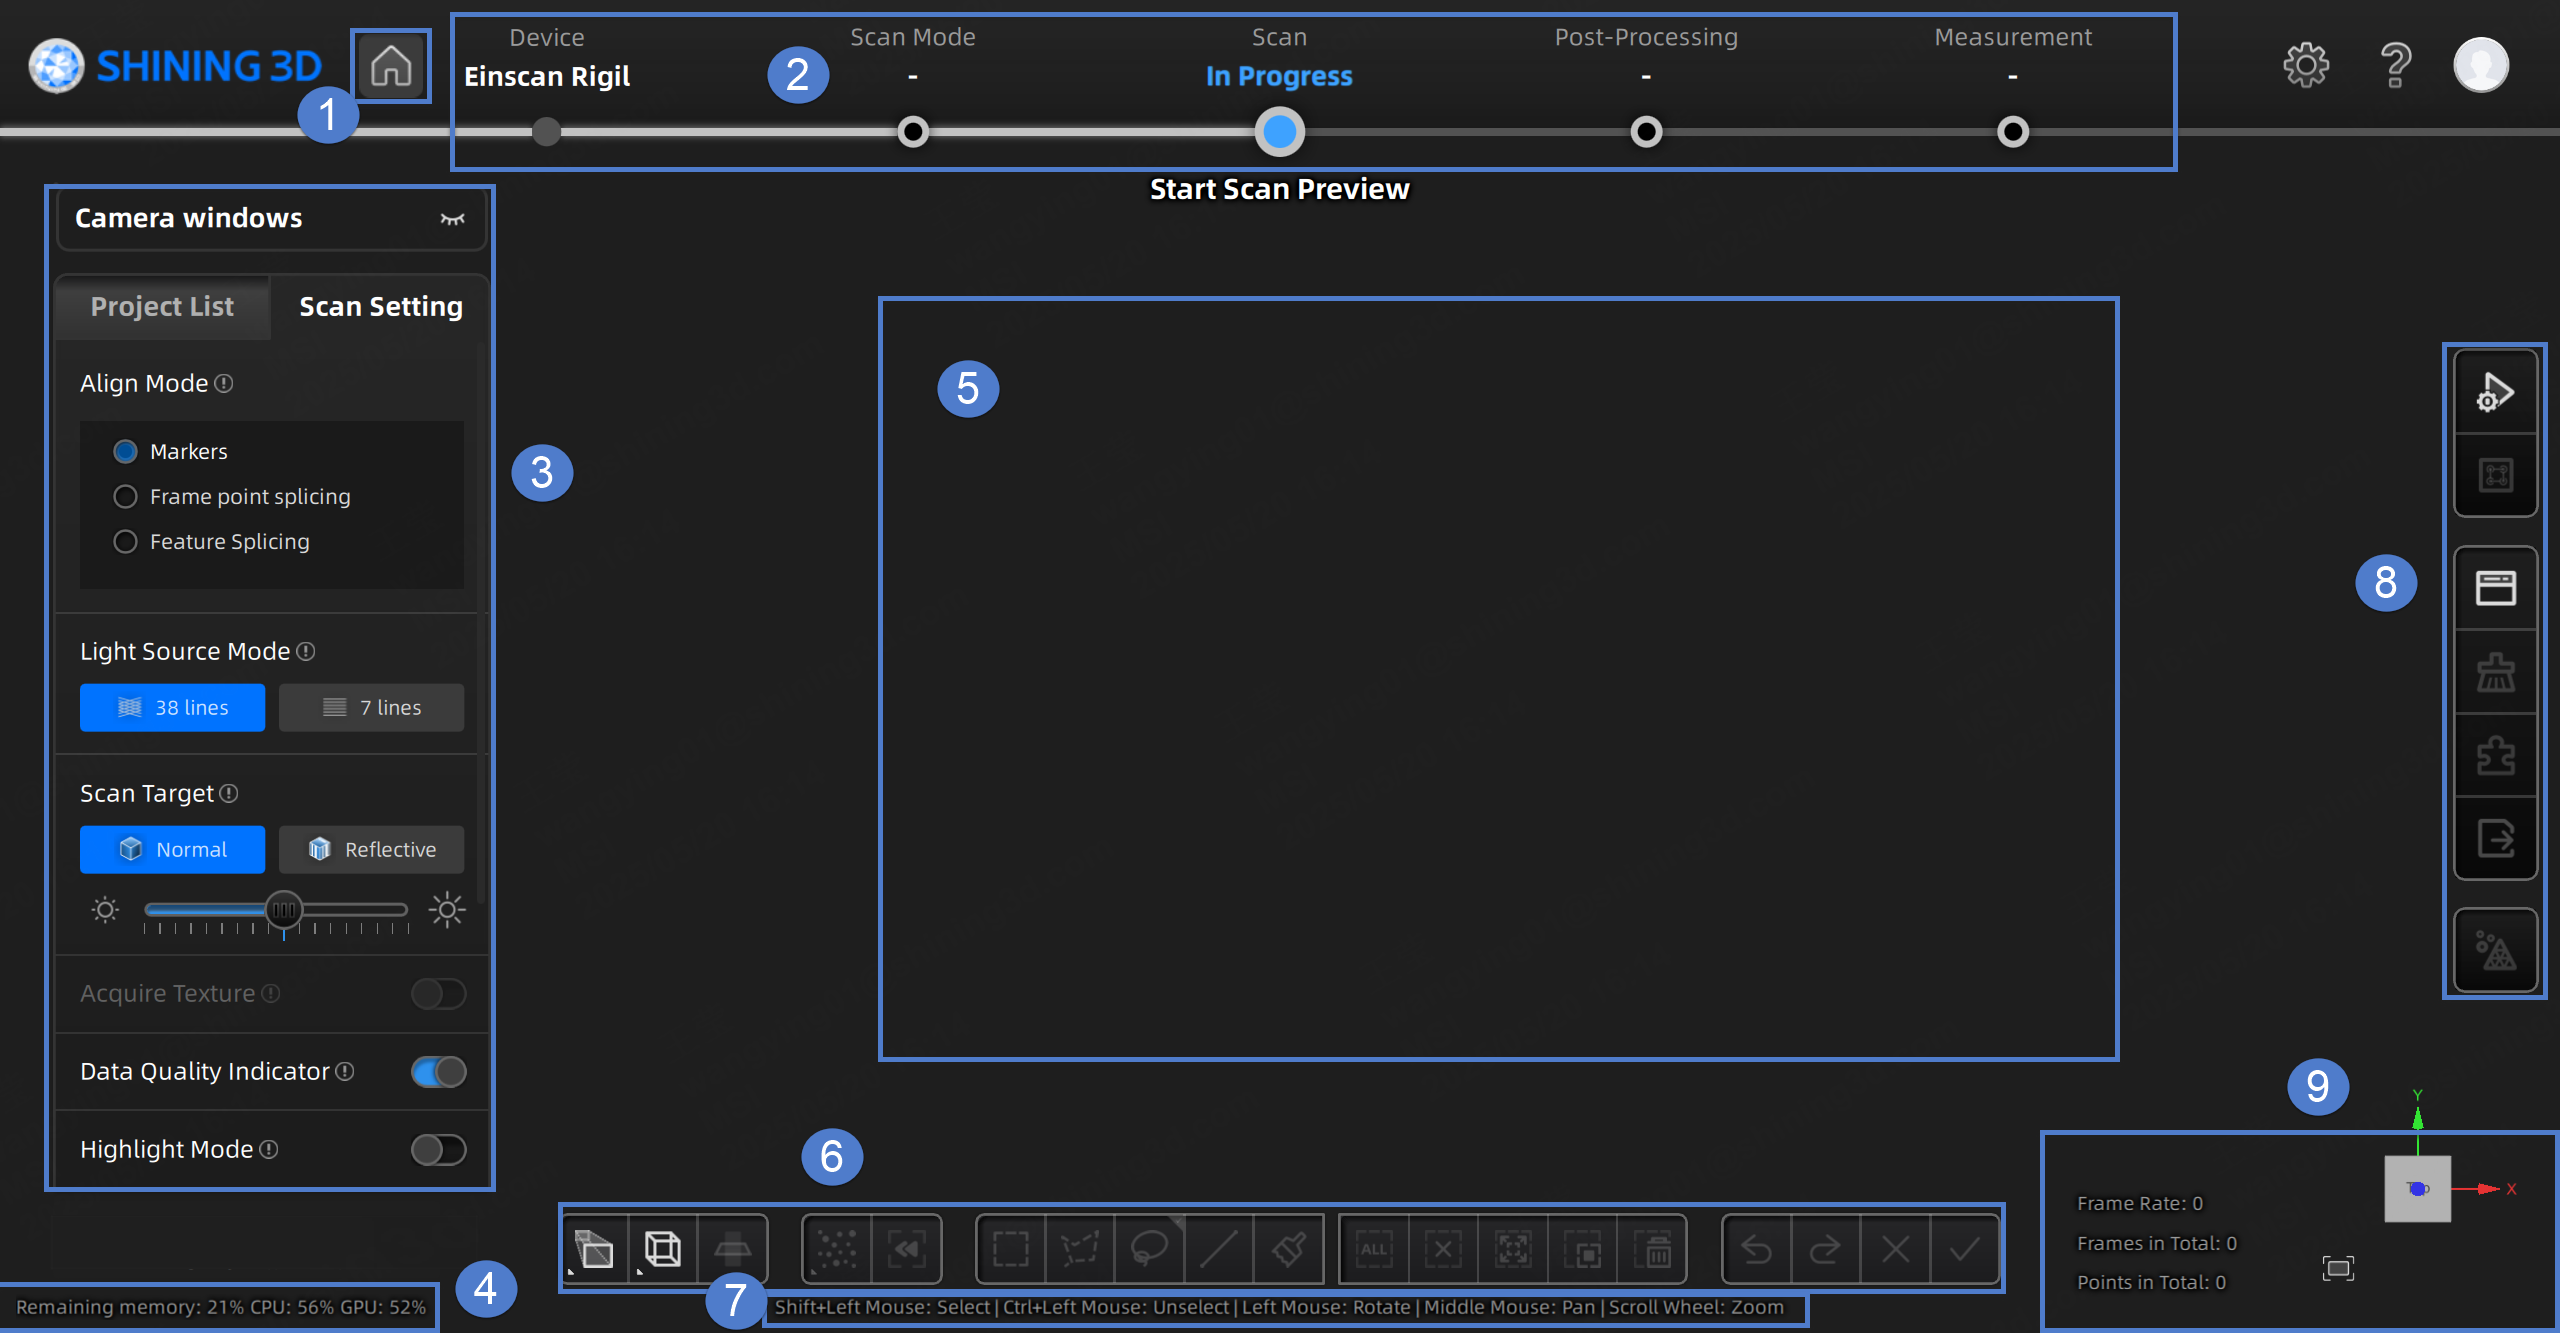
Scan Interface
After entering the scanning interface, you can adjust settings and perform scanning operations.
Overview
Note
The screenshot shown above is for illustrative purposes only. Always refer to the actual software interface.
① Home Screen
Click ![]() to quickly return to the home screen.
to quickly return to the home screen.
② Navigation Bar
- Device: When the device is online, the device name is displayed. When the device is offline, click
 on the navigation bar to reconnect the device.
 - Scan Mode: Click
 on the corresponding position in the navigation bar to choose the scan mode.
 - Scan: Click on the corresponding position in the navigation bar to start the scanning.
- Post-Processing: After scanning, click
 to switch to the Post-Processing interface where you can do mesh and mesh editing for the data.
Measurement: Click on the corresponding position in the navigation bar to switch to Measurement interface where you can measure your model here.
to switch to the Post-Processing interface where you can do mesh and mesh editing for the data.
Measurement: Click on the corresponding position in the navigation bar to switch to Measurement interface where you can measure your model here.
③ Scanning Settings
- Camera Windows: To preview the actual scene during scanning. Parameters can be adjusted accurately through the camera window.
- Project List: To create, open, or delete projects. For more, see Project Management.
- Scan Setting: To set scanning parameters. For more, see Settings.
④ Memory / CPU / GPU
- Remaining Memory: To display the percentage of remaining memory.
- CPU Usage: To display the CPU usage of the computer in real time. You may need to close other unrelated software if it is too high.
- GPU Usage: To display the GPU usage of the computer in real time.
⑤ Preview / Scanning Window
To preview the model and check the scanned model.
⑥ Editing Toolbar
To edit data after scanning. See more details in Data Editing.
⑦ Shortcuts
To change the perspectives and move the model by the composition of keys.
⑧ Right Sidebar
For more, see Scanning.
⑨ Other Information
To show information about FPS, Frames in Total, Points in Total, etc.
| Function | |
|---|---|
Fit View |
Click |
View Controller |