Mesh editing
After mesh generation and optimization, you can edit the mesh on the left panel. Click + to open corresponding function.
| Function | ||
|---|---|---|
| Texture | To adjust brightness and contrast. | |
| Simplification | To reduce triangles and consequent data size. | |
| Mesh Optimization | To optimize the mesh. | |
| Smooth | To denoise the data and make it smooth to improve the quality. | |
| Remove Small Floating Parts | To remove small floating parts of the scanned data. |
| Icon | Function | |
|---|---|---|
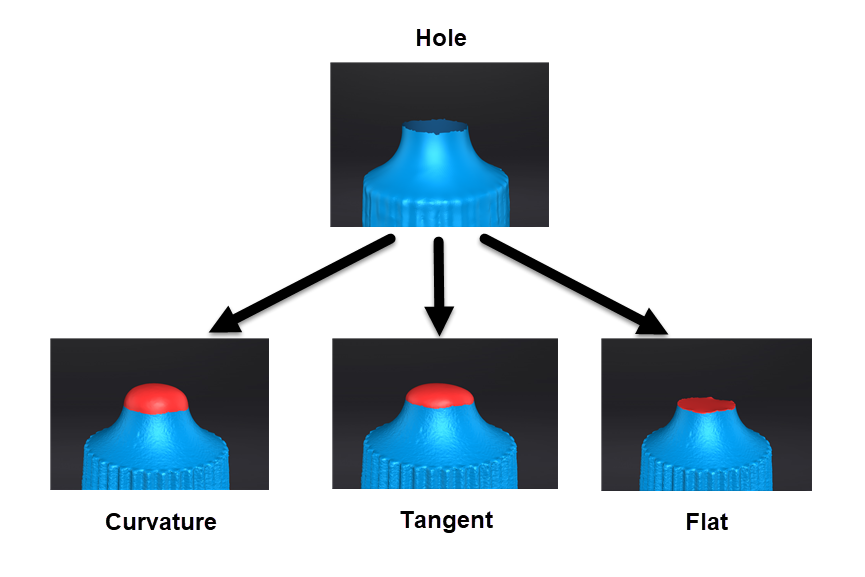
| Auto Hole Filling | To fill every hole whose perimeter is within the input value automatically after the selection of type. | Types: . . |
| Manual Hole Filling | To fill the hole manually by clicking the edge of the hole after the selection of type. The edge of the hole to be filled is displayed green,and that of the chosen hole is displayed red. | |
| Flip Normal | To turn around the normal to the connected domain of the selected data. | |
| Cutting Plane Tool | To adjustment the coordinate of the data with a custom plane as the bottom. | |
| Mirror | Press Shift + left mouse button to draw a central axis, and then click Preview to mirror the scanned data. |
Bottom panel

| Icon | Function | |
|---|---|---|
| Select Visible | To select the outer data. | |
| Select Through | To select the inner and outer data. |
Note
See more details in Data editing.
Right panel
| Icon | Function | |
|---|---|---|
| Open File | To open a file (STL, OBJ, PLY) for post processing. | |
| Export Your Scan | ||
| Share Your Scan | To use your Sketchfab account to share the model. | |
| Texture Mapper | Merge HD texture images with the model file to enhance the overall texture quality of the scanned data. It is recommended that you complete the removal of noise and hole filling before using the Texture Mapper. Please refer to the Texture Mapper User Manual for more details. |
|
| Third-party Software | Open the third-party software and import the scanned data into the third-party software. | |
| Texture Remapping | After post-processing, textures on the scanned data will be misrendered. Texture remapping can correct the mistakes. If you have already filled holes and simplified the data, it's better to remap the textures before you save the data. |
|
| Show/Hide Texture | To show/hide texture on screen. |