Operation
The entire calibration process includes camera calibration and white balance calibration. You can complete the corresponding calibration according to your needs.
Note
Calibration is only supported in wired mode.
Binding the Calibration Board
Before the first calibration or after changing the calibration board, please bind the calibration board first, then start the calibration.
Col
Method 1:
- After connecting the device, click
 Calibration in the navigation bar at the top of the interface to switch to the calibration interface.
 - Click
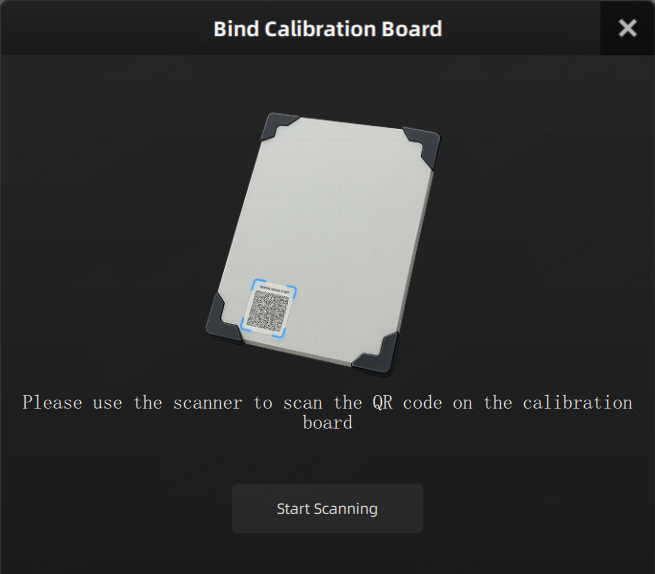
 in the lower right corner of the interface to open the binding calibration board window.
 - Click Start Scanning.
- According to the illustration, use the device to scan the QR code on the calibration board to complete the binding.
Col
Note
- If this is your first calibration, the binding calibration board window will automatically pop up after switching to the calibration interface. You can use the device to scan the QR code on the calibration board to complete the binding as shown.
- If the light is too dim, click
 or press
  on the device to turn on the device's fill light before scanning the QR code.
Col
Method 2:
- Click
 >
>  About > Calibration Board No.
  to open the binding calibration board window.
 - Click Start Scanning.
- According to the illustration in the binding calibration board window, use the device to scan the QR code on the calibration board to complete the binding.
Col
Note
If the light is too dim, click ![]() or press on the device to turn on the device's fill light before scanning the QR code.
or press on the device to turn on the device's fill light before scanning the QR code.
Camera Calibration
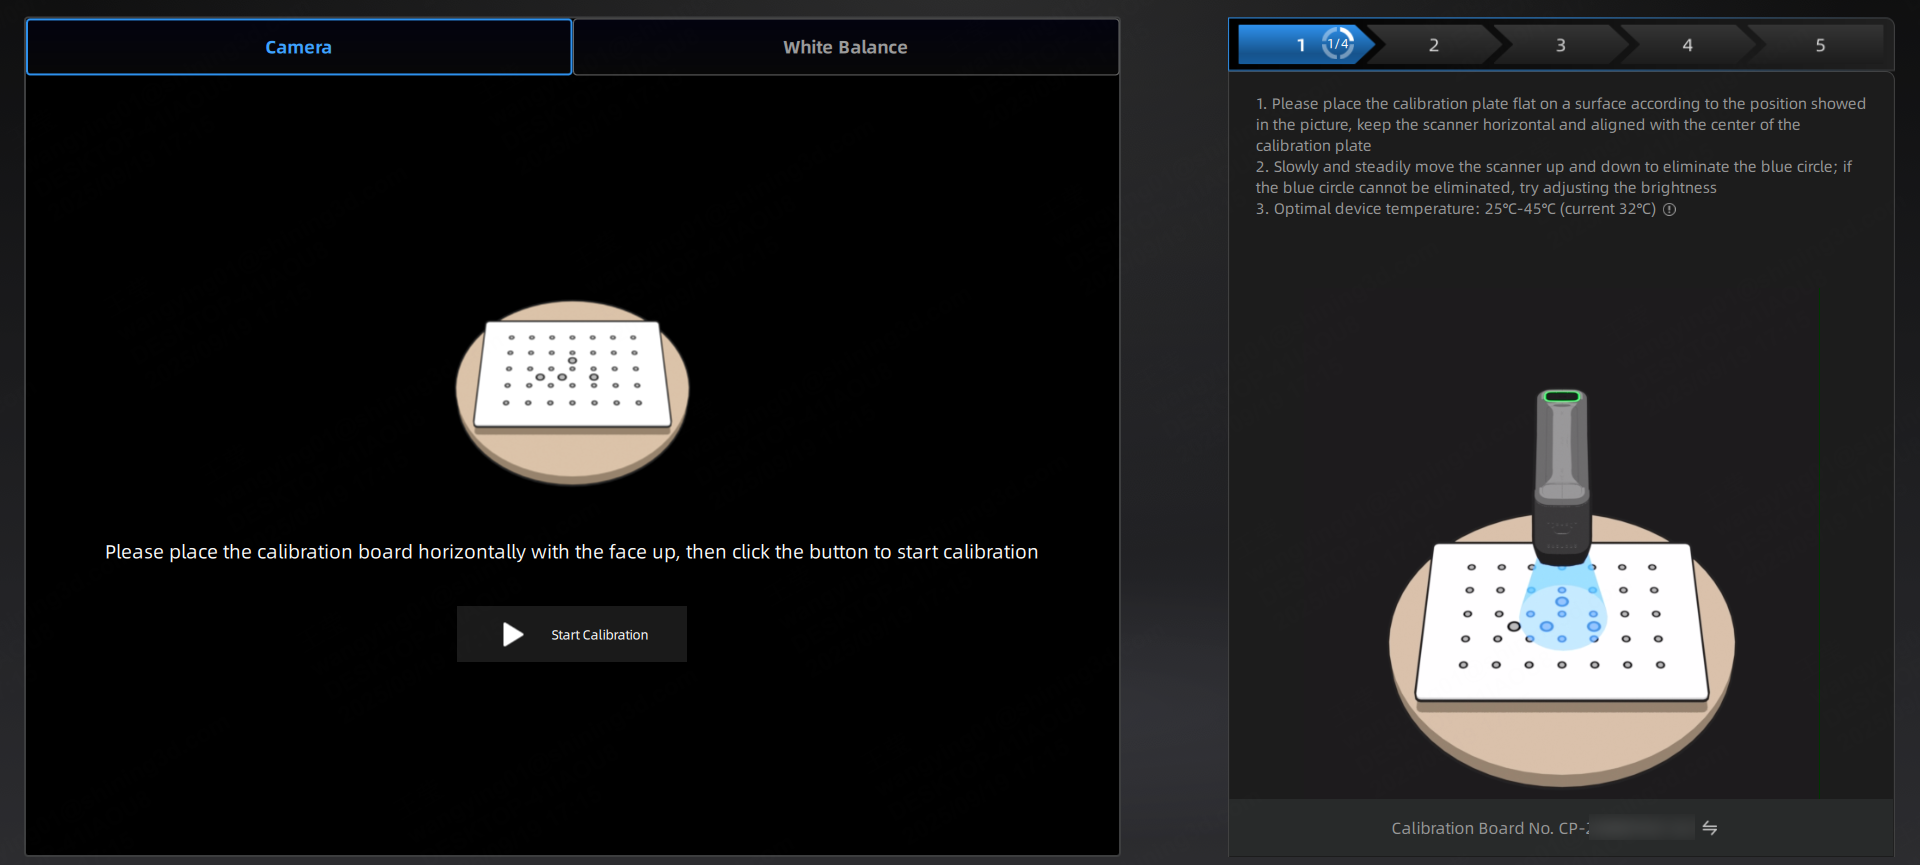
A calibration process requires completing the calibration at all angles and distances according to the illustrations.
Caution
- Do not perform calibration on reflective tile floors.
- Do not perform calibration in environments with cluttered markers.
- Place the calibration board on the flat surface with the marked side facing up.
- Align the red crosshair of the scanner with the white crosshair on the calibration board; when the two crosshairs overlap, the crosshair will turn green.
-
Move the scanner vertically up and down until the blue area on the screen is completely eliminated.
Caution
-
When moving the scanner up and down, please ensure:
- The center of the scanner remains aligned with the center of the calibration board.
- The scanner remains parallel to the plane where the calibration board is located.
-
If you are unable to eliminate the blue area completely while moving the scanner up and down, try adjusting the camera brightness using the brightness slider on the left side.
-
-
Place the calibration board on the holder as shown.
- Repeat steps 2 to 3 to complete the calibration for that direction.
- Rotate the calibration board as shown, and repeat steps 2 to 3 to complete the calibration for other directions.
- After completing calibration for all directions, a calibration file will be automatically generated.
- Exit calibration and proceed to scanning after calibration, or recalibrate if the calibration fails.
Note
- After calibration is complete, please store the calibration board properly for future use.
- If calibration fails multiple times, please promptly contact technical support and provide the error code.
White Balance Calibration
White balance calibration is an optional calibration step. It can be performed when there is a discrepancy between the scanned texture data and the actual texture of the object.
Steps
- Please place the calibration board with the white side facing up on a flat surface.
- Aim the scanner at the calibration board.
- Move the scanner vertically up and down until the white circle on the screen completely overlaps with the blue circle.
- After successful calibration, you can exit calibration and proceed to scanning; if calibration fails, please recalibrate.
Note
- After calibration is complete, please store the calibration board properly for future use.
- If calibration fails multiple times, please promptly contact technical support and provide the error code.