Mesh
Meshing is to convert the point cloud into a triangular mesh surface. The data after mesh can be directly used for rendering, measurement or printing.
Mesh type
| Icon | Function | Instruction |
|---|---|---|
 |
Unwatertight | Unclosed model stays the way it is scanned. Processing time is quicker than Watertight. |
 |
Half watertight | Some of the holes will be filled automatically. Note Holes with a diameter less than or equal to the resolution*5 will be filled. Note Holes with a diameter less than or equal to the resolution*5 will be filled. |
 |
Watertight | All holes will be filled automatically. The data can directly be 3D printed. Note Only watertight mesh can set model quality. |
Mesh optimization
| Optimization | Instruction | Note |
|---|---|---|
| Filter | Optimize the data and improve the clarity of the data. The higher the level, the less the small details .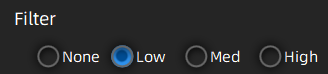 |
- None: No optimization - Low: Optimizes data slightly and preserves data characteristics - Med: Reduce the noise on the surface of the scan data - High: Reduce the noise on the surface of the scan data and sharpen it powerfully. |
| Smooth | Smooth the possible noise on the surface of the scan data. |
|
| Remove small floating parts | Remove small floating parts on the model. |
|
| Simplification | Select to reduce the polygon numbers, file size and detail of data while meshing. |
- Resolution <= 0.5mm, simplification will be selected by default. - Resolution > 0.5mm, simplification will be deselected by default. |
| Max triangles | Set max plate number to get mesh model’s triangle plate number is within configured plate number. |
|
| Fill small hole | Auto fill the small hole when mesh. |
Default value 10mm, for objects with holes (smaller than 10 mm), please set the function parameter value to a smaller one. |
| Remove spike | Remove spike-like data on the image edge. |
|
| Marker hole fill | Fill in the surface of the object that is not scanned to the pasting marker. |
Click Apply to confirm the settings and start meshing, you can click  to restore or click Confirm to confirm the mesh result. Click Cancel to restore and exit the function.