Device
Please read carefully before the first time of using Einstar (hereinafter referred to as the "Scanner").
Appearance
Scanner
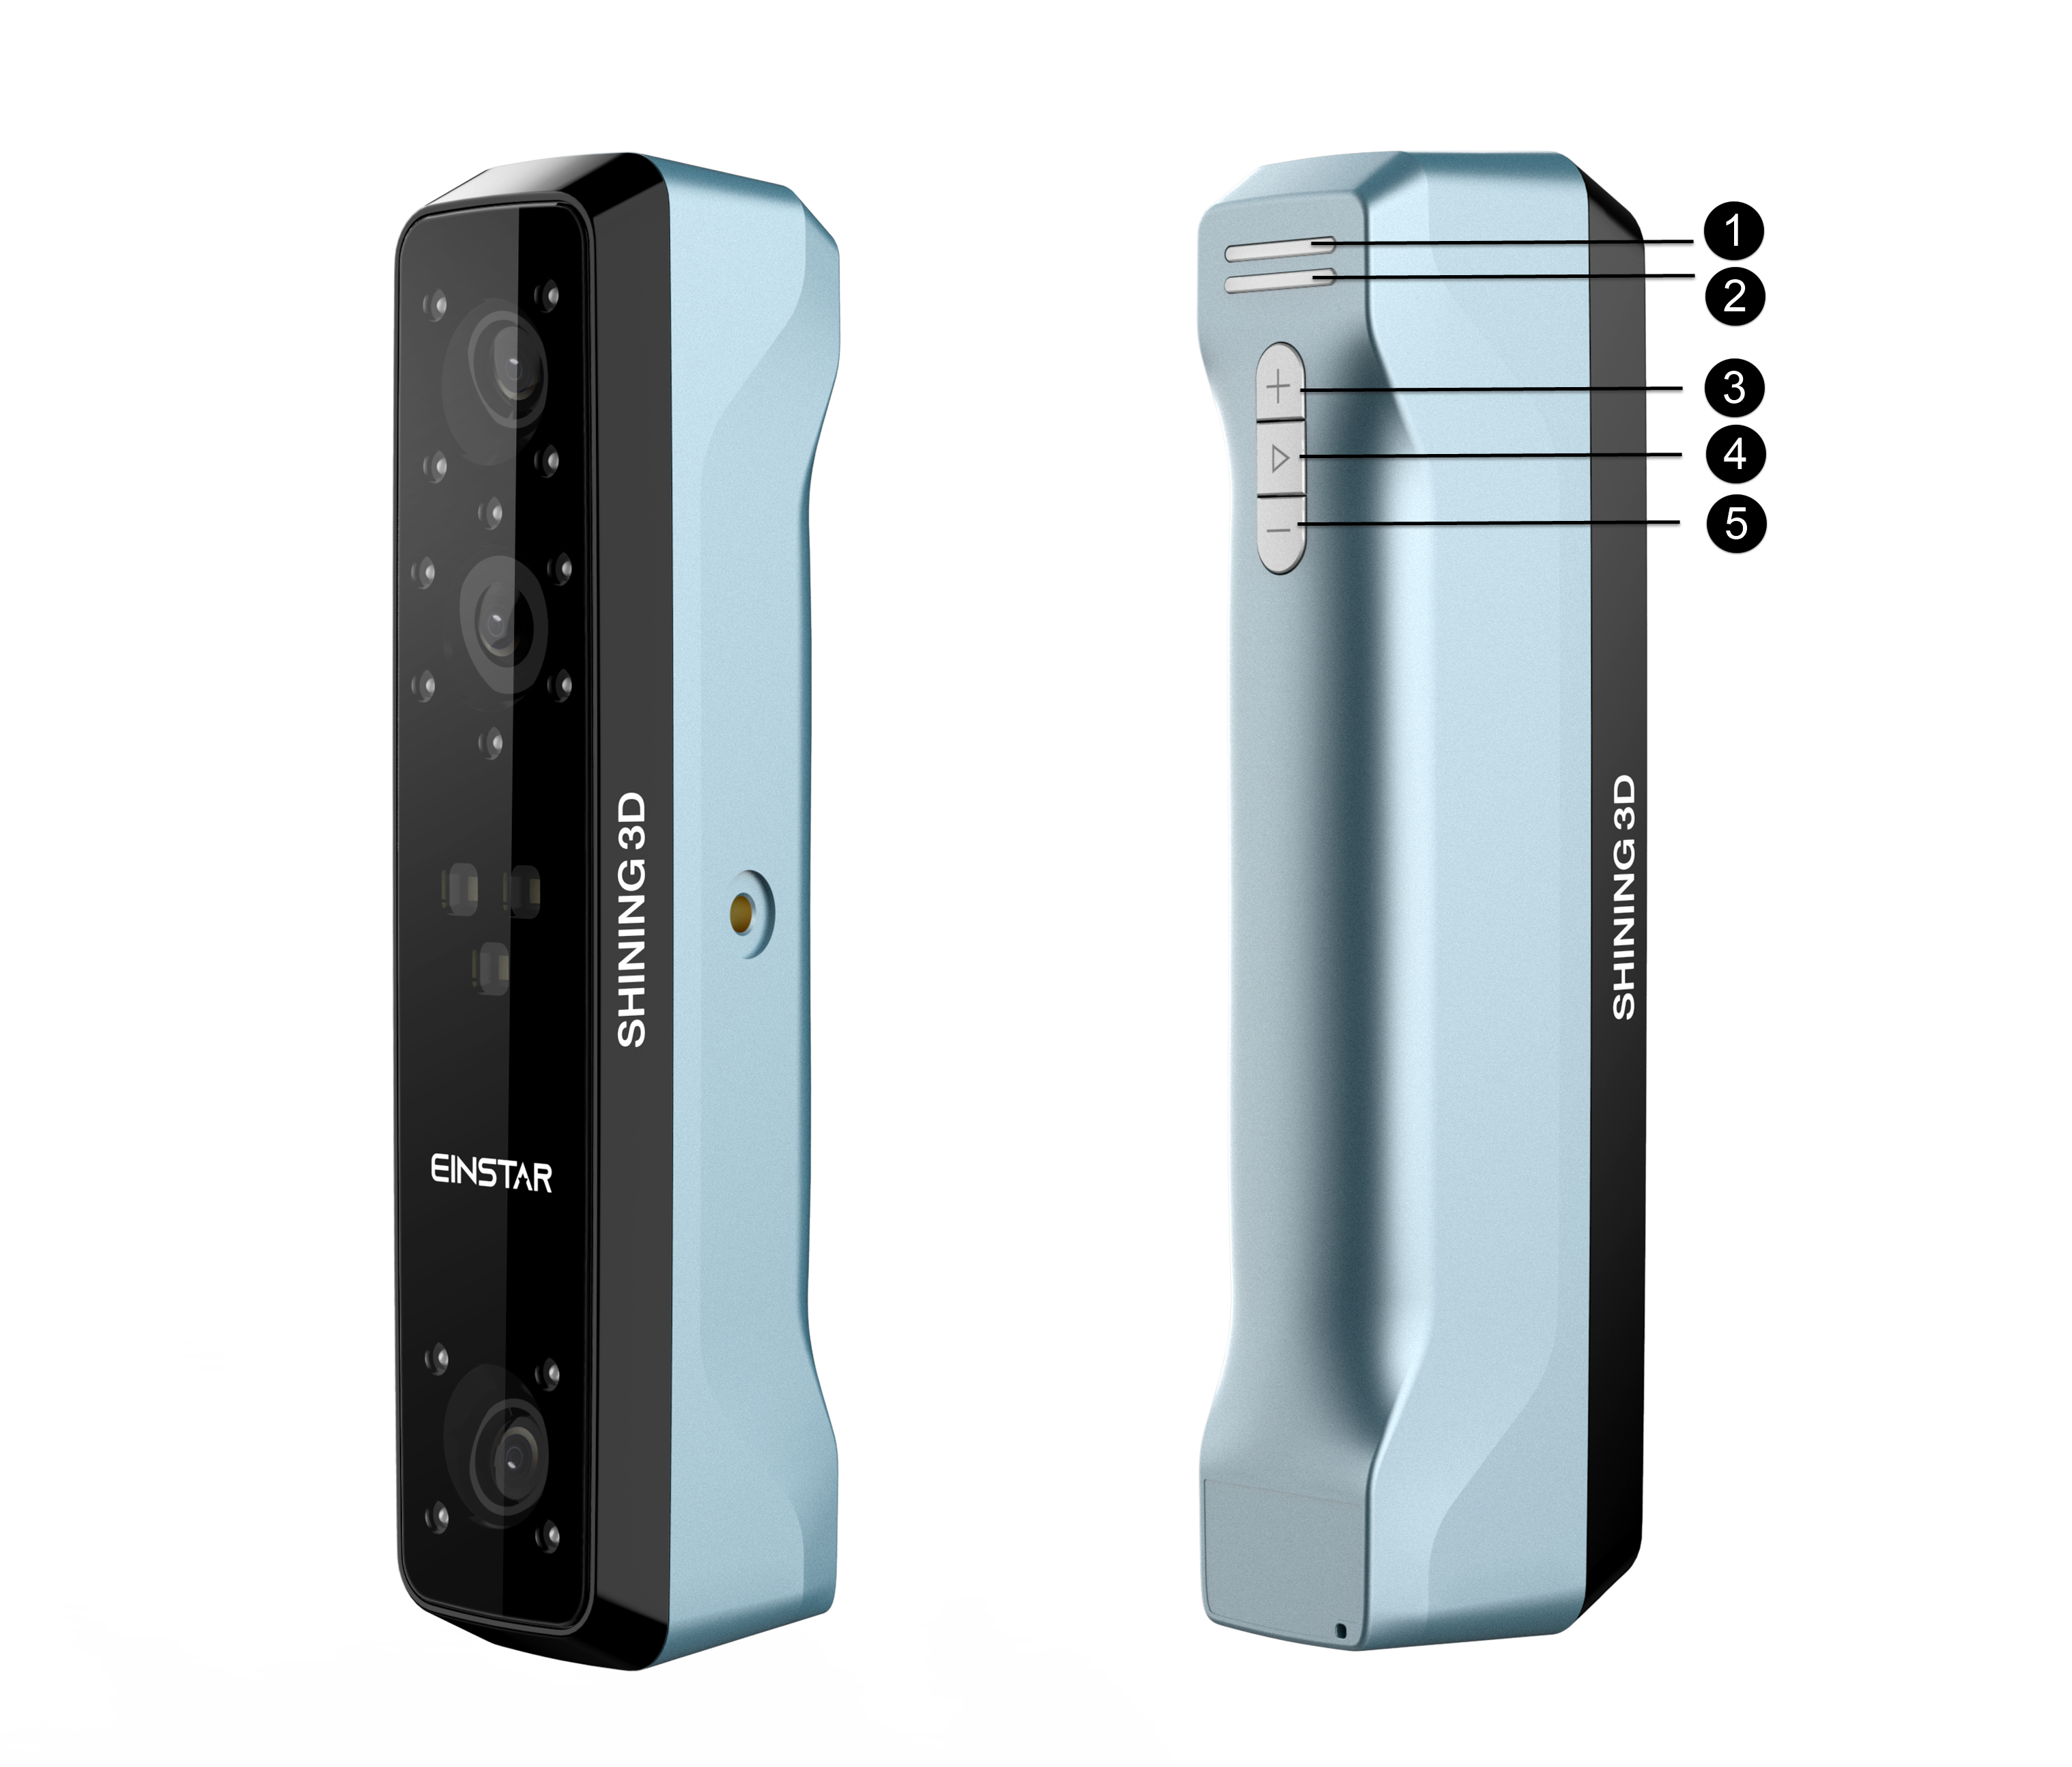
| Appearance | Description |
|---|---|
| 1 | Working distance indicator |
| 2 | Scanner status indicator |
| 3 | Zoom in/Brighter |
| 4 | Preview/Scan/Pause |
| 5 | Zoom out/Darker |
Note
During scan, press scan button twice to enter brightness adjustment, then you can use button 3 and 5.
Component
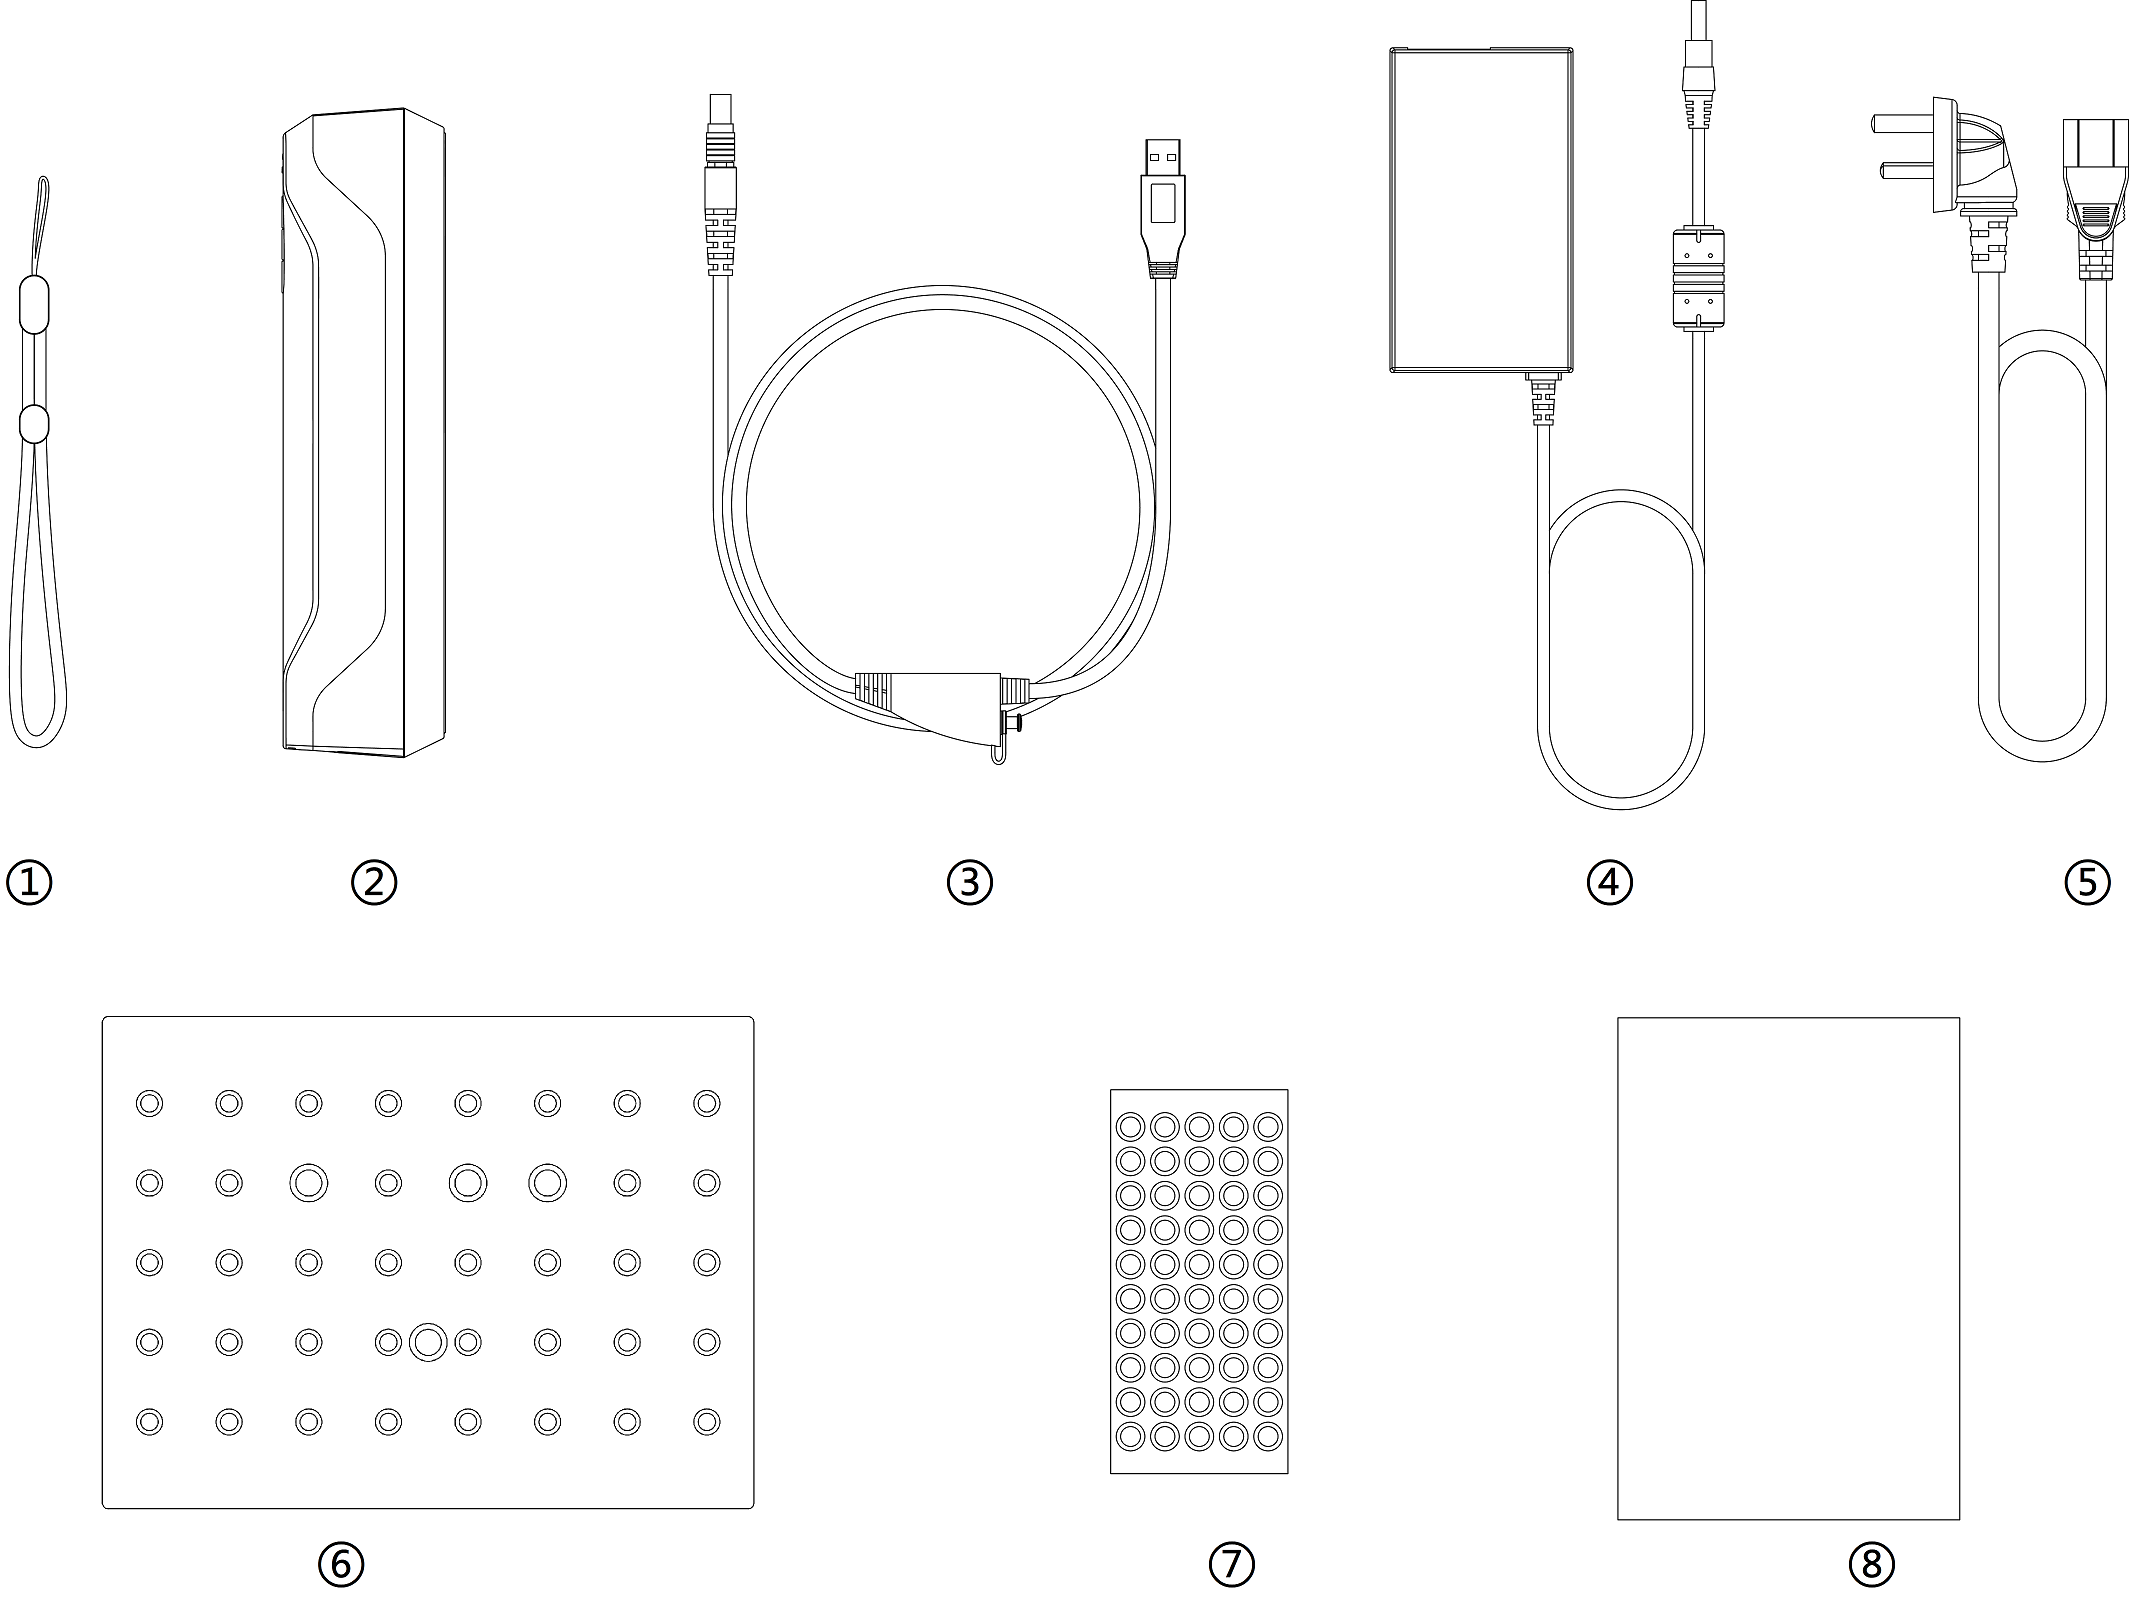
| Components | Description |
|---|---|
| 1 | wrist strap |
| 2 | scanner body |
| 3 | USB cable |
| 4 | power adapter 12V/5A |
| 5 | power cable |
| 6 | calibration board |
| 7 | markers |
| 8 | quick start guide |
Connect the cable
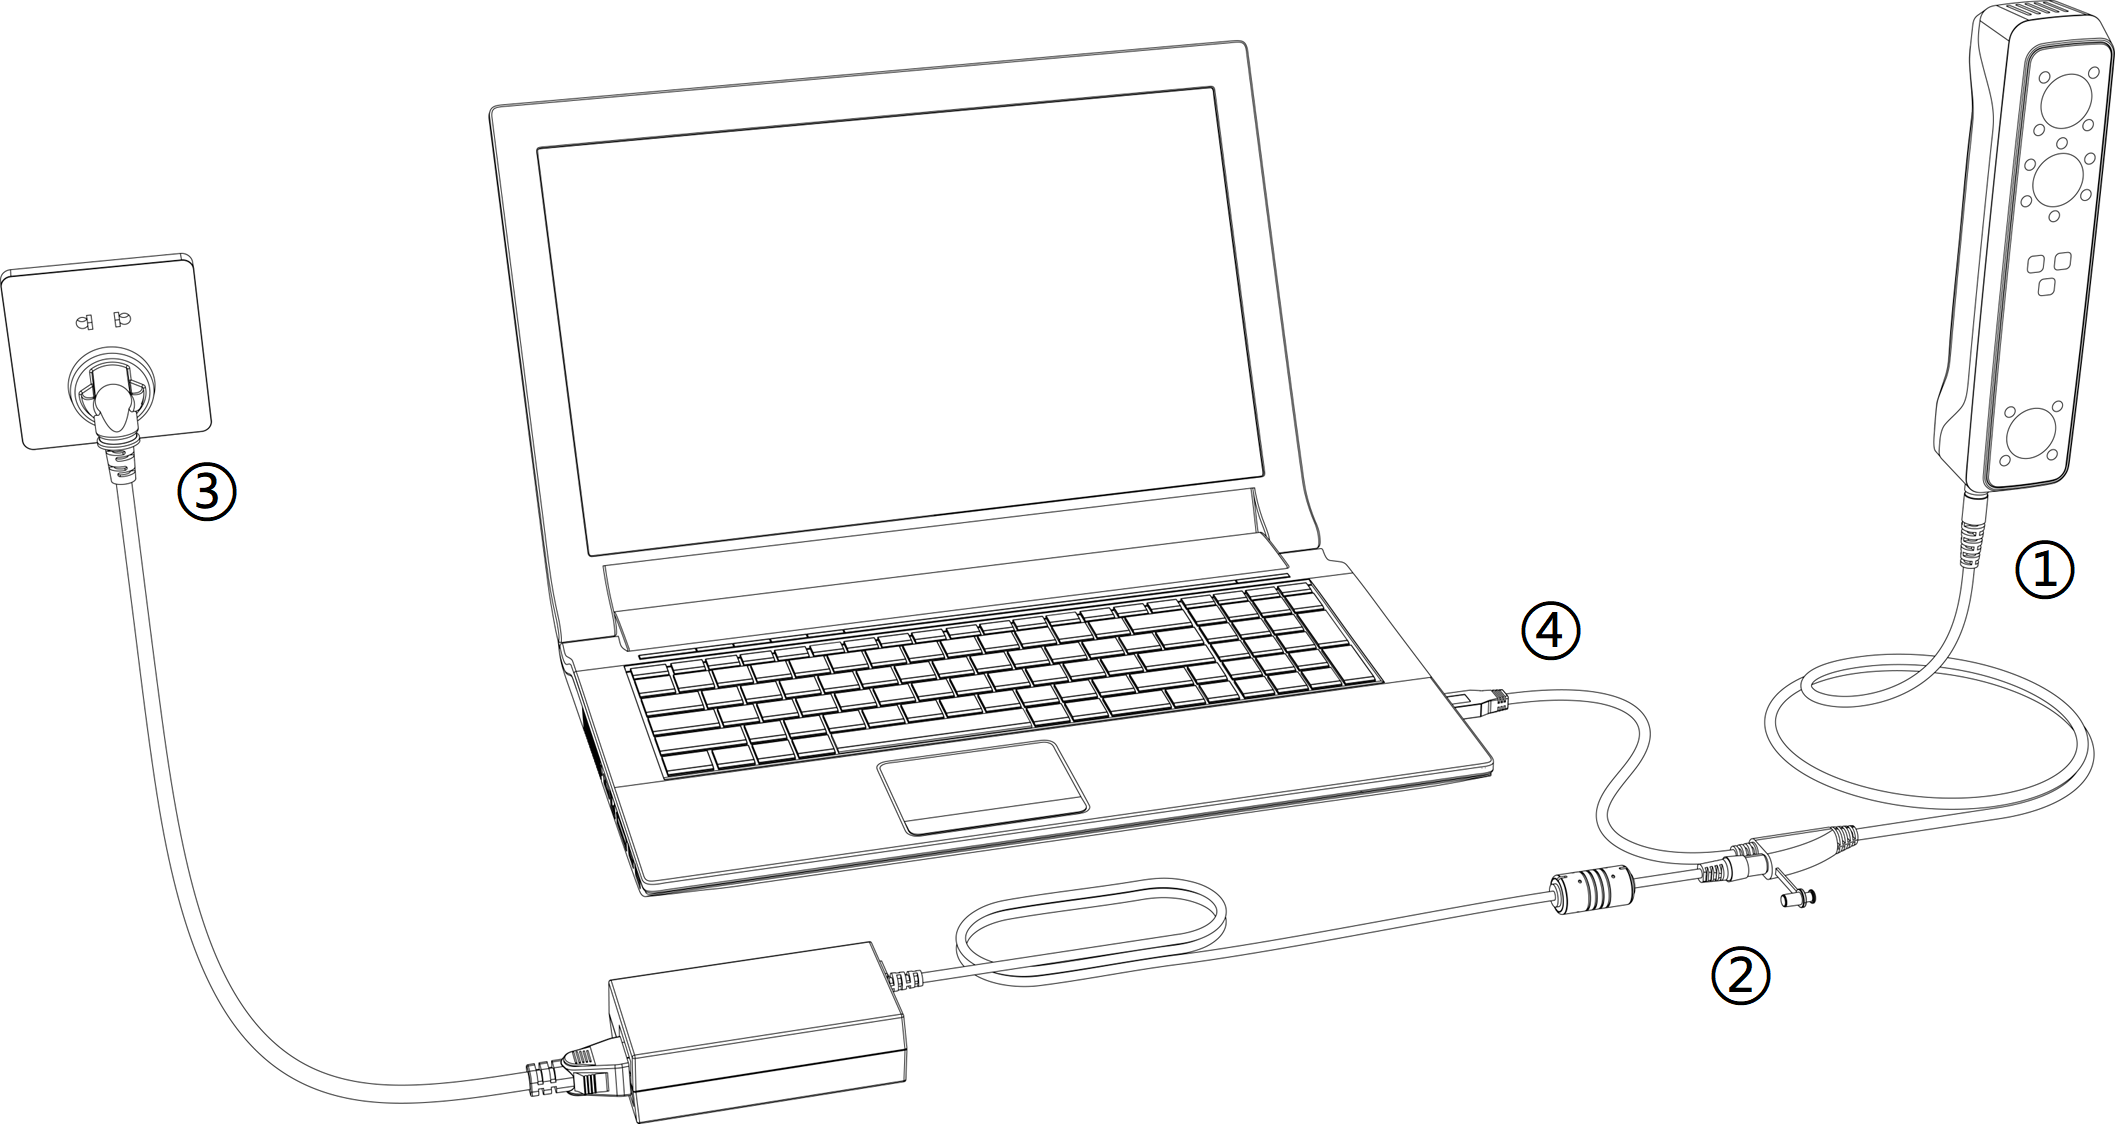
Warning
Make sure you are using the correct power adapter (12V/5A).
Please install the software before using the device.
Steps
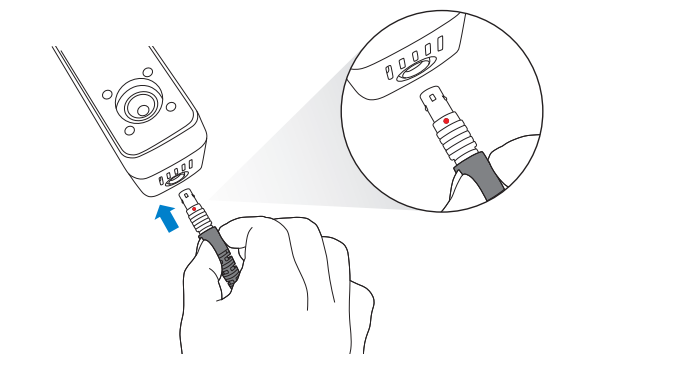
- Plug USB cable into the bottom of Scanner, the red dot should be consistent with the front side of the scanner.
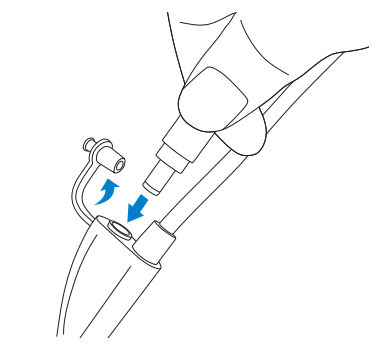
- Plug the power cable into the USB cable.
- Power on and the LED indicator should show blue.
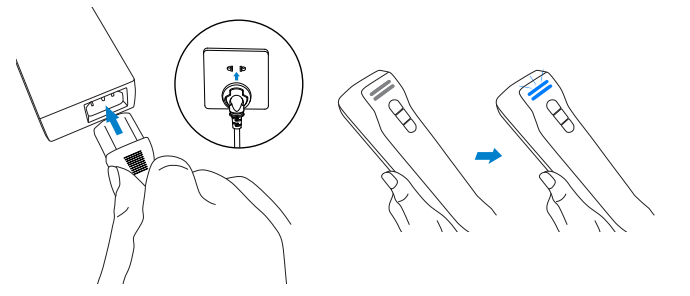
- Plug the other side of USB cable into the USB port of computer.
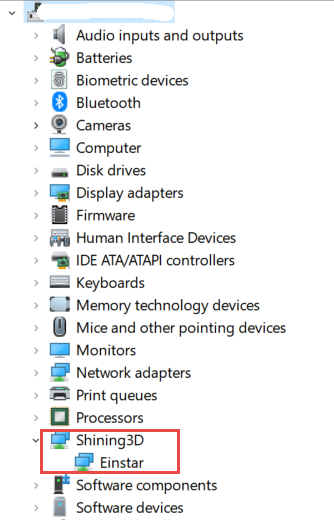
Now you can see our device in your Device Manager.
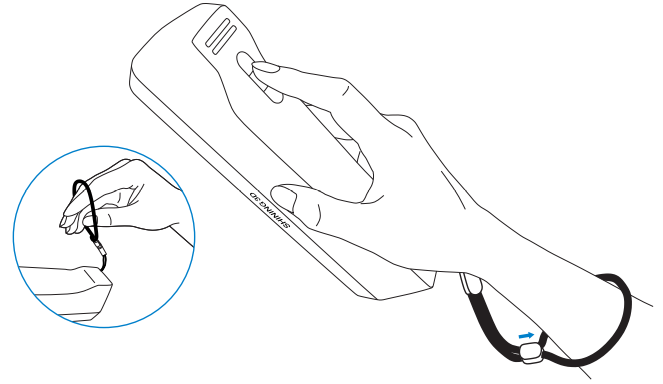
Hold the scanner
Put on and tighten the wrist strap. Hold the scanner securely as shown in the picture.