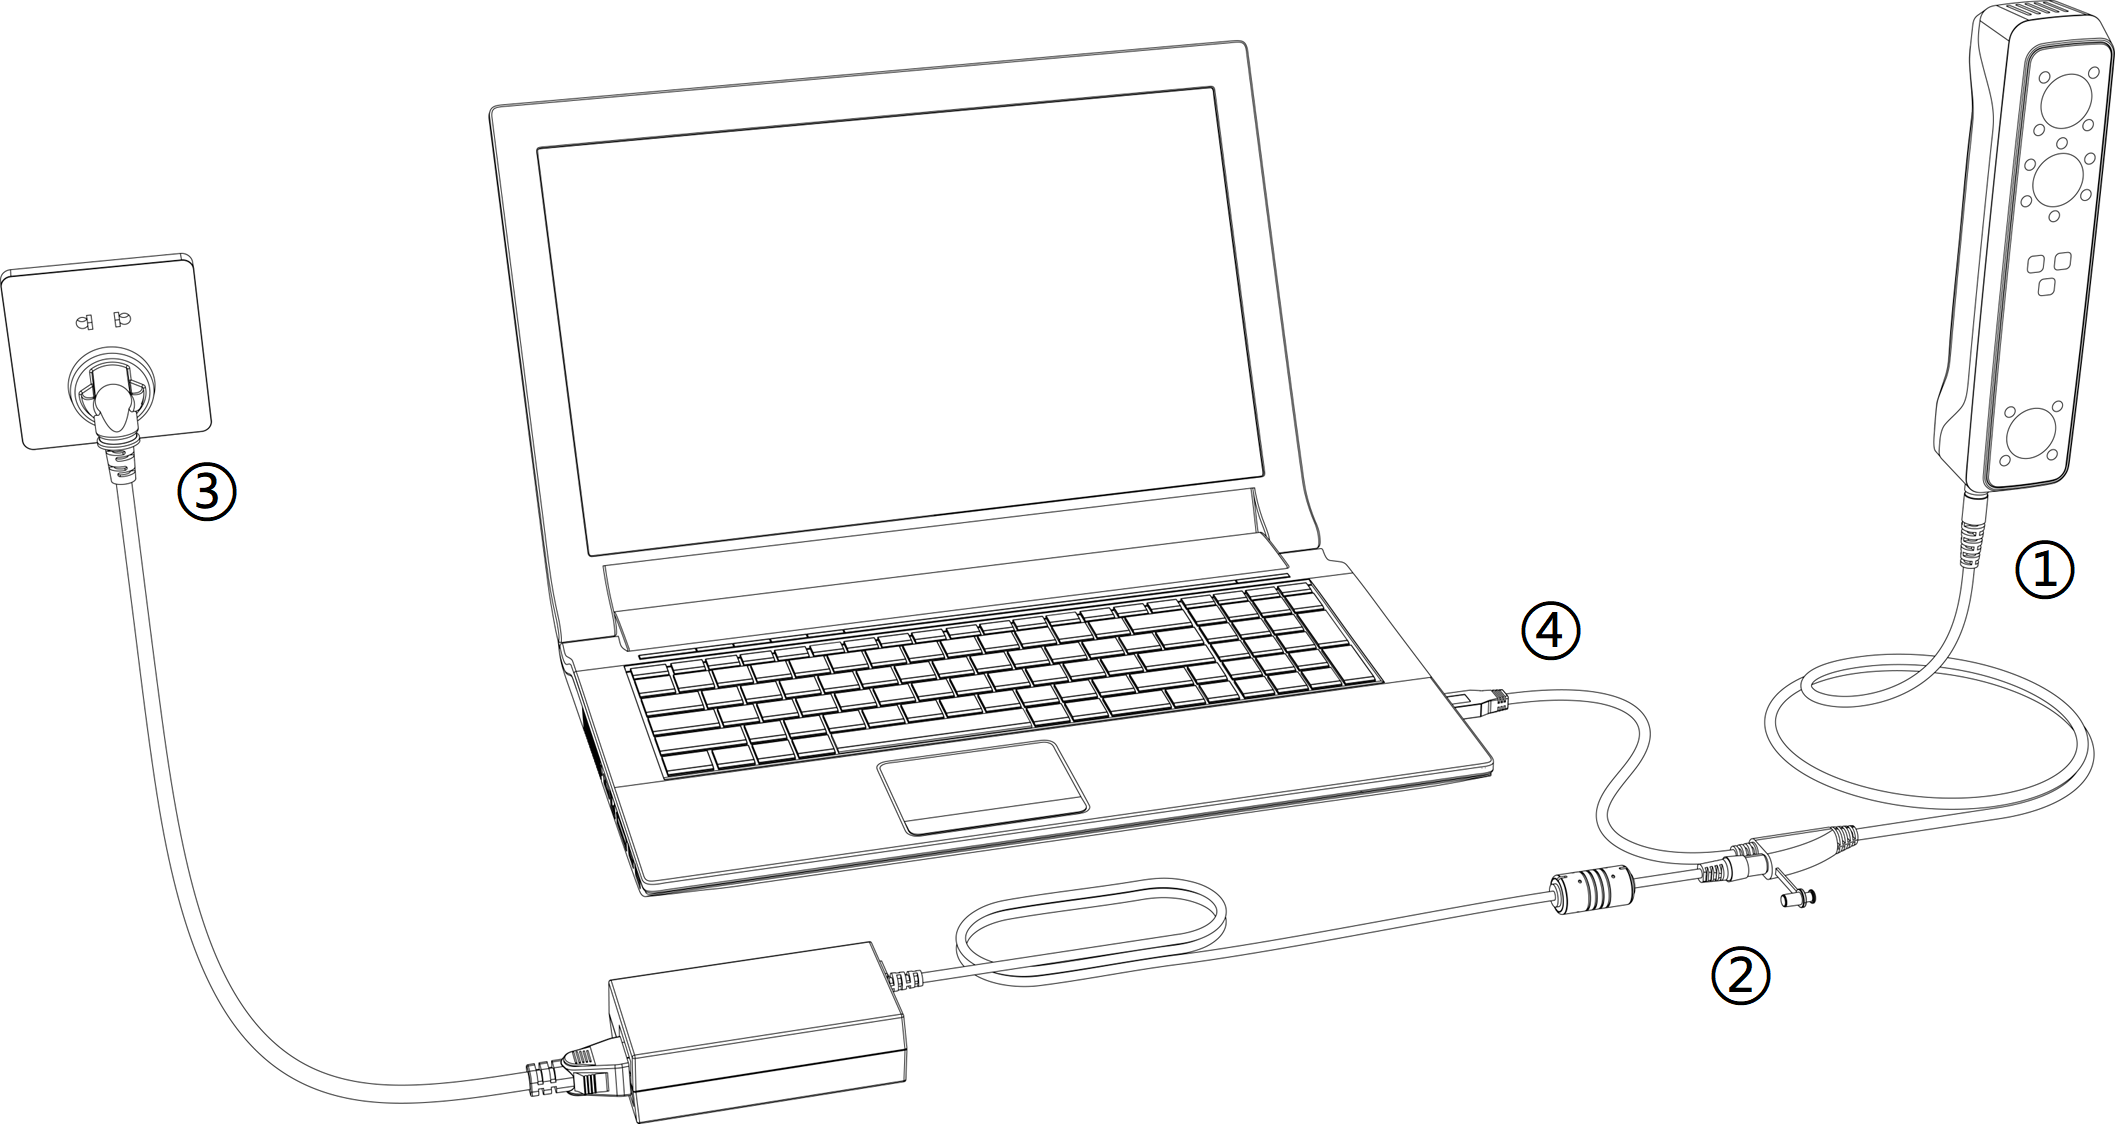
Device Connection
Overview:
Caution
- Make sure you are using the correct power adapter (12V / 5A).
- Please install the software before using the device.
Warning
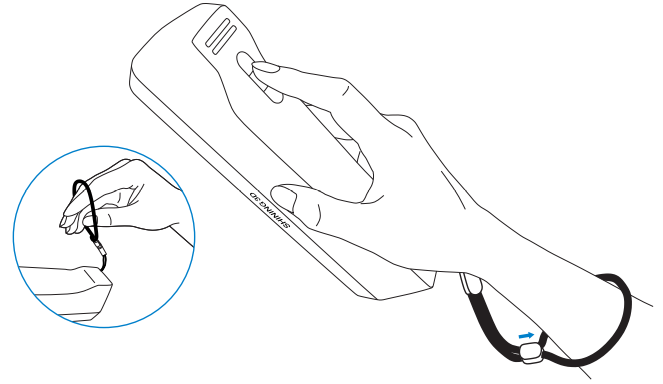
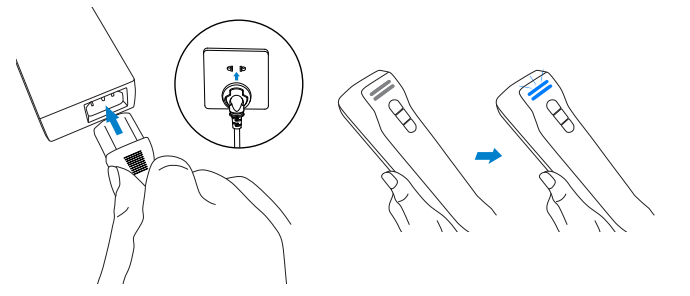
How to hold the device:
Please put on and tighten the ① wrist strap, and hold the scanner securely as shown in the picture.
The steps to connect the device are as follows:
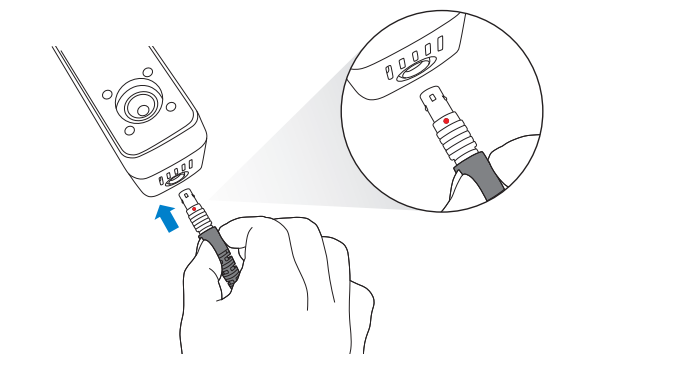
1. Plug USB cable into the bottom of the scanner (as shown in overview). Caution
Please note that the red dot should be consistent with the front side of the scanner.
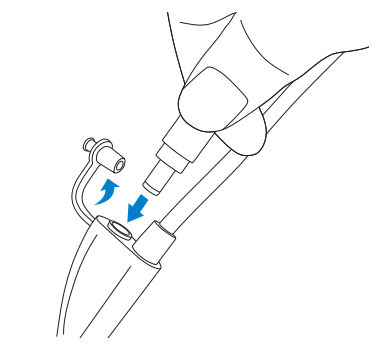
2. Plug the power cable into the USB cable (as shown in overview).
3. Power on (as shown in overview); if the ② LED indicator shows blue, it indicates the power-on status.
4. Plug the other side of USB cable into the USB port of computer (as shown in overview).

5. Now you can see our device in your System Report.