Device Connection
You can connect the device to FreeScan Omni software in both wireless and wired ways; once connected successfully, you can use the software with the scanner for activation, upgrade, online scanning, data transfer, and other operations.
Note
- When using the device for scanning, you cannot connect to the device.
- If the device is currently casting, entering the device connection interface will automatically stop the casting.
Wireless Connection
-
Place the scanner on the dock, and the scanner will automatically connect to the dock's hotspot.
-
Use an Ethernet cable or USB upstream cable to connect the dock to the computer, and the computer will automatically connect to the dock's hotspot.
Note
It is recommended to use a USB upstream cable to connect the dock to the computer.
-
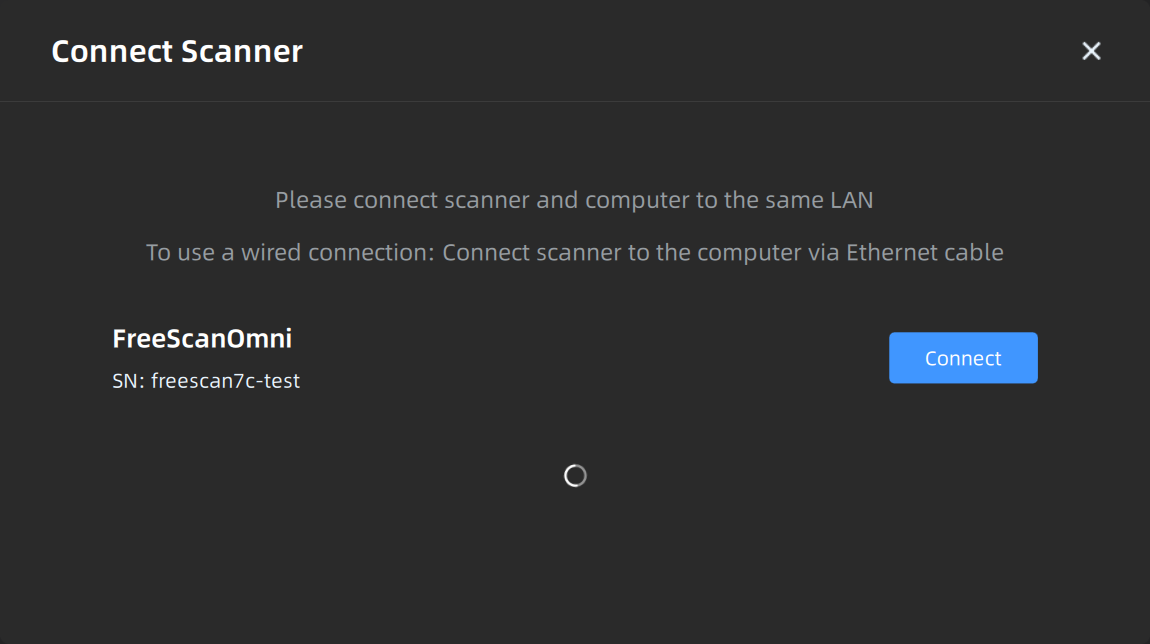
On the software homepage, click Connect Scanner in the upper left corner to open a dialog box.

-
In the dialog box, select the scanner you want to connect to, and tap Join to initiate the connection request.
-
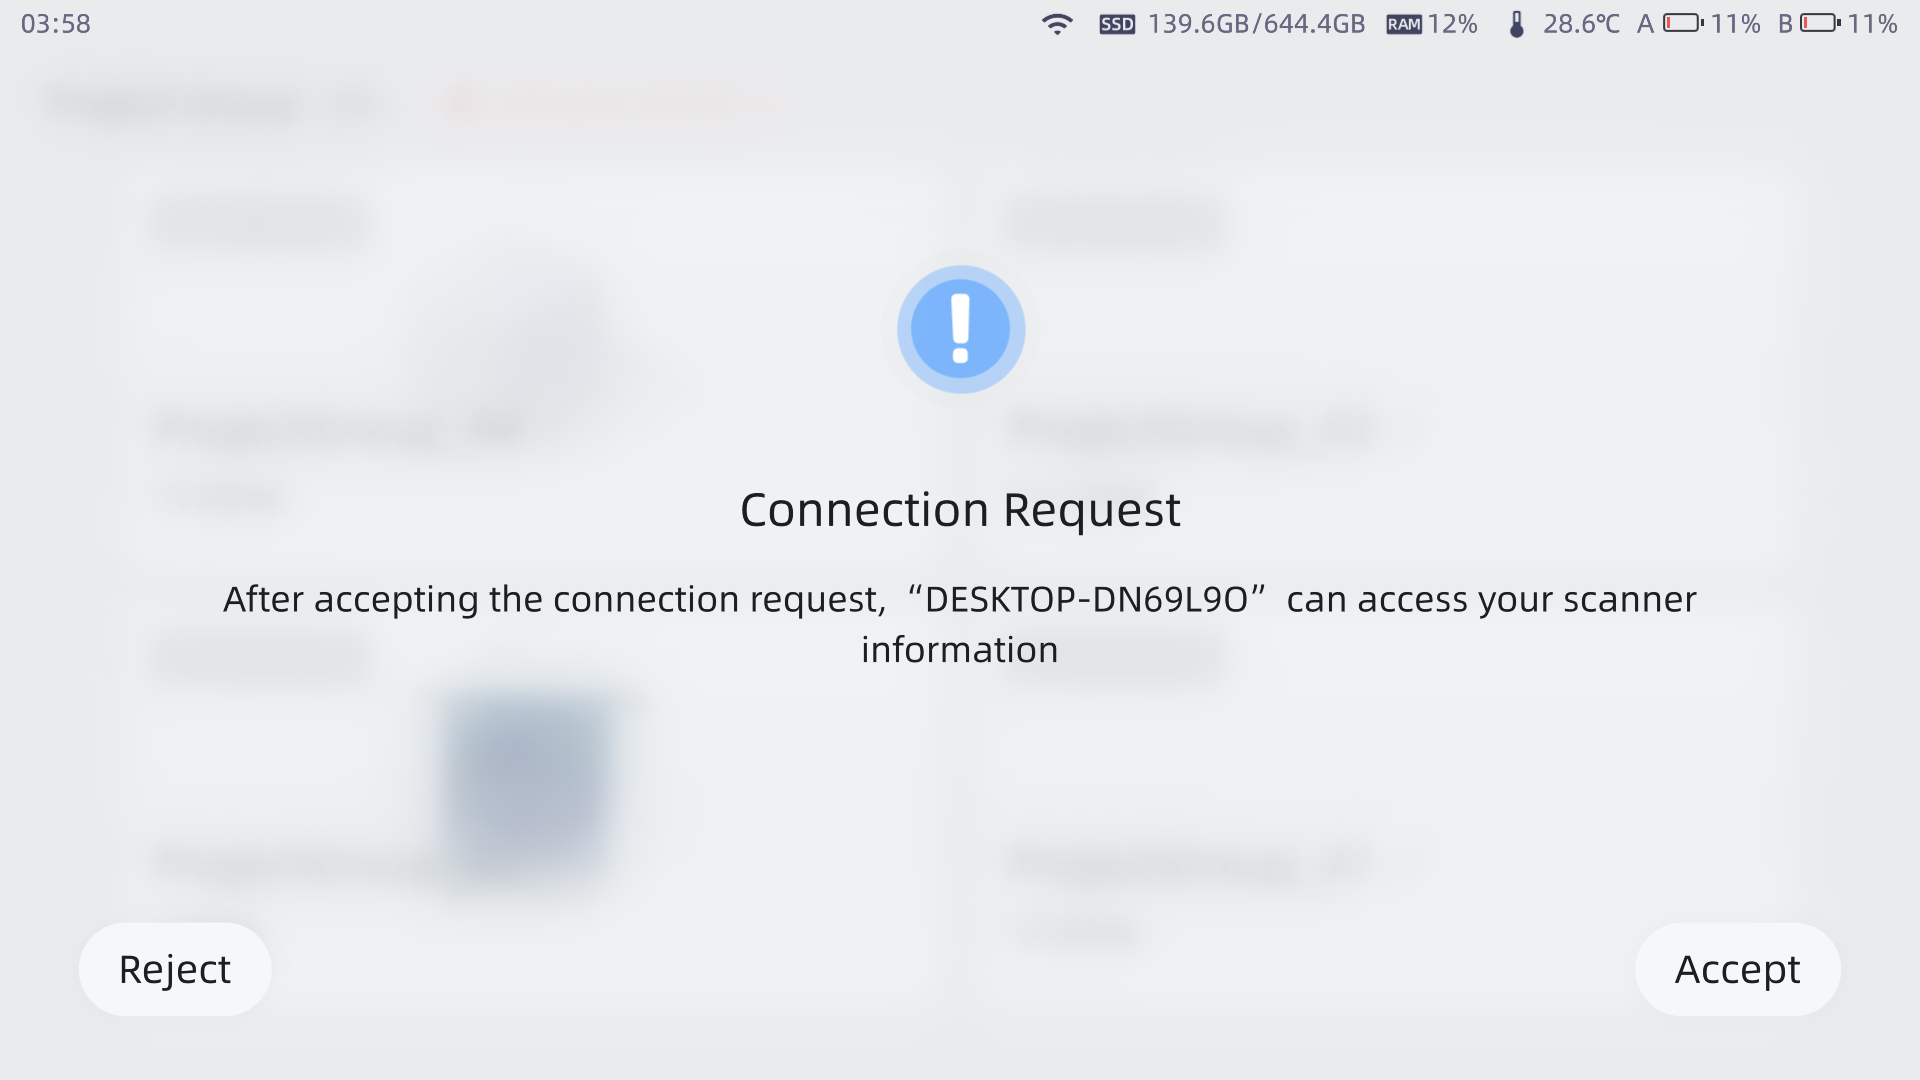
Click Accept on the scanner to accept the connection request.
-
Once connected successfully, the scanner name and device folder will be displayed in the upper left corner of the software homepage.

Wired Connection
-
Use an Ethernet cable to connect the scanner to the computer.
-
On the software homepage, click Connect Scanner in the upper left corner to open a dialog box.
-
In the dialog box, select the scanner you want to connect to, and click Connect to initiate the connection request.
-
Click Accept on the scanner to accept the connection request.
-
Once connected successfully, the scanner name and device folder will be displayed in the upper left corner of the software homepage.
Disconnection
Note
FreeScan Omni only supports connecting to one device at a time. If you need to change the connected device, please disconnect the current one first.
After the device is connected successfully, on the scanner interface, tap Disconnect.