Data Editing
When the scan is paused and there is point cloud or mesh data, you can tap ![]() to enter the data editing interface.
to enter the data editing interface.
-

Use touch gestures to rotate/zoom/pan the model. -

Use the lasso tool to select a specified area, supporting touch gestures to zoom the model. -
 /
/  /
/  Mesh/Point Cloud/Markers
Switch between mesh, point cloud, and marker data. -
 Expand / Connected Domain
Select all data connected to the currently selected area. -
 Invert Selection
Select all currently unselected data. -
 Deselect All
Deselect all currently selected data. -
 Undo
Undo
Undo the most recent deletion operation and restore the deleted data. -
 Revert
Restore to the state before the last edit. -
 Delete
Delete the selected data. (You can choose whether to retain the markers.)
Caution
Deleting all the markers is not supported. To ensure the alignment is completed, at least 4 markers must be retained.
 Cutting Plane
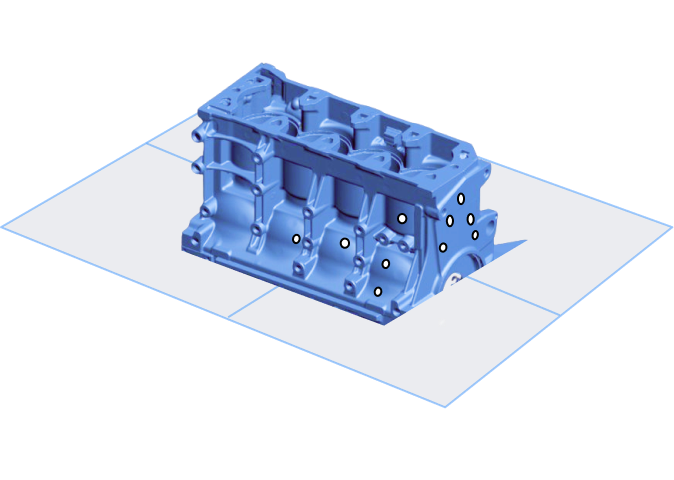
When the scan is paused and there is point cloud, mesh, or marker data, you can create a cutting plane. Data below the cutting plane will not be collected and can be used to remove the base data of the object.
-
Select mesh, point cloud, or marker data; if there is only a single data type, no selection is needed.
- : Mesh
- : Point Cloud
- : Markers
-
Slide to draw a closed shape. The area within the lasso will be selected.
Note
- Zooming the model is supported. Tap to also pan and rotate the model. For gesture instruction, refer to Touch Gesture.
- If selecting markers, the area must contain at least 3 markers.
- Unselected marker:

- Selected marker:

- Unselected marker:
- Zooming the model is supported. Tap
-
Tap Create. The normal vector of the created cutting plane will be blue on the front side and red on the opposite side.
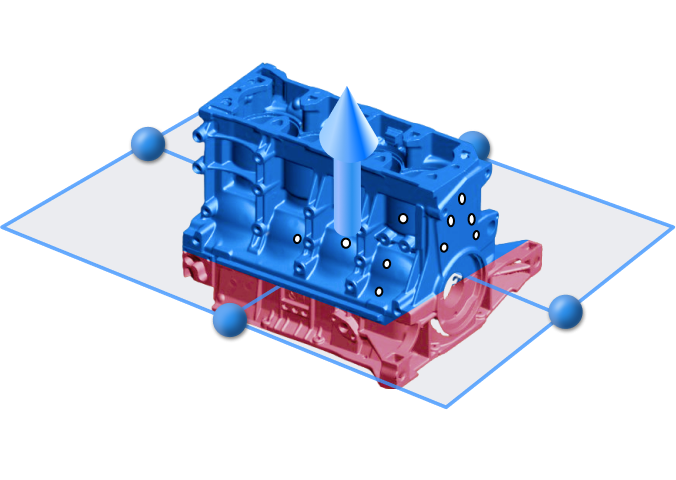
-
Edit the cutting plane:
Operation Steps Move Cutting Plane Tap the arrow above the cutting plane  , and adjust the height of the cutting plane along the arrow direction.
Rotate Cutting Plane Tap the blue circle on the cutting plane  , and rotate the cutting plane around another edge parallel to it.
Invert Selection Tap  , which will reverse the normal direction and select the data to be retained (data on the normal front side is blue, indicating retained data).
Delete Plane Tap  , to delete the created cutting plane.
 -
Tap Apply, which will delete the data in the red area below the cutting plane (marker data will be retained) and return to the scan paused interface.