Interface
Click  |
| - Official Website: Open the official website of Shining 3D to learn about the company’s products and information. - Facebook: Enter Shining 3D’s Facebook to view product introduction and other operations. - Support Platform: Enter Shining 3D’s support platform to view product introduction and other operations. - Running Environment Detection:Diagnose the running environment of the software. Check the device information and whether computer configuration meet the operating conditions. - Preview:After checking the function, you can preview the scanning performance before scanning. - Scanning Distance Indicator:After checking the function, there is a bar on the left side of the scanning interface, displaying the scanning distance;After unchecking the function, the distance bar will no longer be displayed and the scanning distance can be adjusted according to the color of the laser lines. For more, see Scanning Settings. - Advanced Mode: Check the box to select a smaller dot pitch when creating a new project1. - User Experience: To help us improve the user experience. We hope to be allowed to collect usage experience information and we will . - Factory Default: All settings can be restored to the initial settings, and the software will restart automatically. - Language: To set the language displayed in the software. - About: View related software release information, contact information, etc. - User Manual: Open the user manual. - Teamviewer: The quick access to remote assistance. Please send the ID and password in the pop-up window to the technical supporters for remote assistance. |
| |
||
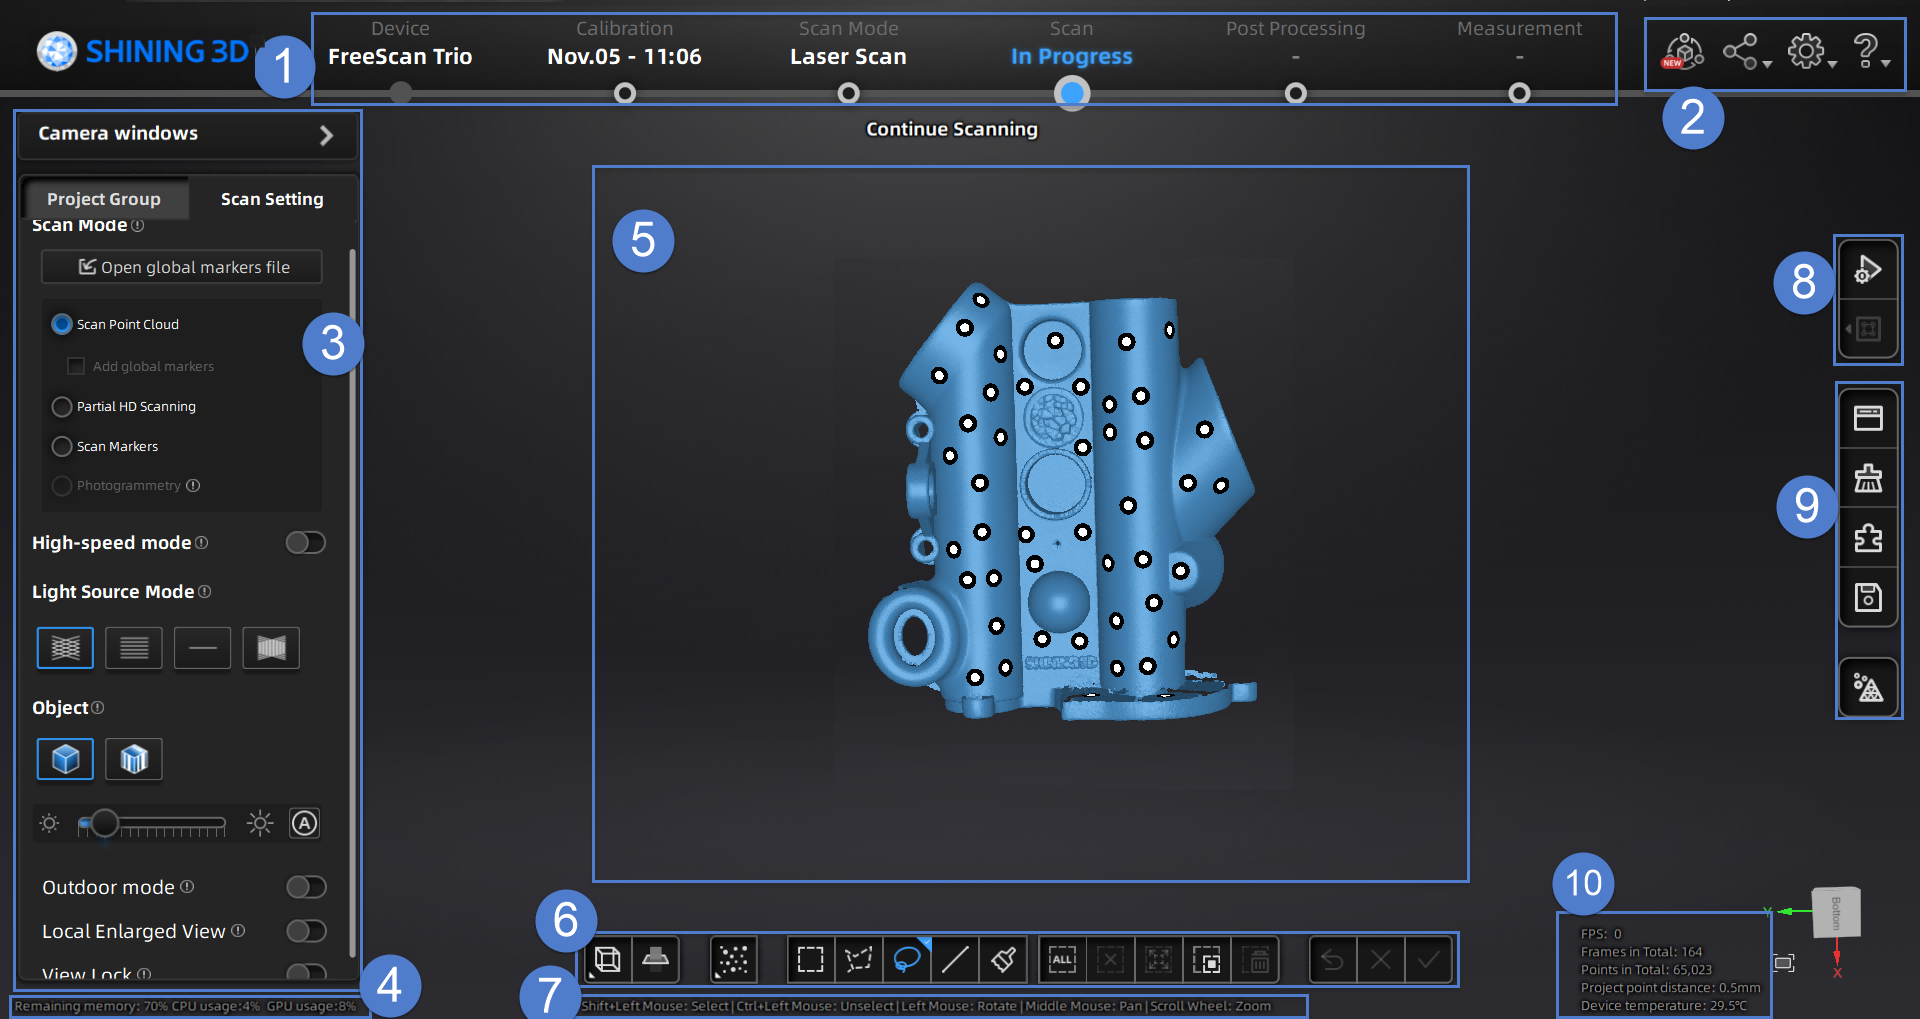
| Window for viewing the preview and scanning model. | ||
| For more, see Data Editing. | ||
| Quickly move the model or adjust the angle through shortcut keys. | ||
| For more, see Scanning. | ||
| For more, see Functions. | ||
| To show information about FPS, Frames in Total, Points in Total, etc. |
-
Advanced Mode: the minimum point distance is 0.01mm on the Scan Point Cloud Mode and the Partial HD Scanning Mode;
Non-advanced Mode: the minimum point distance is 0.1mm on the Scan Point Cloud Mode; the minimum point distance is 0.02mm on the Partial HD Scanning Mode. ↩