Calibration
Please follow the guidance to start the calibration.
- Stand in the visual field of the tracker with a calibration bar.
- Move the bar to a correct position and the calibration will start.
- Change its direction.
Note
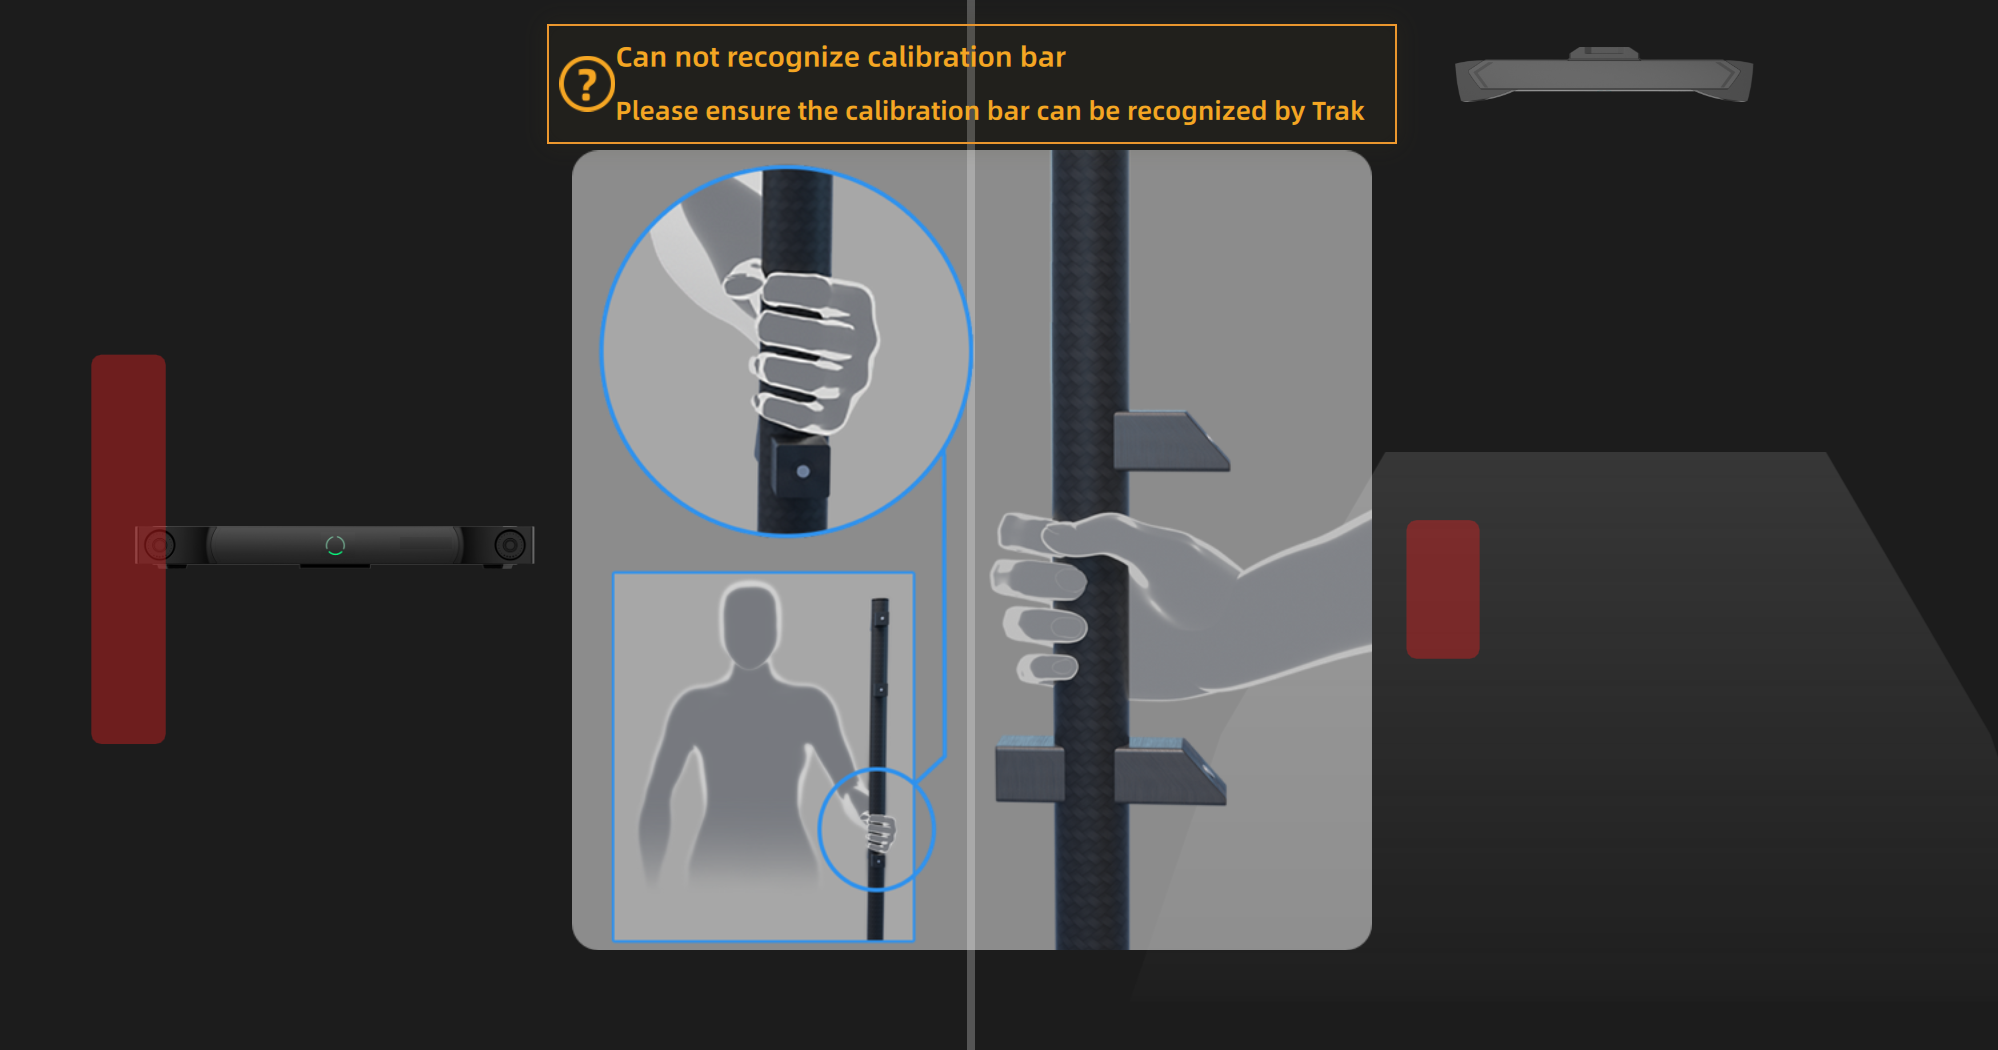
- Do not cover or damage the markers on the calibration bar.
- If the tracker fails to recognize the calibration bar, please follow the guidance and adjust the direction of the bar to make sure it is at a right position in the front view and the top view.
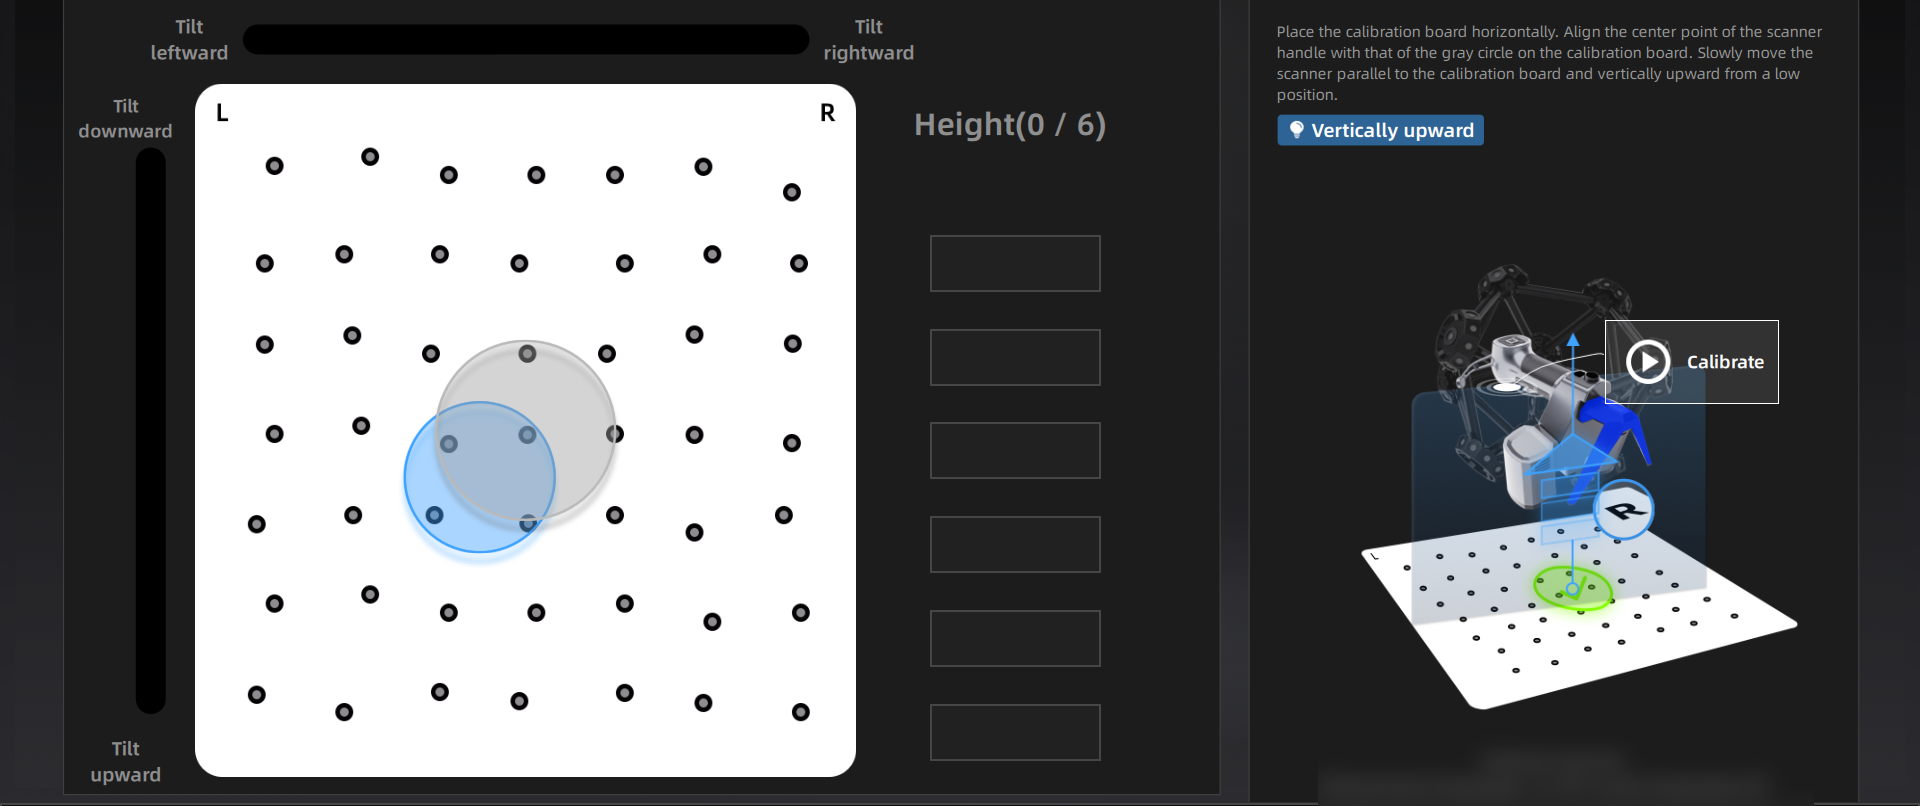
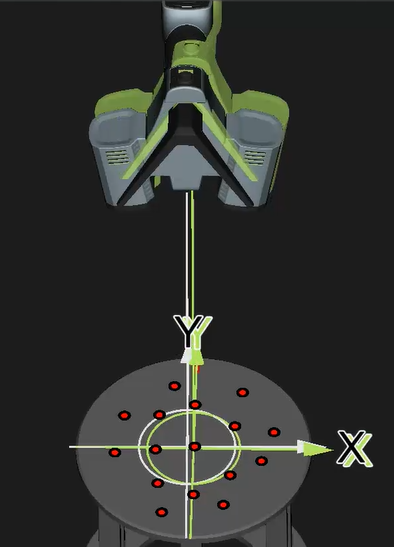
- Place the calibration board horizontally.
- Adjust the distance between the scanner and the calibration board according to the height box.
- Place the scanner in the same direction as shown in the figure and align the center point of the scanner handle with that of the gray circle on the calibration board.
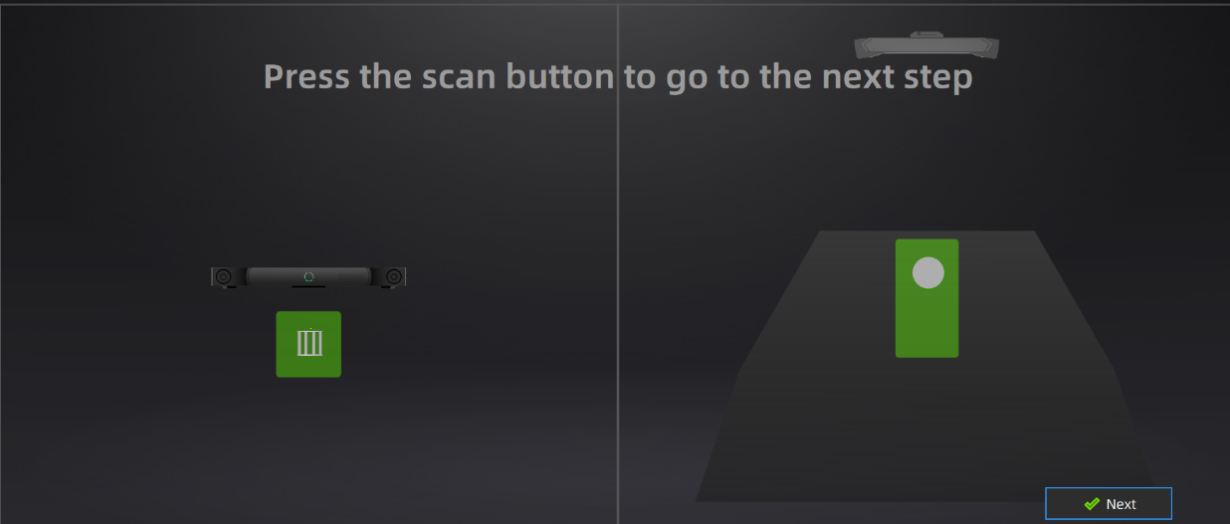
- Press the scan button on the scanner to start.
- Move the device upward slowly until all height boxes turn green.
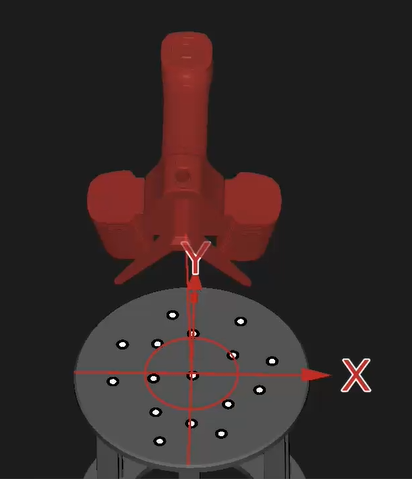
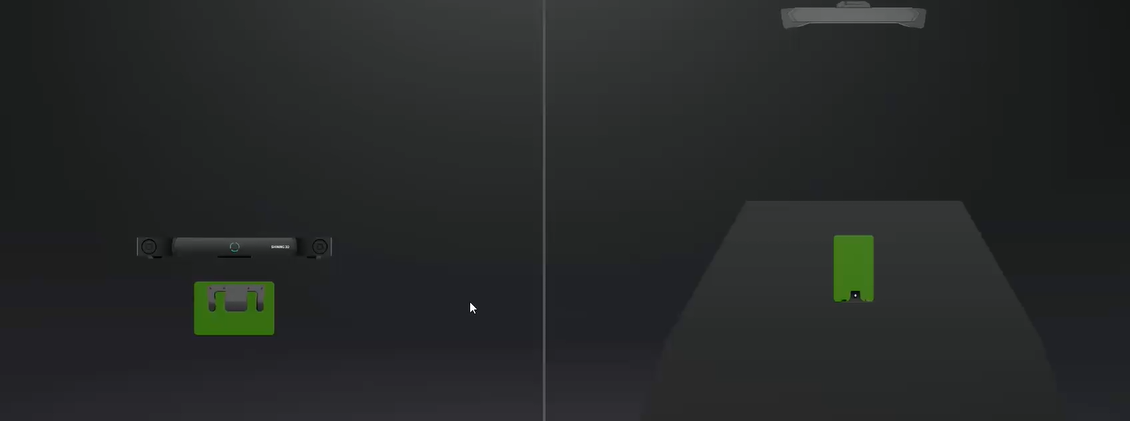
- Place the system calibrator in the visual field of the tracker, and move it to a right position in the front view and the top view.
- Click Next to do system calibration.
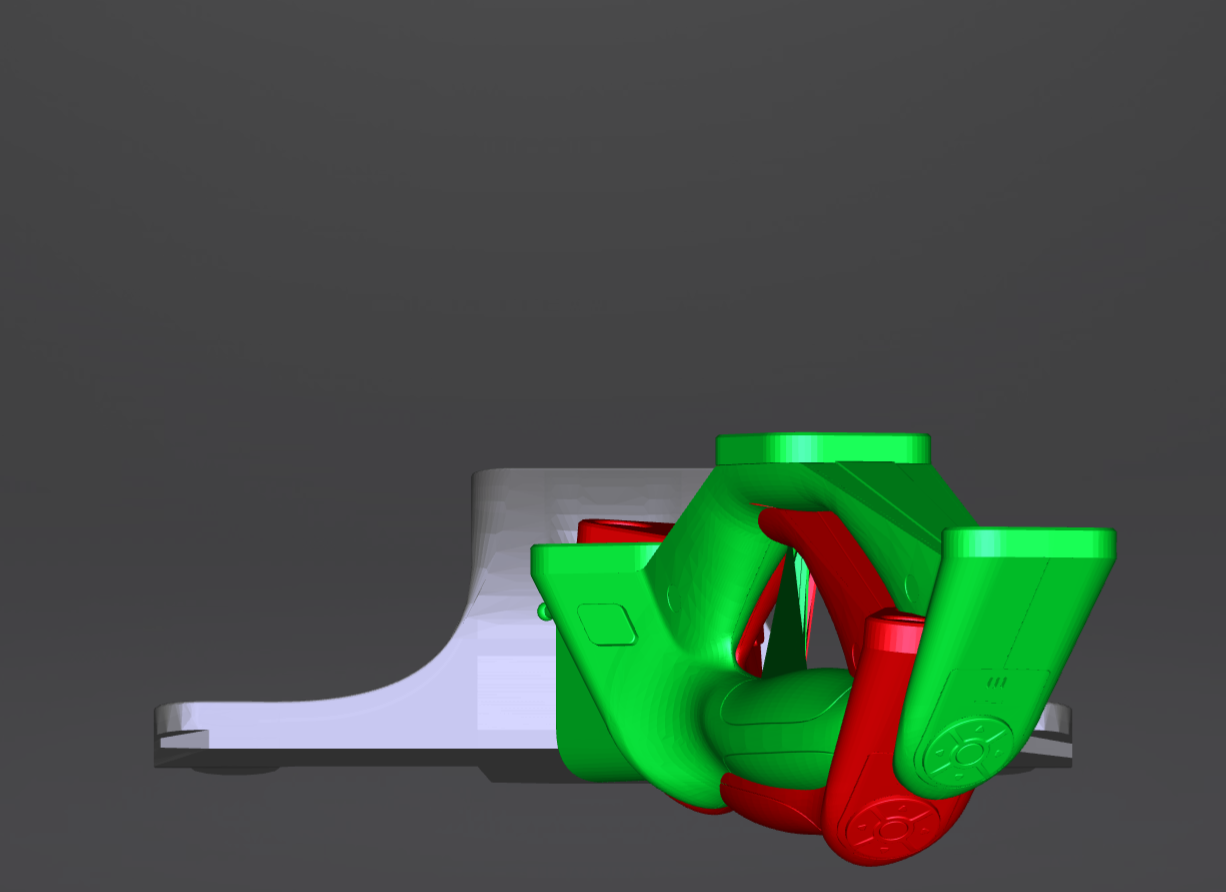
- Align the three-dimensional graphics and coordinates of the device with the diagrams on the interface one by one, and complete the calibration of all positions.
Col
Col
-
Move the calibrator of FreeProbe into the position according to the guidance.
-
Place the tip of the probe at the specified position according to the interface diagram, and adjust the position of the probe to continuously align with the red indicator diagram until the entire probe calibration is completed.
The navigation bar on the top of the interface will display ![]() when the calibration was completed successfully. If no calibration is performed within 7 days since,
when the calibration was completed successfully. If no calibration is performed within 7 days since,![]() will appear and prompt you to calibrate the device again to ensure scanning accuracy.
will appear and prompt you to calibrate the device again to ensure scanning accuracy.
Note
When hovering the cursor over ![]() , you can see the exact time when all devices are calibrated. You may need to calibrate the device when the corresponding time is yellow, and not to do when it is green.
, you can see the exact time when all devices are calibrated. You may need to calibrate the device when the corresponding time is yellow, and not to do when it is green.