Calibration
Please follow the guidance to start the calibration.
Note
To enlarge the calibration interface, press F11 for the full-screen display. While in full-screen mode, press F11 or Esc to exit the full-screen display.
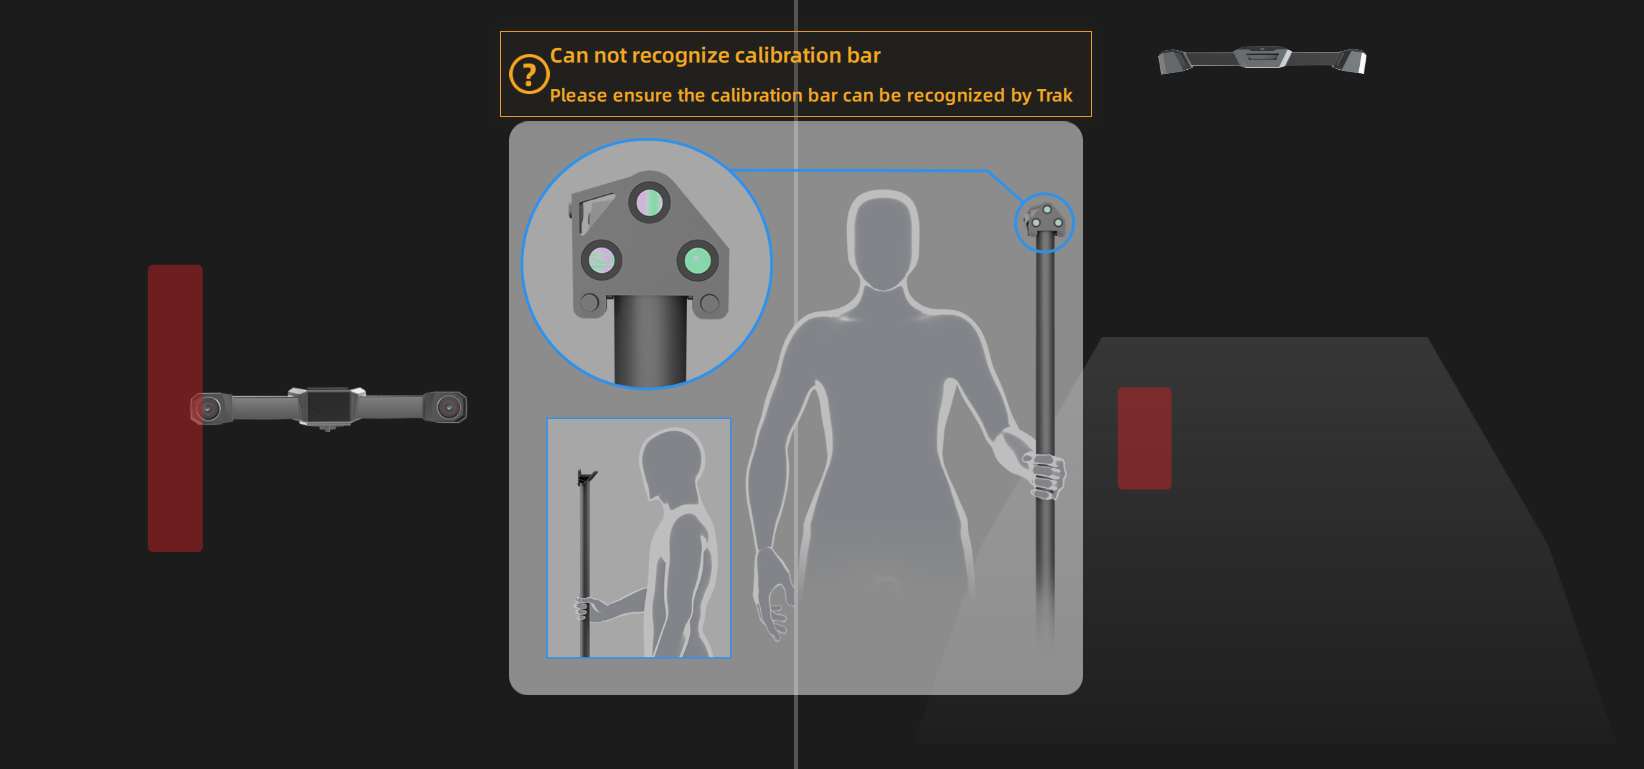
- Stand in the visual field of the tracker with a calibration rod.
- Move the calibration rod to a correct position and the calibration will start.
- Change its direction.
Note
- Do not cover or damage the markers on the calibration rod.
- If the tracker fails to identify the calibration rod, please follow the guidance and adjust the direction of the calibration rod to make sure it is at a right position in the front view and the top view.
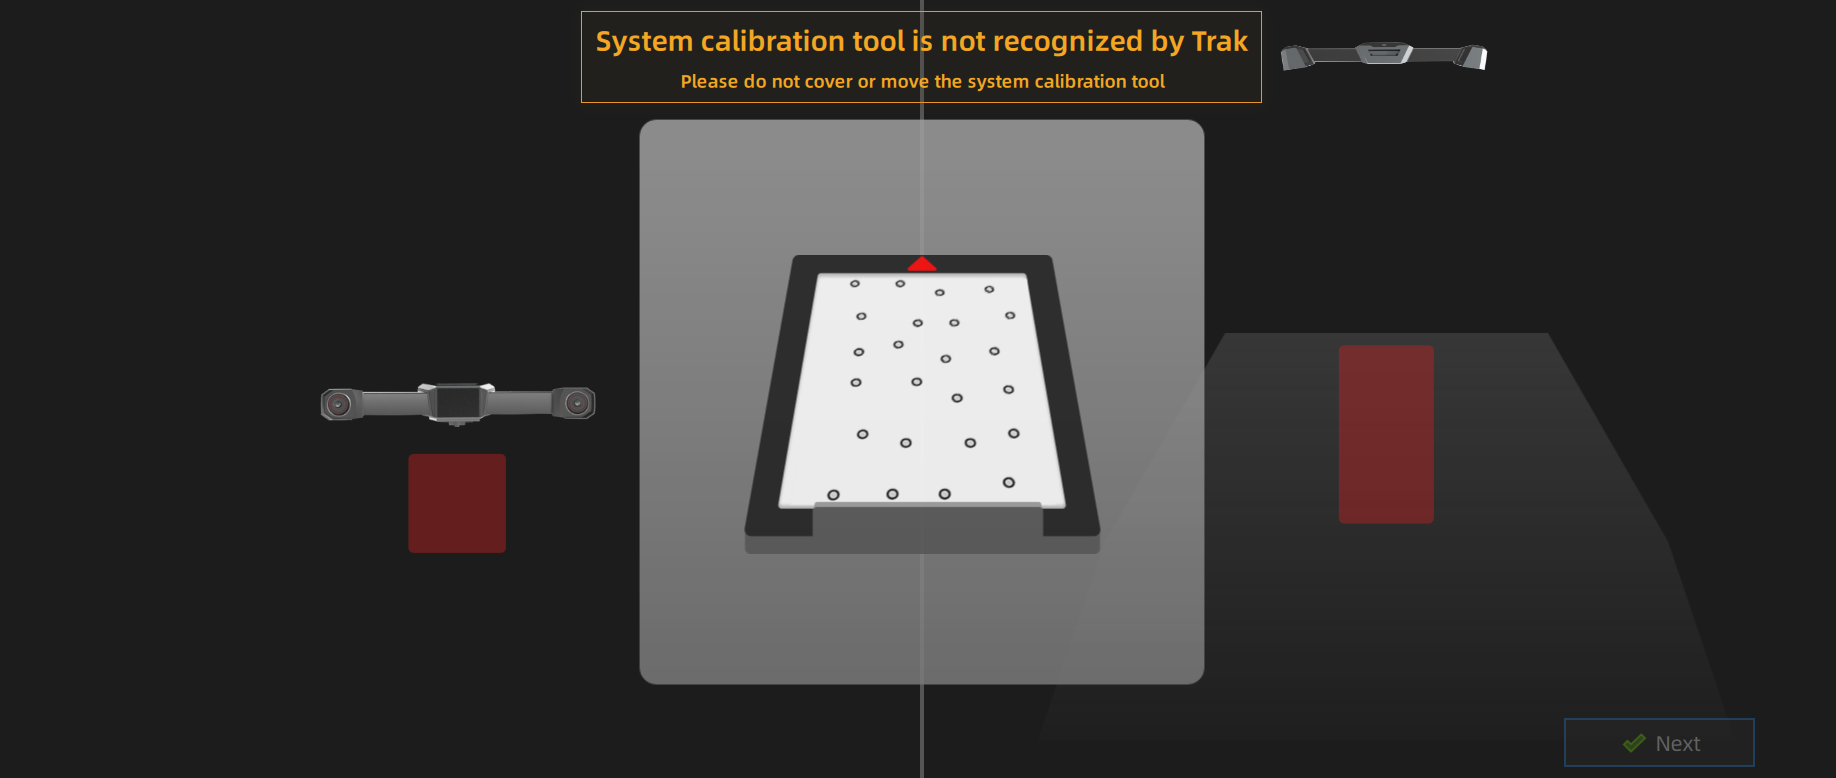
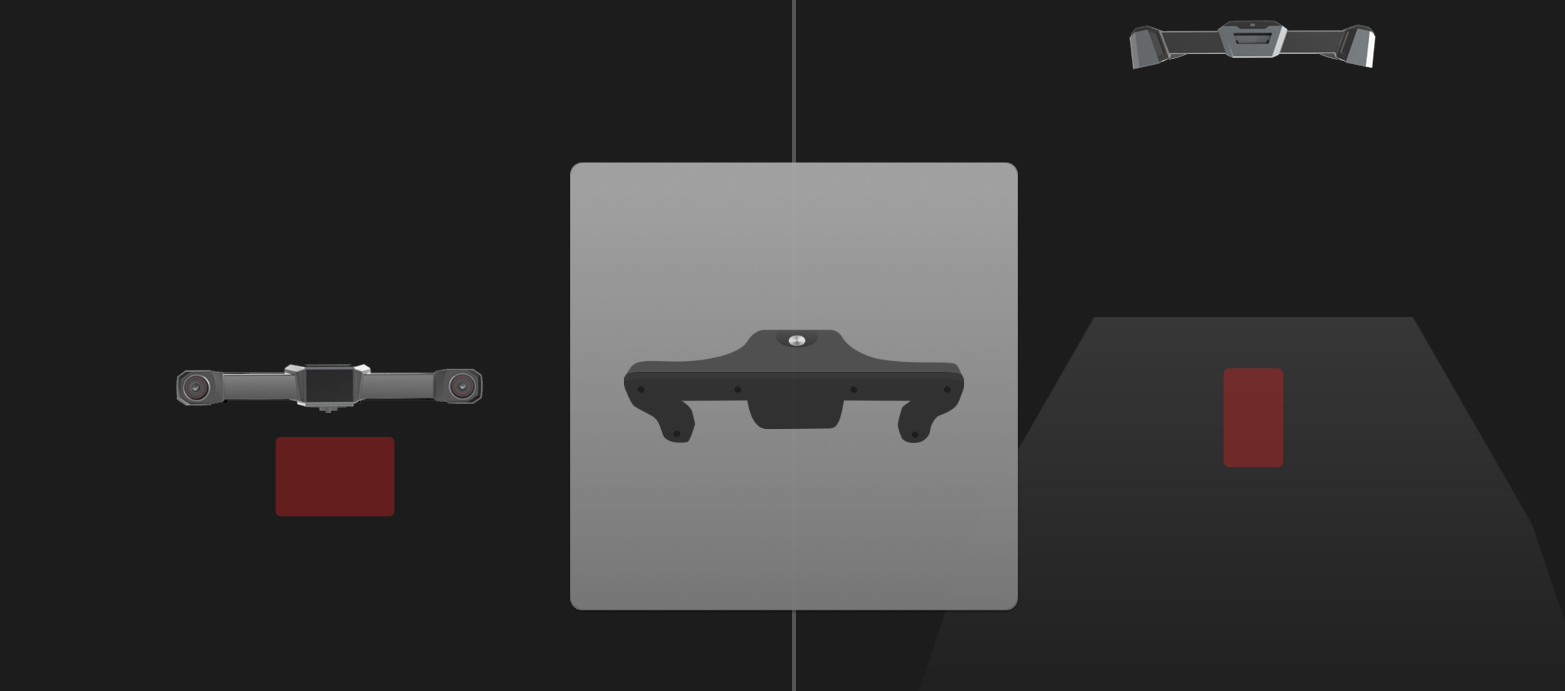
- Place the system calibrator in the visual field of the tracker, and move it to a right position in the front view and the top view.
- Click Next to do system calibration.
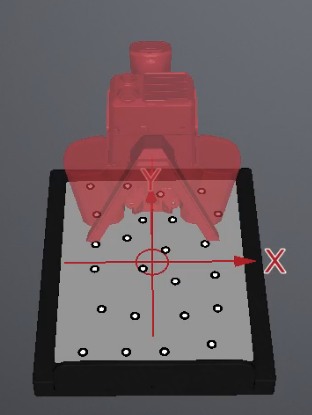
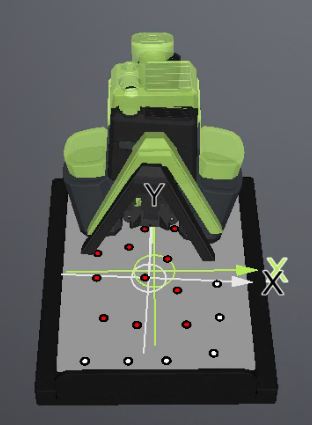
- Align the three-dimensional graphics and coordinates of the device with the diagrams on the interface one by one, and complete the calibration of all positions.
Col
Col
-
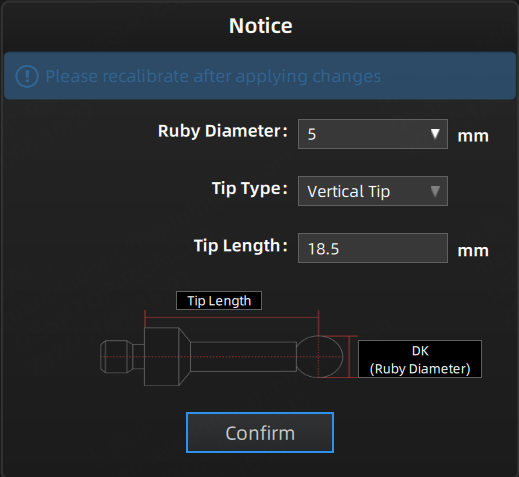
Please enter the diameter and the length of the probe.
Col
- Ruby Diameter: Please enter a value between 0.3 and 10, with a maximum of one decimal place (unit: mm).
- Tip Type: Only the vertical probe is supported.
- Tip Length: Please enter a value between 1 and 200, with a maximum of two decimal places (unit: mm).
Col
Note
Col
- The probe is equipped with two types of tips: one with a diameter of 3 mm and a length of 18.5 mm, and another with a diameter of 5 mm and a length of 17.5 mm. You can replace the tip according to your needs, as shown in the diagram, and enter the corresponding diameter and length before calibrating the probe. After calibration, you can use the probe for measurement.
- After replacing the tip, please recalibrate to ensure the accuracy.
- If you need measuring tips of other diameters, please prepare them yourself.
Col

-
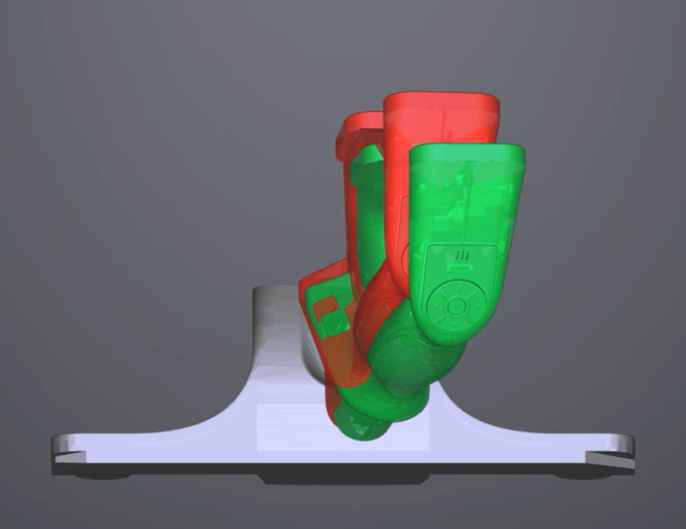
Move the calibrator of FreeProbe into the position according to the guidance.
-
Place the tip of the probe at the specified position according to the interface diagram, and adjust the position of the probe to align with the red indicator diagram multiple times until the entire probe calibration is completed.
The navigation bar on the top of the interface will display ![]() when the calibration is successful. If no calibration is performed for more than 7 days,
when the calibration is successful. If no calibration is performed for more than 7 days, ![]() will appear and prompt you to calibrate the device again to ensure scanning accuracy.
will appear and prompt you to calibrate the device again to ensure scanning accuracy.
Note
When hovering the cursor over ![]() , you can see the exact time when all devices are calibrated. You may need to calibrate the device when the corresponding time is yellow, and not need to do when it is green.
, you can see the exact time when all devices are calibrated. You may need to calibrate the device when the corresponding time is yellow, and not need to do when it is green.