Connection
Please connect all parts as the following steps.
Wired Connection
Introduction to the Hub

| No. | Name | |
|---|---|---|
| 1 | Networking Port | To connect the tracker, the scanner and the computer to transmit data. |
| 2 | Auxillary Power Input | To connect the power adapter. It is only available when an extended tracker is used. |
| 3 | System Power Input | To connect the power adapter. It is a main power input of the system. |
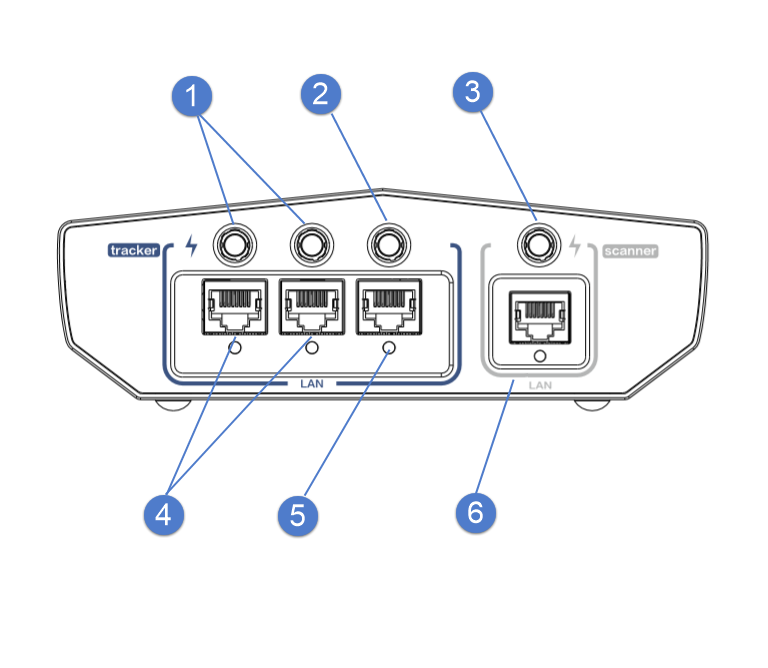
| No. | Name | |
|---|---|---|
| 1 | Power Output | To power on the extended tracker. |
| 2 | Power Output | To power on the tracker. |
| 3 | Power Output | To power on the scanner. |
| 4 | Networking Port | To transmit data of the extended tracker . |
| 5 | Networking Port | To transmit data of the tracker. |
| 6 | Networking Port | To transmit data of the scanner. |
Connection Steps
- Install the tracker on the tripod and tighten the bolts.
- Insert the power plug and data cable plug into the bottom socket of the tracker.
- Insert the power plug and data cable plug into the bottom socket of the scanner.
- Insert the power plug and data cable plug of the tracker into the hub.
- Insert the power plug and data cable plug of the scanner into the hub.
- Connect one end of the networking cable to the hub and the other end to the computer's networking port.
- Power on the device.
Wireless Connection
-
Connect your computer and router using a networking cable.
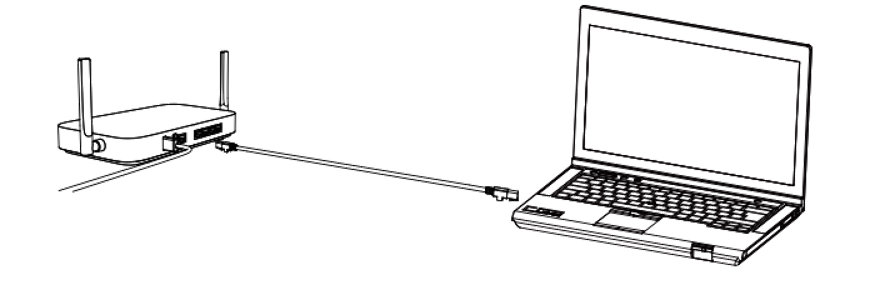
-
Power on the router.
- Install the corresponding batteries into the scanner and the tracker.
- Press the power button.
- After launching the software, check the device connection status.
Note
For more information on wireless connections and related illustrations, please refer to Device Pairing.