Calibration
Please follow the guidance to start the calibration.
Note
To enlarge the calibration interface, press F11 for the full-screen display. While in full-screen mode, press F11 or Esc to exit the full-screen display.
-
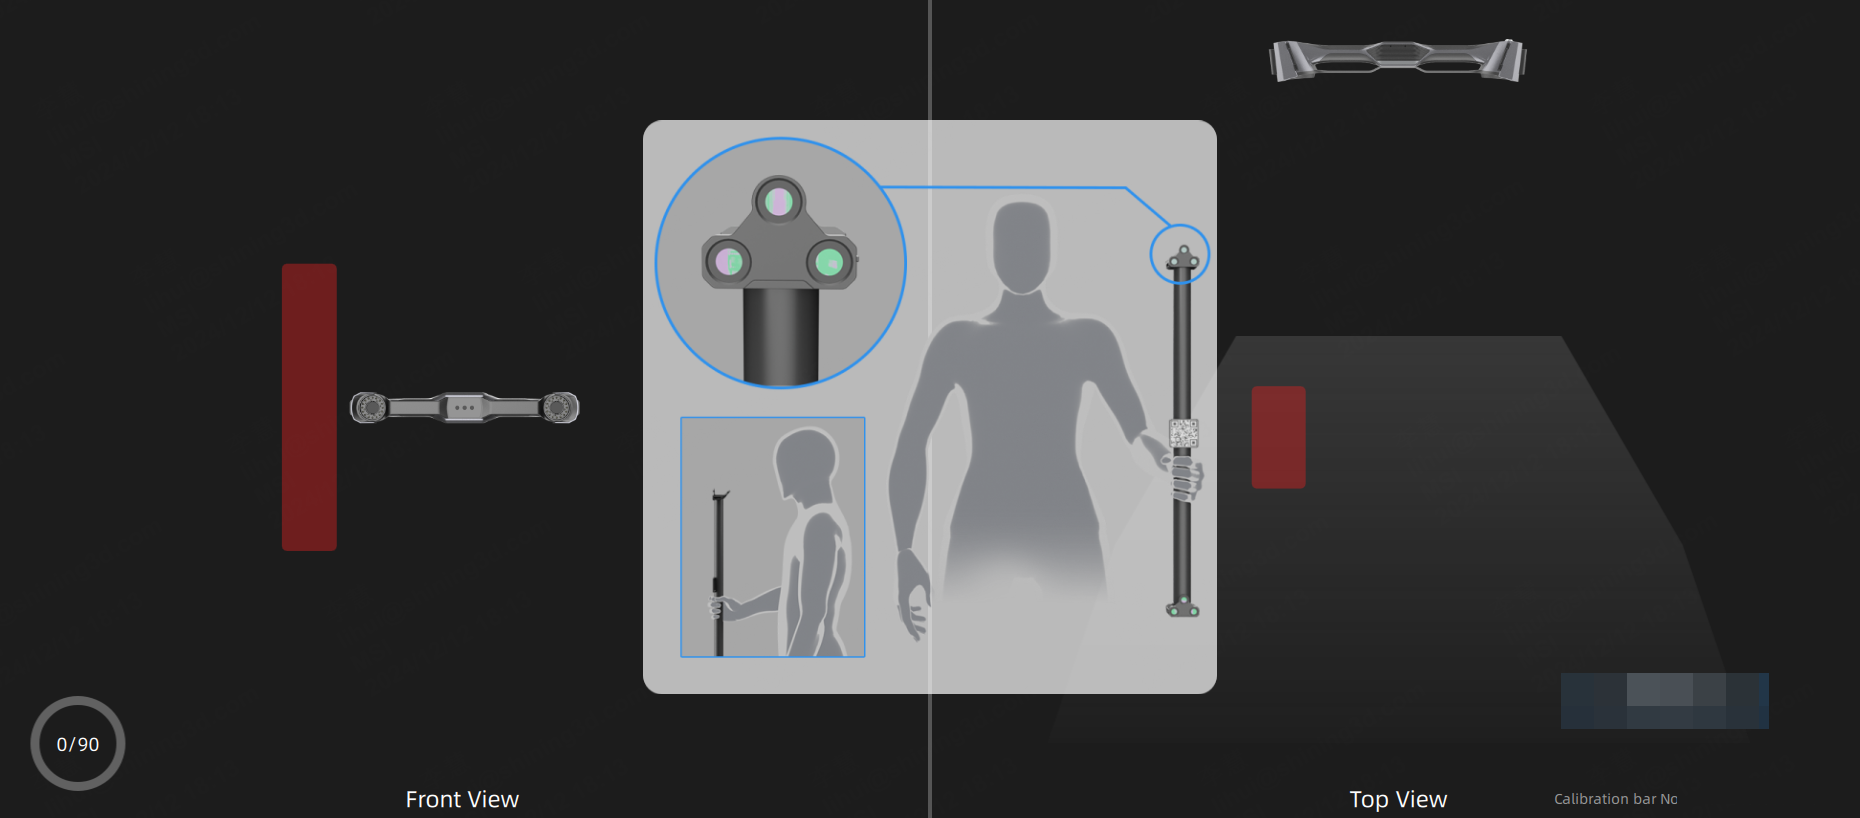
According to the guidance, use the tracker to scan the QR code on the calibration rod; calibration will begin only after the QR code has been successfully recognized.
Note
Please ensure that the straight rod calibrator's number matches the factory-configured number exactly, then you can click
 in the upper right corner to disable Scan QR for Calibration Rod. Once disabled, you can skip the QR code scanning step when re-entering UE Nova Calibration.
 -
Stand in the visual field of the tracker with the calibration rod.
-
According to the guidance, move the rod to a correct position. When the position indicator on the interface turns green, the calibration for that position will be completed automatically.
Note
Once the calibration for that position is successful, the device will beep once.
-
Change the handheld angle according to the guidance until all angles and positions are calibrated.
Note
- This calibration mode requires the tracker to be online.
- Do not cover or damage the markers on the calibration rod.
- If the tracker fails to identify the calibration rod, please follow the guidance and adjust the direction of the rod to make sure it is at a right position in the front view and the top view.
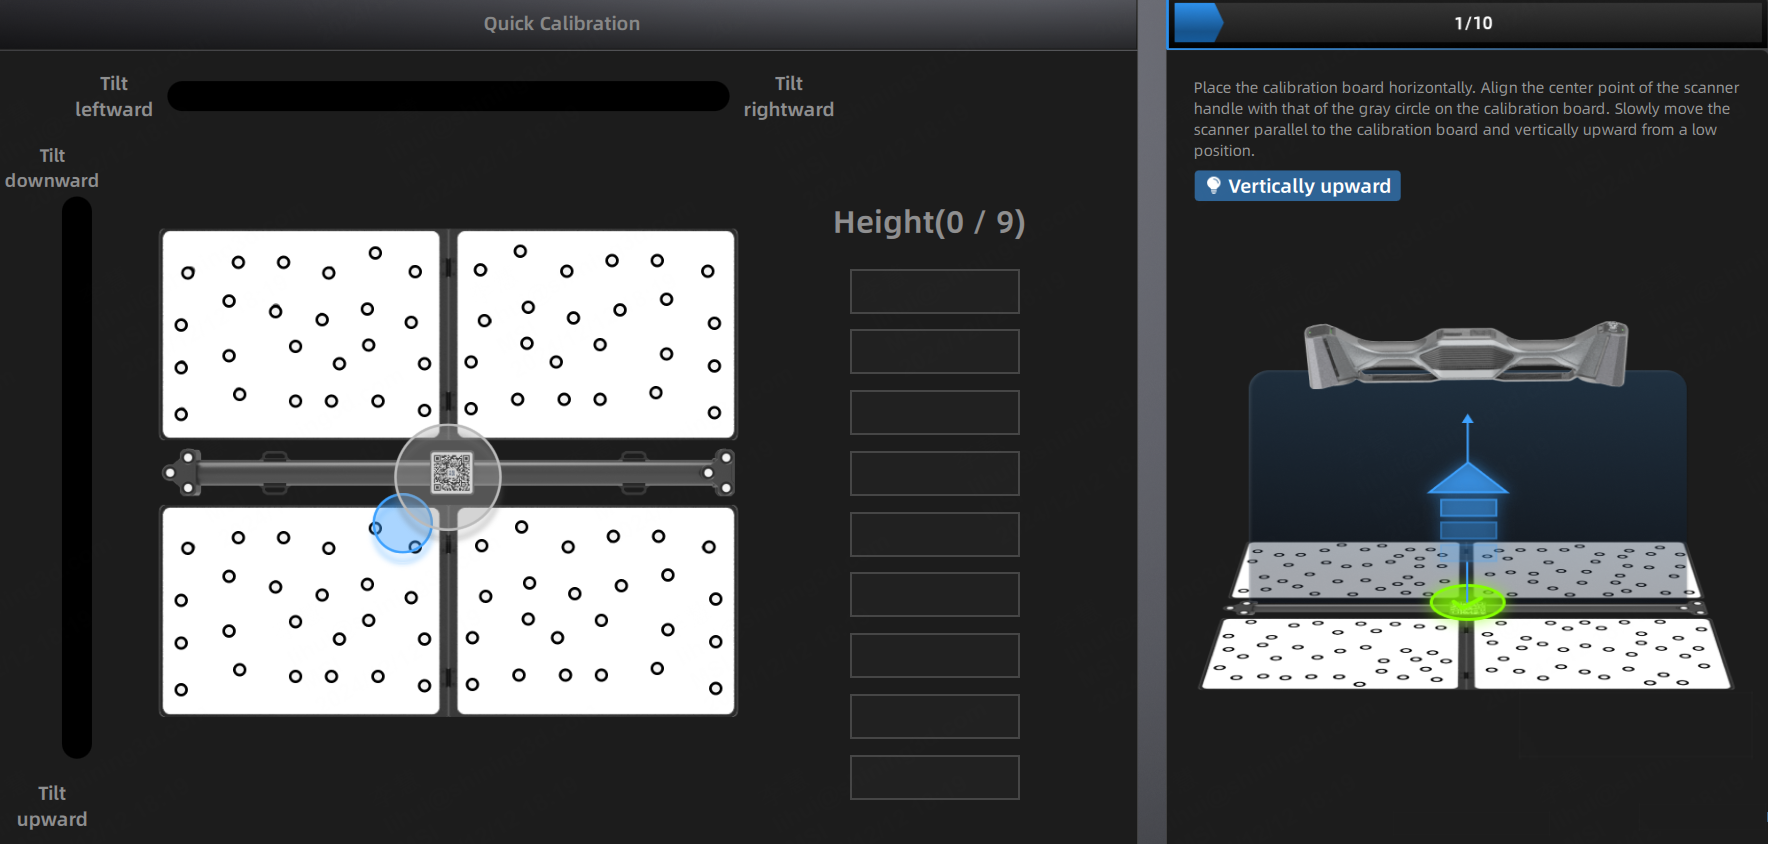
- Place the calibration board horizontally.
- Position the calibration rod at the center of the calibration board.
-
Use the tracker to scan the QR code on the calibration rod; once the QR code is successfully recognized, you can start the UE Nova Laser Calibration.
Note
Please ensure that the straight rod calibrator's number matches the factory-configured number exactly, then you can click
in the upper right corner to disable Scan QR for Calibration Rod. Once disabled, you can skip the QR code scanning step when re-entering UE Nova Laser Calibration. -
Adjust the position and angle of the tracker according to the guidance.
- Align the center point of the tracker handle with the gray circle on the calibration board.
- Ensure that the pitch and tilt angles of the tracker are in the green state within the indicator box.
- Slowly move the tracker vertically from low to high until all calibration boxes show a green checkmark.
- Adjust the position and angle of the tracker according to the guidance to complete the calibration in all directions.
- Once the calibration is successful, you can enter the scanning interface to scan.
Note
This calibration mode requires the tracker to be online.
The navigation bar on the top of the interface will display ![]() when the calibration is successful. If no calibration is performed for more than 7 days,
when the calibration is successful. If no calibration is performed for more than 7 days, ![]() will appear and prompt you to calibrate the device again to ensure scanning accuracy.
will appear and prompt you to calibrate the device again to ensure scanning accuracy.