Scan Markers
Scan Markers (supported in Laser Mode) refers to the collection of the markers. By collecting such markers, the markers data of an object can be quickly obtained.
Steps
-
Select Laser Mode > Scan Markers.
-
(Optional) Click
 or press the scan button on the scanner to preview scanning.
Note
- The data scanned at this time is not automatically saved and is only used for viewing the scanning effect.
- Preview can be disabled by clicking
 in the top-right corner of the interface. Once disabled, you can skip the preview step.
-
Click
 or press the scan button to start scanning.
 -
After scanning, click
 or press the scan button to stop.
Note
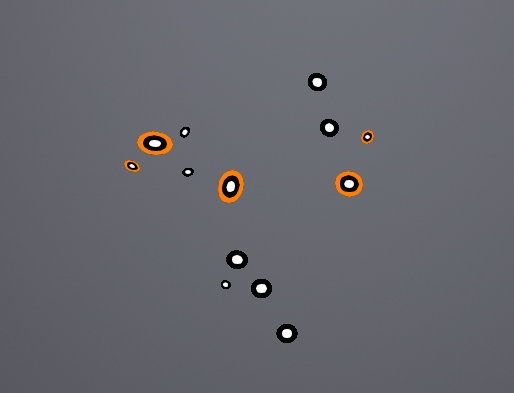
In Laser Mode, after scanning the global markers, you may notice additional colors outside the global markers.
Col
- If there is an orange circle outside the markers, it indicates that the quality of the scanned markers is low.
- If there are no additional colors outside the markers, it indicates that the quality of the scanned markers is normal.
- Markers with an orange circle may disappear or be displayed abnormally after data processing.
- Once the markers are optimized, the color indication will disappear.
- There is no color outside the newly added global markers in Scan Mesh.
Col
-
Click
 to optimize the markers.
 -
Click
 to save data, or choose Scan Mesh to continue.