Alignment
Through alignment, multiple scanned data are combined into a larger mesh, thereby effectively solving the problem of incomplete data collection at one time.
Caution
When more than two project files with scanned data are present in the project list, these projects can be aligned.
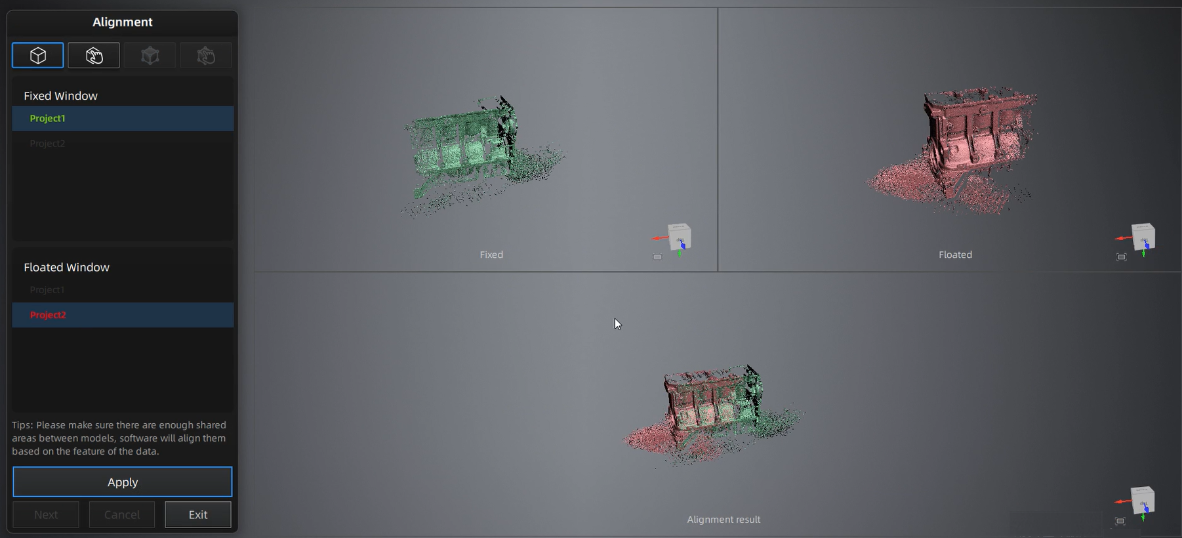
Click ![]() on the right side of the interface to enter the project alignment interface.
on the right side of the interface to enter the project alignment interface.
| Mode | ||
|---|---|---|
 Auto Feature Alignment |
|
Objects with repeated features, like a round or a ring, or with small size are not suitable for this mode. |
 Manual Feature Alignment |
|
The chosen points should not be in a line. |
 By Markers |
|
The two projects should have at least 3 markers in common. |
 Manual Markers Alignment |
|
The chosen markers should not be in a line. |
Note
Manual alignment serves as an alternative method of auto alignment. You can choose it when auto alignment fails.