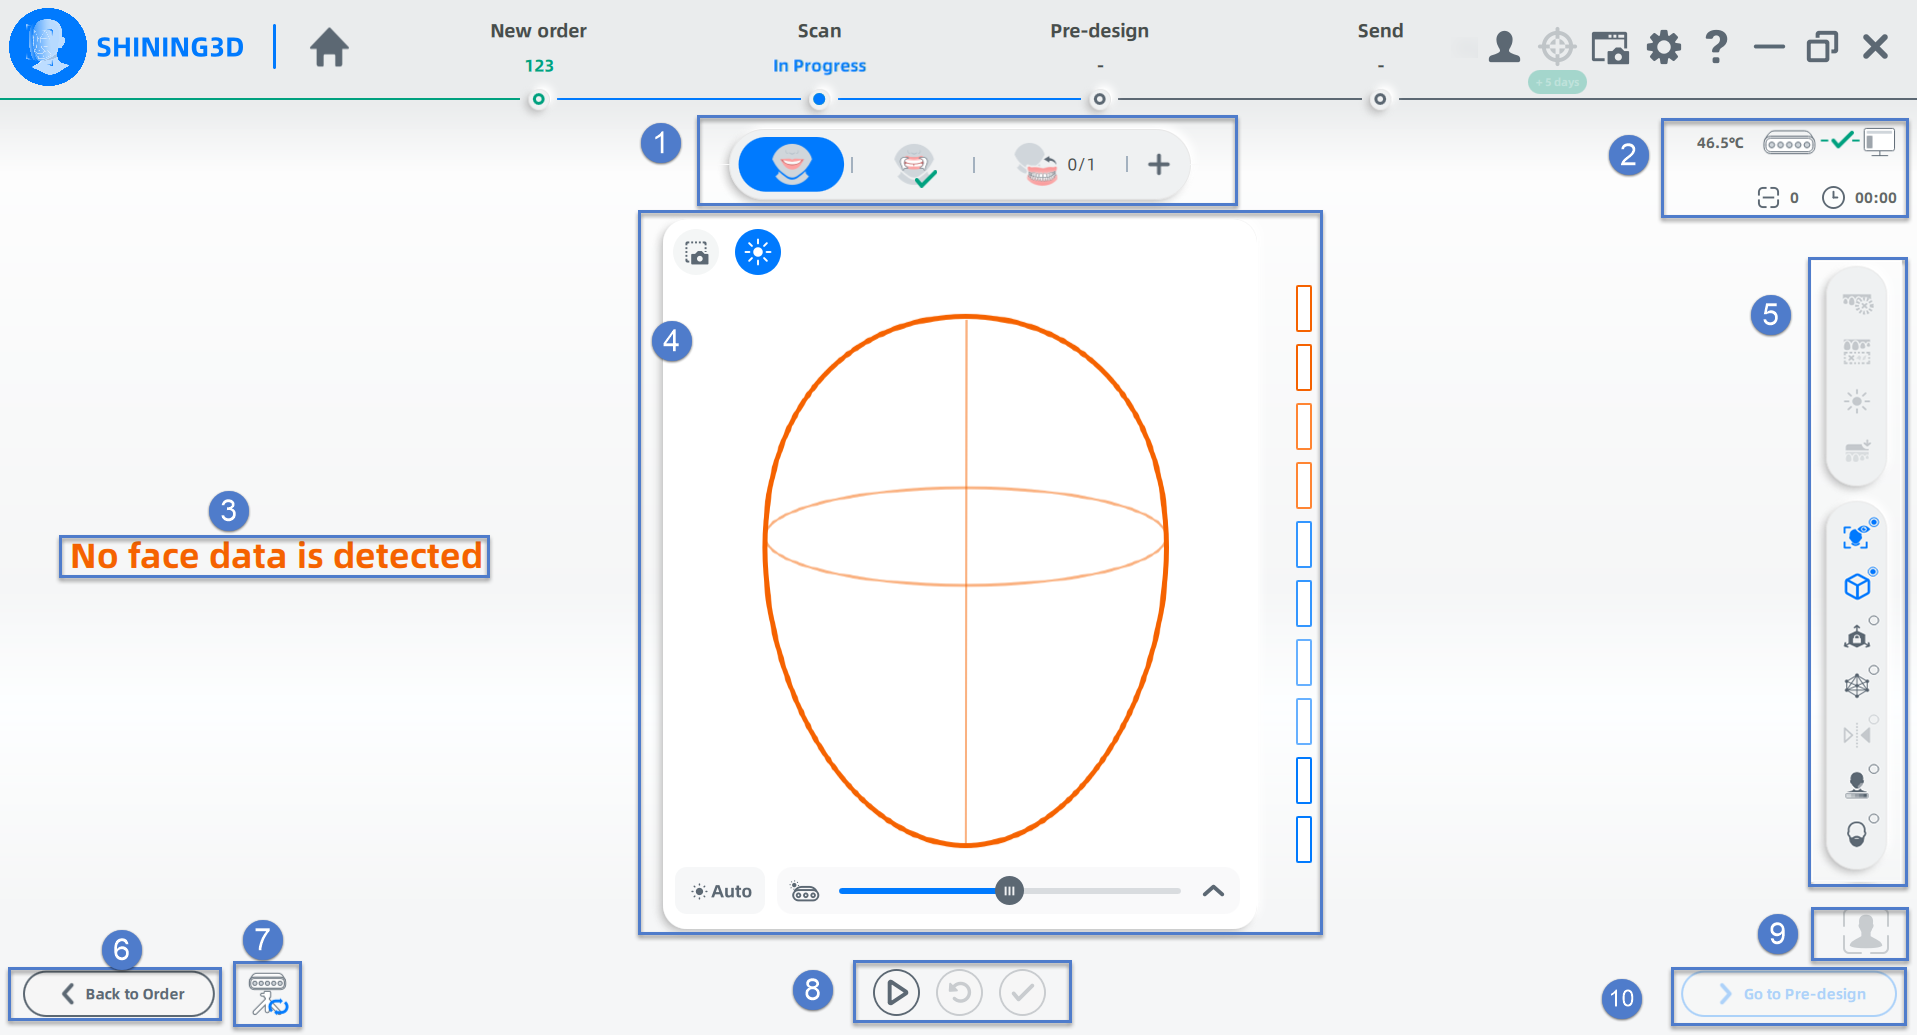
| 1 |
Scanning process |
To display the whole scanning stages, including Smile Face, Retracted Face(optional) and Face Align. |
| 2 |
Information |
To show connection status of the device, scanning frames and the time it takes to scan the face and process related data. |
| 3 |
Scanning guide |
To show related information during scanning.
|
| 4 |
Camera window |
A window to preview the model during scanning. You can adjust parameters in the window.  :To take a screenshot and save it in the "ScreenshotImg" folder under the current save path. :To take a screenshot and save it in the "ScreenshotImg" folder under the current save path.  :Enabled by default. You can choose to adjust the brightness automatically or manually. :Enabled by default. You can choose to adjust the brightness automatically or manually.
 :To set parameters manually. Only for professional technicians! :To set parameters manually. Only for professional technicians!
 : To adjust camera brightness by dragging the slider. You can also click Auto to adjust the brightness. : To adjust camera brightness by dragging the slider. You can also click Auto to adjust the brightness.
 : Click : Click  on the lower right and you can adjust light bar brightness by dragging the slider. on the lower right and you can adjust light bar brightness by dragging the slider. |
| 5 |
Toolbar |
To modify the scanned data. See more details in Data Modification. |
| 6 |
Back to order |
To return to the order interface. |
| 7 |
Mode shift |
To switch between Handheld Mode and Fixed Mode. The window will mirror the scanned face when the scanner is in fixed mode. |
| 8 |
Scanning operation |
 :To start scanning. :To start scanning. :To delete the data and re-scan the face. :To delete the data and re-scan the face. :To save the data. :To save the data. |
| 9 |
Fit View |
Click to restore the model's size when it is zoomed in or out. |
| 10 |
Go to pre-design |
Click to go to pre-design after scanning. |