Mandibular movement
Dentulous motion scan acquires 3D images from the dentulous mandible and track the mandibular movements, which allows you to better simulate the mandibular movements and its effect on the entire face so as to provide targeted therapy. The whole scanning process includes:
Recognize the coordinates of the markers for the alignment with face data.
Preparations
- Use 97% alcohol pads to disinfect the markers.
- Assist the patient in wearing a mouth retractor or using a mouth opener to keep mouth open.
Steps
-
Dry the tooth surfaces with cotton balls or an air syringe.
-
Select Stick markers or Jaw Motion Tracker, and click Confirm.
Col
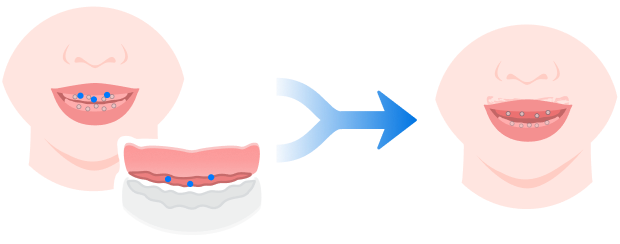
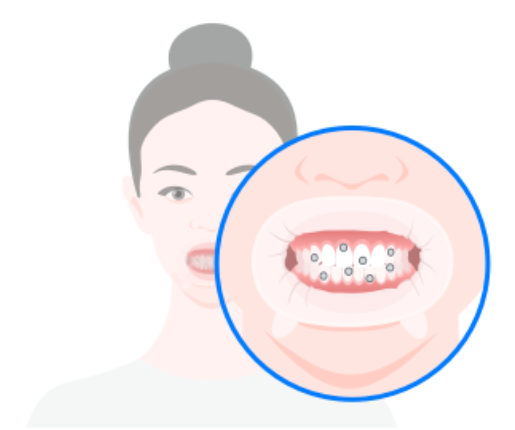 Stick markers
(for patients with a fully exposed low dentition)Col
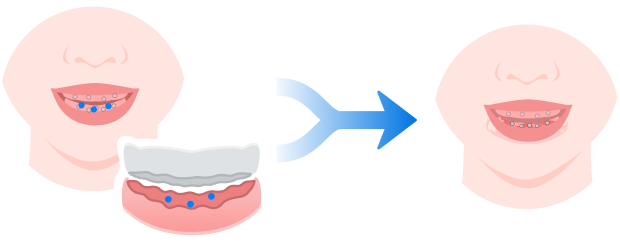
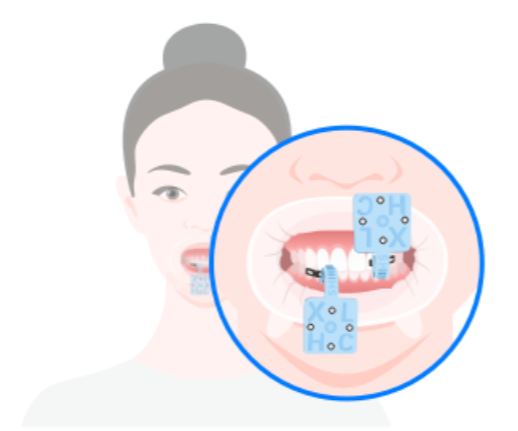 Jaw Motion Tracker
(for patients with a deep overjet or overbite)Caution
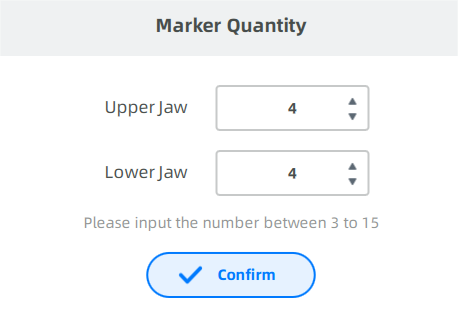
- More than 3 markers are required.
- Please do not arrange the markers in a regular pattern.
-
Click Start, and enter the marker quantity to collect two sets of marker data. (Skip the step if the collection is already done. And the Static Face Scan will start immediately.)
-
Keep the head steady.
-
The scanner's camera will automatically count the markers and record the number.
Note
-
If the number of markers is consistent with the number you punched in, the camera will automatically save the coordinates of points when the maxillary and mandibular teeth approach each other.
-
If the number of markers is not consistent with the number you punched in, adjust the face position or re-attach the points.
-
-
Open your mouth slightly. The camera will automatically recognize the number of markers on the upper and lower jaw again.
-
When finished, a message will pop up to inform that marker input is completed.
-
It aims to align face scan data with the mandible scan data acquired from recognizing the coordinates of markers.
Preparation
- Ensure that the patient is putting on the retractor in place.
- Ensure that the markers are securely bonded to the patient's teeth or the tracker to prevent them from falling off.
Steps
-
Adjust the face position.
- Facial recognition: center the face in the camera and the face detection box will be green.
- Marker recognition: ensure markers are identified as green.
- Appropriate distance: adjust the distance between the face and camera untill the vertical indicator shows Suitable.
-
The software automatically starts scanning after 3 seconds when the face distance from the camera is suitable. Or click
 to start scanning directly.
 -
Instruct the patient to slowly and steadily turn their head up, down, left, and right, or hold the scanner yourself and move it in the same directions to scan the patient’s head, depending on the mode you choose.
Col
Col

-
Click
 to finish scanning static face.
Caution
During the scan, the patient should maintain a stable facial expression.
It refers to the scanning of the left, right, protrusive and occlusal mandibular movements. The time of wearing cheek retractor can be shorten by tracking the mandibular movements first.
steps
-
Click
 to scan the left lateral movements of the lower jaw.
 -
Patient should position the face inside the frame and gently move the head until the frame turns green.
-
Click
to scan the upper jaw and tell the patient slowly moves the head to the left. -
Click
to finish the data collection.Note
You can check the scanned data through video.
If the scanning effect is not ideal, you can click
 to rescan.
 -
Click
 to scan the right lateral movement and refer to steps 2-4 for specific instructions on how to proceed.
 -
Click
 to scan the protrusive movement and refer to steps 2-4 for specific instructions on how to proceed.
 -
Click
 to scan the occlusion movement and refer to steps 2-4 for specific instructions on how to proceed.
The face data and the mandible data can be aligned together automatically or manually. You can first choose auto alignment. If the result is not satisfactory, you can choose manual alignment.
Steps
-
Click
 to start alignment.
 -
Click
 and choose one patient’s upper and lower jaw data to upload.
 -
Perform the alignment.
Click
 and the result of auto alignment will turn up.
If the result is not satisfactory, you can choose manual alignment.-
Click
 to start manual alignment.
 -
Double click on the upper and lower jaw data and face data to select 3 corresponding feature points for alignment.
Col
Col
-
Click
 to align the data manually.
-
-
Click
 to check the result of manual alignment.