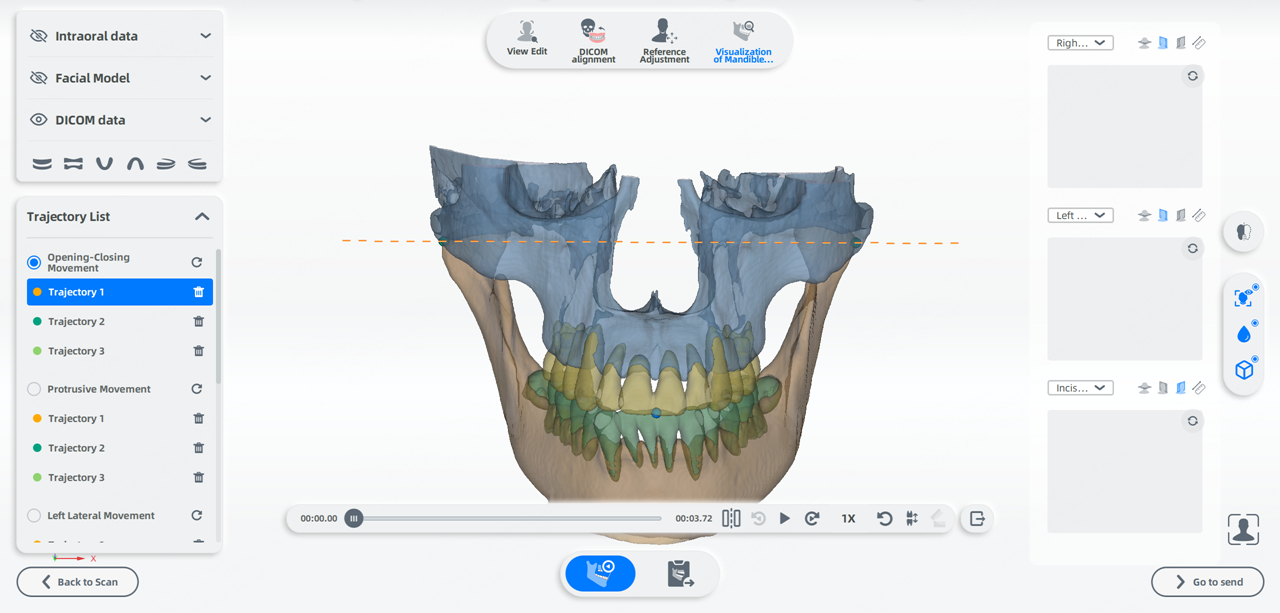
Visualization of mandible movement trajectory
The visualization feature offers versatile playback options for virtual jaw movements, including variable speed, looping, and frame-by-frame viewing. It captures the trajectories of the condyle and incisal point across horizontal, midsagittal, and coronal planes. Additionally, it can generate comprehensive trajectory analysis reports, which can be exported as PDF files.
In the pre-design interface, after completing the reference adjustment, click ![]() to enter the interface.
to enter the interface.
Interface
Note
If no DICOM data is imported, the default display will be the facial model + oral scan model.
Trajectory playback
You can perform trajectory playback and view the curves traced by the condylar points and incisal point, which are projected on sagittal plane, coronal plane or horizontal plane in real time during the playback.
Trajectory list
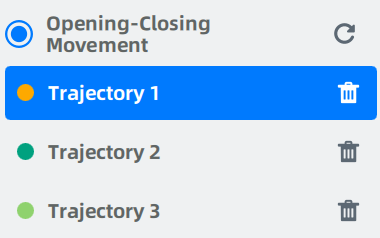
You can select a specific trajectory of one movement for playing.
Trajectory playback

The progress bar shows the playback progress of a single trajectory. Once the current trajectory finishes playing, please select another one from the trajectory list if you want to view a different trajectory.
| Icon | Description |
|---|---|
| Trajectory clipping | |
| Previous frame | |
| Play | |
| Next frame | |
| 1X | Select playback speed |
| Replay | |
| View occlusion | |
| Open the bite | |
| Export the intraoral data and DICOM data as STL files |
Trajectory clipping
The trajectory clipping feature allows you to precisely remove unwanted parts of the trajectory while keeping exactly what you need.

- Drag the start point
 or the end point
  on the timeline to the position where you want to start or end.
 - Click
 to play the trajectory from the starting point to the endpoint and preview the clips.
  represents the current playback position on the timeline.
 - Click
 to confirm the clipping.
Caution
After the trajectory clipping, the following data will be affected, please make sure to update it in time:
- Articulator parameters: Those parameters from reference adjustment will be updated accordingly.
- PDF report: The data on the PDF report will be updated. If the PDF report has already been exported, it needs to be exported again.
- Order file: If the order has been exported, it needs to be exported again.
Trajectory recording
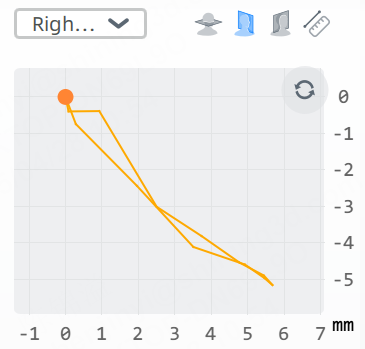
During the movement, the curve traced by the condyle points and incisal point are recorded in real-time on different planes.
- Coronal plane:

- Midsagittal plane:

- Transverse plane:

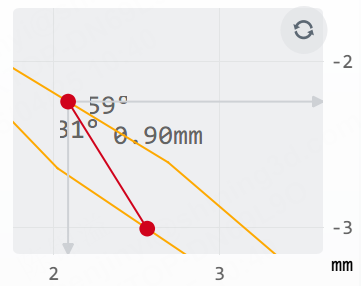
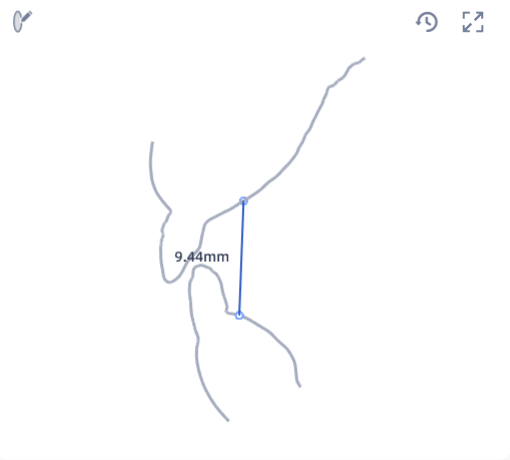
Trajectory measurement
You can measure the distance and angle between two points on the curve when the trajectory playback is paused or stopped.
- Click
 , to enter measurement mode.
 - Click to add two points on the different position of the curve.
-
View measurement results:
- Distance: The straight-line distance between two points will be displayed automatically.
- Angle: Using the upper point as the origin, establish a two-dimensional coordinate system to automatically calculate and display the angle between the two points and the X/Y axes.
-
Move measurement points (optional): Drag any point, and the distance and angle will update in real time.
Note
- To measure again, add another two points.
- Changing to other plane will clear the existing results.
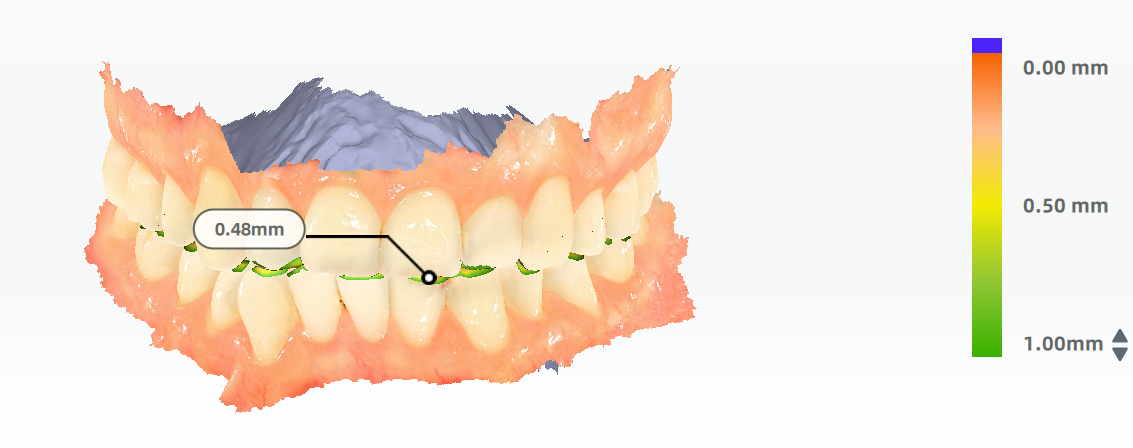
View Occlusion
You can view the occlusion with color indications and the specific value.
-
Click
 and select the upper and lower jaw data.
 -
The model is colored to indicate the occlusion.
Color Indications Green Area with a large separation Red Area with a smaller separation Blue Bite-through area -
You can click any point on the model’s color map to add a label displaying the vertical dimension at that location.
-
To adjust the range of depth displayed on the model, click ▲/▼ beside the color map.
Col

Default valueCol

Maximum value
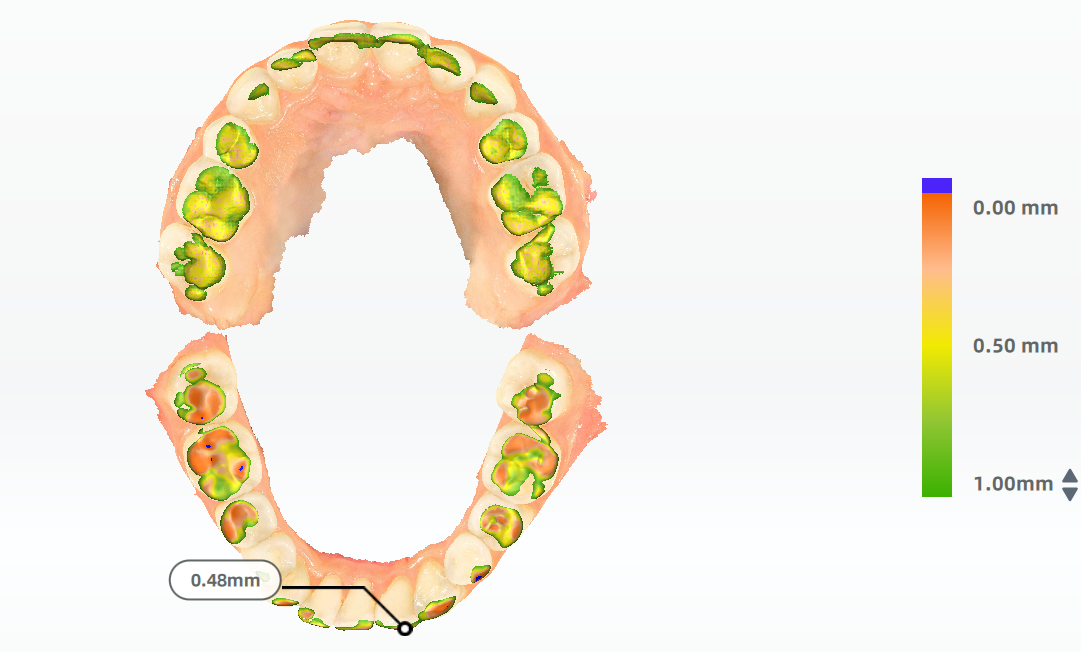
Open the bite
Switch the display mode. This function is available only when viewing occlusion. Click ![]() to view the top-down occlusal view.
to view the top-down occlusal view.
Sectional mode
Click ![]() and a vertical section plane will appear at the incisal point of the upper jaw. In the bottom right corner, a 2D slice showing the intersection between this plane and the intraoral scan with CBCT data will be displayed simultaneously.
and a vertical section plane will appear at the incisal point of the upper jaw. In the bottom right corner, a 2D slice showing the intersection between this plane and the intraoral scan with CBCT data will be displayed simultaneously.
Move the plane
Hold the points on the middle of the section plane and move the cursor.
Rotate the plane
Press the other part except the points of the section plane and move the cursor.
Draw a section
Click ![]() and hold the Left Button to draw a line. Make sure the line intersects with the intraoral scan to generate a cross-section.
and hold the Left Button to draw a line. Make sure the line intersects with the intraoral scan to generate a cross-section.
Measure the distance
- Add a point: Click on the contour line to add a point in the section view.
- Distance measurement: When 2 points are added, a straight line linking the 2 points will be formed with the distance between them. This line will alos be shown on the model as well.
- Move a point: Drag the point along the straight line and the distance will be updated simultaneously.
- Re-measurement: Add another 2 points to measure the distance again.
- Delete points: Click
 to reset the section view and delete the points.
Note
- Scroll up and down the wheel to zoom in and out the section view.
- Click
 to expand the section view panel.
Report preview
Click ![]() to preview report.
to preview report.
Click  to save the report in PDF format to local storage.