Calibrate the Scanner
Under these circumstances, we recommend that you shall execute the calibration for the scanner to ensure the accuracy of scanned data:
● The initial setup of the scanner is completed.
● The scanner has been used for a period of time (e.g. 2 weeks).
● Scanner brightness adjustment is recommended once every 3 months.
● The scanner is accidentally dropped.
Note
● The LED light of the scanner body turns green when the power connection is working properly.
● Normally the calibration takes approximately 7 minutes.
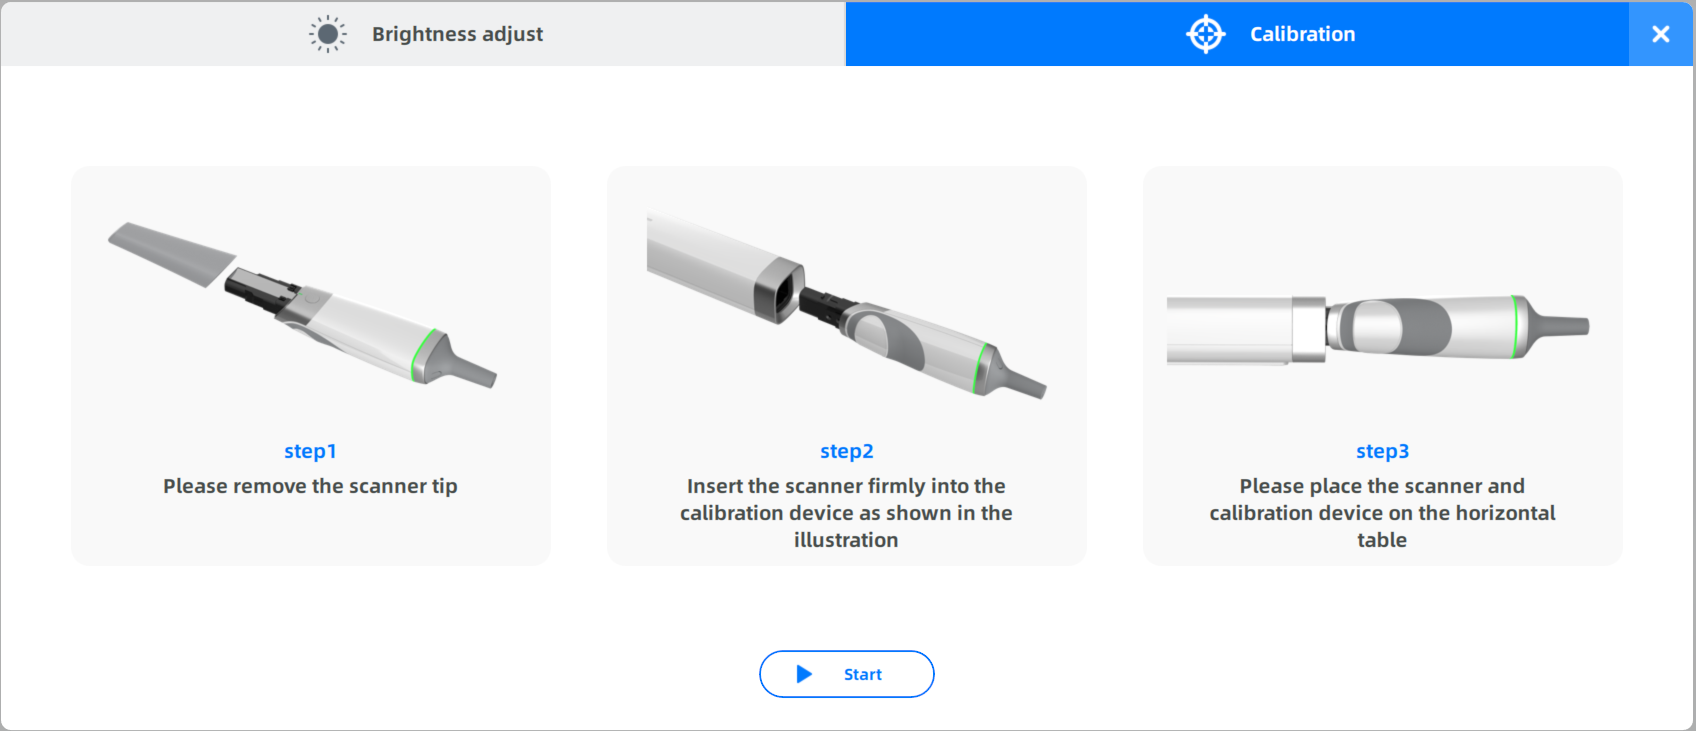
Follow the steps below to perform the calibration:
1 gently slide the tip off from the scanner.

Caution
● Do not place your finger(s) on the mirror of the tip when detaching as this may result in damage to the mirror.
● Store the detached tip in a safe place, e.g. a dental instrument tray, for future use.
2 Connect the supplied calibrator and your computer with the supplied USB 3.0 cable.
3 Gently slide the calibrator onto the front end of the scanner.

4 Click on the main interface to display the calibration interface.

5 Ensure the scanner is plugged into the calibrator firmly. Click Start. Calibration begins.
6 The message prompting successful calibration appears once the calibration is completed.
7 Click in right corner to exit.
8 Gently slide the Calibrator off the scanner.
9 Reattach the scanner tip to the scanner for later use or put the dust cap onto the scanner to prevent damage and dust.
Caution
Make sure that the Calibrator is removed from the scanner after the calibration is done. Otherwise, the Calibrator temperature may get very high.