Pre-op Scanning
Pre-op scanning means to collect and retain intraoral data before treatment.
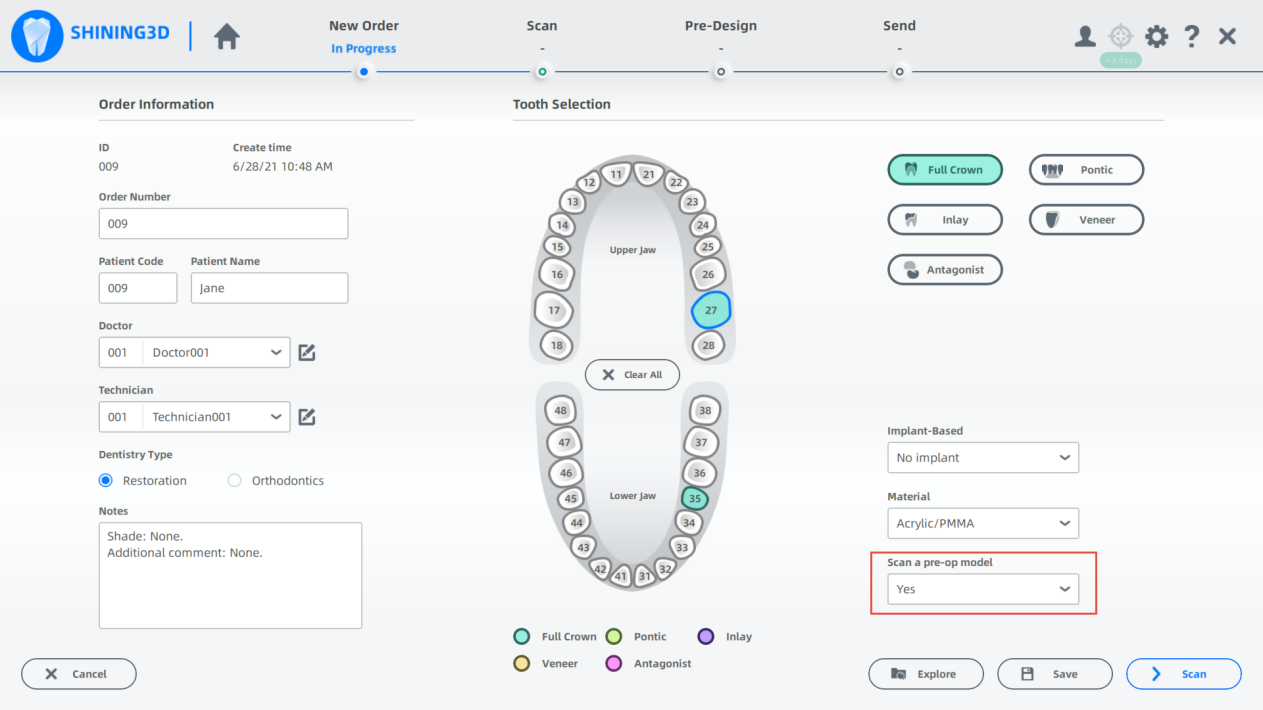
Create an Order
Pre-op scanning takes restoration of full crown as an example.
Enter necessary information.
1 Choose patient types, first visit or follow-up.
2 Enter necessary information of the patient such as name and age.
3 Add a doctor/operator. Click ![]() and enter the doctor's name, then click
and enter the doctor's name, then click to confirm.
4 Choose restoration or implant as the dentistry type. Add notes such as teeth shade.
| Dentistry type | Description |
|---|---|
| Restoration | Restore missing parts of your tooth structure. Select the restoration type according to the reality such as full crown, pontic, inlay and veneer. |
| Implant | Replace a lost tooth with a dental implant. Select the implant type according to the reality such as full crown, bridge, upper jaw, lower jaw and full jaw. |
5 Select the tooth.
Click on the number of one tooth to select it (click right mouse button on the number to cancel the selection). Multiple selection is available.
- Click Ctrl+left mouse button to copy the restoration type of last tooth to the currently selected tooth.
- Click Shift+left mouse button to copy the restoration type of last tooth to all the teeth between the last tooth and the currently selected tooth.
6 Select Yes in the pop-up window of Scan a pre-op model.
7 Click Scan to enter the scanning interface.
Start Scanning
Steps of pre-op scanning: pre-op of the upper jaw (the treated tooth is on the upper jaw)→ upper jaw→ pre-op of the lower jaw (the treated tooth is on the lower jaw)→ lower jaw→ full jaw.

Note
- Default scanning steps are: pre-op of the upper jaw→ pre-op of the lower jaw→ full jaw (scanning the bite)→ upper jaw→ lower jaw→ full jaw (aligning automatically)
- The scanning steps of upper jaw/ lower jaw (post-op) is similar to implant jaw. After loading pre-op data, the doctor needs to dig a hole on the tooth, then starts scanning post-op teeth.
Scanning steps:
1 Scan pre-op upper jaw with a disinfected scanner.
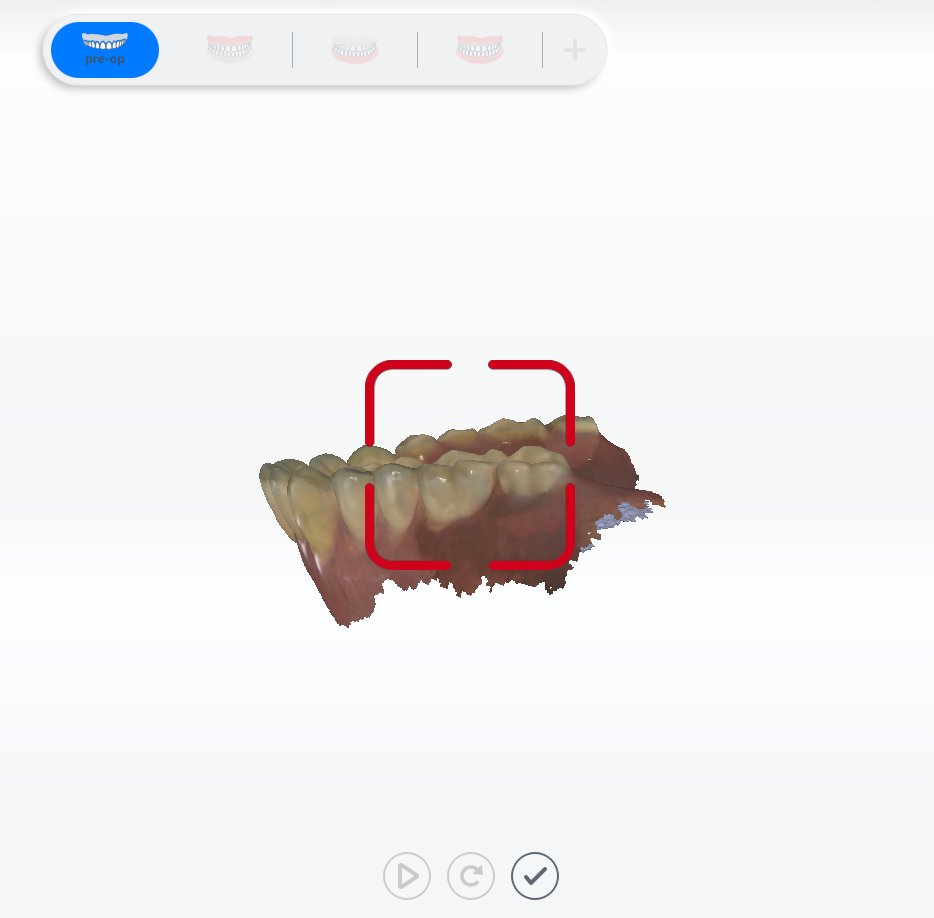
Caution
Please keep moving the scanner at a relatively same speed.
The distance between the scanner tip and the surface of the teeth should be 3 mm to 5 mm.
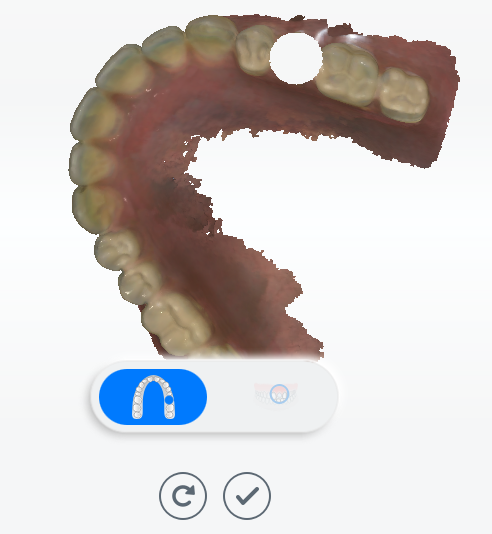
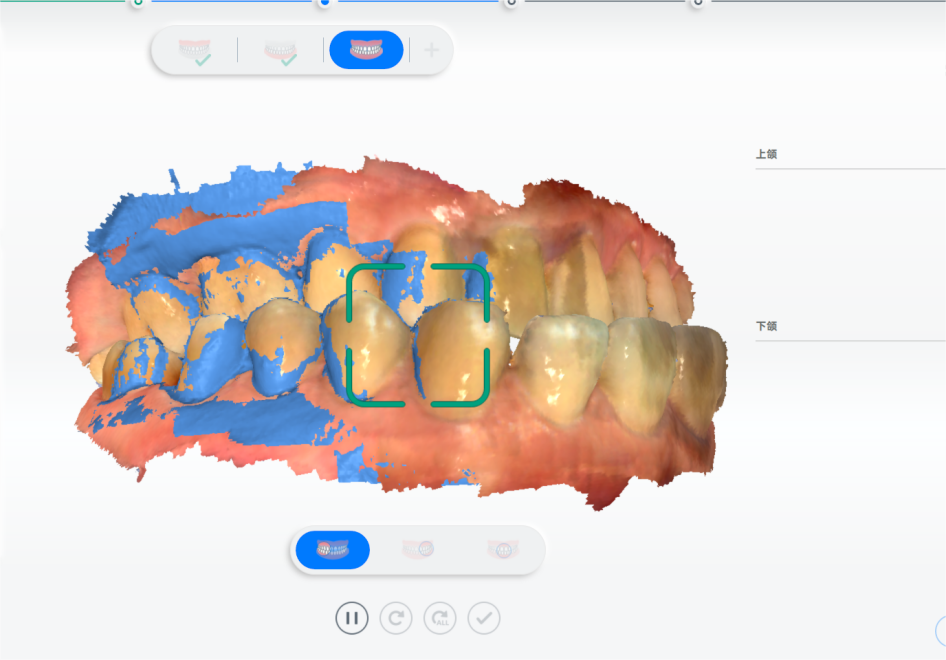
2 Dig a hole on the treated tooth to avoid alignment failure resulting from the inconsistent scanning data of pre-op and post-op.
(1) Move the cursor to the treated tooth.
(2) Scroll the wheel up and down to zoom in and out the tooth model (make the treated tooth as big as the circle). Select the tooth place and make preparation for digging a hole.
(3) Double-click to dig a hole.
3 Scan the post-op teeth.
4 Repeat step 1 to 3 if teeth on the lower jaw need to be treated.
After scanning, Refined Area will be open automatically for key areas. It can display more partial details in pre-design. It is often used as restoration of sharp edges of inlay and veneer.
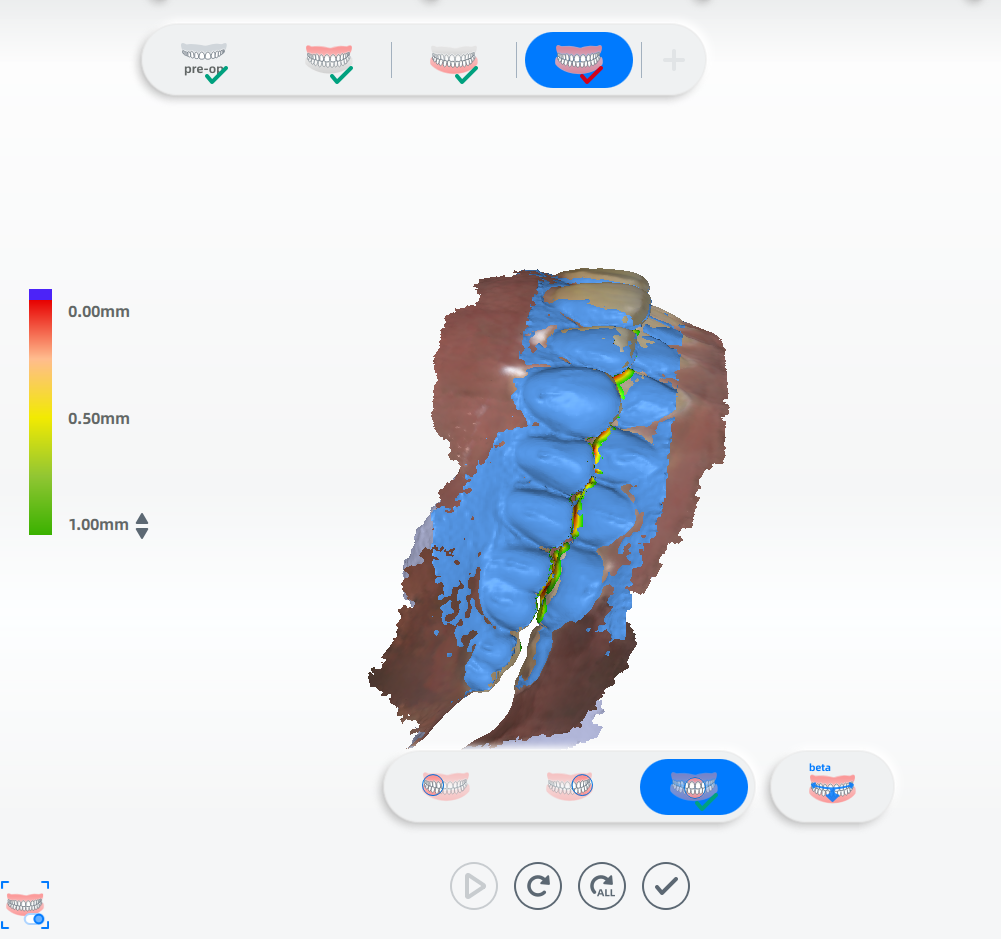
5 Scanning the bite part.
Scan the left bite part, the right bite part and the center bite part.
| Before alignment | After alignment |
|---|---|
 |
 |
| Click |
When the upper jaw and lower jaw is aligned, click |
Note
- There is no need to scan full jaw for collecting bite data. You can scan left and right (recommended) or left, right and front teeth to align the models of upper jaw and lower jaw.
- The maximum scanning frames of each bite group is 500. The software will stop the scanning once the frames are up to 500.
6 Click  on the right panel to edit the model. Details see Data Edit.
7 Click  to confirm the changes and exit the edit interface.
Scanning Completed
Click ![]() to complete scanning. Click pre-design on the lower right corner to enter pre-design interface.
to complete scanning. Click pre-design on the lower right corner to enter pre-design interface.