| 1 |
Navigation bar |
New Order, Scan, Pre-design and Send. The executed steps can be switched by clicking  on the navigation bar. on the navigation bar. |
| 2 |
Other operation |
 :View users information and Connection. :View users information and Connection.
 :Process accuracy calibration and lightness. Details in Calibration. :Process accuracy calibration and lightness. Details in Calibration.
 : To record the screen, take a screenshot and check screenshots. : To record the screen, take a screenshot and check screenshots.
 :Parameters of orders, scanning process and pre-design. Details in Setting Order. :Parameters of orders, scanning process and pre-design. Details in Setting Order.
 :Click for remote assistance, online consultant, the Manual and other instructions. :Click for remote assistance, online consultant, the Manual and other instructions. |
| 3 |
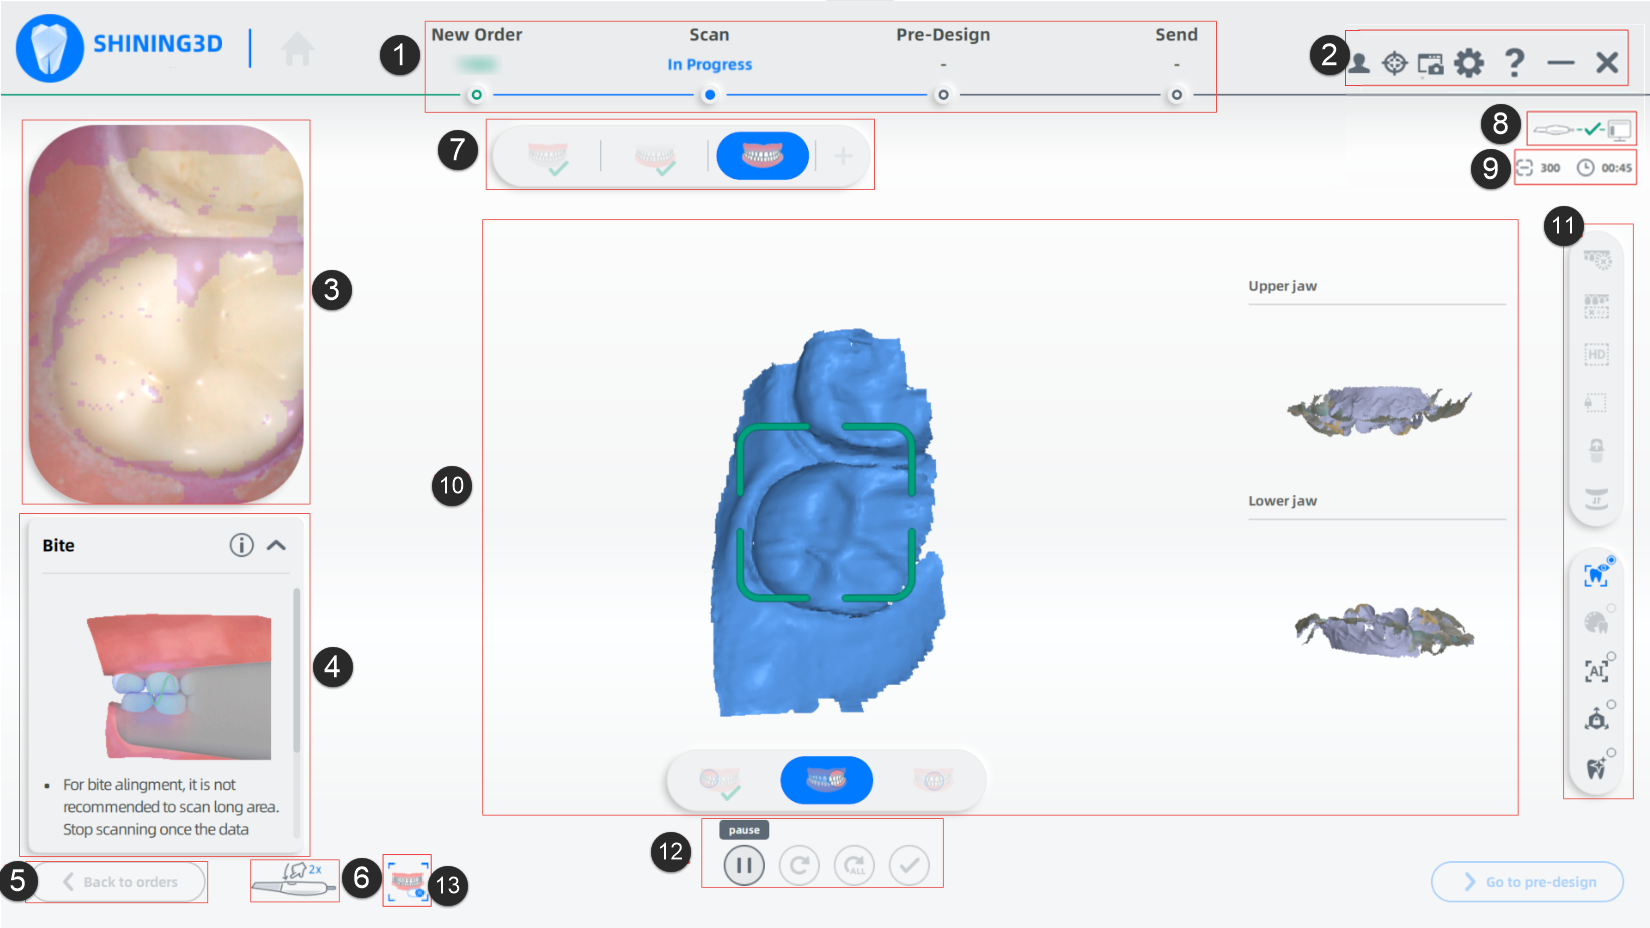
Camera Window |
Displays the real scanning scenarios and supports setting scanning Parameters.
Move the mouse within the image window to display three icons:
 Endoscope: Click to enlarge the image window, and click again to restore it to the default size. Endoscope: Click to enlarge the image window, and click again to restore it to the default size.
 Screenshot: Take a screenshot of the current image in the image window, and save the image in the "EndoscopeImg" folder under the current order directory. Screenshot: Take a screenshot of the current image in the image window, and save the image in the "EndoscopeImg" folder under the current order directory.
 Mask: Scanning indication switch. Disabled by default. When turned on, the camera window displays the current unscanned data area in purple when scanning. Mask: Scanning indication switch. Disabled by default. When turned on, the camera window displays the current unscanned data area in purple when scanning.
|
| 4 |
Guide |
Contains the current process, operating diagrams and detailed tips. |
| 5 |
Back to orders |
Return to the order interface to view order information or edit. |
| 6 |
IMU operations |
Double-click the scanner body button quickly to display the IMU menu. |
| 7 |
Progress Bar |
Displays the current position within the whole progress.
To view the other processes, click ••• .
To add extra processes, click ✚. |
| 8 |
Device status |
Displays device status during non-scanning processes. |
| 9 |
Scan frames and time |
Records the number of scanned frames; scan and data processing time. |
| 10 |
Preview |
Supports previewing the scanned data.
To gain a comprehensive view to the model:
● Rotating: Click and hold the right-mouth-button and move the cursor.
● Panning: Click right and left mouth buttons and hold, then move the cursor.
● Zooming in/out: Move the mouse wheel. |
| 11 |
Edit& Import |
 : Edit current model. Details in Data Edit. : Edit current model. Details in Data Edit.
 : Delete smaller and isolated model data that are not connected to the main model. Help delete unrelated model data quickly. : Delete smaller and isolated model data that are not connected to the main model. Help delete unrelated model data quickly.
 : The area will display more partial details in a higher resolution grid during the post-op process. This feature is best used with Tooth Color function to ensure that the quality of the tooth color is true in the refined area. Select Refined Scan in the Settings ->Scanning Settings to automatically enter the process of refined area selection when the upper/lower jaw scanning is completed. : The area will display more partial details in a higher resolution grid during the post-op process. This feature is best used with Tooth Color function to ensure that the quality of the tooth color is true in the refined area. Select Refined Scan in the Settings ->Scanning Settings to automatically enter the process of refined area selection when the upper/lower jaw scanning is completed.
 : When the scan is paused during the scanning process of pre-op or upper/lower jaw, click Part Lock to set the scanning lock area to ensure the data in the locked area will note change in subsequent scanning. : When the scan is paused during the scanning process of pre-op or upper/lower jaw, click Part Lock to set the scanning lock area to ensure the data in the locked area will note change in subsequent scanning.
 : It is used to check and calculate the undercut area on the marked teeth (in accordance with the order). During the scanning process of upper/lower jaw, pause the scanning and click Undercut. The area selected by the brush will be calculated automatically. Details see Undercut. : It is used to check and calculate the undercut area on the marked teeth (in accordance with the order). During the scanning process of upper/lower jaw, pause the scanning and click Undercut. The area selected by the brush will be calculated automatically. Details see Undercut.
 : Switch data of upper and lower jaw after the scan is completed or post-processing is completed. For cases where the upper and lower jaw flow is reversed during scanning. : Switch data of upper and lower jaw after the scan is completed or post-processing is completed. For cases where the upper and lower jaw flow is reversed during scanning. |
| 11 |
Additional Function |
 : Texture switch. Set whether the model shows colored model or not. : Texture switch. Set whether the model shows colored model or not.
 : Tooth color switch. Turn on the tooth color display. If the gray color is displayed when scanning, it means the data quality in these area is not good enough, and the area should be scanned again. When the grey color turns into true color display, it means the data quality has reached the requirements of better post-processing. : Tooth color switch. Turn on the tooth color display. If the gray color is displayed when scanning, it means the data quality in these area is not good enough, and the area should be scanned again. When the grey color turns into true color display, it means the data quality has reached the requirements of better post-processing.
 : AI Optimize, applied to intraoral scanning. After clicking it, miscellaneous data will be automatically deleted when scanning, such as data of buccal, lingual and soft tissues. When you use the software for the first time and enter the scanning interface, the button is gray and you need to wait for 1-2 minutes for initialization. After the initialization is completed, the button can be clicked. : AI Optimize, applied to intraoral scanning. After clicking it, miscellaneous data will be automatically deleted when scanning, such as data of buccal, lingual and soft tissues. When you use the software for the first time and enter the scanning interface, the button is gray and you need to wait for 1-2 minutes for initialization. After the initialization is completed, the button can be clicked.
 : When you click View Lock, you will check the model from one fixed perspective when scanning, and the automatic perspective tracking function is not enabled. This function is not enabled by default. : When you click View Lock, you will check the model from one fixed perspective when scanning, and the automatic perspective tracking function is not enabled. This function is not enabled by default.
 : Metal Tooth Scan will improve the scanning speed and sweep the whole situation for metal teeth. : Metal Tooth Scan will improve the scanning speed and sweep the whole situation for metal teeth.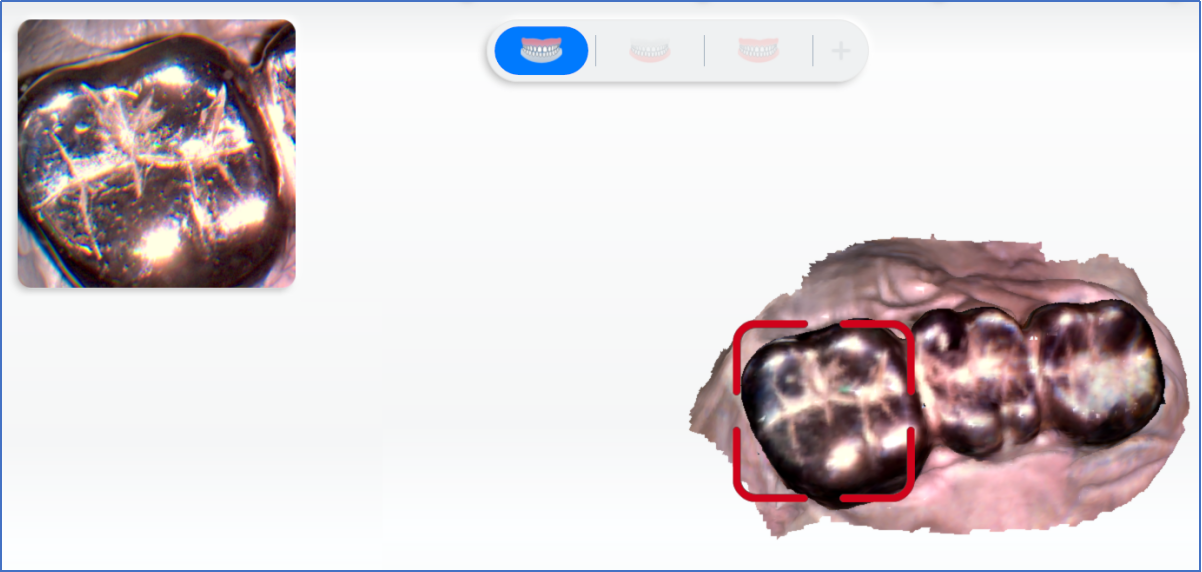 |
| 12 |
Operation |
Scan
 : Start scanning. : Start scanning.
 : Reset current scanning data. : Reset current scanning data.
 : Preview the scanned model. : Preview the scanned model.
 : Save the current scanning data. : Save the current scanning data.
|
| 13 |
Intraoral |
Checked by default, applicable to intraoral scanning. It is recommended to leave this checkbox unchecked when scanning dental models. |